
Mastering Compost: Your Guide to Nutrient-Rich Soil and Sustainable Gardening
Composting is a powerful and eco-friendly practice that transforms organic waste into a valuable resource for your garden. Beyond simply recycling, it creates “black gold” – a nutrient-rich soil amendment that will make your plants thrive. This comprehensive guide will walk you through the process of making and maintaining perfect compost, drawing inspiration from expert gardening advice to help you cultivate a flourishing food garden, no matter its size or location.
Many gardeners, especially those with small spaces, often seek ways to maximize their harvest and improve soil health naturally. Composting offers a sustainable solution, turning everyday kitchen scraps and garden refuse into a potent fertilizer. We’ll cover everything from selecting the right compost system to understanding the balance of materials and troubleshooting common issues, ensuring you can create a vibrant, healthy ecosystem right in your backyard.
Why Compost? The Unsung Hero of Your Garden
Before diving into the “how-to,” let’s explore the incredible benefits that proper composting brings to your garden and the environment. Understanding these advantages can motivate you and help you appreciate the value of this simple yet profound practice.
- Enriches Soil Structure: Compost acts as a natural soil conditioner, improving its texture. It helps sandy soils retain water and nutrients, while loosening heavy clay soils to allow better drainage and aeration. This creates an ideal environment for root growth.
- Boosts Plant Health: By providing a slow release of essential nutrients, compost feeds your plants gradually, reducing the need for synthetic fertilizers. Plants grown in compost-amended soil are generally stronger, more resistant to pests and diseases, and produce more bountiful yields.
- Reduces Waste: Composting diverts a significant portion of household waste, such as kitchen scraps and yard trimmings, from landfills. This directly contributes to reducing methane gas emissions, a potent greenhouse gas, making it a crucial step towards environmental sustainability.
- Supports Microbial Life: A healthy compost pile is teeming with beneficial microorganisms, fungi, and insects that continue to enrich the soil long after the compost is added. These organisms break down organic matter, convert nutrients into plant-available forms, and even suppress plant pathogens.
- Saves Money: By producing your own soil amendments, you can significantly cut down on expenses for commercial fertilizers, potting mixes, and even water, as compost-rich soil holds moisture more efficiently.
Choosing Your Compost System: Starting with the Right Bin
The first step to successful composting is selecting an appropriate system for your needs. While there are many options available, a common and effective method, particularly good for beginners, involves a simple, enclosed bin that sits directly on the earth.
Essential Materials for Your Compost Bin:
- A large bin with a hollowed-out bottom: This design is crucial as it allows direct contact with the soil below. This connection is vital because it enables beneficial soil organisms – earthworms, bacteria, and fungi – to easily migrate into your compost pile, kickstarting and accelerating the decomposition process.
- Sticks or small tree branches: These are used for the base layer, promoting essential airflow.
- Cardboard (shredded): A carbon-rich “brown” material that also aids in aeration.
- Paper (shredded): Another excellent “brown” source.
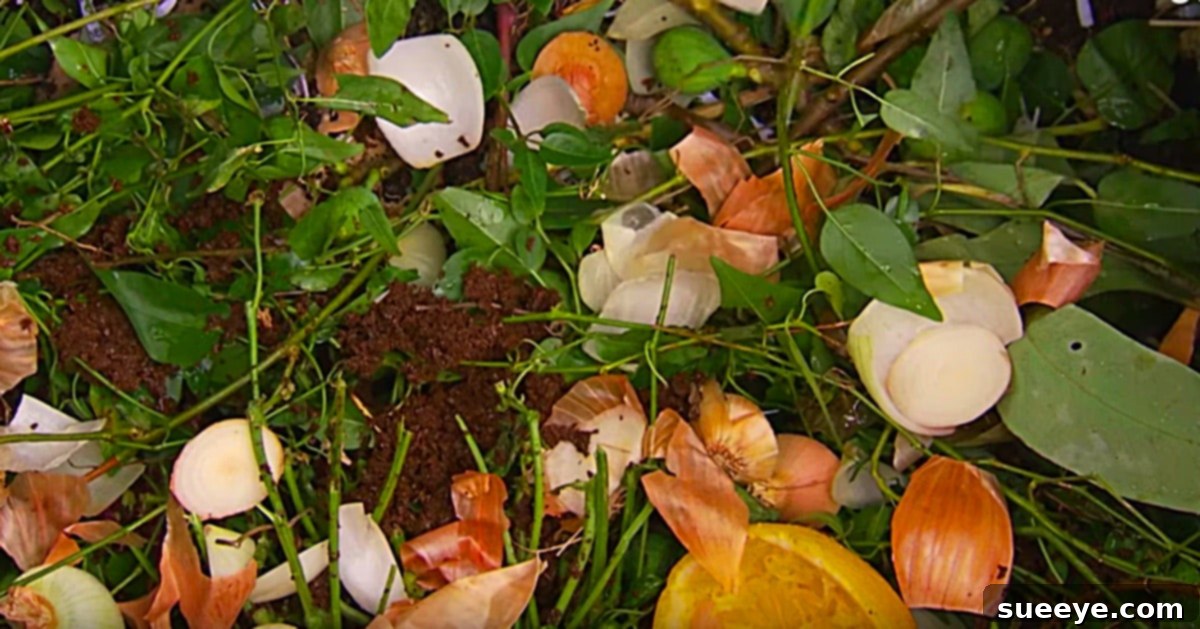
- Vegetable scraps: A primary “green” material. This includes tea leaves, coffee grounds, onion skins, fruit peels (orange, lemon, lime), and crushed eggshells. Avoid wheat, dairy, or meat products.
- Leaves and fresh plant cuttings: More “browns” and “greens” from your garden.
- Water source: For maintaining optimal moisture levels.
Site Selection and Initial Setup: Laying the Foundation
The location of your compost bin is more important than you might think. Choose a spot that is:
- Shaded: Prevents the pile from drying out too quickly, especially in warmer climates.
- Accessible: Easy to add materials and turn the pile.
- Well-drained: Avoids waterlogging the bin.
- Away from direct structures: Prevents potential odor issues or attraction of pests near your home.
Once you’ve selected your spot, the preparation of the ground beneath your bin is key for both nutrient exchange and pest deterrence.
Step-by-step Ground Preparation:
- Dig into the soil: Before placing your bin, dig a shallow trench or slightly depress the area where the bin will sit. This allows the bottom edges of the bin to be wedged into the soil, creating a natural blockade.
- Create a vermin barrier: This depression, combined with the bin’s direct contact with the earth, helps to deter opportunistic vermin like rodents or raccoons who might otherwise be tempted to raid your lovely compost. Burying the bin’s edge slightly makes it harder for them to tunnel underneath.
- Scatter sticks at the bottom: Once the bin is in place, spread a layer of sticks, twigs, or other coarse material at the very bottom. This initial layer is paramount for airflow. It creates vital air pockets, preventing compaction and ensuring oxygen can circulate throughout the pile. Good airflow is essential to prevent your compost from becoming anaerobic (lacking oxygen), which can lead to foul odors and slow decomposition.
The Art of Layering: Balancing Greens and Browns for Optimal Decomposition
Successful composting hinges on achieving the right balance between “greens” and “browns.” These terms refer to the nitrogen and carbon content of your materials, respectively. Microbes need both to thrive and break down organic matter efficiently.
Greens (Nitrogen-Rich Materials):
These materials are typically moist, fresh, and provide the nitrogen necessary for microbial growth. Aim for roughly one part green to two or three parts brown by volume.
- Vegetable Scraps: A staple for any compost pile. This includes discarded tea leaves and coffee grounds, onion skins, fruit peels (orange, lemon, lime), and any general green vegetable trimmings. These provide a quick boost of nitrogen.
- Eggshells: While not purely nitrogen-rich, crushed eggshells provide calcium, which is beneficial for soil health. Always crush them to speed up decomposition.
- Fresh Grass Clippings: A great source of nitrogen. However, add them in thin layers (no more than an inch or two) to prevent them from compacting and becoming slimy or anaerobic.
- Garden Cuttings: Freshly pulled weeds (ensure they haven’t gone to seed!), spent flowers, and trimmings from non-diseased plants are excellent additions.
Browns (Carbon-Rich Materials):
These materials are typically dry, woody, and provide the carbon that forms the bulk of the compost pile, contributing to its structure and aeration.
- Shredded Cardboard: An excellent carbon source. Tearing or shredding it into smaller pieces increases its surface area, allowing microbes to work faster. It also helps aerate the pile.
- Shredded Paper: Similar to cardboard, shredded newspaper or plain paper (avoid glossy or heavily inked paper) adds carbon and helps absorb excess moisture.
- Dry Leaves: Fall leaves are a goldmine for compost. They are abundant, free, and provide a fantastic carbon base. Crumble them to aid decomposition.
- Straw or Hay: Provides bulk, carbon, and improves aeration.
- Sawdust or Wood Chips (in moderation): These are very high in carbon and can take longer to break down. Use sparingly and balance with plenty of greens to prevent tying up nitrogen.
The Layering Process:
Once you have your bin set up, begin adding materials in layers:
- Start with your base layer of sticks/twigs for aeration.
- Add a layer of browns (e.g., dry leaves, shredded cardboard).
- Follow with a layer of greens (e.g., kitchen scraps, grass clippings).
- Sprinkle a thin layer of garden soil or finished compost on top of the greens. This “activator” introduces a fresh batch of beneficial microbes.
- Repeat the layers, ensuring a good mix of browns and greens. Aim for a ratio of approximately 2-3 parts browns to 1 part greens.
- Keep the pile moist! It should feel like a wrung-out sponge – damp but not soggy. If it’s too dry, add water; if it’s too wet, add more browns.
What NOT to Compost (and why):
To avoid odors, pests, and slow decomposition, certain items should never go into your compost pile:
- Meat, Bones, Fish, Dairy Products, and Oily Foods: These attract pests (rodents, flies), can create foul odors, and decompose slowly, potentially introducing harmful bacteria.
- Diseased Plants: Pathogens in diseased plants can survive the composting process and spread to your garden when the compost is used.
- Weeds with Seeds: Many weed seeds can remain viable through composting and will sprout in your garden when the compost is applied.
- Pet Waste (Dog/Cat): Contains pathogens that can be harmful to humans and should not be used in vegetable gardens.
- Treated Wood or Sawdust from Treated Wood: Can contain chemicals harmful to plants and soil organisms.
- Coal Ash: Can contain heavy metals.
Composting Process and Maintenance: Nurturing Your Black Gold
Once your bin is established, regular maintenance will ensure efficient decomposition and a high-quality finished product. The key elements are aeration, moisture, and temperature management.
Aeration (Turning Your Pile):
Turning your compost pile is crucial. It introduces oxygen, which is essential for the aerobic bacteria that do most of the work. Without enough oxygen, the pile can become anaerobic, leading to unpleasant smells and slower decomposition.
- How often? Aim to turn your pile every few days or at least once a week, especially if you have a “hot” compost pile (actively decomposing and warm). If it’s a slower, “cold” pile, turning monthly is sufficient.
- How to turn? Use a pitchfork or compost aerator to mix the outer, cooler material into the center and bring the inner, warmer material to the outside. This ensures even decomposition.
Moisture Management:
The compost pile needs to be consistently moist, like a damp sponge. Too dry, and microbial activity slows down; too wet, and it becomes waterlogged and anaerobic.
- If too dry: Sprinkle water over the pile as you turn it.
- If too wet: Add more dry, carbon-rich materials like shredded cardboard, dry leaves, or straw to absorb excess moisture. Turn the pile to distribute the dry material.
Temperature:
Active compost piles generate heat as microorganisms break down materials. A hot compost pile (reaching 130-160°F or 55-70°C) decomposes quickly and can kill weed seeds and pathogens. This requires a good balance of greens and browns, adequate moisture, and frequent turning. Smaller, slower “cold” compost piles will still decompose but will take longer and may not reach high temperatures.
Troubleshooting Common Issues:
Even experienced composters encounter challenges. Here’s how to address some common problems:
- Smelly Compost (Rotten Odor):
- Cause: Often too much green material, too wet, or not enough aeration. Anaerobic conditions lead to a sulfuric smell.
- Solution: Add more brown materials (shredded cardboard, dry leaves), turn the pile thoroughly to introduce oxygen, and if too wet, allow it to dry out slightly before adding more moist materials.
- Compost Not Breaking Down (Pile is Cold):
- Cause: Too dry, not enough green (nitrogen) materials, or too much woody material.
- Solution: Add water until it’s damp, incorporate more green materials (kitchen scraps, fresh grass clippings), and turn the pile to mix everything. Smaller pieces decompose faster, so chop up larger items before adding them.
- Attracting Pests (Rodents, Flies):
- Cause: Adding forbidden items like meat, dairy, or oily foods; or leaving food scraps exposed on the surface.
- Solution: Never add problematic items. Always bury fresh food scraps deep within the pile and cover them with a layer of brown material. Ensure your bin is secure if pests are a persistent problem.
When is Compost Ready? Harvesting Your Black Gold
Knowing when your compost is ready for use is crucial for maximizing its benefits. Fully decomposed compost, often called “humus” or “black gold,” will have distinct characteristics:
- Appearance: It will be dark brown or black in color.
- Texture: Crumbly and uniform, with no recognizable original materials (you shouldn’t see banana peels or newspaper fragments).
- Smell: It should have a pleasant, earthy aroma, reminiscent of forest soil, not foul or ammoniac.
- Temperature: The pile will have cooled down and no longer generate heat.
The time it takes for compost to mature can vary significantly, from a few weeks in a hot, well-managed pile to several months or even a year in a slower, cold pile.
How to Use Your Finished Compost:
- Soil Amendment: Mix 1-3 inches of compost into your garden beds before planting. It enriches the soil, improves drainage, and provides nutrients.
- Top Dressing: Spread a thin layer of compost (1/2 to 1 inch) around existing plants, shrubs, and trees. It acts as a slow-release fertilizer and helps retain moisture.
- Potting Mix Component: Mix compost with other ingredients like perlite, vermiculite, and peat moss (or coconut coir) to create your own nutrient-rich potting soil for containers.
- Seed Starting: For seed starting, it’s best to use screened compost (passing it through a mesh) to remove any larger particles, ensuring a fine texture for delicate seedlings.
Advanced Composting Tips for Enthusiasts
Once you’ve mastered the basics, you might consider exploring more advanced composting techniques:
- Compost Tea: Brew your finished compost in water to create a liquid fertilizer rich in beneficial microbes and nutrients. This can be used as a foliar spray or soil drench.
- Vermicomposting (Worm Composting): Utilize special composting worms (like red wigglers) in a dedicated bin to break down kitchen scraps into nutrient-dense worm castings. This is excellent for smaller spaces or indoor composting.
- Bokashi Composting: An anaerobic fermentation process that “pickles” food scraps using a special inoculant. While it doesn’t produce finished compost directly, it pre-processes food waste, making it ready for faster breakdown when buried or added to a traditional compost pile.
Conclusion: Embrace the Composting Journey
Composting is more than just a gardening chore; it’s a rewarding practice that connects you intimately with the natural cycles of growth and decay. By transforming waste into a valuable resource, you not only enhance the health and vitality of your garden but also contribute to a more sustainable and environmentally friendly lifestyle. The journey from scraps to “black gold” is a testament to the power of nature, and with this guide, you are well-equipped to embark on your successful composting adventure. Happy composting!