
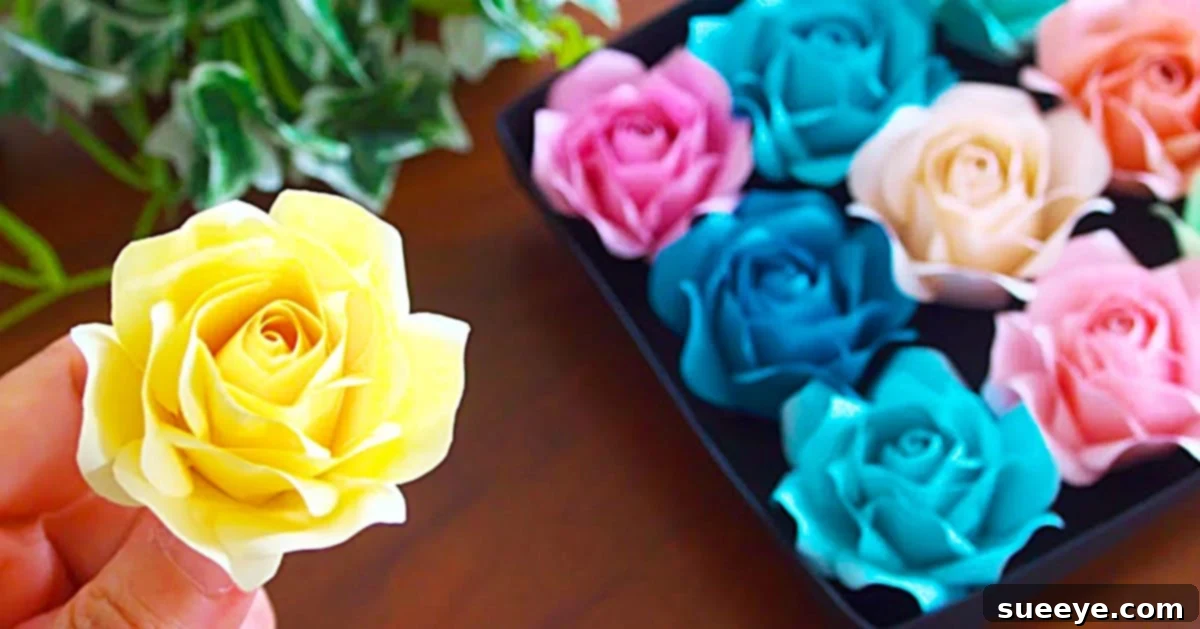
How to Make Beautiful Paper Roses: Your Ultimate DIY Guide to Stunning Floral Decor
There’s something truly magical about bringing a touch of nature indoors, especially when it comes in the form of elegant roses. While fresh flowers eventually wilt and artificial ones can sometimes lack a personal touch, handmade paper roses offer a unique blend of beauty, longevity, and profound satisfaction. Imagine crafting an entire bouquet that stays vibrant forever, customized to your exact color palette and design vision. This guide will walk you through the delightful process of creating your own professional-looking paper roses, drawing inspiration from an incredibly accessible video tutorial.
My journey into making paper roses began with a simple desire to transform a small corner of my bedroom into a distinct, inviting sitting area. I envisioned this space as a serene retreat, visually separate from the rest of the room. Flowers immediately came to mind as the perfect element to achieve this. I explored various options: real flowers for their natural fragrance and charm, store-bought artificial flowers for convenience, and of course, the intriguing possibility of personally crafted blooms. Having accumulated a lovely collection of artificial flowers from frequent sales at Michaels Craft Store and Joann’s Fabrics—always with the help of those fantastic 25% off app coupons that make them incredibly affordable—I already had a base. However, I yearned for something more unique, something that truly reflected my personal style and added a handmade touch to complement my existing decor.
That’s when I stumbled upon this incredible paper rose video tutorial by Simple Paper Made on YouTube. From the moment I watched it, I was captivated. The roses looked astonishingly professional, yet the step-by-step instructions were so clear, so easy to follow, that I knew I had to try them. It was the perfect solution: a way to create exquisite floral arrangements that were not only budget-friendly but also allowed for complete creative control. The joy of crafting something beautiful with my own hands, knowing it would last indefinitely, was an irresistible prospect.
Why Choose Paper Roses for Your Decor?
Handmade paper roses offer a plethora of advantages that make them a superior choice for many decorating needs:
- Everlasting Beauty: Unlike fresh flowers, paper roses never wilt or fade. They maintain their vibrant colors and perfect form indefinitely, offering enduring elegance.
- Cost-Effective: Crafting paper flowers is significantly more affordable than purchasing fresh bouquets regularly or even high-quality artificial ones, especially when you utilize sales and coupons for your materials.
- Limitless Customization: You have complete control over color, size, and even the type of paper. This allows you to perfectly match your roses to any room’s decor, theme, or special occasion.
- Eco-Friendly Potential: Paper is a sustainable resource, and you can even use recycled paper or upcycle old book pages, adding an artistic, vintage touch.
- Allergy-Friendly: For those with pollen allergies, paper roses are a fantastic alternative, allowing everyone to enjoy beautiful floral displays without discomfort.
- Therapeutic Crafting: The process of making paper flowers can be incredibly relaxing and meditative, offering a wonderful creative outlet and a sense of accomplishment.
- Versatile Applications: From simple vase arrangements to elaborate wreaths, garlands, wall art, gift embellishments, and even wedding decorations, paper roses are incredibly versatile.
Essential Materials for Crafting Paper Roses
One of the most appealing aspects of making paper roses is that it requires only a few basic, readily available craft supplies. You likely have many of these items around your home already:
- Small Pack of Paper: This is your primary material. While standard printer paper works, for a more professional and durable rose, consider lightweight cardstock (65-80 lb), construction paper, or even specialized craft paper. Different textures and patterns can add unique character to your roses. Experiment with colors that complement your decor or event theme.
- Craft Glue: A good quality craft glue that dries clear is essential. Tacky glue, PVA glue, or even a low-temperature hot glue gun can work. For finer details and faster drying, a glue pen might be useful.
- Sharp Scissors: Precision is key for clean petal cuts. A pair of sharp, fine-tipped scissors will make your work much easier and your roses look more refined.
- A Toothpick (or thin dowel/skewer): This humble tool is crucial for curling and shaping the delicate edges of your paper petals, giving them a natural, soft appearance.
- A Pencil: For tracing shapes onto your paper. Make sure it’s light enough to erase easily if needed, or that your cuts will completely remove the lines.
Optional Materials for Enhanced Realism and Design:
- Rose Template: While freehand drawing is possible, a template ensures consistent petal shapes and sizes, which is especially helpful if you’re making many roses.
- Cutting Mat and Craft Knife: For very precise cuts or intricate designs, a craft knife used with a self-healing mat offers superior control.
- Floral Wire and Tape: If you plan to create full stems for your roses, floral wire (various gauges) and green floral tape are indispensable.
- Green Paper: For cutting out realistic leaves and sepals (the small green leaves at the base of a rose bloom).
- Embellishments: Glitter, iridescent paint, or small pearls can add extra sparkle and sophistication to your finished paper roses.
Step-by-Step Guide to Crafting Your Own Paper Roses
Making these gorgeous paper roses is a surprisingly straightforward and enjoyable process. The paper rose video tutorial by Simple Paper Made on YouTube provides excellent visual guidance, but here’s a detailed breakdown of the steps to help you along:
1. Preparation and Template Creation:
Begin by gathering all your materials and setting up a clean, well-lit workspace. If you’re using a template, print it out and cut the shapes. If drawing freehand, gently sketch a simple daisy-like shape onto your chosen paper. This daisy shape will serve as the base for several petals. You’ll typically need multiple daisy shapes for one full rose, varying slightly in size for a natural layered look. The key is to have equally spaced, rounded petals around a central circle.
2. Precision Cutting:
Carefully cut out your daisy shapes. Take your time to ensure smooth, clean edges for each petal. The cleaner the cut, the more professional your finished rose will appear. You’ll typically cut around the outer perimeter of the daisy, separating it from the rest of the paper.
3. Curling the Petals for Natural Curves:
This is where the toothpick comes in handy. Take each petal of your cut-out daisy shape and gently curl the edges backward. Place the toothpick on the underside of a petal, near the edge, and roll the paper around it, applying gentle pressure. This process gives the petals a soft, organic curve, mimicking the natural look of a real rose. Ensure consistency in your curling for a uniform look, or vary it slightly for a more rustic feel.
4. Forming the Rose Bud (Initial Layers):
Once all the petals are curled, it’s time to start forming the rose. Begin with your smallest daisy shape. Apply a small dot of glue to the bottom center of one petal. Gently fold this petal towards the center, overlapping it slightly with the next petal. Continue this process, folding the petals inwards one by one, securing each fold with a tiny dab of glue at the base. You’re essentially creating a tight spiral, forming the innermost bud of your rose. Hold each section briefly until the glue sets.
5. Building Out the Rose:
As you add subsequent daisy layers (moving from smaller to larger sizes if you’ve prepared varied templates), you’ll start to create the fuller body of the rose. For these outer layers, instead of folding them tightly, you’ll arrange them to overlap and encircle the central bud you’ve already formed. Apply glue to the base of each petal or to the underside of the central “disc” of the daisy shape before attaching it. Ensure that the petals are evenly spaced and layered to create a symmetrical and balanced appearance. The goal is to build volume and natural depth.
6. Securing and Refining:
Once all your layers are glued in place, gently reshape your rose with your fingers. You can softly open or close petals to achieve your desired look. Make sure all glued sections are firmly adhered and allow ample drying time, especially if using liquid craft glue. For added realism, you can cut out small green sepals from green paper and glue them to the very bottom of the finished rose. If you’re adding a stem, thread a floral wire through the base and secure it with floral tape.
Tips for Crafting Flawless Paper Roses
Achieving stunning paper roses is a skill that improves with practice. Here are some expert tips to help you:
- Practice Makes Perfect: Don’t get discouraged if your first rose isn’t perfect. Each attempt will teach you something new about paper, glue, and shaping techniques.
- Experiment with Paper: Different paper weights and textures yield different results. Cardstock offers sturdiness, while lighter paper provides delicate curves.
- Vary Petal Sizes: For the most realistic roses, use templates with slightly varying petal sizes. Smaller petals for the center and progressively larger ones for the outer layers mimic natural growth.
- Use Templates for Consistency: If you need multiple roses that look uniform, use pre-made templates or create your own precise ones.
- Patience with Glue: Allow glue sufficient time to dry, especially when forming the central bud. Rushing can cause petals to spring apart.
- Don’t Over-Glue: Use only a small amount of glue. Too much can make the paper soggy and messy.
- Add Leaves and Sepals: Green leaves and sepals (the small leaves at the base of the flower) significantly enhance the realism of your paper roses.
- Personalize with Embellishments: Consider adding a touch of glitter to the petal edges, a light dusting of chalk pastels for shading, or even a spritz of floral-scented spray for an extra sensory experience.
Creative Uses for Your Beautiful Handmade Paper Roses
Once you master the art of making these exquisite paper roses, a world of creative possibilities opens up. Their versatility and everlasting nature make them perfect for countless applications:
- Elegant Home Decor: Arrange them in vases for stunning centerpieces, create beautiful wreaths for your door or wall, or assemble them into garlands to drape across shelves or mantels. They can even be framed as unique wall art.
- Unique Gift Embellishments: Adorn gift boxes, bags, or even homemade cards with a handmade paper rose for a personal and luxurious touch that shows you care.
- Party and Event Decorations: Paper roses are ideal for decorating for birthdays, bridal showers, baby showers, and anniversaries. Use them in centerpieces, as backdrop accents, or even as charming place card holders.
- Wedding Decor: Create stunning bridal bouquets, elegant boutonnieres, delicate corsages, or beautiful table decorations that will last long after the wedding day.
- Scrapbooking and Card Making: Add dimension and texture to your memory books and greeting cards with tiny, perfectly crafted paper roses.
- Fashion Accessories: Attach smaller roses to hair clips, headbands, or even brooches for a unique, handmade accessory.
- Nursery Decor: Soft, colorful paper roses can create a whimsical and safe environment in a baby’s room, free from allergens.
These flowers look amazing and are truly so easy to make, offering endless opportunities to add a personalized touch to your life and surroundings.
Conclusion: Embrace the Joy of DIY Paper Roses
Crafting paper roses is more than just a hobby; it’s an art form that brings immense satisfaction and beauty into your home. From the initial excitement of discovering a simple tutorial to the rewarding experience of seeing your finished, professional-looking blooms, every step of the process is enjoyable. Whether you’re looking to enhance your home decor, create meaningful gifts, or simply indulge in a relaxing creative activity, making paper roses is an incredibly fulfilling endeavor.
So, gather your materials, watch the excellent video tutorial by Simple Paper Made, and allow your creativity to blossom. You’ll be amazed at how easily you can transform simple sheets of paper into an exquisite garden of everlasting roses. Dive into the world of DIY paper flowers and start crafting your own beautiful, budget-friendly, and truly personal floral arrangements today!