
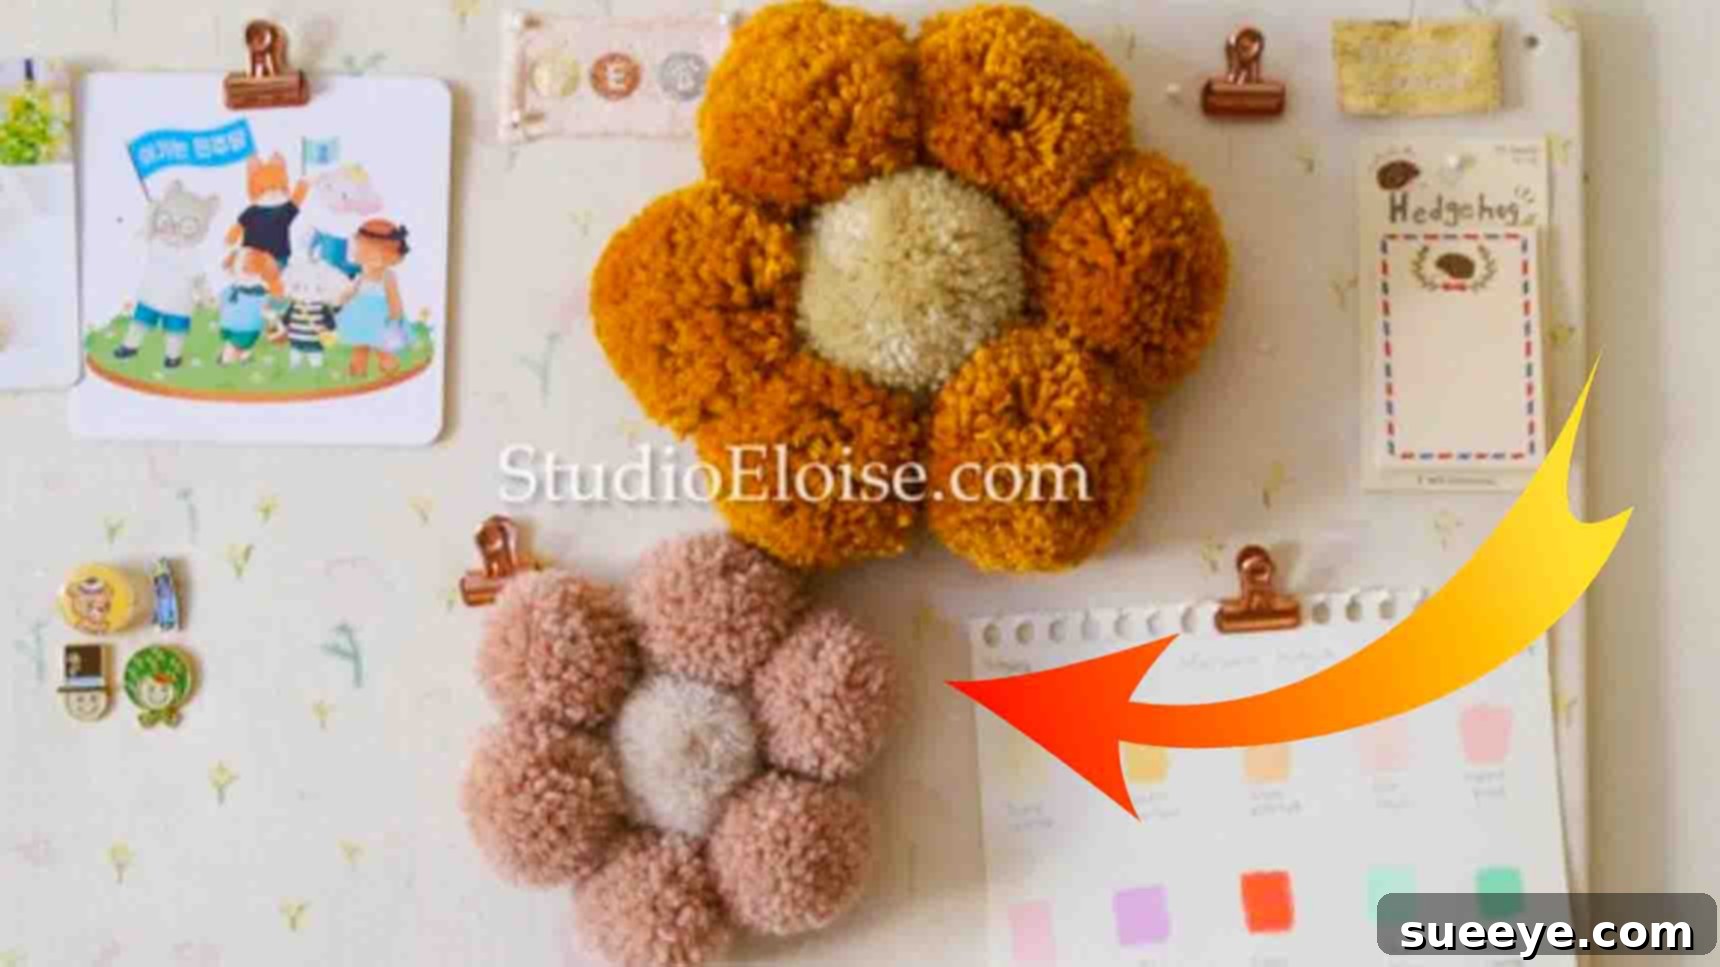
Charming DIY Pom Pom Flower Wall Decor: An Easy Craft Project for Your Home
Are you searching for a delightful and inexpensive way to refresh your home decor? Look no further! This enchanting DIY pom pom flower wall decor project, inspired by the creative minds at Studio Eloise on YouTube, offers a perfect blend of simplicity and charm. It’s an ideal weekend activity that promises to add a touch of handmade elegance and a burst of color to any room. Whether you’re a seasoned crafter or just starting, this guide will walk you through every step, ensuring a beautiful result you’ll be proud to display.
Handmade decor pieces bring a unique warmth and personality that store-bought items often lack. This pom pom flower is not just a decoration; it’s a testament to your creativity and a wonderful way to personalize your living space. Imagine a vibrant floral accent brightening a nursery, adding a playful touch to a living room, or becoming a focal point in a cozy reading nook. Best of all, this project requires only a handful of basic crafting materials, making it incredibly accessible and budget-friendly. Gather your supplies, invite your family, and prepare for a fun and rewarding crafting experience!
Why Choose DIY Pom Pom Flower Wall Decor?
The appeal of crafting your own home accessories goes beyond just saving money. DIY projects like this pom pom flower wall decor offer numerous benefits:
- Personalized Aesthetic: You have complete control over colors, sizes, and arrangements, allowing you to create a piece that perfectly matches your existing decor and personal style. Want a vibrant, multi-colored flower? Or perhaps a subtle, monochromatic design? The choice is entirely yours.
- Budget-Friendly: Pom poms and plastic canvas are relatively inexpensive, making this an affordable way to enhance your home’s ambiance without breaking the bank. You might even have some of the materials lying around from previous crafts!
- Engaging Family Activity: This simple craft is perfect for all ages. Kids will love choosing colors and helping with the assembly, fostering creativity and fine motor skills. It’s a fantastic opportunity for quality family time and creating lasting memories.
- Unique & Thoughtful Gifts: A handmade pom pom flower can make a truly special and heartfelt gift for birthdays, housewarmings, or baby showers. It shows care and effort, making it far more meaningful than a generic store-bought item.
- Sense of Accomplishment: There’s immense satisfaction in creating something beautiful with your own hands. Seeing your finished pom pom flower displayed prominently in your home will fill you with pride.
This project is designed for everyone, from beginners to experienced crafters. The instructions are straightforward, and the process is enjoyable, ensuring that you’ll end up with a lovely piece of wall art regardless of your skill level.
Materials for Your Pom Pom Flower
One of the best aspects of this DIY craft is the minimal and accessible list of materials. Most items can be found at your local craft store or even a dollar store.
- 6 Pink Pom Poms (or any color of your choice): These will form the petals of your flower. Consider the aesthetic of your room; pastel shades for a soft look, bright hues for a playful vibe, or even an ombre effect for sophistication. Ensure they are all roughly the same size for a uniform appearance, typically around 1.5 to 2 inches in diameter. The quality of pom poms varies, so choose ones that are full and plush for the best result.
- 1 Beige Pom Pom (or any color of your choice): This will be the center of your flower. It’s often chosen in a contrasting or complementary color to the petals to make it stand out. Similar to the petals, consistency in size relative to the petal pom poms is important for a balanced design.
- Plastic Canvas (or anti-slip rug mat): This acts as the sturdy base for your pom poms. Plastic canvas, often used for needlepoint, provides a grid structure that makes it easy to attach and secure the pom poms. An anti-slip rug mat can also work effectively, offering a flexible yet durable foundation. Choose a piece large enough to accommodate your flower design with some extra margin for easy handling.
- Marker: Any permanent or washable marker will do, primarily for marking the placement of your pom poms on the canvas. A fine-tip marker offers greater precision.
- Scissors: A sharp pair of craft scissors will be essential for cutting the plastic canvas cleanly and trimming any excess threads.
- Measuring Tape or Ruler (Optional but Recommended): For precise spacing of your pom poms, especially if you want a perfectly symmetrical flower.
Having all your materials organized before you begin will make the crafting process much smoother and more enjoyable. Double-check your chosen pom pom colors and sizes to ensure they create the visual impact you desire.
Step-by-Step Guide: Crafting Your Pom Pom Flower Wall Decor
Follow these simple steps to bring your charming pom pom flower to life. This detailed guide ensures clarity and helps you achieve a professional-looking finish.
Step 1: Planning and Marking Your Flower Design
Begin by laying your plastic canvas flat on a clean, well-lit surface. This is where you’ll visualize and plan your flower. Take your central pom pom and place it roughly in the middle of the canvas. Then, arrange your six petal pom poms around it, creating a pleasing floral shape. Experiment with the spacing until you’re happy with the arrangement. You want the petal poms to be close enough to the center pom to form a cohesive flower, but not so cramped that they lose their individual shape. Once you’re satisfied with the layout, use your marker to carefully mark the exact spot where each pom pom will be attached. Make a small dot or an ‘X’ at the center point where you intend to thread each pom pom. This marking ensures a symmetrical and balanced design, which is key for a polished final look.
Step 2: Attaching the Pom Poms to the Canvas
Now it’s time to secure your pom poms. Each pom pom typically has a thread or string loop in its center. If yours doesn’t, you can carefully use a needle and thread to create a small loop through the core of the pom pom. Take your first pom pom (starting with the center one is often easiest) and align its thread with one of your marked spots on the plastic canvas. From the front of the canvas, push the thread through one of the canvas holes. Flip the canvas over to the back. Pull the thread taut, ensuring the pom pom is snug against the front of the canvas. Make a simple, secure knot. To ensure it doesn’t come loose, tie a second knot. You can tie these around a bar of the plastic canvas or loop them through an adjacent hole for extra security. For the petal poms, you might consider tying just one knot initially, as this allows for slight repositioning later if you find the spacing isn’t quite right. Once you’re confident in the placement, go back and tie the second knot to fully secure each petal. Repeat this process for all the petal pom poms, positioning them tightly close to the central pom to form a beautiful, cohesive flower.
Step 3: Trimming the Excess Thread and Refining Attachment
After each pom pom is securely knotted, use your scissors to carefully trim any excess thread close to the knot. This prevents loose ends from showing and keeps the back of your decor piece neat. Flip the canvas back to the front and gently fluff the pom poms, ensuring they are positioned perfectly. If you used only one knot for the petal poms in the previous step, now is the time to double-check their alignment. Make any final adjustments to their position before tying the second, securing knot for each petal. The goal is to have a robust attachment that will withstand handling and display, ensuring your flower holds its shape beautifully over time.
Step 4: Shaping and Cutting the Plastic Canvas
Once all your pom poms are firmly attached and you are satisfied with their arrangement, it’s time to trim the plastic canvas. This step is crucial for making your flower look truly finished and professional. Carefully cut the plastic canvas in the shape of your flower. The idea is to cut around the perimeter of your pom poms, leaving just enough canvas to support them without being visible from the front. Aim to follow the natural curve and outline of the flower, ensuring the canvas is completely hidden behind the fluffy poms. Using sharp scissors will help you achieve clean, smooth cuts. Take your time with this step to avoid cutting any pom pom threads or uneven edges. When done correctly, the canvas will be practically invisible, giving the illusion that your pom pom flower is magically floating on the wall.
Displaying Your Handmade Masterpiece
With your pom pom flower complete, the final exciting step is to decide where to display your beautiful creation! Thanks to its lightweight nature, there are many versatile ways to incorporate this charming piece into your home decor:
- Wall Hanging: The most straightforward option is to hang it on any wall that needs a pop of color or a soft, whimsical touch. You can use a small command hook, a thumbtack, or even a piece of fishing line looped through the canvas and hung from a nail. It’s perfect for a nursery, a child’s bedroom, a living room, or even a cozy hallway.
- Accent Piece: Don’t limit yourself to walls! Place it as an accent piece on a bookshelf, a dresser, or a console table. Lean it against a stack of books or a decorative vase to add texture and visual interest.
- Gallery Wall Addition: Integrate your pom pom flower into an existing gallery wall. Its unique texture and dimension will provide a lovely contrast to framed pictures and other flat art pieces, making your gallery wall even more dynamic.
- Door Decor: Hang it on an interior door to welcome guests with a burst of handcrafted cheer.
- Party or Event Decor: These flowers aren’t just for everyday home decor. Make several in different sizes and colors to create stunning backdrops or table decorations for birthdays, baby showers, or other celebrations.
Consider the color scheme and existing decor of the chosen space to ensure your pom pom flower complements its surroundings beautifully. This simple addition can transform an ordinary space into something extraordinary, reflecting your personal style and love for handmade crafts.
Creative Variations and Embellishments
Once you’ve mastered the basic pom pom flower, the possibilities for customization are endless! Here are some ideas to inspire your next project:
- Varying Sizes: Create flowers of different sizes by using larger or smaller pom poms. Group them together on a wall to form a captivating floral cluster.
- Color Palettes: Experiment with different color combinations. Try an ombre effect using shades from light to dark, or opt for a monochromatic look with varying textures. For a vibrant statement, mix bold, contrasting colors.
- Layering: For a fuller, more dimensional flower, you can layer a second, smaller set of petals on top of the first, using slightly smaller pom poms.
- Adding Leaves: Cut simple leaf shapes from felt in shades of green and attach them to the back of your plastic canvas using hot glue or by tying them through the canvas holes. This adds a more natural, botanical touch.
- Embellishments: Consider adding small beads, buttons, or even glitter glue to the center of your flower for extra sparkle and detail.
- Different Shapes: While this tutorial focuses on a classic flower shape, you could experiment with other designs. How about a heart or an abstract cloud of pom poms?
- Garlands or Mobiles: Create several pom pom flowers and string them together to make a charming garland for a mantelpiece or a nursery mobile.
Don’t be afraid to let your imagination run wild! The beauty of DIY lies in its flexibility and the ability to tailor each piece to your unique vision. These variations can transform a simple flower into a complex and artistic statement piece, allowing you to continually evolve your home decor.
Tips for a Perfect Finish
- Secure Knots: Always double-knot your threads when attaching pom poms to the canvas. This ensures durability and prevents your poms from coming loose over time.
- Even Spacing: While marking helps, always eyeball your arrangement before making final knots. Minor adjustments can make a big difference in the overall look.
- Sharp Scissors: Invest in a good pair of sharp craft scissors for cutting the plastic canvas. Dull scissors can lead to frayed edges and an untidy finish.
- Clean Pom Poms: If your pom poms get a bit squished during the process, gently fluff them with your fingers or even a soft brush to restore their volume and shape.
- Consider Hot Glue: For an alternative to tying, you could use a hot glue gun to attach the pom poms directly to the plastic canvas. This is often quicker but less easily adjustable once set. Ensure you use strong craft glue for a lasting bond if going this route.
This DIY pom pom flower wall decor project is more than just a craft; it’s an opportunity to infuse your living space with creativity, warmth, and a personal touch. It’s incredibly satisfying to create something beautiful with your own hands, especially when it’s as charming and simple as this floral accent. Whether you’re looking for a fun family activity, a thoughtful gift idea, or a way to brighten up your home, this project is sure to delight.
So, why wait? Gather your materials, follow these easy steps, and enjoy the process of making your very own handmade wall art. The joy of creating and the beauty of your finished pom pom flower will be a wonderful addition to your home. Happy crafting!