
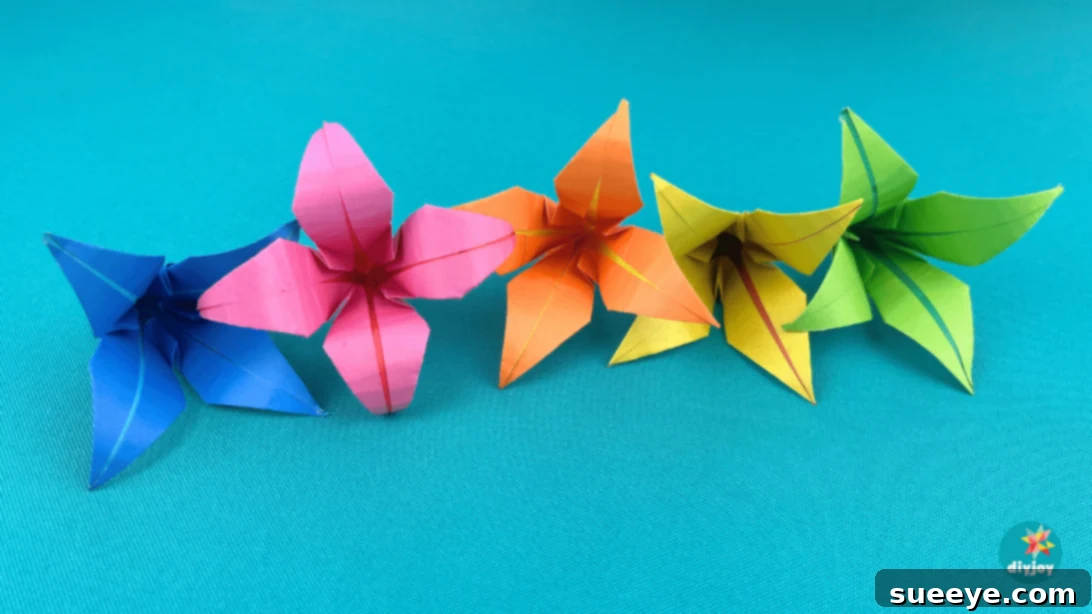
Welcome, fellow craft enthusiasts! As the vibrant colors of spring unfold around us, there’s no better time to immerse ourselves in the delightful world of paper flower crafting. I’ve been absolutely captivated by the charm of creating beautiful paper flowers, and these exquisite paper lilies have truly become a favorite. They’re not only stunningly elegant but also incredibly simple and budget-friendly to make, proving that beautiful art doesn’t have to be complicated or expensive. If you’re searching for an easy and rewarding craft project to brighten your home or surprise a loved one this season, look no further. This origami lily tutorial is perfect! You’ll be amazed at what you can achieve with just a square piece of paper and a simple skewer – no fancy tools required to bring these charming blooms to life.
RELATED: Explore more paper flower projects! Check out our guide on How to Make Origami Daffodils for another delightful spring craft.
My recent venture into crafting a tulip paper flower bouquet also yielded results far beyond my expectations. These DIY paper tulips turned out so lovely that they’ve become my go-to photo props, adding a touch of handmade charm to every shot. Truly, these easy paper flowers are the quintessential spring decoration, bringing a fresh, vibrant feel to any space. Whether you’re a seasoned crafter or a complete beginner, a child or an adult, you’ll find immense joy and satisfaction in this fun and engaging art activity. Paper flower making is a fantastic way to unleash your creativity, practice mindfulness, and create something beautiful with your own hands. If you’re ready to learn the secrets of making these gorgeous paper lilies, keep reading for our comprehensive, step-by-step instructions!
Essential Materials for Your Origami Lily Paper Flowers
Gathering your materials is the first step to any successful craft project. For these beautiful DIY paper lilies, you’ll be delighted to find that you only need a couple of basic items, making this an incredibly accessible and inexpensive craft for anyone, anywhere. No need for elaborate tools or expensive supplies!
- Origami Paper or Square-Colored Paper: The heart of your project! Choose vibrant colors to mimic real lilies or pastel shades for a softer look. Standard origami paper (6×6 inches or 15×15 cm) works perfectly, but any square-shaped paper of a similar weight will do. The key is that it’s easy to fold and holds creases well.
- Skewer: A simple wooden skewer, a thin dowel, or even a pen or pencil will work wonders for curling the petals and giving your lily a realistic, delicate finish.
That’s it! With these two simple items, you’re ready to begin crafting your stunning origami lily flowers.
How to Craft Beautiful Origami Lily Paper Flowers: A Step-by-Step Guide
Follow these detailed instructions to transform a simple piece of paper into an elegant origami lily. Each step is designed to be clear and easy, ensuring a successful crafting experience, even for beginner origami enthusiasts.
Step 1: Create Your First Fold
Begin your origami lily by taking your chosen square piece of paper. Carefully fold it exactly in half, bringing one edge precisely to meet the opposite edge. Press down firmly along the crease to ensure it’s sharp and well-defined. This initial fold is fundamental for establishing the symmetrical foundation of your beautiful lily.
Step 2: The Second Essential Fold
Now, gently open your paper back up. Rotate it 90 degrees so that the existing crease runs horizontally. Once again, fold the paper in half, ensuring the new edges align perfectly. Press the crease firmly. When you open it again, you should see a cross shape formed by two intersecting creases in the center of your square paper. These foundational folds are crucial for guiding the rest of your origami lily creation.
Step 3: Beginning Diagonal Folds
Rotate your paper so that one corner is pointing directly towards you, resembling a diamond shape. Now, take the bottom corner and fold it upwards diagonally, aligning it precisely with the opposite top corner. Make sure your crease is crisp and extends fully from one side to the other. This diagonal fold is key for defining the structure of your origami lily.
Step 4: Completing the Crease Pattern
Open the paper again. You’ll now have a visible diagonal crease. Rotate the paper another 90 degrees so that a new corner is pointing towards you. Repeat the diagonal fold, bringing the bottom corner up to meet the opposite top corner. Once you unfold the paper this time, you should see a total of four creases: two horizontal, two vertical, and two diagonal, all intersecting at the center. This grid of creases is essential for the next steps, creating the “preliminary base” from which your lily will emerge.
Step 5: Forming the Square Base
This step is where your lily truly starts to take shape! Gently hold the paper by its sides, as demonstrated in the first image below. Using the creases you’ve just made, carefully push the sides inward, allowing the paper to fold towards the center. The goal is to collapse the paper into a smaller square shape, often referred to as a “square base” in origami. Ensure all corners align and the layers lie flat. This base is fundamental to many origami projects, including our beautiful paper lily.
Once successfully folded, your paper should now look like a perfect, flattened square, with multiple layers, as depicted in the image below. This compact form is the “square base,” ready for the next set of folds.
Step 6: Shaping the Petals
With your square base in hand, identify the open edge (where the layers of paper separate). Take the right side of the top layer and fold it inward, aligning its edge precisely with the center crease line. Repeat this action with the left side, folding it inward to meet the same center line. This creates a kite-like shape on one face of your square base and begins to define the structure of your lily’s petals.
Step 7: Mirroring the Folds
Now, carefully flip your entire paper structure over to the other side. You’ll see another face of the square base. Repeat the exact same folding process from Step 6: fold both the right and left sides of the top layer inward, aligning them perfectly with the center crease. This ensures symmetry and prepares all four “sides” of your lily for the next complex folds, laying the groundwork for a truly beautiful origami bloom.
Step 8: Opening and Flattening the Flaps
This step requires a little finesse. Gently open up one of the folded flaps you created in the previous steps. You’ll notice a pocket formed. Carefully flatten this pocket, pushing the paper downwards and outwards to create a diamond shape that lies flat against the main body of the paper. This technique, often called a “petal fold” or “squash fold,” is critical for forming the distinct petals of your lily. Repeat this process for all four flaps around the entire paper model, ensuring each one is neatly opened and flattened. Precision here will contribute to a more refined final lily flower.
Step 9: Refining the Petal Shape
With all four flaps opened and flattened, you’ll now see a diamond-like shape at the top. Take the outer edges of this diamond on one side and fold them inward, once again aligning them with the central vertical crease. This action further refines the individual petal shape, making it narrower and more pointed, which is characteristic of a lily. Repeat this process for all four diamond shapes around your origami model.
Step 10: Inverting the Base and Creating the Stem Point
This is a slightly more advanced but crucial step for giving your lily its distinctive structure. Locate the bottom point of your paper model. Gently open up the folds slightly. As shown in the first photo below, you will need to push the bottom-most point *upwards and inwards* along the existing creases. This is an “inside reverse fold” that forms the base of the flower and the beginning of what would be the stem. Once pushed up, carefully press the paper flat again, ensuring the new fold is sharp and neat. This creates a clean, pointed base for your lily petals to sprout from.
After pushing the bottom point inward and flattening, the bottom tip should now be folded upward, neatly concealed within the layers, creating a clean, defined base for your lily.
Step 11: Sculpting the Lily Petals
This step brings your lily to life with its characteristic open shape. Carefully hold the model by its middle side folds. With a gentle but firm motion, pull the top layers of paper outward and downward, allowing the center to open up. Simultaneously, take the top center tip of each petal and fold it slightly inward, creating a soft curve. This shaping gives your lily a more realistic, three-dimensional appearance, mimicking the natural elegance of a blooming flower. Take your time to adjust each petal for the best effect.
Once you’ve adjusted the top center fold, press it flat to set the crease. Repeat this shaping process carefully on all four sides of your origami lily, ensuring each petal has a consistent, elegant curve. This step truly transforms the folded paper into a recognizable lily flower.
Step 12: Final Petal Adjustments
Now, let’s refine the inner structure of your lily petals. Gently open the model to reveal the flat, inner sections of the petals. On each of these flat sides, carefully fold the outer edges inward towards the center line. This helps to create a more defined, rounded petal shape and adds another layer of detail to your origami lily. Work slowly and precisely, repeating this fold on all four of the flat sides. This step is about adding depth and realism to your blossoming paper flower.
Step 13: The Finishing Touch – Curling the Petals
You’re almost done! The final step transforms your folded paper into a beautifully realistic lily. Take your skewer (or a pen/pencil) and gently curl the tips of each petal outwards. Hold the skewer against the back of the petal tip and roll the paper around it. This delicate curl adds softness, dimension, and a natural organic flow to your lily, making it look as if it’s just blossomed. Adjust the curl on each petal to achieve your desired aesthetic, whether you prefer a tight curl or a subtle wave. And just like that, your exquisite DIY origami paper lily is complete!
Tips for Perfect Paper Lilies:
To ensure your origami lilies turn out exquisite every time, here are a few expert tips:
- Crisp Creases: Always press your folds firmly. Sharp creases are the secret to precise origami and well-defined petals.
- Paper Choice: While standard origami paper is ideal, you can experiment with different types. Lighter weight paper is easier to fold, while slightly heavier paper (like scrapbook paper) can give your lilies more structure and a luxurious feel, though it requires more effort to crease.
- Patience is Key: Especially for the more intricate steps, take your time. Origami is a meditative art form, and rushing can lead to errors.
- Practice Makes Perfect: Don’t be discouraged if your first lily isn’t flawless. Each attempt will improve your technique and understanding of the folds.
Creative Ways to Use Your Handmade Paper Lilies:
Now that you’ve mastered the art of making these beautiful paper lilies, the possibilities for their use are endless! Here are some ideas to inspire your creativity:
- Stunning Bouquets: Combine several lilies of different colors to create a breathtaking paper flower bouquet that lasts forever.
- Elegant Home Decor: Place them in a vase as a centerpiece, adorn a mantelpiece, or use them to brighten up any corner of your home. They add a touch of handcrafted elegance without the need for watering!
- Thoughtful Handmade Gifts: A bouquet of paper lilies makes a unique and heartfelt gift for birthdays, anniversaries, Mother’s Day, or just to show someone you care.
- Party and Event Decorations: Use them for weddings, bridal showers, baby showers, or spring parties. They can be incorporated into garlands, table settings, or even boutonnieres.
- Scrapbooking and Card Making: Smaller versions of these lilies can add a beautiful dimensional element to your scrapbooks, greeting cards, or gift tags.
- Kids’ Crafts & Educational Fun: This project is fantastic for engaging children in a creative and educational activity, helping them develop fine motor skills and patience.
We hope you’ve enjoyed this detailed tutorial on how to make beautiful origami lily flowers. Crafting these elegant blooms is a wonderfully relaxing and rewarding experience, offering a unique blend of artistry and simplicity. Whether you’re making them for yourself, as gifts, or for special occasions, these DIY paper lilies are sure to bring joy and a touch of spring beauty wherever they go. Don’t hesitate to experiment with different paper colors and sizes to create your own unique collection. Share your creations with us – we love seeing what you make! Happy crafting, and keep exploring the endless possibilities of paper art!