
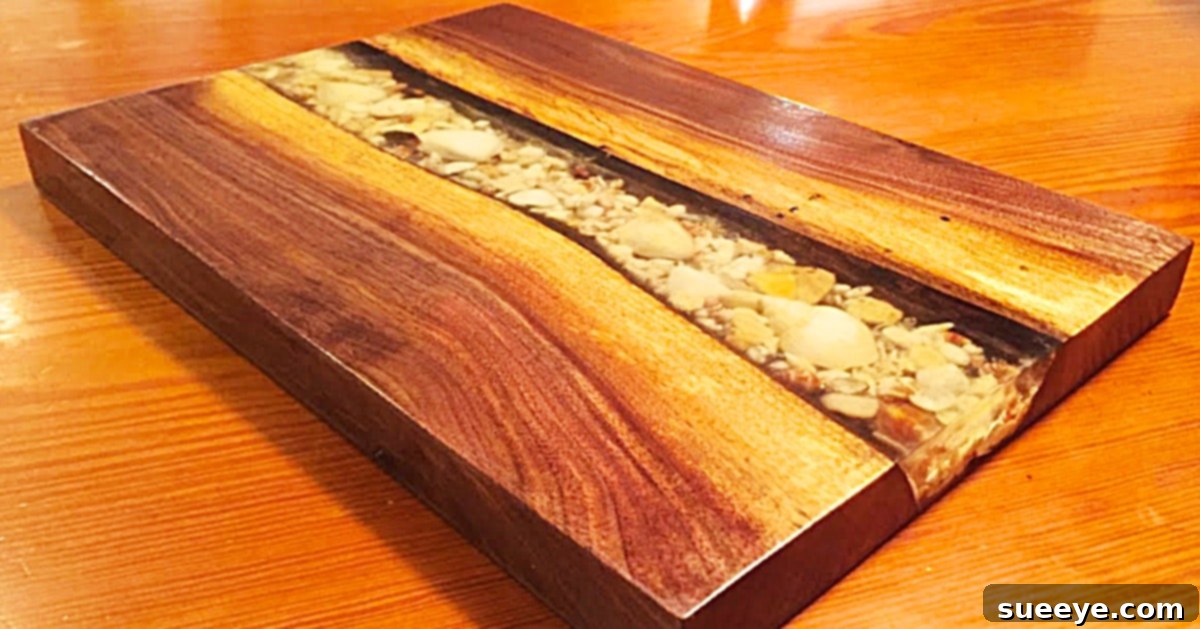
How to Craft Your Own Stunning Epoxy Resin River Serving Board
The allure of epoxy resin river tables has captivated countless enthusiasts, showcasing the incredible beauty of merging natural wood with vibrant, liquid glass. While full-sized river tables might seem like an ambitious undertaking for a beginner, the concept can be scaled down into equally stunning and highly practical projects. A perfect entry point into the world of epoxy resin is crafting your very own epoxy resin river serving board. This project not only allows you to experiment with this versatile material but also results in a beautiful, functional piece that can enhance your home decor or serve as a unique, handmade gift.
Inspired by phenomenal creations like those from Seth’s Custom Creations on YouTube, embarking on an epoxy resin river serving board journey is an ideal way to master fundamental techniques. This guide will walk you through every step, transforming simple materials into a captivating work of art that is both attractive and surprisingly easy to achieve, even if you’re new to resin crafting.
Why Create an Epoxy Resin River Serving Board?
Beyond its aesthetic appeal, a DIY epoxy resin river serving board offers numerous advantages. It’s a fantastic way to:
- Develop New Skills: Learn the basics of working with epoxy resin, including mixing, pouring, curing, sanding, and finishing.
- Craft Unique Home Decor: Add a personalized and artistic touch to your kitchen, dining room, or living space. Each board is one-of-a-kind.
- Make Thoughtful Gifts: Handmade gifts carry a special sentiment. A custom resin serving board is perfect for weddings, anniversaries, housewarmings, or holidays.
- Practice for Bigger Projects: Gain confidence and experience before tackling larger epoxy resin projects like coffee tables, dining tables, or countertops.
- Upcycle Materials: Utilize interesting pieces of wood or decorative inclusions that might otherwise go unused.
Understanding Epoxy Resin for Your Project
Before diving into the creation process, it’s beneficial to understand a bit about epoxy resin itself. Epoxy resin is a two-part polymer system, typically consisting of a resin and a hardener. When these two components are mixed in precise ratios, they undergo a chemical reaction that causes them to cure into a durable, clear, and solid plastic. For projects like river boards, you’ll generally want to use a “casting resin” or “deep pour resin.” These resins are designed to be poured in thicker layers without overheating, which can lead to cracking or yellowing.
Key Considerations for Epoxy Resin:
- Mixing Ratio: Always adhere strictly to the manufacturer’s specified mixing ratio (e.g., 1:1, 2:1 by volume or weight). Incorrect ratios will prevent the resin from curing properly.
- Working Time (Pot Life): This is the amount of time you have to work with the mixed resin before it starts to thicken and cure.
- Cure Time: The time it takes for the resin to fully harden. This can range from 24 to 72 hours, or even longer for deep pours.
- Temperature: Epoxy resin cures best in a stable, warm environment (typically 70-75°F or 21-24°C). Temperature fluctuations can affect cure time and clarity.
Safety First:
Working with epoxy resin requires certain safety precautions:
- Ventilation: Always work in a well-ventilated area, or use a respirator with organic vapor cartridges.
- Gloves: Wear nitrile gloves to protect your skin from direct contact with the resin.
- Eye Protection: Safety glasses or goggles are essential to prevent splashes from reaching your eyes.
- Surface Protection: Cover your workspace with plastic sheeting or drop cloths to protect against spills.
Materials Required for Your Epoxy Resin River Serving Board
Careful selection and preparation of your materials are crucial for a successful project. Here’s a detailed list of what you’ll need:
- Plexiglass Sheet: This will serve as the base for your mold. Choose a thickness that is rigid enough to support the wood and resin without bowing. Alternatives include melamine board or HDPE (High-Density Polyethylene), which resin doesn’t stick to.
- Epoxy Resin: A high-quality, clear casting resin (also known as deep pour epoxy) is recommended. The amount needed will depend on the size of your board and the depth of your pour.
- Clear Glue or Silicone Caulk: Used to secure the wood pieces to the plexiglass and seal any gaps, preventing resin leaks.
- Decorative Inclusions (e.g., Shells, Pebbles): These are what create the “riverbed” effect. Other popular options include dried flowers, colored glass, glitter, coffee beans, small crystals, or even LED lights for a unique glow. Ensure they are clean and completely dry. Porous items might need a thin seal coat of resin before the main pour to prevent bubbles.
- Two Pieces of Split Logs or Live-Edge Wood Slabs: These form the “banks” of your river. Look for pieces that are relatively flat on both sides, dry, and have interesting natural edges. Hardwoods like walnut, maple, oak, or exotic woods work well. Ensure they are kiln-dried or air-dried for an extended period to prevent future warping or cracking.
Additional Essential Tools and Supplies:
- Mixing Cups and Stir Sticks: Disposable plastic cups and wooden craft sticks are ideal for mixing epoxy.
- Heat Gun or Propane Torch: Essential for removing air bubbles that rise to the surface of the poured resin. Use with caution and keep it moving.
- Clamps: To hold the wood pieces firmly against the plexiglass base while the glue dries and during the resin pour.
- Sanding Supplies: A range of sandpaper grits (from 80-grit to 3000-grit or higher) for shaping, smoothing, and polishing the resin and wood. An orbital sander can significantly speed up this process.
- Finishing Oil, Stain, or Polyurethane: To protect and enhance the natural beauty of the wood once the resin has cured and been sanded.
- Level: To ensure your workspace and mold are perfectly level before pouring, preventing uneven resin.
- Masking Tape or Painter’s Tape: Useful for taping off areas or creating temporary barriers if needed.
- Personal Protective Equipment (PPE): Nitrile gloves, safety glasses, and a respirator (as mentioned in safety section).
- Clean Rags or Paper Towels: For cleanup.
Step-by-Step Directions to Create Your Epoxy Resin River Serving Board
Creating your river serving board involves several distinct stages, from preparing your workspace to the final polish. Follow these steps for a stunning result.
Step 1: Prepare Your Workspace and Materials
- Clean and Level: Set up your workspace in a clean, dust-free, and well-ventilated area. Ensure your work surface is perfectly level. Use a spirit level to check.
- Temperature Control: Aim for a stable room temperature, ideally between 70-75°F (21-24°C). This temperature range is optimal for epoxy resin curing.
- Wood Preparation:
- Ensure your wood slabs are dry and free from dirt or debris.
- Flatten both sides of your wood pieces if they are not already flat. This is crucial for a stable serving board and to prevent resin leaks.
- Lightly sand the edges of the wood that will face the resin ‘river’ to ensure a smooth surface for the resin to adhere to.
- For very porous wood, consider applying a thin “seal coat” of epoxy resin to the river edges before the main pour. This helps prevent air bubbles from escaping the wood into your main pour.
Step 2: Construct the Mold
- Position the Wood: Place your two pieces of wood onto the plexiglass sheet, leaving a gap in the middle to form the “river.” The width of this gap will define your river.
- Secure the Wood: Apply a bead of clear glue or silicone caulk along the bottom edge of each wood piece where it meets the plexiglass. Press the wood firmly down and secure it with clamps. Allow the glue/caulk to dry completely according to its manufacturer’s instructions. This step is critical to prevent resin from leaking under the wood.
- Check for Leaks: Once the glue is dry, carefully inspect all seams where the wood meets the plexiglass. Any small gap can lead to a leak and a wasted resin pour. You can test by pouring a small amount of water into the river channel (and then drying it thoroughly before resin).
Step 3: Prepare and Pour the Resin
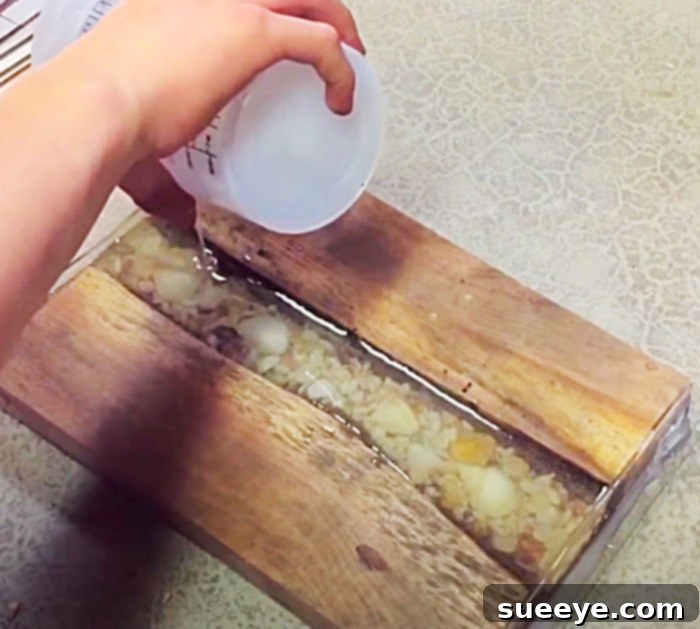
- Place Inclusions: Once your mold is secure, arrange your decorative elements (shells, pebbles, etc.) in the river channel. Think about the aesthetic you want to achieve.
- Measure Epoxy Resin: Following the manufacturer’s instructions precisely, measure out the resin and hardener into separate, clean mixing cups. Accuracy here is paramount. Use a scale for the most accurate measurements if your resin specifies mixing by weight.
- Mix Thoroughly: Pour the hardener into the resin cup (or vice-versa, depending on instructions). Stir slowly and thoroughly for 3-5 minutes, scraping the sides and bottom of the cup frequently. Improper mixing is the most common cause of uncured or tacky resin. Avoid whipping, which can introduce excessive bubbles.
- The Pour: Slowly and steadily pour the mixed epoxy resin into the river channel, allowing it to flow around your inclusions. Be careful not to overfill. If you are doing a deep pour, consider doing it in layers, allowing each layer to partially cure (reach a gel stage) before pouring the next to manage exothermic heat.
- Remove Bubbles: Immediately after pouring, use a heat gun or propane torch (held several inches above the surface and kept moving) to gently pass over the resin. This will pop any surface bubbles. Repeat this process every 10-15 minutes for the first hour of curing, as more bubbles may rise.
- Cover and Cure: Once bubbles are removed, cover your project with a box or plastic sheet to protect it from dust and debris while it cures. Allow the resin to cure fully according to the manufacturer’s recommended time (typically 24-72 hours). Do not disturb it during this time.
Step 4: Demolding, Sanding, and Finishing
- Demold the Board: Once the epoxy is completely cured and hard to the touch, carefully remove the clamps and separate the board from the plexiglass base. You may need a putty knife or chisel to gently pry it off.
- Initial Shaping and Trimming: Trim any excess resin “flash” from the edges of your board using a router, table saw, or hand tools.
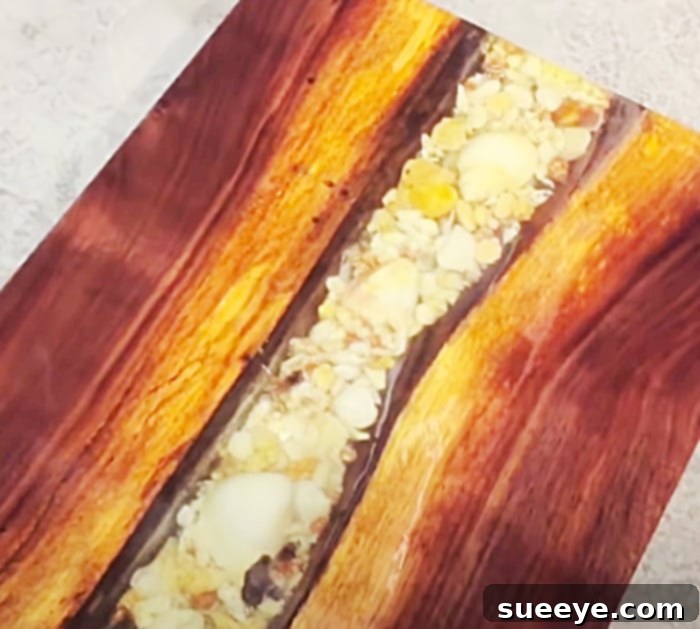
- Sanding the Resin: This is a crucial step for achieving a crystal-clear, smooth finish on your resin. Start with a coarse grit (e.g., 80 or 120-grit) to level any high spots or remove imperfections. Gradually work your way up through finer grits (180, 220, 320, 400, 600, 800, 1000, 1500, 2000, 3000-grit or higher). For the finer grits (above 400), consider wet sanding to achieve a glass-like finish and prevent heat buildup. Clean the surface thoroughly between each grit.
- Sanding the Wood: Sand the wood surfaces and edges to a smooth finish, typically up to 220 or 320-grit, ensuring it’s flush with the resin.
- Finishing the Wood: Once both the wood and resin are perfectly smooth, apply your chosen finish to the wood. Options include:
- Wood Stain: To change or enhance the wood’s color.
- Natural Oil Finish: Such as tung oil, Danish oil, or mineral oil (food-safe if for serving). These penetrate the wood, enhancing its natural grain and providing protection.
- Polyurethane or Lacquer: For a more durable, protective coating on the wood areas.
Apply the finish according to its specific instructions, allowing adequate drying time between coats.
- Polishing the Resin (Optional): For an ultra-glossy finish on the resin, you can use a plastic polish or automotive compound with a buffing pad on a drill or orbital polisher. This will bring out an incredible shine.
Tips for Success with Epoxy Resin Projects
- Read Instructions: Always read the specific instructions for your chosen epoxy resin before you begin. Each brand can have slightly different requirements.
- Accurate Measurement: Use precise measurements for your resin and hardener. Even a small deviation can prevent proper curing.
- Thorough Mixing: Mix slowly and deliberately, scraping the sides and bottom of your mixing cup. Mix for the full recommended time.
- Temperature Control is Key: A warm, stable environment is crucial for proper curing and bubble release.
- Patience is a Virtue: Don’t rush the curing process. Allow the resin to fully harden before demolding or sanding.
- Work in Layers: For very deep pours, consider pouring in multiple thin layers to manage the exothermic reaction and minimize bubbles.
- Test on Scraps: If you’re using new resin or inclusions, do a small test pour on a scrap piece to understand its behavior.
- Protect from Dust: Cover your curing project to prevent dust and pet hair from settling into the wet resin.
Common Mistakes to Avoid
- Improper Mixing: Leads to sticky, uncured spots or areas that never fully harden.
- Ignoring Safety Gear: Exposure to resin can cause skin irritation or respiratory issues. Always wear PPE.
- Pouring Too Thick at Once: Can cause the resin to overheat (exothermic reaction), leading to cracking, yellowing, or excessive bubbles.
- Working in a Cold Environment: Resin cures slower, can become cloudy, or create more bubbles.
- Not Sealing Porous Wood: Air trapped in the wood can escape into the resin as bubbles.
- Impatience: Trying to demold or sand before the resin is fully cured can damage your project.
Caring for Your Epoxy Resin Serving Board
Once your beautiful epoxy resin river serving board is complete, proper care will ensure its longevity and maintain its stunning appearance:
- Cleaning: Wipe clean with a soft, damp cloth and mild soap. Avoid abrasive cleaners or scouring pads, which can scratch the resin surface.
- Heat Resistance: While most epoxy resins are heat-resistant to a degree (often up to 120-150°F or 50-65°C), do not place extremely hot items directly on the resin surface. Use coasters or trivets.
- Cutting Surface: Epoxy resin is not meant to be a cutting surface. Using knives directly on the resin will scratch and damage it. Use the wooden sections for cutting, or use a separate cutting board.
- Storage: Store your board flat to prevent warping over time.
Conclusion
Creating your own epoxy resin river serving board is an incredibly rewarding experience. From selecting the perfect pieces of wood to pouring the shimmering resin and meticulously sanding it to a flawless finish, each step offers a chance to engage your creativity and develop new crafting skills. This project, which seemed daunting at first, quickly becomes manageable and deeply satisfying. The sense of accomplishment you’ll feel as you present your finished, handcrafted serving board is immense, and the experience will undoubtedly build your confidence to tackle even more ambitious resin projects in the future. So go ahead, gather your materials, follow these steps, and bring your unique vision to life. Share your creations and inspire others to dive into the beautiful world of epoxy resin art!