
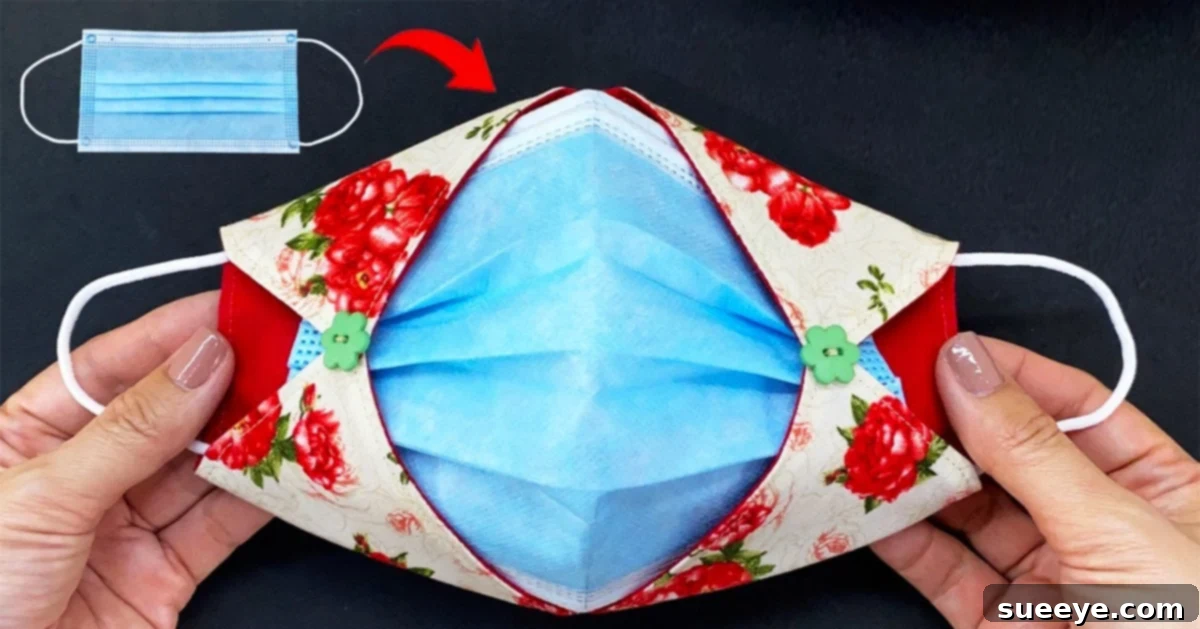
Elevate Your Style: DIY Fabric Surgical Mask Cover Tutorial for Fashion & Function
In today’s world, face masks have become an essential part of our daily lives. While surgical masks offer crucial protection, their standard design often leaves little room for personal expression. What if you could blend safety with undeniable style? Look no further than the innovative concept of a fabric surgical mask cover, a fantastic project brought to light by P&K Handmade on YouTube. This brilliant DIY accessory allows you to personalize your protective gear, add an extra layer of aesthetic appeal, and even make use of those beautiful fabric scraps you’ve been saving.
This tutorial introduces a unique and ingenious way to transform your ordinary surgical mask into a fashion statement. It’s not just about aesthetics; a well-made fabric cover can also offer an additional physical barrier, and perhaps even extend the perceived freshness of your disposable mask. The beauty of this project lies in its simplicity and versatility, making it an accessible craft for anyone with basic sewing skills. Imagine matching your mask to your outfit, or simply adding a pop of color and personality to your everyday look. This guide will walk you through the concept, materials, and process, encouraging you to dive into the P&K Handmade tutorial for the full experience.
Why Choose a Fabric Surgical Mask Cover? Blending Protection with Personal Style
The idea of a fabric cover for a surgical mask is more than just a passing trend; it addresses several practical and aesthetic needs. By enclosing your standard disposable mask in a custom-made fabric shell, you unlock a world of benefits that enhance your masking experience.
Unleash Your Personal Style and Creativity
One of the most compelling reasons to craft a surgical mask cover is the opportunity for personalization. Standard blue or green surgical masks, while effective, rarely complement one’s personal wardrobe. A fabric cover allows you to infuse your unique style into this everyday necessity. Choose fabrics that reflect your personality – vibrant florals, sophisticated geometrics, subtle textures, or even holiday-themed prints. This transformative accessory means your mask can become an extension of your outfit, making you feel more put-together and confident, even during essential errands.
An Extra Layer of Comfort and Potential Protection
While the primary filtration comes from the surgical mask itself, a fabric cover can provide an additional layer of material, contributing to a sense of enhanced physical barrier. Beyond that, a soft cotton fabric against your face can often feel more comfortable than the synthetic materials of a disposable mask, especially for prolonged wear. It can also help to keep the surgical mask cleaner for longer by protecting its outer surface from incidental contact, though it’s crucial to remember that the cover should be washed regularly to maintain hygiene.
Sustainable Crafting: Utilizing Fabric Scraps and Extending Mask Life
For avid crafters, this project is a dream come true for using up those beloved fabric scraps. Instead of letting small pieces of beautiful cotton go to waste, you can transform them into something practical and stylish. This commitment to resourcefulness aligns with sustainable living principles. Furthermore, by protecting the outer layer of your surgical mask, a fabric cover might help it feel fresh for longer, potentially reducing the frequency of changes, although you should always follow health guidelines for mask usage and disposal.
Easy Maintenance and Hygiene
Unlike the disposable nature of surgical masks, a fabric cover is fully washable. This makes maintaining hygiene incredibly simple. After a day of wear, you can easily remove the fabric cover, toss it in the laundry with your regular clothes, and have it fresh and ready for your next outing. This ease of cleaning ensures you always have a clean, stylish option at hand, contributing to better overall mask hygiene.
Essential Materials for Your Stylish Mask Cover Project
Crafting your custom surgical mask cover is a straightforward process, and it begins with gathering the right tools and materials. Most of these items are likely already in your sewing kit or easily found at your local craft store. The beauty of this project is its accessibility, requiring only basic supplies to achieve a fantastic result.
Key Supplies You’ll Need:
- Cotton Fabric: The star of your mask cover! Choose a breathable, tightly woven cotton fabric. This material is comfortable against the skin, easy to sew, and holds up well to repeated washing. Think about patterns, colors, or textures that appeal to you. You won’t need a large amount, making it perfect for fabric remnants.
- Surgical Mask: This will serve as your template. Ensure it’s a clean, unused mask, as you’ll be tracing its shape to create your pattern. Its standardized dimensions provide the perfect starting point for a well-fitting cover.
- Piece of Paper: Any standard printer paper or craft paper will do. This is for drafting your pattern, allowing you to create a reusable template for future mask covers.
- Pencil or Marker: Essential for tracing the outline of your surgical mask onto the paper and then marking your fabric. A fine-tipped marker or sharp pencil ensures accuracy.
- Ruler: Crucial for ensuring straight lines and accurate measurements, especially when adding seam allowances to your pattern. Precision here contributes to a professional-looking finished product.
- 2 Buttons: These will be used to secure the fabric cover to the surgical mask, providing a neat and adjustable attachment method. Choose buttons that complement your fabric design.
- Needle and Thread: For hand-stitching the buttons securely onto your mask cover. A strong, all-purpose thread in a matching or contrasting color will work perfectly.
- Iron: An often-underestimated tool in sewing, the iron is vital for pressing seams flat and giving your fabric pieces a crisp, professional finish. Don’t skip this step!
- Sewing Machine: While small parts might be hand-stitched, a sewing machine will make the bulk of the construction much faster and produce more consistent, durable seams. Ensure it’s threaded with a suitable color for your fabric.
Crafting Your Custom Surgical Mask Cover: A Step-by-Step Overview
The core of this project lies in transforming flat fabric into a contoured cover that perfectly fits over a surgical mask. P&K Handmade’s tutorial provides clear, visual instructions that are easy to follow. Below, we’ll outline the general stages of this creative process, emphasizing the importance of detailed adherence to the video for best results.
First and foremost, we highly recommend watching the full P&K Handmade tutorial on YouTube. The video offers precise visual guidance that complements these written steps and is crucial for creating the exact pattern and understanding specific techniques.
Step 1: Creating Your Mask Cover Pattern
The journey begins with drafting a pattern that mimics and enhances the shape of your surgical mask. You’ll start by folding your surgical mask in half lengthwise (often referred to as “hot dog style”) and carefully placing it onto a blank piece of paper. With a pencil or marker, you’ll accurately trace the perimeter of the folded mask. This initial outline serves as the foundation. The P&K Handmade tutorial then guides you through adding necessary allowances and shaping adjustments to this basic outline, transforming it into a functional pattern for your fabric cover. This crucial step ensures your finished cover will have the correct dimensions and contour to snugly fit over a standard surgical mask.
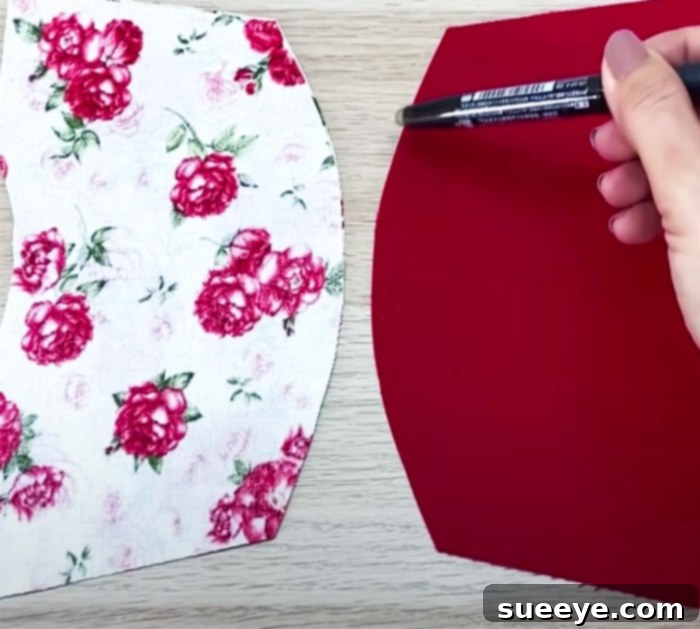
Step 2: Cutting and Assembling the Fabric Pieces
Once your pattern is perfected, you’ll use it to cut out the required number of fabric pieces from your chosen cotton. The tutorial will specify how many pieces are needed and any particular orientation for your fabric (e.g., if it has a directional print). Careful cutting is essential for a smooth sewing process and a polished final product. After cutting, you’ll proceed to the sewing machine. The video meticulously demonstrates how to align and stitch these fabric pieces together, forming the basic structure of your mask cover. This typically involves sewing multiple sections and then joining them to create a three-dimensional shape that will cup the surgical mask. Following these stitching instructions precisely will ensure the mask cover takes on its unique and functional form.
Step 3: Finishing Touches: Turning, Pressing, and Button Attachment
With the primary stitching complete, the next exciting step is to turn your fabric creation right side out. This reveals the finished, beautiful exterior of your mask cover. Once turned, the iron becomes your best friend. Use it to carefully flatten out all the seams and edges, giving your mask cover a crisp, professional, and well-defined look. Pressing is vital for achieving a high-quality finish and ensuring the cover sits neatly. Finally, the tutorial guides you through the process of lining up specific points on the mask cover to sew on your two buttons. These buttons are not just decorative; they serve a practical purpose, allowing you to securely attach the fabric cover to your surgical mask. This clever attachment method ensures the cover stays in place while you wear it, offering both style and stability.
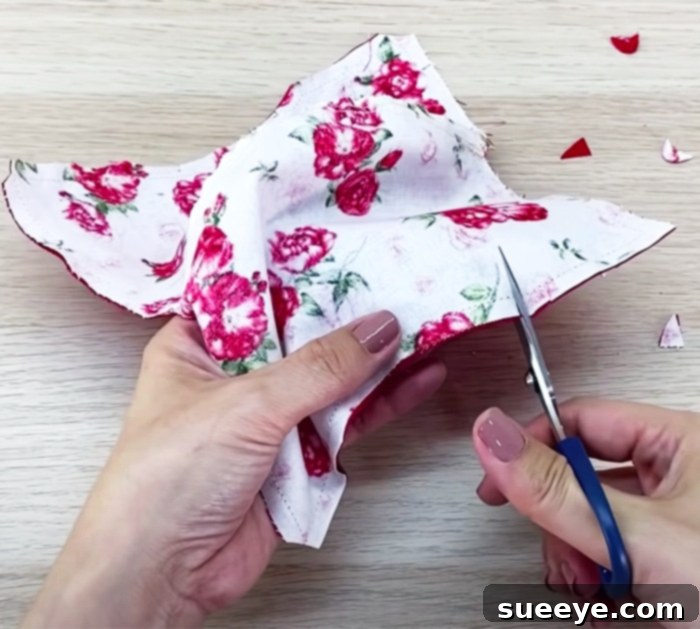
Unleash Your Creativity: Personalizing Your Fabric Mask Covers
One of the most enjoyable aspects of this DIY project is the boundless potential for customization. Once you’ve mastered the basic construction, you can experiment with various designs and embellishments to make each mask cover uniquely yours. This allows you to truly express your personal style.
Fabric Choices: The Foundation of Your Design
The type of fabric you choose will dramatically alter the look and feel of your mask cover. Consider:
- Prints and Patterns: From whimsical florals and playful polka dots to sophisticated geometrics and classic stripes, the options are endless. Choose patterns that resonate with your personal style or match specific outfits.
- Solid Colors: Sometimes, simplicity speaks volumes. A rich jewel tone, a versatile neutral, or a vibrant primary color can create a sleek and modern look.
- Textures: While cotton is recommended for breathability, subtle weaves or linen-blend fabrics can add textural interest (ensure they are still suitable for mask covers and easy to breathe through).
Think seasonally! Create light and airy covers for summer, cozy flannel designs for winter, or festive prints for holidays. The ability to switch out covers means your mask can always be “in season” or match the occasion.
Embellishments and Details
Beyond fabric, small details can make a big impact:
- Button Selection: The buttons are not just functional; they are an integral part of the design. Choose buttons that complement your fabric – contrasting colors, unique shapes, or even vintage finds can add character.
- Embroidery: For those with a flair for needlework, adding a small embroidered motif, monogram, or initial can elevate the cover to a truly bespoke item.
- Fabric Appliqué: Simple shapes or designs cut from contrasting fabric and stitched onto the main cover can add a playful or artistic touch.
Remember to keep any embellishments lightweight and placed in areas that won’t interfere with the fit or function of the mask.
Caring for Your Fabric Surgical Mask Cover
Maintaining the hygiene and longevity of your fabric mask cover is simple, thanks to its washable nature. Proper care ensures it remains fresh, clean, and ready to complement your style day after day.
After each use, especially if worn for an extended period or in public settings, it’s recommended to wash your fabric cover. Simply detach it from your surgical mask and toss it into your washing machine with your regular laundry. A gentle cycle with warm or hot water and your preferred detergent will suffice to clean and sanitize the cotton fabric. For delicate fabrics or to prolong the life of your cover, hand-washing with mild soap and warm water is also an excellent option.
Once washed, you can either tumble dry on a low setting or, for best results and to prevent shrinking or damage to the fabric, air dry by laying it flat or hanging it. Using an iron on a cotton setting after drying will help to smooth out any wrinkles, making your mask cover look crisp and new for its next wear. Always ensure your fabric cover is completely dry before storing or reattaching it to a surgical mask to prevent mildew or odors.
Conclusion: Crafting Comfort, Style, and Confidence
In a world where masks have become a ubiquitous accessory, the ability to personalize and enhance them offers a refreshing touch of individuality. The DIY fabric surgical mask cover, as demonstrated by P&K Handmade, stands out as an incredibly practical and rewarding project. It’s an easy-to-follow tutorial that yields a beautiful, functional item, proving that protection doesn’t have to come at the expense of personal style.
This project is more than just sewing; it’s about empowerment. It empowers you to take control of your aesthetic, utilize your crafting skills, and make a statement even with something as utilitarian as a face mask. Whether you’re a seasoned seamstress or a curious beginner, the clear, step-by-step instructions provided in the video make this an achievable goal for anyone. So, gather your materials, pick out your favorite fabric, and embark on this creative journey. You’ll not only gain a stylish accessory but also the satisfaction of having crafted something unique and meaningful. Give it a try, and transform your everyday surgical mask into a piece that truly reflects you.