
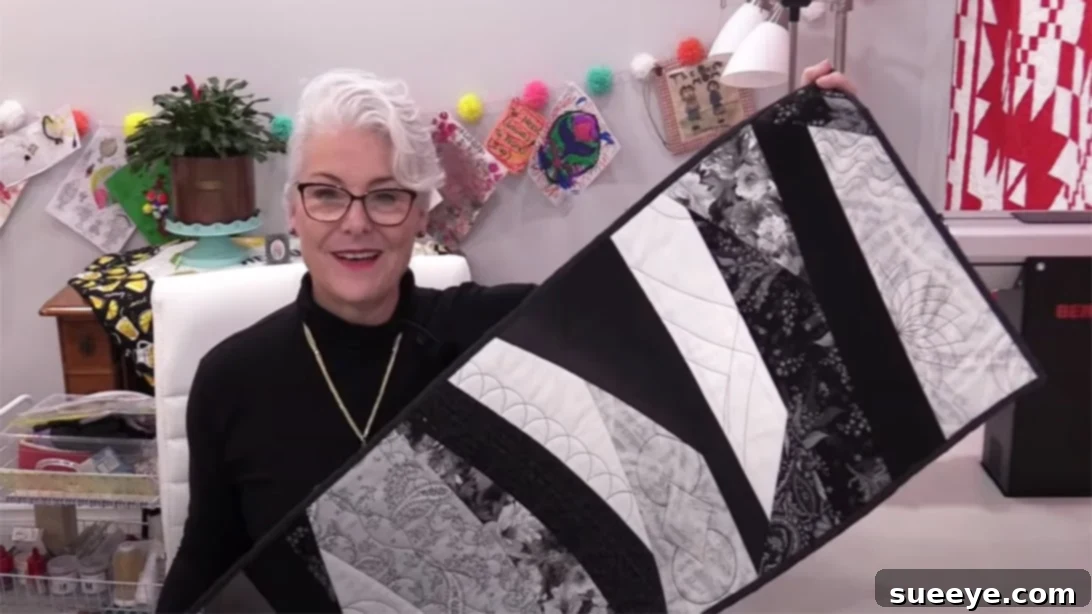
Master the “Stitch n’ Flip” Table Runner: An Easy Quilted Project for Beginners
Quilting, an art form rich in history and tradition, has evolved from a practical necessity for warmth into a beloved hobby and a vibrant creative outlet. For centuries, intricate fabric arrangements provided comfort during cold winters, and today, they continue to tell stories, preserve memories, and add personalized charm to any home. If you’ve ever admired quilted masterpieces but felt intimidated by their complexity, the “Stitch n’ Flip” technique is your perfect entry point into this rewarding craft. This beginner-friendly method simplifies the process, allowing you to create stunning, professional-looking projects with ease.
In this comprehensive guide, inspired by the fantastic SewVeryEasy tutorial, we’ll walk you through crafting a beautiful and functional table runner using the straightforward “Stitch n’ Flip” approach. This project is ideal for those new to quilting, offering immediate gratification and a solid foundation in essential sewing skills. Get ready to transform your fabric stash into a unique piece of home decor!
Why Choose the “Stitch n’ Flip” Method?
The “Stitch n’ Flip” technique, sometimes called “Flip and Sew” or “Add-on Quilting,” is celebrated for several reasons, especially among beginners:
- Simplicity: It eliminates the need for precise block cutting and intricate piecing, making it less daunting than traditional quilting methods.
- Efficiency: You build your quilt top directly onto a batting and backing layer, reducing steps and saving time.
- Scrap Friendly: This method is fantastic for utilizing smaller fabric strips and scraps, helping you minimize waste and make the most of your fabric collection.
- Creative Freedom: While the technique is straightforward, it allows for immense creativity in fabric selection, color placement, and strip arrangement.
- Visible Progress: You’ll see your table runner come to life with each strip you add, providing a satisfying sense of accomplishment throughout the process.
Materials You’ll Need for Your Quilted Table Runner
Before diving into the creative process, gathering all your materials is crucial. Quality tools and fabrics will make your quilting journey smoother and ensure a beautiful finished product. Here’s a detailed list:
- Main Fabric (Backing): This fabric will form the underside of your table runner. Choose a sturdy cotton fabric approximately 18-24 inches wide and 40-60 inches long, depending on your desired table runner length. A solid color or a subtle print often works well.
- Rectangular Fabric Strips (Top): This is where your creativity shines! Gather a variety of cotton fabric strips. They should be at least 1.5 to 3 inches wide and long enough to span the width of your main fabric (e.g., 20-26 inches). A mix of coordinating colors and patterns will create visual interest. You’ll need enough strips to cover the entire length of your table runner.
- Small Scrap Fabrics with a Straight Edge: Don’t throw away those smaller pieces! These can be incorporated for added texture and variety, especially if they have at least one straight edge for easy sewing.
- Sewing Machine: Any standard sewing machine capable of a straight stitch will work perfectly. Ensure it’s in good working order and threaded correctly.
- Cloth Iron: Essential for pressing seams flat and setting fabric in place, which is critical for a neat and professional finish.
- Ironing Board: Provides a stable, heat-resistant surface for pressing.
- Batting (Quilt Wadding): This is the middle layer that provides warmth, loft, and helps define the quilting stitches. Choose a low-loft cotton or cotton-poly blend batting cut to the same size as your main fabric.
- Sharp Scissors: For precise fabric cutting and trimming threads.
- Quilting Rulers: Clear acrylic rulers (e.g., 6″ x 24″ or a square ruler) are invaluable for accurate cutting and guiding your stitching lines.
- Fabric Pins or Clips: To hold fabric layers securely in place before sewing.
- Rotary Cutter and Mat (Optional but Recommended): For faster and more precise cutting of fabric strips and edges.
Step-by-Step Directions: Crafting Your “Stitch n’ Flip” Table Runner
With your materials ready, let’s embark on the creative journey. The key to “Stitch n’ Flip” is methodical progression and careful pressing, which ensures a polished final product.
1. Prepare Your Base Layer
Begin by laying your main fabric (the backing) face down on your ironing board or a large, flat surface. Center your batting on top of the main fabric. Smooth out any wrinkles or creases in both layers. This combination forms the stable foundation for your table runner.
Next, carefully place your first rectangular fabric strip vertically in the center of the batting. Ensure it is straight and centered. Press this strip neatly with a warm iron to adhere it slightly to the batting and ensure it lies perfectly flat. Trim any excess strip length if it extends beyond the batting and backing.
2. Building Your Table Runner with “Stitch n’ Flip”
This is where the magic happens! The “Stitch n’ Flip” technique involves adding strips one by one, sewing them, and then pressing them open.
- Add the Second Strip: Choose another fabric strip, preferably one that contrasts nicely with your first strip. Place this new strip on top of the first strip, right sides facing each other. Align one long edge perfectly.
- Pin and Sew: Secure the aligned edge with a few pins. Using your sewing machine, sew a straight line along this pinned edge. A standard 1/4-inch seam allowance is typically used in quilting, but consistency is more important than the exact measurement for this project. Use a ruler as a guide if you’re aiming for a perfectly straight seam.
- Flip and Press: Once sewn, carefully flip the second fabric strip open so its right side is now facing up, extending outwards from the first strip. Press this newly opened strip flat with your iron. This step is crucial for crisp seams and a smooth, professional look.
- Repeat and Expand: Continue this process, adding strips one by one. Select a new strip, place it right sides together with the last strip you just added (aligned along the unsewn edge), pin, sew, and then flip and press. As you add more strips, they will build outwards from the center.
3. Designing with Fabrics and Colors
Embrace your creativity as you layer the strips. Consider the following:
- Color and Value: Experiment with color segregation, arranging fabrics from dark to light or alternating vibrant hues with more subdued tones.
- Pattern Play: Mix large prints with small patterns, or solids with stripes, to create visual interest.
- Scrap Utilization: Don’t hesitate to use smaller scrap fabrics to create unique sections or to add a pop of unexpected color. The “Stitch n’ Flip” method is very forgiving for irregular pieces, as long as you maintain a straight edge for sewing.
When you’ve covered one entire side of your batting and backing, turn the whole fabric assembly around. Now, repeat the “Stitch n’ Flip” process on the second side, working outwards from the central strip until the entire surface is covered. Once complete, you’ll have a beautifully pieced quilt top securely attached to your batting and backing!
4. Squaring Up Your Project
Once all your strips are sewn and pressed, your table runner might have slightly uneven edges. This is perfectly normal! Lay your project flat and use your rotary cutter and a long quilting ruler to trim all four sides, making sure they are perfectly straight and square. This step is essential for a professional finish and for preparing for the binding.
5. The Art of Quilting (Stitching)
With the “Stitch n’ Flip” method, the initial sewing of the strips already secures your quilt top to the batting and backing. However, adding more quilting stitches enhances durability, adds texture, and prevents the batting from shifting over time. This is where your individual style truly shines!
- Straight-Line Quilting: The simplest approach is to stitch straight lines across your table runner. You can follow the seams you’ve already created, or stitch parallel lines a certain distance apart (e.g., 1/2 inch or 1 inch) using your ruler as a guide.
- Decorative Stitches: Many sewing machines offer decorative stitches. You could use these to add a unique touch along the strips or around the perimeter.
- Free-Motion Quilting (Advanced): For those feeling adventurous, free-motion quilting allows you to draw designs with your sewing machine. While more advanced, it offers endless creative possibilities.
There’s no strict pattern to follow; the goal is to secure the layers and add visual appeal. Have fun experimenting with different kinds of rulers or even just free-handing simple designs.
6. Finishing with Binding
The final step to complete your quilted table runner is to add binding. Binding provides a clean, durable edge and gives your project a professional, finished look.
- Prepare Binding Strips: Cut 2-inch or 2.5-inch wide strips of fabric, usually from a coordinating solid or subtle print. You’ll need enough length to go around the entire perimeter of your table runner plus a few extra inches for joining. Join these strips together at a 45-degree angle to create one continuous long strip. Press the binding strip in half lengthwise.
- Attach to Front: With right sides together, align the raw edge of your folded binding strip with the raw edge of your table runner. Start about halfway along one side and pin it all the way around, mitering the corners. Sew the binding to the table runner using a 1/4-inch seam allowance.
- Fold and Finish: Once sewn, press the binding away from the table runner. Then, flip the table runner over. Fold the binding over to the back side, ensuring it covers the stitching line. You can then hand-stitch the binding in place for an invisible finish or machine-stitch it for a quicker, more visible seam.
Tips for a Successful “Stitch n’ Flip” Table Runner
- Press, Don’t Iron: When quilting, “pressing” involves lifting and placing the iron, rather than sliding it. This prevents distorting your fabric pieces.
- Accurate Seam Allowance: While consistency is key, striving for a 1/4-inch seam allowance will help your project lie flat and square.
- Sharp Tools: Use a new rotary blade and sharp scissors for clean, precise cuts.
- Fabric Choice: Stick to 100% cotton fabrics for your first projects, as they are easy to work with and press beautifully.
- Patience is a Virtue: Don’t rush! Take your time with each step, especially pinning and pressing, for the best results.
- Pre-Wash Fabrics: To prevent future shrinkage or color bleeding, it’s a good practice to pre-wash and dry all your fabrics before cutting.
Caring for Your Quilted Table Runner
Once your beautiful table runner is complete, proper care will ensure its longevity. Most cotton quilted items can be machine washed on a gentle cycle with cold water. Use a mild detergent. Tumble dry on low heat or lay flat to air dry. Avoid harsh chemicals or excessive heat, which can damage the fabric and batting.
Conclusion: Embrace the Joy of Quilting
The “Stitch n’ Flip” table runner is more than just a craft project; it’s an invitation to explore the delightful world of quilting. It’s an accessible way for beginners to learn fundamental skills while creating a functional and aesthetically pleasing item for their home. With simple steps, abundant creative freedom, and the satisfaction of a handmade creation, this project offers a wonderful gateway into the rich tradition of fabric artistry. So, gather your materials, follow these steps, and enjoy the fulfilling journey of making your very own quilted masterpiece!