
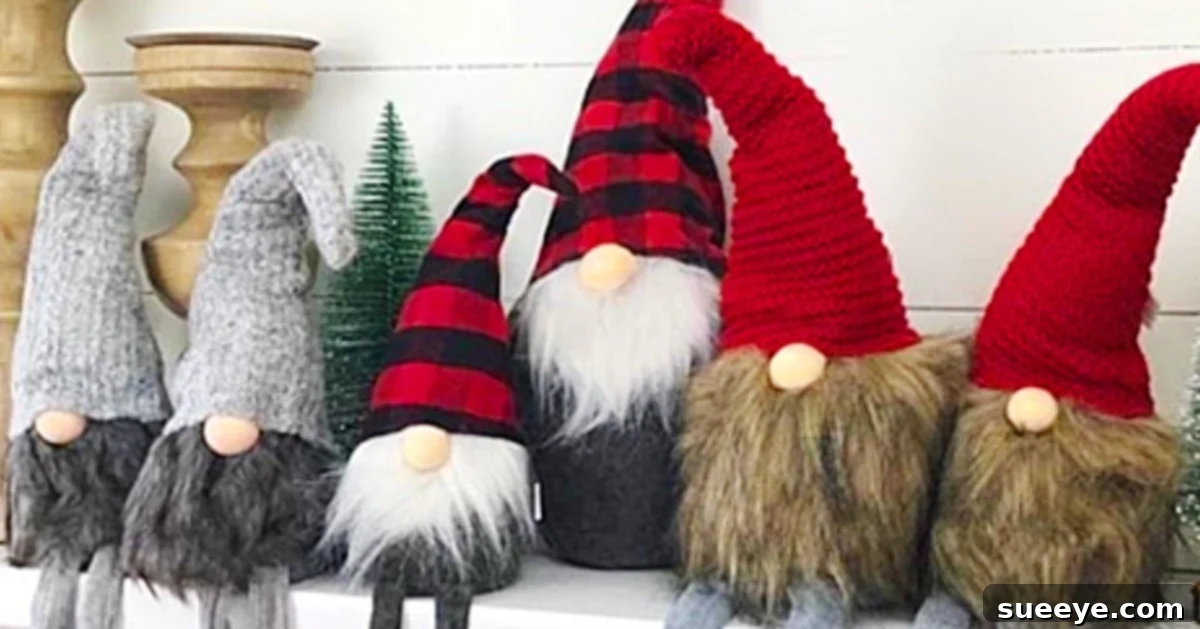
The Enchanting World of DIY Sock Gnomes: Craft Your Own Whimsical Holiday Decor
Have you ever encountered the charm of a sock gnome? These delightful little characters have captured hearts around the globe, and for good reason. They are incredibly fun to make, surprisingly easy to assemble, and each one develops its own unique personality, always turning out adorably cute. My family recently discovered the joy of crafting sock gnomes during a holiday break, and I’m already planning to create an entire village of them to adorn our home this Christmas season!
Holiday breaks, while wonderful, can sometimes lead to restless energy, especially with children. Keeping everyone engaged and focused can be a delightful challenge. That’s why I always keep a collection of creative projects on hand, ready to be pulled out and placed at the center of our family table. Crafting provides a wonderful outlet for imaginative expression, allowing each person to quietly immerse themselves in their own creative spirit. Among our favorite go-to projects are DIY sock crafts, and the sock gnome stands out as an absolute winner. This project appeals to all ages, from the youngest crafters to the most seasoned adults, offering a simple yet incredibly rewarding experience.
The basic premise is beautifully straightforward: you fill a sock with a suitable material, tie it off, and then shape it to create the distinct body and head of your gnome. When I first embarked on this journey, I started by cutting a clean sock roughly in half, reserving the top portion for the hat later. For the filling, I used about two cups of plain white rice. Rice is an excellent, readily available option that provides good weight and malleability for shaping your gnome. If you’re concerned about pantry pests like weevils, a simple preventative measure is to freeze your rice for at least 24 hours beforehand. Alternatively, for those seeking a more permanent and pest-proof solution, Poly-Pellets, often found at craft stores like JoAnn’s or Michael’s, are a fantastic choice, typically costing around $6.00 a bag. These plastic pellets offer similar weight and are entirely washable if your gnome ever needs a refresh.
Why Craft Sock Gnomes? The Magic of Handmade Holiday Decor
Beyond the simple act of making, there are numerous compelling reasons to embrace the world of DIY sock gnomes. They offer a unique blend of creativity, affordability, and personal satisfaction that few other crafts can match, making them an ideal project for festive seasons or any time you need a sprinkle of whimsical charm.
Unleash Your Inner Artist and Boost Creativity
Crafting a sock gnome is more than just following instructions; it’s an opportunity to let your imagination run wild. From selecting the perfect socks and faux fur to choosing embellishments and designing unique hats, every step allows for personal expression. No two gnomes ever turn out exactly alike, making each creation a truly unique piece of art. This creative freedom is not only enjoyable but also a fantastic way to de-stress and focus your mind, offering a therapeutic escape from daily routines.
Perfect for Family Fun and Bonding
One of the greatest joys of crafting sock gnomes is the shared experience. This project is wonderfully inclusive, providing tasks suitable for all skill levels, making it ideal for family gatherings. Children can help with filling socks, choosing colors, and simple gluing (with supervision), while adults can tackle the more intricate details like shaping and adding finishing touches. It’s a fantastic way to create lasting memories, foster teamwork, and encourage communication as everyone collaborates on their gnome creations.
An Affordable and Eco-Friendly Decor Option
Sock gnomes are incredibly budget-friendly. Many of the materials, like old socks and rice, might already be found around your home. For other supplies like faux fur or poly-pellets, you can often find great deals at craft stores or even repurpose materials from old clothing or accessories. This makes them a sustainable choice for decorating, allowing you to create beautiful, festive displays without breaking the bank or contributing to excessive waste.
Unique Gifts and Thoughtful Keepsakes
Handmade gifts carry a special sentiment that store-bought items simply cannot replicate. A DIY sock gnome, crafted with love and care, makes a heartfelt present for friends, family, teachers, or neighbors. You can personalize each gnome to reflect the recipient’s personality or favorite colors, making it an even more cherished keepsake. Imagine the delight of receiving a gnome uniquely designed just for you!
Versatile Decor for Any Season
While often associated with Christmas, sock gnomes are incredibly versatile. By simply changing the colors of socks, the type of embellishments, or the theme of their hats, you can create gnomes for any season or holiday. Think spring gnomes with floral hats, fall gnomes adorned with miniature leaves, or even gnomes dressed for specific events like birthdays or national holidays. Their adaptability ensures they can be a year-round decorative staple in your home.
Essential Supplies for Your Sock Gnome Project
Before diving into the crafting process, let’s gather all the necessary materials. Most items are readily available, making this a convenient and accessible DIY project for everyone.
The Body: Socks and Fillers
- Socks: You’ll need two socks per gnome. One for the body and one for the hat. Opt for crew socks, knee-high socks, or even fuzzy slipper socks for the body, depending on the size and texture you desire. For the hat, a second sock, perhaps a colorful or patterned one, works perfectly. Ensure they are clean and free of holes.
- Filler:
- Rice: White rice is the most common and economical choice. It provides good weight and is easy to shape. Remember the freezing tip for pest prevention!
- Poly-Pellets: These small plastic pellets offer a more durable, washable, and pest-proof alternative. They are excellent for creating a stable base.
- Dry Beans or Lentils: Another affordable option that provides good weight.
- Batting/Stuffing: While not heavy enough on its own, a small amount of polyester fiberfill can be used in the upper part of the body or head for softness.
Facial Features: Noses and Beards
- Rubber Bands: Small, clear ponytail rubber bands or regular elastic bands are ideal for shaping the head and nose.
- Faux Fur Fabric: A small piece of faux fur (about 3×3 inches or larger, depending on gnome size) is essential for the beard. Look for longer pile fur for a more dramatic effect, or shorter pile for a subtle beard. Craft stores offer various colors and textures.
- Optional Nose Materials: While a rubber band creates a charming nose, you could also use a small wooden bead, a felt ball, or a pom-pom for a different look.
The Hat: Adding Personality
- Second Sock: As mentioned, the top part of another sock or a completely separate sock works wonders for the hat. Fuzzy socks, striped socks, or socks with fun patterns add extra character.
- Embellishments: This is where personalization truly shines! Consider:
- Miniature buttons, bells, or small ornaments
- Ribbon, twine, or lace scraps
- Felt shapes, tiny silk flowers, or artificial berries
- Small pinecones or acorns for a natural touch
- Glitter glue or fabric paint for accents
Tools and Adhesives
- Scissors: Sharp scissors are crucial for cutting socks and faux fur cleanly.
- Hot Glue Gun and Glue Sticks: A low-temp hot glue gun is highly recommended for quickly and securely attaching the beard, hat, and embellishments. Always use with adult supervision, especially when crafting with children.
- Fabric Glue (Optional): If you prefer not to use hot glue, a strong fabric adhesive can work, though it will require longer drying times.
Step-by-Step Guide: How to Craft Your Adorable Sock Gnome
Now that we have all our supplies ready, let’s embark on the delightful journey of bringing your sock gnome to life! Each step is simple, allowing for plenty of creative freedom.
Step 1: Preparing the Gnome’s Body
To begin, select your first sock, which will form the body of your gnome. Start by cutting the sock across the middle, roughly at the ankle area, or slightly above, depending on how tall you want your gnome to be. The bottom part of the sock will be used for the body, and the top portion can be saved for another project or even for creating a smaller gnome hat. Next, open the cut end of the sock and carefully fill it with your chosen filler material. I typically use about 2 to 2.5 cups of rice for a medium-sized gnome, which provides a good weight and stable base. If you’re using Poly-Pellets, you might use a similar volume. Gently pat and shape the bottom of the sock to create a flat, sturdy base so your gnome can stand upright. Once you have reached your desired height and shape for the body, gather the open end of the sock and secure it tightly with a rubber band or a piece of twine. Ensure it’s sealed well to prevent any filler from escaping.
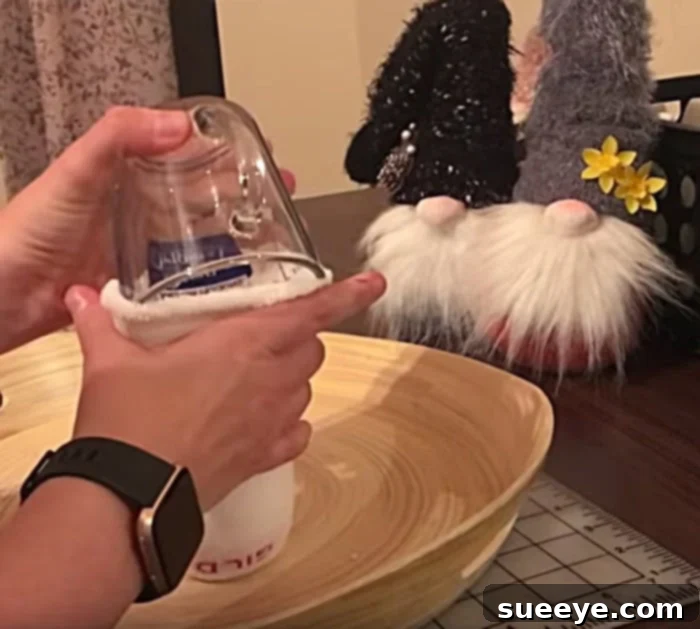
The amount of filler you use will dictate the size and sturdiness of your gnome. For a wider, more robust gnome, use more filler. For a slimmer figure, use less. The key is to make sure the base is firm enough to support the gnome’s eventual hat and accessories. Experiment with different densities; a slightly softer body can be more huggable, while a very firm body will be more stable for display. This initial stage is crucial for establishing the overall look and feel of your gnome, so take your time to achieve the desired foundational shape.
Step 2: Creating the Distinctive Head and Nose
With the body now filled and secured, it’s time to define the gnome’s head and iconic nose. About two-thirds of the way up from the base of your filled sock, gently squeeze the sock together to form a small, round section that will become the head. Once you have a pleasing shape, take another small rubber band and wrap it tightly around this section to clearly delineate the head from the body. Now, for the gnome’s most recognizable feature – its nose! About an inch or two below the rubber band that forms the head (and above where the beard will eventually sit), pinch a small section of the filled sock. Take a very small ponytail rubber band or a tight elastic band and wrap it securely around this pinched section. This will create a prominent, adorable nose for your gnome, much like forming “nostrils” in the fabric. Small, clear rubber bands work best for this as they blend in seamlessly.
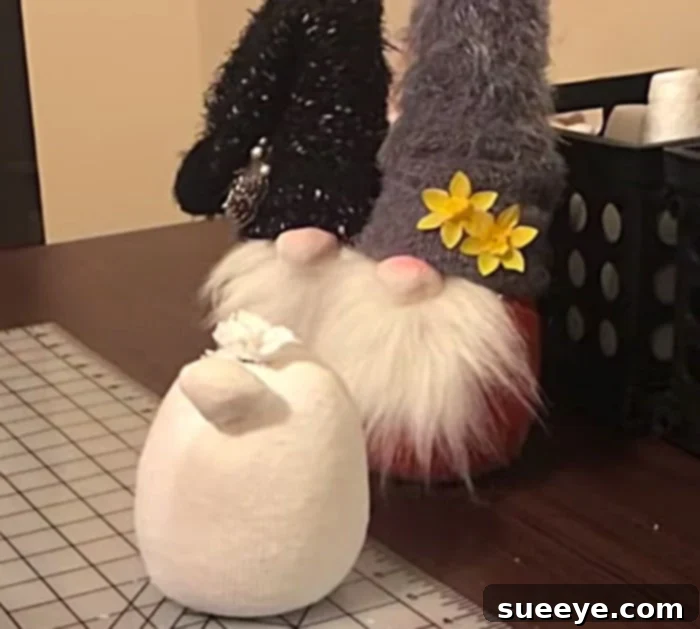
The size and placement of the nose can significantly alter your gnome’s character. A larger, rounder pinch will result in a more prominent nose, while a smaller, more subtle pinch creates a delicate look. Experiment a little to find the expression you like best. If you prefer, instead of pinching the sock, you can glue a small wooden bead, a felt ball, or a pom-pom directly onto the front of the gnome’s face area to serve as a nose. Whichever method you choose, ensure it is securely attached or formed, as it will be a focal point of your gnome’s face.
Step 3: Giving Your Gnome a Charming Beard
No gnome is complete without a glorious beard! This step adds so much personality and warmth to your creation. I typically purchase small pieces of faux fur from craft stores like JoAnn’s – they often have remnants or small cuts perfect for this purpose. From your chosen faux fur, cut a piece that is roughly a 3×3 inch square, or adjust the size according to your gnome’s proportions. The key is to cut the backing of the fur, not the fur fibers themselves, to avoid a choppy look. Once you have your square, cut a small U-shape or an inverted V-shape from the top middle edge. This notch is designed to fit snugly just under your gnome’s nose, allowing the beard to frame it perfectly. With your hot glue gun, apply a line of glue along the top edge of the fur piece (the edge with the U-cutout) and carefully press it onto your gnome’s face, ensuring the U-shape sits just below the nose. Hold it firmly in place until the glue sets.
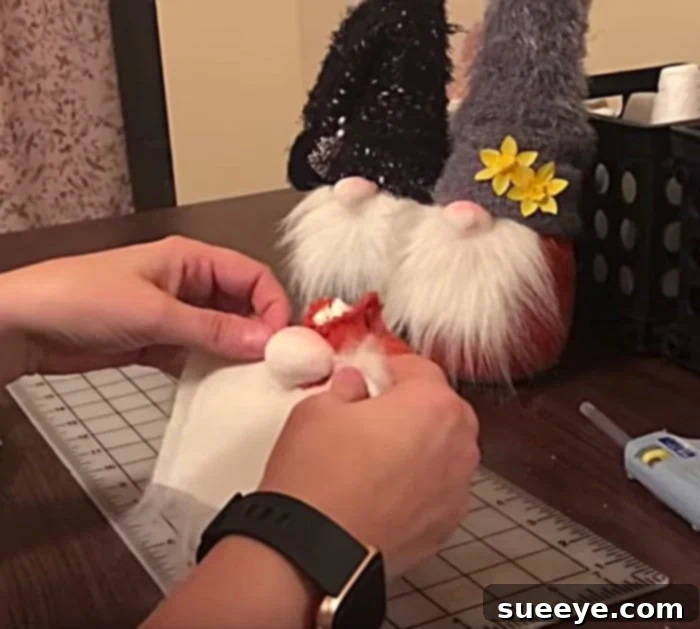
When cutting faux fur, always cut from the back side with a sharp craft knife or the tips of your scissors, trying to only cut the fabric backing. This preserves the length of the fur and gives the beard a more natural, flowing appearance. You can experiment with different fur colors – classic white or grey, or even more adventurous colors like brown or black for a unique gnome. For an alternative to faux fur, you could also create a yarn beard by cutting strands of yarn, bundling them, and gluing them in place. The beard truly transforms the sock into a recognizable gnome, so take care in selecting and shaping this crucial element.
Step 4: Designing the Perfect Hat
The hat is the crown of your gnome, offering yet another opportunity for creative flair! For the hat, take your second sock. If you used the bottom half of a sock for the body, you might have the top half left over, which is perfect. Alternatively, you can use a brand new sock, perhaps a fuzzy, plush, or decorative one, to add texture and color. Simply pull the sock over the gnome’s head, covering the secured top of the body and the top edge of the beard. You can leave the hat long and floppy, or you can bend and glue the tip to the back of the hat for a jaunty, curved look. Secure the hat in place by applying a thin line of hot glue around the brim, where it meets the gnome’s face and beard, ensuring it is firmly attached and won’t slip off.
Consider the color and pattern of your hat sock. A bright, festive sock can make your gnome pop, while a more subdued color might give it a classic, rustic feel. You can even use a small piece of fabric, felt, or an old sweater sleeve if you don’t have another sock. For a truly whimsical look, you might even add a small jingle bell to the tip of the hat, or a tiny pom-pom. The hat isn’t just for covering the gnome’s ‘head’; it’s a canvas for expression, defining much of its character.
Step 5: Personalizing and Embellishing Your Gnome
This is where your gnome truly comes to life! The hat, in particular, offers endless possibilities for decoration. You can further adorn the hat with miniature candy canes for a festive Christmas touch, small silk flowers for a spring-themed gnome, or tiny faux berries and leaves for an autumn vibe. Buttons, ribbons, small patches of contrasting fabric, or even a dusting of glitter can add sparkle and charm. Don’t be afraid to let your imagination guide you. Perhaps your gnome needs tiny glasses, a miniature tool belt, or a little sign bearing a cheerful message. This is also an excellent opportunity to involve children, letting them pick out small trinkets or draw designs for the hat and body.
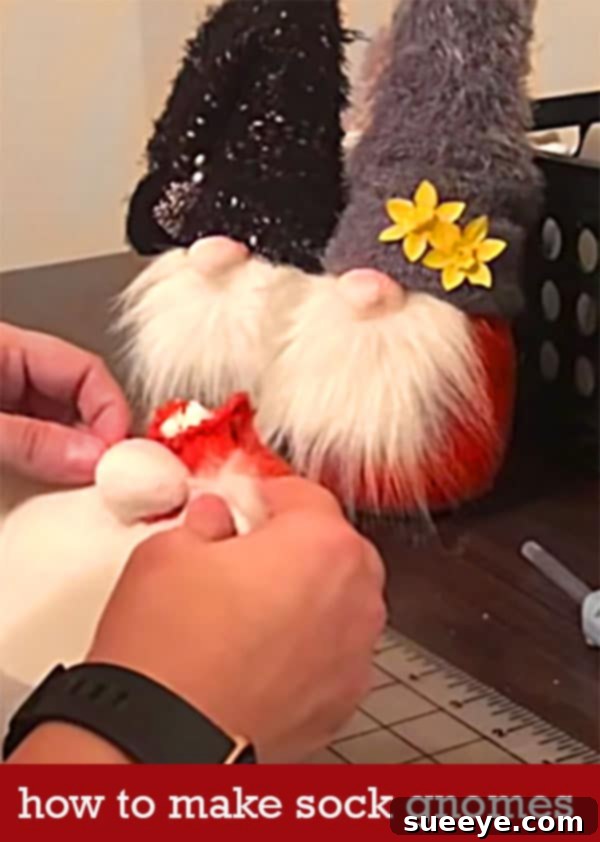
Think about the overall theme you want for your gnome. Is it a cozy winter gnome, a vibrant spring gnome, or a whimsical forest dweller? Embellishments can range from simple stitches to elaborate glued-on elements. You can add tiny scarves made from fabric scraps, little boots made from felt, or even small backpacks. For holiday gnomes, miniature Christmas ornaments, tiny presents, or strands of tinsel can be glued to the hat. The goal is to make each gnome uniquely yours, reflecting your personal style and creativity. These decorative touches transform a simple craft into a cherished piece of holiday decor or a thoughtful, handmade gift.
Tips and Tricks for Mastering Sock Gnome Crafting
To ensure your sock gnome crafting experience is smooth, enjoyable, and results in the cutest gnomes possible, here are some helpful tips and tricks:
Safety First with Hot Glue
If you’re using a hot glue gun, especially with children, always opt for a low-temperature gun. Ensure adults supervise closely or handle the gluing process entirely to prevent burns. Always have a heat-resistant surface or silicone mat underneath your work area to protect your table.
Experiment with Sizes and Proportions
Don’t stick to one size! Try making gnomes in varying heights and widths. Use different lengths of socks to create a whole family of gnomes, each with distinct proportions. A tall, skinny gnome might look great next to a short, plump one. This adds visual interest to your gnome display.
Mix and Match Textures and Colors
Play with different types of socks – fuzzy, ribbed, patterned, solid. Combine a smooth sock body with a fluffy hat, or a patterned body with a solid hat. The contrast in textures and colors can make your gnomes truly stand out. Don’t be afraid to use bold colors or subtle pastels.
Consider the Filler Carefully
While rice is great, consider other fillers. If you want a softer gnome that can be squeezed or cuddled, use a mix of rice (for weight) and polyester fiberfill (for softness) in the upper body and head. Sand can also be used for extra weight, but ensure the sock is robust enough to prevent leaks.
Give Your Gnome Accessories
Think beyond just the hat and beard. Does your gnome need a tiny twig as a walking stick? A small felt bag? Perhaps a miniature bird perched on its hat? Small accessories can add a narrative element and a touch of whimsy. You can find tiny props at dollar stores, craft shops, or even repurpose items from old toys.
Display Ideas
Once your gnomes are complete, consider how to display them. They look fantastic arranged on a mantelpiece, nestled among pine branches, or as a centerpiece on a holiday table. Group them together in odd numbers for a visually appealing arrangement. They also make charming additions to bookshelves, windowsills, or even tiered trays.
Gifting Your Creations
Sock gnomes make thoughtful, handmade gifts. For an extra special touch, consider packaging them in a clear cello bag with a festive ribbon and a handmade tag. Tailor the gnome’s theme to the recipient’s preferences – a gardening gnome for a green thumb friend, or a gnome with favorite team colors for a sports enthusiast.
Unleash Your Creativity: The Joy of DIY Gnomes
These sock gnomes have become an absolute favorite crafting project for my family this year. The beauty of them lies in their simplicity and the boundless opportunities for personalization. We now have a collection of five, and each one is so wonderfully unique and different that it’s truly impossible to pick a favorite. Whether you’re looking for an inexpensive yet adorable craft to brighten your Christmas decorations, a fun activity to share with loved ones during the holidays, or simply a way to unwind and express your creativity, DIY sock gnomes are a perfect choice.
The satisfaction of creating something charming with your own hands, especially something that brings so much joy and character to your home, is immeasurable. So gather your supplies, invite your family or friends, and dive into the enchanting world of sock gnome crafting. You’ll not only end up with delightful decorations but also cherish the memories made during the process. Happy crafting, and may your home be filled with the whimsical charm of your handmade gnome family!