
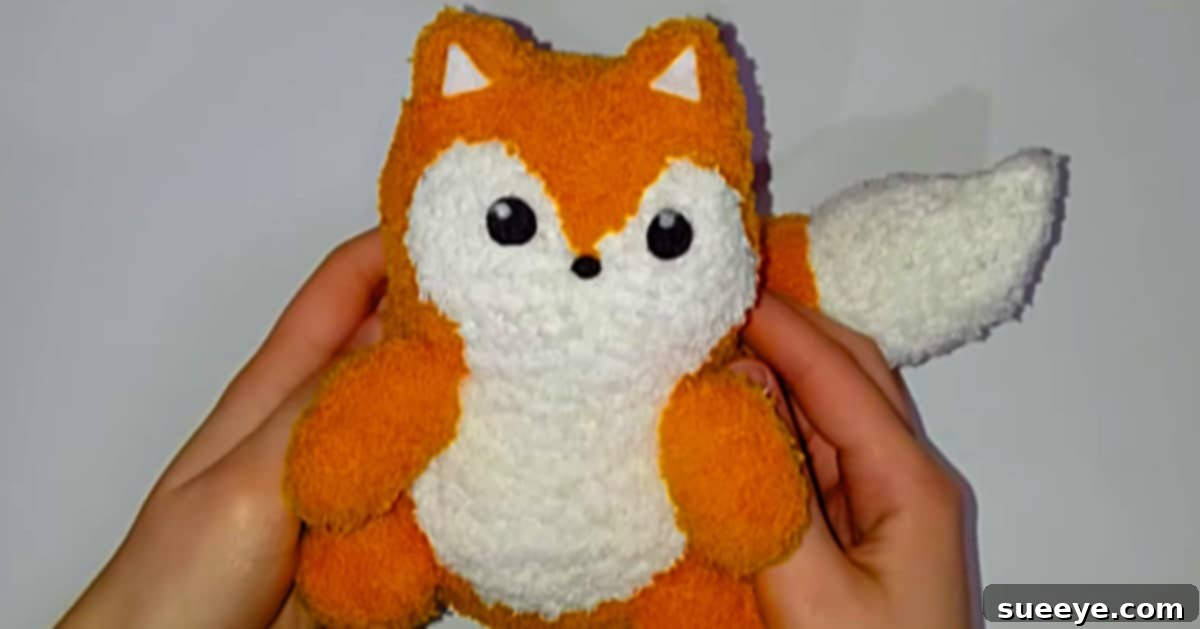
DIY Sock Fox: Your Ultimate Guide to Crafting Adorable Stuffed Animals
Are you looking for a delightful, budget-friendly craft project that brings joy to all ages? Look no further than the enchanting world of DIY sock animals! Specifically, we’re diving into how to create your very own adorable DIY Sock Fox. This isn’t just a simple craft; it’s an opportunity to unleash your creativity, combat boredom, and produce charming little companions that make perfect gifts or adorable additions to your home decor. Imagine having an entire family of these whimsical foxes by Valentine’s Day, or any special occasion! Making these DIY Sock Foxes is incredibly rewarding—they are cheap to create, wonderfully fun, remarkably easy to assemble, and each one turns out uniquely super cute. All you need is a single sock and some polyfill stuffing, and you’ll be amazed by the incredible results.
In today’s fast-paced world, finding quiet, engaging activities for the whole family can be a challenge. Children and adults alike can easily get restless, leading to chaos at a moment’s notice. To foster focus and channel creative energy, I’ve found immense success in keeping readily available project boxes. When boredom strikes, these boxes are pulled out, placed on the table, and everyone settles down to immerse themselves in their own imaginative endeavors. Among my collection of favorite sock projects, the DIY Sock Fox stands out as a true gem. Its universal appeal crosses generations; from the youngest crafter to the oldest, everyone falls in love with this cute, enjoyable craft. While fluffy bedtime socks in foxy colors like orange, red, or brown work best to capture that authentic look, the beauty of this project is its versatility—any sock can be transformed into a charming fox, offering endless possibilities for color and pattern variations.
Why Craft a DIY Sock Fox? The Benefits of This Adorable Project
Beyond simply creating a cute toy, crafting a DIY Sock Fox offers a myriad of benefits. For children, it’s an excellent way to develop fine motor skills, hand-eye coordination, and patience. Following step-by-step instructions also helps in fostering problem-solving abilities and a sense of accomplishment. For adults, it’s a wonderfully therapeutic activity, providing a mindful escape from daily stresses and a chance to reconnect with your inner creative spirit. These sock foxes also make thoughtful, personalized gifts for friends and family, adding a handmade touch that mass-produced items simply can’t replicate. Furthermore, it’s an incredibly sustainable craft, repurposing old or mismatched socks that might otherwise end up in landfill. This project proves that you don’t need expensive materials to create something truly special and heartwarming.
Gathering Your Materials: What You’ll Need for Your Sock Fox Adventure
Before we embark on this exciting crafting journey, let’s ensure you have all the necessary supplies. The beauty of the DIY Sock Fox is its simplicity and affordability. Most items you might already have around your home!
- One Clean Sock: This is the star of our show! While fluffy, knee-high socks in fox-like colors (orange, rust, brown, red, even gray or white for Arctic foxes) are ideal, don’t limit yourself. Any clean sock can work. Consider texture too—a fuzzy sock will give your fox a softer, more cuddly feel, while a thinner cotton sock might offer a sleeker appearance. Mismatched socks are perfect for this project, giving them a new lease of life!
- Polyester Fiberfill (Polyfill): This is the stuffing that will bring your fox to life, giving it shape and a squeezable softness. You can find polyfill at any craft store. A small bag goes a long way, making this a very economical choice. Alternatively, if you’re looking for an even more eco-friendly option, you can repurpose stuffing from old pillows or even use fabric scraps cut into small pieces.
- Elastic Bands or String: Essential for shaping the head and neck of your fox. Small rubber bands or sturdy string/thread will work perfectly.
- Felt Fabric: White, cream, or light beige felt is needed for the fox’s bib and face details. You might also want small pieces of black felt for the nose, or even other colors for ear interiors.
- Buttons or Beads: For those expressive fox eyes and a cute nose. Choose buttons that are appropriate in size for your sock, typically small to medium. Ensure they are securely attached, especially if the fox is for a young child. Alternatively, you can use embroidery floss to stitch on eyes and a nose, which is a safer option for very young children.
- Scissors: A good sharp pair of fabric scissors will make cutting your sock and felt much easier.
- Needle and Thread: For sewing the ears and attaching features. Matching thread color to your sock or felt is ideal, but a neutral color like white or black can also work depending on the details.
- Fabric Glue (Optional): If you prefer a no-sew or low-sew option for attaching felt features, a strong fabric glue can be a great alternative to stitching.
- Fabric Marker or Pen: To draw the ear and face shapes on your sock. A washable fabric marker is ideal, but any pen that shows up on your sock will do.
Step-by-Step Guide: Crafting Your Enchanting DIY Sock Fox
Now that you have all your materials ready, let’s get started on bringing your adorable sock fox to life! Follow these simple steps for a fun and rewarding crafting experience.
Step 1: Preparing the Sock – Shaping the Ears and Face
Begin by turning your chosen sock completely inside out. This is crucial for creating clean seams. Once it’s inside out, lay it flat. Identify the heel part of the sock; this will become the head of your fox. Using your fabric marker or pen, carefully draw the outline of the fox’s ears and the initial shape of its face directly onto the heel. Think of two pointed triangles for the ears extending upwards from the top edge of the heel, and a slightly rounded, tapered shape for the snout area. Ensure the ears are symmetrical and proportionate to your sock size. Now, with your needle and thread, sew along the lines you’ve just drawn for the ears. Make sure to use small, neat stitches for a strong, durable seam. You can use a simple running stitch or a backstitch. After sewing, carefully cut out the ear shapes, leaving a small seam allowance (about 1/4 inch) outside your stitching line. This prevents fraying and gives a cleaner finish once turned right side out.
Step 2: Stuffing Your Sock Fox
Once you’ve sewn and trimmed the ears, it’s time to turn your sock right side out. Gently push out the ear shapes so they are well-defined. Now, take your polyester fiberfill and begin stuffing your sock. Start by pushing small handfuls of stuffing into the ears to ensure they are firm and hold their shape. Then, gradually fill the rest of the sock, working your way down from the head area. The key here is to stuff firmly but evenly. Avoid creating lumpy areas or overstuffing to the point where the sock fabric is strained. You want your fox to be cuddly and plump, not rigid. Pay particular attention to the head and snout area, ensuring it has a nice, rounded shape. Continue stuffing until you reach the desired body size for your fox, leaving a small opening at the cuff end.
Step 3: Defining the Head and Adding Facial Features
With your sock now stuffed, it’s time to define the head and bring your fox’s personality to life with facial features. Take an elastic band (or a piece of string/thread) and tie it firmly around the neck area, just below the head. This will create a clear distinction between the head and the body, giving your fox its distinctive shape. If the elastic band is visible, you can later cover it with a piece of felt or a ribbon. Next, take your white or cream felt. Cut out a shape that resembles a bib for the fox’s chest, typically a heart-like or teardrop shape. You’ll also want to cut a smaller, corresponding shape for the fox’s snout area to add definition. You can either glue these felt pieces onto your fox’s body using fabric glue or, for a more durable finish, carefully sew them in place with small, neat stitches. Finally, it’s time for the eyes and nose! Select two small buttons for the eyes and a slightly larger one for the nose. Position them carefully on the felt snout and bib. Securely sew these buttons onto your fox. If you’re making this for a very young child, consider embroidering the eyes and nose with black thread instead of using buttons, to eliminate any choking hazards. You can also add small stitches for eyebrows or a tiny mouth for extra character!
Personalizing Your Sock Fox: Endless Creative Possibilities
The beauty of DIY crafts lies in the ability to personalize each creation. Your DIY Sock Fox doesn’t have to be just a fox! Here are some ideas to make each one truly unique:
- Color and Pattern Play: Experiment with different sock colors and patterns. A striped sock could give your fox a whimsical, quirky look, while a solid gray sock might become a sophisticated urban fox.
- Accessorize: Add tiny bows, scarves, or even a little felt backpack to your fox. A small patch of faux fur can be added for a bushy tail.
- Embroidered Details: Instead of buttons, use embroidery floss to create intricate eyes, rosy cheeks, or even stitched paw pads on the body. This adds a lovely handmade touch and is safer for younger recipients.
- Different Animals: Once you master the fox, apply the same techniques to create other sock animals! With slight modifications to ear shapes and facial features, you can easily make sock bunnies, bears, or even cats.
- Weighted Base: For a sock fox that can sit upright more easily, you can add a small bag of rice or poly pellets (secured in a separate pouch) into the bottom of the sock before stuffing with polyfill.
The Joy of Handmade: A Project You’ll Highly Recommend
This DIY Sock Fox project is truly adorable and incredibly rewarding. It’s an accessible craft for beginners and experienced crafters alike, offering a perfect blend of simplicity and creative satisfaction. The result is a charming, cuddly companion that brings a smile to anyone’s face. Whether you’re looking for a fun weekend activity, a unique handmade gift, or simply a way to add a touch of handmade charm to your home, I wholeheartedly recommend giving this DIY Sock Fox project a try. Dive into your sock drawer, gather your materials, and prepare to create something truly special!