
DIY Pressed Flower Coasters: Bring Nature’s Elegance to Your Home
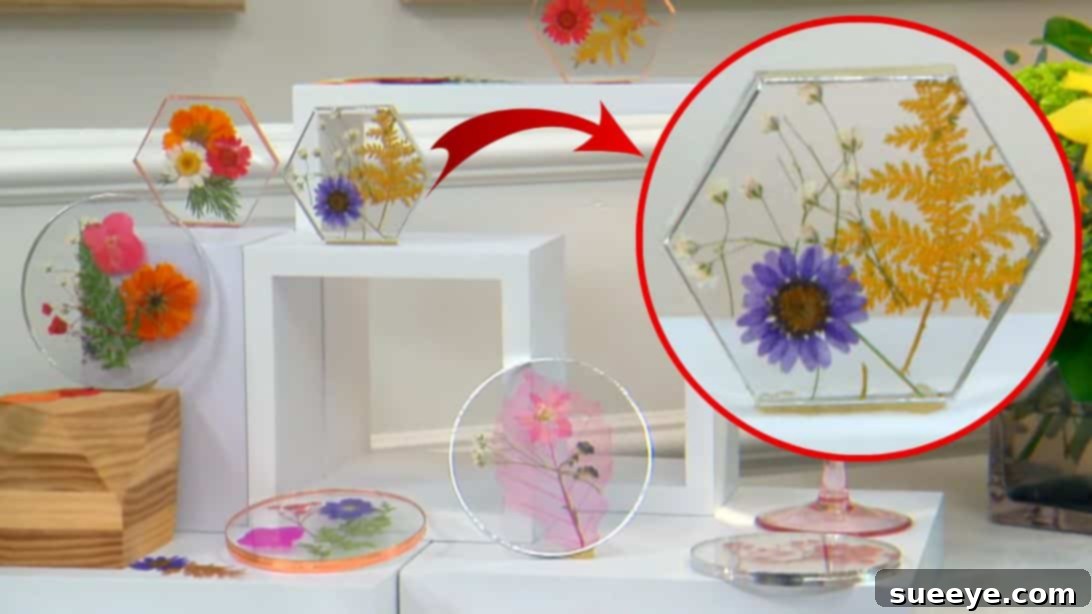
Are you searching for a captivating craft project that combines natural beauty with practical home decor? Look no further! This comprehensive guide will walk you through creating exquisite pressed flower coasters. Inspired by the brilliant design showcased by Orly Shani on the Hallmark Channel, these coasters feature delicate pressed flowers beautifully preserved between clear acrylic discs and edged with elegant copper tape. Not only are they surprisingly simple to make – some can be completed in as little as 5 minutes once you master the technique – but they also make fantastic personalized gifts or unique items to sell. Get ready to transform ordinary materials into stunning works of art!
Handmade items add a touch of warmth and personality to any living space, and these floral coasters are no exception. They offer a perfect blend of rustic charm and modern elegance, making them suitable for various interior styles. Imagine sipping your morning coffee or evening tea on a coaster adorned with your favorite pressed botanicals – a miniature garden preserved just for you. This project is ideal for crafters of all skill levels, offering a rewarding experience and a beautiful finished product that you’ll be proud to display or share.
Why Create Your Own Pressed Flower Coasters?
Beyond the simple joy of crafting, making your own pressed flower coasters offers a multitude of benefits:
- Personalization: Choose flowers that resonate with you, perhaps from a special occasion, your garden, or a memorable hike. Each coaster can tell a unique story.
- Unique Home Decor: Elevate your home’s aesthetic with bespoke pieces that are sure to spark conversation. They add a natural, artistic flair that store-bought items often lack.
- Thoughtful Gifts: Handmade gifts carry immense sentimental value. A set of personalized flower coasters makes an unforgettable present for birthdays, housewarmings, weddings, or any special occasion.
- Cost-Effective: Compared to purchasing high-end decorative coasters, crafting your own can be significantly more budget-friendly, especially if you already have some basic crafting supplies.
- Eco-Friendly Crafting: Utilize flowers from your garden or salvaged blooms, giving new life to nature’s transient beauty.
- Mindfulness and Relaxation: Engaging in creative projects like this can be a wonderful way to de-stress, focus your mind, and enjoy a calming activity away from daily pressures.
Materials You’ll Need for Your Floral Coasters
Gathering your materials is the first exciting step towards your beautiful coasters. Here’s a detailed list of what you’ll need, along with some considerations for selection:
- Coasters: You’ll need sets of clear, round acrylic discs. These typically come in pairs, designed to sandwich items between them. Ensure they are clean and scratch-free for the best visual effect. The clarity of acrylic allows your pressed flowers to shine through.
- Copper Tape: This self-adhesive tape not only creates a beautiful, metallic border but also plays a crucial role in securely sealing the two acrylic discs together. Look for tape that is easy to handle and has strong adhesive properties. Copper offers a classic, elegant finish, but you could experiment with other metallic tapes like silver or gold.
- Pressed Flowers: This is where the magic happens! Select a variety of small, flat flowers and leaves. Think about color, shape, and size to create harmonious designs. Ensure your flowers are thoroughly pressed and completely dry to prevent mold or discoloration inside your coaster. Examples include small pansies, violas, fern leaves, delicate wildflowers, or even rose petals.
- Scissors: Sharp scissors are essential for precise trimming of flower stems and for cutting the copper tape cleanly.
- Binder Clip (or small clamps): A binder clip will temporarily hold your acrylic discs together while you prepare to apply the copper tape, ensuring the flowers stay perfectly in place.
Step-by-Step Guide: Crafting Your Pressed Flower Coasters
Step 1: Preparing Your Coasters and Arranging Flowers
The foundation of a stunning coaster lies in careful preparation and thoughtful arrangement. Take your time with this step to ensure your design is exactly as you envision it.
Begin by taking one acrylic coaster disc. Most new acrylic discs come with a thin protective film on both sides to prevent scratches. Carefully peel off the protective film from only *one side* of this coaster. This peeled side will be your working surface. Lay this disc down with the peeled side facing up.
Now comes the creative part: arranging your pressed flowers. Gently pick up your dried flowers and leaves, using tweezers if necessary for delicate pieces. Start placing them on the exposed acrylic surface. Experiment with different layouts – you can create a dense floral cluster, a minimalist design with a single prominent bloom, or a flowing pattern. Remember, fewer, well-placed flowers often create a more elegant and less cluttered look. As you arrange, avoid touching the clear acrylic surface directly with your fingers to prevent leaving smudges or oils that could later be visible.
Pro Tip for Flower Pressing: For optimal results, ensure your flowers have been pressed between the pages of a heavy book (or using a dedicated flower press) for at least a week, or even longer, depending on their thickness. They must be completely dry and flat. If any flowers have thick stems, trim them off flush with the petals before pressing or before arranging on the coaster, as protruding stems can make the coaster uneven.
Step 2: Sealing Your Floral Masterpiece with Copper Tape
Once you are completely satisfied with your flower arrangement, it’s time to seal your design permanently. This step requires precision to ensure a clean finish and a durable coaster.
Take the second acrylic coaster disc. Carefully peel off the protective film from *one side* of this disc. This peeled side will now be placed face down directly onto your arranged flowers. Align the edges of the top disc perfectly with the bottom disc, making sure your flowers remain undisturbed beneath. Once aligned, gently press the two discs together using your fingers, applying even pressure across the surface to help them adhere and eliminate any air pockets. At this point, the flowers are sandwiched securely between the two pieces of acrylic.
Before applying the copper tape, peel off the remaining protective film from the *other side* (the outer side) of your assembled coaster. Now, take a binder clip and attach it firmly to the edge of the coaster. This will hold the two acrylic pieces tightly together, preventing them from shifting while you work with the copper tape. This small but important step ensures a smooth, even application.
Unroll a length of your copper tape. Starting at any point, carefully apply the copper tape around the entire circumference of the coaster, making sure it overlaps both the top and bottom edges of the acrylic discs evenly. Press it down firmly as you go, ensuring a tight seal. When you’ve gone all the way around, trim the tape neatly, allowing for a slight overlap to create a continuous seam. Use your thumbs or a flat tool (like the back of a spoon) to push the copper tape firmly against the edges of the coaster. This not only ensures a strong bond but also creates a smooth, finished edge, securely fusing the two acrylic pieces and encapsulating your beautiful pressed flowers forever. And just like that, your elegant pressed flower coaster is complete!
Tips for Perfect Pressed Flower Coasters
To ensure your pressed flower coasters turn out beautifully and last for a long time, consider these additional tips:
- Quality of Flowers: Choose fresh, vibrant flowers for pressing. Avoid those that are already wilting or have blemishes. Thinner flowers and leaves generally press better and retain their color more effectively.
- Advanced Flower Pressing: While heavy books work, a dedicated flower press or even an iron (on low heat with parchment paper) can speed up the drying process. Ensure flowers are completely dry to prevent mold.
- Design Pre-Planning: Before placing flowers on the coaster, lay them out on a piece of paper the same size as your coaster. This allows you to experiment with your design without smudging the acrylic.
- Negative Space: Don’t feel the need to fill every inch. Strategic use of negative space can make your floral arrangement pop and appear more artistic.
- Color Palette: Consider a color theme. Monochromatic arrangements can be subtle and sophisticated, while a mix of complementary colors can create a vibrant, cheerful look.
- Air Bubbles: When pressing the two acrylic pieces together, work from the center outwards to minimize trapped air bubbles.
- Copper Tape Application: For a super clean edge, use a craft knife or exacto blade to trim any excess copper tape cleanly. Ensure the tape is smoothly burnished down without wrinkles, especially at the seam.
- UV Protection: While the acrylic offers some protection, prolonged direct sunlight can still fade pressed flowers over time. Advise recipients (or yourself) to place coasters in areas that don’t receive intense, direct sun exposure for extended periods.
Beyond Coasters: Expanding Your Pressed Flower Crafts
The technique of sandwiching pressed flowers between clear acrylic and sealing with tape can be adapted for numerous other charming projects. Once you’ve mastered the coasters, why not try:
- Bookmarks: Use smaller, rectangular acrylic pieces to create unique floral bookmarks, perfect for avid readers.
- Keychains: Smaller, decorative acrylic shapes can be turned into personalized keychains with a small eyelet screw and key ring.
- Ornaments: Cut out festive shapes from acrylic and adorn them with seasonal pressed foliage to create beautiful ornaments for holidays or year-round display.
- Wall Art: Larger acrylic sheets can be used to create framed botanical art, bringing the beauty of a preserved garden directly to your walls.
- Jewelry Pendants: Miniature acrylic pieces can become unique necklace pendants or earring charms.
The possibilities are endless, limited only by your imagination and the availability of clear acrylic shapes!
Care and Maintenance of Your DIY Coasters
To ensure your beautiful pressed flower coasters remain pristine for years to come, a little care goes a long way:
- Cleaning: Wipe the coasters clean with a soft, damp cloth. Avoid abrasive cleaners or harsh chemicals, which can scratch the acrylic or damage the copper tape.
- Avoid Submersion: While the copper tape provides a good seal, these coasters are not designed to be submerged in water. Clean spills promptly.
- Heat Sensitivity: Acrylic can be sensitive to extreme heat. While suitable for warm beverages, avoid placing extremely hot pots or pans directly onto the coasters.
- Storage: When not in use, store them flat and away from direct sunlight to preserve the vibrancy of the pressed flowers.
Frequently Asked Questions about Pressed Flower Coasters
Q: What types of flowers are best for pressing and using in coasters?
A: Thin-petaled flowers and flat leaves work best. Good choices include pansies, violas, small ferns, daisies, cosmos, larkspur, and individual rose petals. Avoid very thick or fleshy flowers (like orchids or tulips) as they are difficult to press flat and can retain moisture, leading to mold.
Q: How long do pressed flowers last inside the coasters?
A: With proper sealing, pressed flowers can last for many years. Their longevity is primarily affected by exposure to light. Direct sunlight will cause the colors to fade over time. Keeping them out of strong, direct sunlight will help preserve their vibrant hues for longer.
Q: Can I use fresh flowers instead of pressed ones?
A: Absolutely not! Using fresh flowers will trap moisture inside your coaster, leading to mold, rot, and discoloration. It is crucial that your flowers are completely dried and pressed before you use them in this project.
Q: What if my copper tape isn’t sticking well to the acrylic?
A: Ensure the acrylic surfaces are completely clean and free of dust, oil, or fingerprints before applying the tape. You can wipe them with a microfiber cloth. Also, make sure to apply firm, even pressure when pressing the tape down. If the issue persists, the tape’s adhesive might be old or of low quality; try a fresh roll.
Q: Are these coasters waterproof?
A: They are water-resistant, meaning they can handle occasional spills and condensation from drinks. However, they are not completely waterproof and should not be submerged in water or put through a dishwasher, as water could eventually seep in and damage the flowers.
Conclusion: Embrace the Beauty of Handmade
Crafting these DIY pressed flower coasters is a wonderfully rewarding project that allows you to bring a touch of natural elegance into your home or create heartfelt gifts for loved ones. With just a few simple materials and a couple of easy steps, you can create a collection of unique, beautiful coasters that celebrate the delicate artistry of nature. So, gather your materials, let your creativity blossom, and enjoy the process of making something truly special. We hope this guide inspires you to start your own botanical crafting journey!
*A special thank you to Hallmark Channel via YouTube for sharing the original inspiration and images used in this tutorial. If you enjoyed this project, be sure to visit their channel for more inspiring video tutorials and creative ideas!