
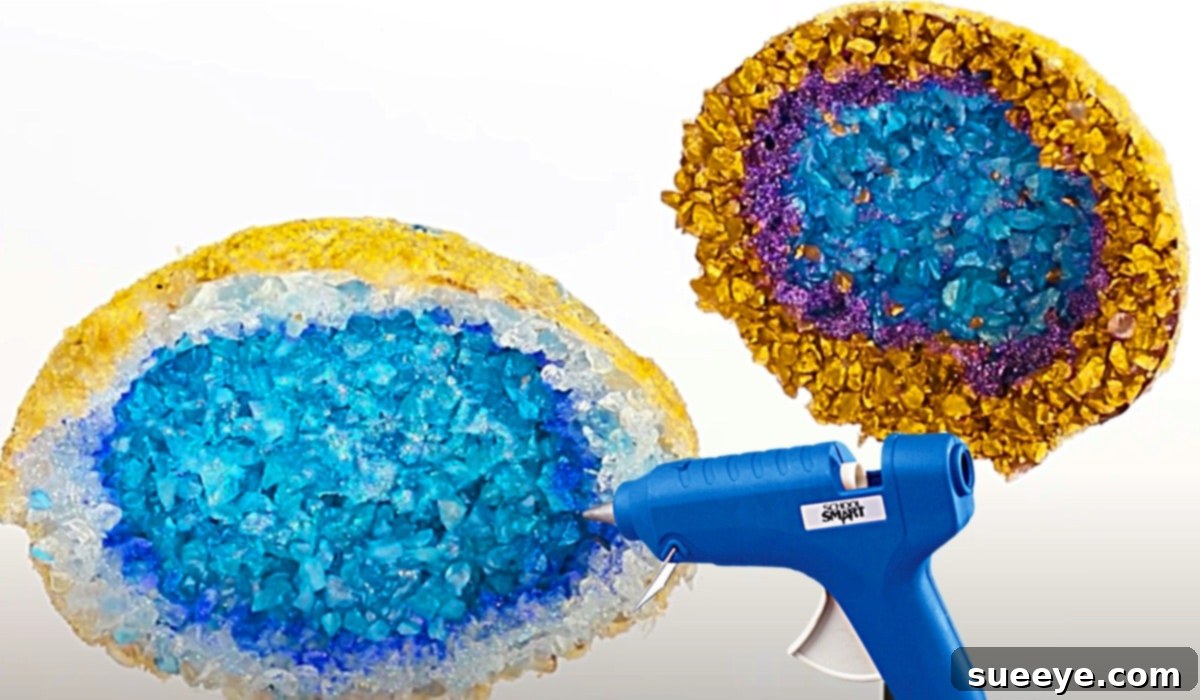
How to Create Stunning DIY Hot Glue Geodes: A Step-by-Step Guide
Geodes, with their captivating crystalline formations and sparkling interiors, have always held a special allure. They are natural wonders that bring a touch of earthy elegance to any space. However, acquiring authentic geodes can sometimes be costly, and finding one with the perfect colors to match your home decor can be a challenge. What if you could capture that mesmerizing beauty with an exciting, budget-friendly, and incredibly rewarding DIY project?
Prepare to be inspired! We’re diving into the brilliant world of DIY hot glue geodes, a fantastic craft idea popularized by the talented Mark Montano on YouTube. This tutorial transforms simple craft store materials into stunning, realistic geode replicas that are perfect for enhancing your home decor or gifting to loved ones. Not only do these faux geodes look remarkably authentic, but the tutorial also includes a clever display stand idea to showcase your creations beautifully. Get ready to unleash your creativity and craft some truly spectacular pieces!
Why Craft Your Own Hot Glue Geodes?
Embarking on a DIY project like making hot glue geodes offers a multitude of benefits beyond just creating a decorative item. It’s an opportunity to engage your artistic side, produce unique pieces tailored to your personal style, and enjoy a therapeutic crafting experience. Here’s why this project stands out:
- Cost-Effective Decor: Real geodes can be expensive. Crafting your own provides an affordable way to enjoy their aesthetic without breaking the bank.
- Fully Customizable: You have complete control over the size, shape, and color palette of your geodes. Match them perfectly to your existing interior design or experiment with bold new looks.
- Unique Home Accents: Handmade decor adds a personal touch and character to your home that mass-produced items simply cannot. Each geode you create will be one-of-a-kind.
- Rewarding Crafting Experience: The process is enjoyable and seeing your beautiful geodes come to life from simple materials is incredibly satisfying. It’s a fantastic project for crafters of all skill levels.
- Thoughtful Gifts: These handmade geodes make exquisite, personalized gifts for friends and family, perfect for birthdays, holidays, or housewarmings.
Gather Your Crafting Essentials for Stunning Geodes
Before you begin, ensure you have all your materials ready. Gathering everything beforehand makes the crafting process smoother and more enjoyable. Most of these items can be found at your local craft store, ensuring easy access to everything you need to create your magnificent hot glue geodes.
Materials You Will Need:
- Crushed glass (available in various colors at craft stores)
- Silicone bowl molds (choose different sizes and shapes for variety)
- A reliable hot glue gun
- Plenty of hot glue sticks (clear or translucent are best)
- Dowel rods (for the display stands)
- Small wooden bases (one for each geode you plan to display on a stand)
- Glitter (select colors that complement your crushed glass)
- Acrylic craft paint (earth tones or colors to match your geode’s interior)
Detailed Insights into Your Materials:
Understanding your materials can elevate your crafting game. Let’s look closer at each component:
- Crushed Glass: This is the star of your geode’s interior. Craft stores offer crushed glass in an array of colors and even iridescent finishes. Consider mixing complementary colors or creating ombre effects for more depth. Always handle crushed glass with care to avoid cuts.
- Silicone Bowl Molds: The flexibility of silicone is crucial for easy demolding. You can find molds in various bowl shapes and sizes, allowing you to create diverse geode forms. Make sure they are clean and dry before use.
- Hot Glue Gun and Sticks: A good quality hot glue gun with multiple temperature settings can be beneficial. Lower temperatures work well for detailed work and can prevent the glue from overheating the crushed glass. Use clear or translucent glue sticks to maintain the vibrant colors of the glass.
- Dowel Rods and Wooden Bases: These form the elegant stands for your geodes. Dowel rods come in different diameters, so choose one that offers good stability. The wooden bases can be simple discs or squares, ready for painting or staining to match your decor.
- Glitter: For that extra sparkle! Fine glitter works best to mimic the natural shimmer of crystals. Gold, silver, iridescent, or colors matching your crushed glass will enhance the geode effect significantly.
- Acrylic Craft Paint: This is used to paint the back of your geode, giving it a polished and finished look. Earthy tones like browns, grays, or even a deep metallic color can simulate the natural rock exterior of a geode. Ensure the paint is opaque enough to cover the back of the glue.
Crafting Your Magnificent Hot Glue Geodes: Step-by-Step Instructions
The process of creating these stunning hot glue geodes is surprisingly simple, thanks to Mark Montano’s ingenious method. Follow these detailed steps to bring your sparkling geode visions to life.
Step 1: Prepare Your Workspace and Arrange the Crushed Glass
Before you begin, lay down newspaper or a craft mat to protect your work surface, as crushed glass and glitter can be messy. Plug in your hot glue gun and allow it to heat up completely. Next, take your silicone bowl molds. Carefully pour your chosen colors of crushed glass into the molds. This is where your creativity shines! You can arrange the glass in concentric circles, create swirling patterns, or mix colors for a marbled effect. Think about how natural geodes display layers of color; try to emulate this for a more authentic look. Ensure the glass covers the bottom and sides of the mold to form the desired geode shape, leaving the center slightly open or less dense if you want a more natural concave appearance.
Step 2: Secure the Glass with Hot Glue
Once your crushed glass arrangement is perfect within the silicone mold, it’s time for the hot glue. Starting from the center and working your way outwards, carefully apply hot glue over the crushed glass. The goal is to fully cover and encase the glass, creating a solid base that will hold your geode together. Be generous with the glue, ensuring it seeps into all the nooks and crannies between the glass pieces. This creates the matrix that binds the glass, mimicking the natural rock formation. Work steadily to avoid creating large air bubbles and ensure an even layer.
Step 3: Embellish with Glitter (Optional but Recommended)
For an extra touch of sparkle and realism, while the hot glue is still warm and tacky, lightly sprinkle glitter over the wet glue and exposed crushed glass. This step helps to catch the light beautifully, enhancing the crystalline effect of your geode. You can choose a single color of glitter or mix a few complementary shades for added depth and shimmer. A fine-grain glitter usually provides the most elegant finish.
Step 4: Allow to Dry and Carefully Demold
Patience is key for this step. Let your hot glue geode cool and dry completely. This can take anywhere from 15 minutes to an hour, depending on the thickness of your glue layer and the room temperature. Once the glue is firm and cool to the touch, gently peel the silicone mold away from your geode. Silicone molds are fantastic because their flexibility allows for easy removal without damaging your newly formed creation. If it feels stuck, try gently pushing from the back of the mold to loosen the edges. You’ll be amazed at the solid, sparkling result!
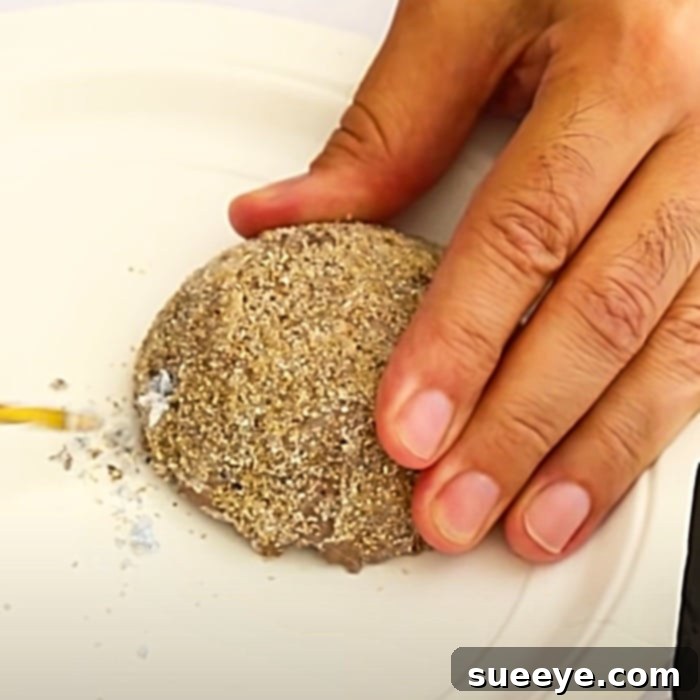
Step 5: Paint the Back for a Polished Finish
To give your geode a truly professional and finished look, paint the back (the hot glue side) with acrylic craft paint. Choose an earth-toned color like a deep brown, charcoal gray, or even a metallic bronze or copper. This step serves two purposes: it hides the hot glue, making the geode appear more natural, and it creates a solid, opaque background that makes the crushed glass and glitter sparkle even more vividly from the front. Apply one or two coats as needed, allowing each coat to dry thoroughly.
Creating the Elegant Display Stand
The tutorial includes a charming idea for a raised display platform, which truly elevates the presentation of your finished geode. This simple stand adds a touch of sophistication and ensures your beautiful creation is showcased prominently.
Assembly Instructions for the Stand:
To construct the display stand, you will need a dowel rod and a small wooden base. First, you can paint or stain the wooden base and dowel rod to match your geode or room decor. Once dry, carefully attach one end of the dowel rod to the center of the wooden base using strong craft glue or a small screw for added stability. After the glue has set, attach the finished geode to the top of the dowel rod, again using a strong adhesive. Ensure the geode is balanced and securely fastened. This creates an elegant pedestal, making your DIY geode look like a museum piece.
Alternative Display Ideas:
If a raised stand isn’t your preference, there are many other ways to display your hot glue geodes:
- Bowl Arrangement: Place several geodes of varying sizes and colors in a decorative bowl or tray on a coffee table.
- Shelf Decor: Arrange them artfully on bookshelves, mantels, or side tables as eye-catching accents.
- Wall Art: You could even incorporate smaller geodes into a larger mixed-media wall art piece using a strong adhesive.
- Terrariums: Add a geode to a succulent or air plant terrarium for an unexpected sparkle.
Tips for Success and Customization
To make your hot glue geode project even more successful and unique, consider these additional tips:
- Color Combinations: Experiment with contrasting colors for dramatic effect, or use analogous colors for a more harmonious blend. Consider using iridescent crushed glass for an extra magical shimmer.
- Safety First: Always supervise children when using a hot glue gun. Be cautious when handling crushed glass; wearing gloves is recommended to prevent accidental cuts. Ensure good ventilation, especially when using paints or strong adhesives.
- Experiment with Molds: Don’t limit yourself to just bowl molds. You can experiment with other flexible silicone molds or even create your own temporary molds with aluminum foil for unique, organic shapes.
- Layering Techniques: For a deeper, more complex geode look, try applying the crushed glass in layers, securing each layer with a thin coat of hot glue before adding the next. This can create more visible depth and texture.
- Gloss Finish: After the back paint is dry, you can apply a clear sealant or gloss varnish to the entire geode (both front and back) for extra durability and a beautiful, polished shine.
Unleash Your Inner Artist and Create Your Own Geode Wonders!
There you have it – a comprehensive guide to creating magnificent hot glue geodes that rival their natural counterparts. This project is a testament to how simple materials, combined with a touch of creativity, can yield truly spectacular results. Whether you’re looking to add a personalized touch to your home decor, seeking a fun and engaging craft activity, or searching for the perfect handmade gift, these DIY geodes are an excellent choice. So, what are you waiting for? Head to your craft store, gather your materials, and prepare to be enchanted by the beautiful, sparkling geodes you’re about to create. Happy crafting!