
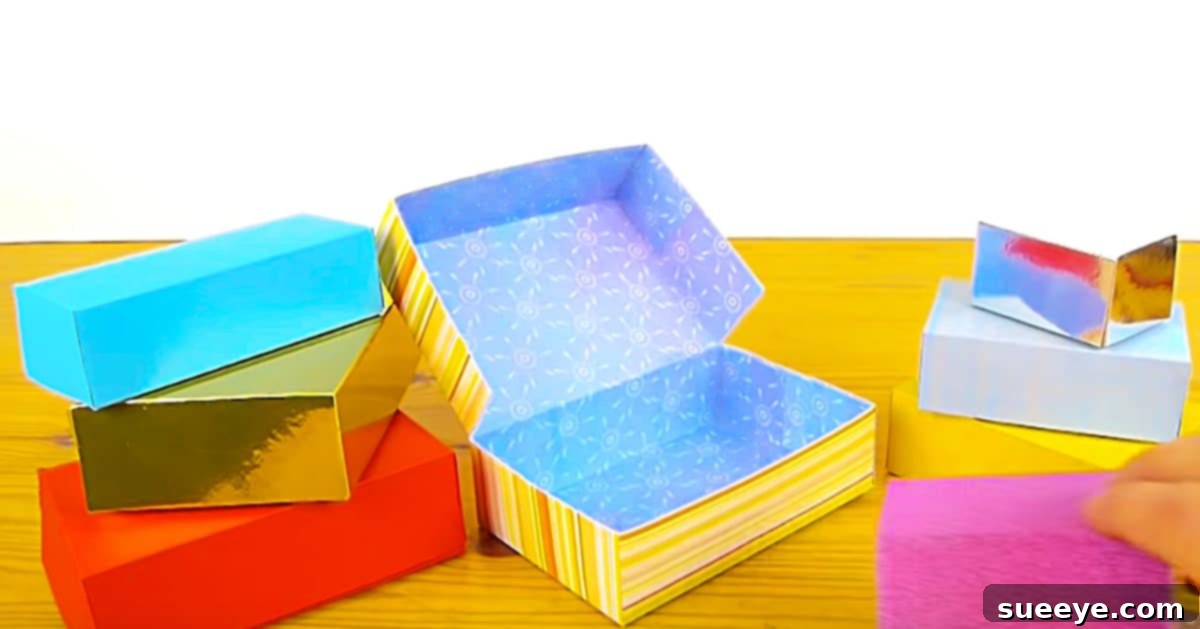
There’s an undeniable joy in giving a thoughtful gift, but often, the presentation can be as important as the gift itself. Finding the perfect gift box that matches your item’s size, style, and your personal aesthetic can be a challenge, not to mention an unexpected expense. This year, after realizing I was short on suitable gift packaging despite my extensive shopping, I stumbled upon a brilliant solution that changed my approach to gift-giving forever: DIY cardstock gift boxes. Not only are they incredibly cost-effective, especially if you take advantage of craft store sales like Michael’s 60% off coupon days, but they also offer unparalleled customization and a truly personal touch. This comprehensive guide will walk you through the simple yet rewarding process of crafting your own beautiful gift boxes, transforming basic cardstock into elegant packaging.
Making your own gift boxes is a fantastic way to unleash your creativity, save money, and ensure every gift you give is presented with care and unique flair. The beauty of this project lies in its simplicity and versatility. All you need are a few basic supplies you likely already have around the house or can easily acquire: a sheet of cardstock per box, a reliable ruler, a sharp pair of scissors (or a craft knife), and some strong glue. The steps are straightforward, making it an ideal craft for beginners and experienced DIYers alike. Let’s dive into the fascinating world of homemade gift packaging and discover how easy it is to create stunning results.
Why DIY Cardstock Gift Boxes Are a Game Changer
Beyond the immediate need for a box, there are numerous compelling reasons to embrace the art of DIY cardstock gift boxes. Firstly, **cost-effectiveness** is a major benefit. Pre-made gift boxes can be surprisingly expensive, especially for specialty sizes or designs. By using cardstock, which is often available in bulk or on sale, you dramatically reduce the cost per box. This means more budget for the gift itself or for creating an entire collection of personalized boxes for various occasions.
Secondly, **unlimited customization** is at your fingertips. Store-bought boxes come in a limited array of colors and patterns. When you craft your own, you dictate every detail. Want a glittery box for a festive occasion? Or perhaps a subtle, metallic finish for an elegant present? How about a vibrant pattern to match a child’s birthday theme? With cardstock, the possibilities are truly endless. You can select the exact color, texture, and pattern to perfectly complement your gift and the recipient’s style, making each box a unique piece of art.
Thirdly, these handmade boxes add an incredible **personal touch**. In an era of mass-produced items, a handmade element speaks volumes. It shows the recipient that you’ve invested not just money, but also time and effort into their gift, making the presentation itself a cherished part of the present. This thoughtfulness elevates the entire gifting experience, transforming a simple item into a memorable gesture.
Finally, DIY gift boxes are an excellent step towards **eco-friendly gifting**. By choosing durable cardstock, your handmade boxes can often be reused multiple times, reducing waste from single-use wrapping paper or flimsy store-bought boxes. You can even use recycled cardstock for an even greener approach. This conscious choice contributes to a more sustainable lifestyle while still offering beautiful packaging solutions.
Essential Supplies for Your Cardstock Box Project
Before you begin, gather your tools. Having everything at hand ensures a smooth and enjoyable crafting process:
- Cardstock: This is the star of our project. Choose a weight that’s sturdy enough to hold its shape but flexible enough to fold easily. Typically, 65 lb (176 gsm) to 110 lb (298 gsm) cardstock works well. Explore different finishes like matte, glossy, glitter, metallic, or patterned cardstock to add character. Remember, one sheet of cardstock generally makes one box.
- Ruler: A sturdy ruler, preferably metal or a transparent crafting ruler, is essential for accurate measurements and drawing straight lines. Precision here is key to a well-formed box.
- Pencil: A standard pencil with a good eraser is perfect for marking your cut and fold lines. Always draw lightly so your lines are easy to erase or won’t show on the final product.
- Scissors or Craft Knife: Sharp scissors will do the job for straight cuts. For even cleaner, more precise edges, especially on longer lines, a craft knife with a cutting mat is highly recommended. Always exercise caution when using a craft knife.
- Scoring Tool or Bone Folder: While you can score with a dull knife or the back of a pair of scissors, a dedicated scoring tool or bone folder will create crisp, professional-looking fold lines without tearing the paper fibers. This step significantly improves the final appearance of your box.
- Glue: A strong adhesive is crucial. A glue stick can work for smaller, lighter boxes, but for more durability, consider white craft glue (like Elmer’s Glue-All) or a hot glue gun. If using hot glue, work quickly as it dries fast.
- Optional Embellishments: Think ribbons, twine, glitter glue, stickers, stamps, decorative paper punches, or even small charms. These additions can elevate your basic box into something truly spectacular.
Step-by-Step Guide: Crafting Your Own Cardstock Gift Box
The instructions for these DIY gift boxes are incredibly simple to follow, allowing you to transform a flat sheet of cardstock into a three-dimensional container with ease. Let’s break down the process:
Step 1: Preparing Your Cardstock and Marking the Base
Start with one simple piece of cardstock. Decide on the desired dimensions of your finished box. For a perfect square box, for example, if you want a 4x4x2 inch box, you’ll need a larger sheet of cardstock. For a base, you’ll draw a square in the center of your cardstock. Let’s say you want a 4×4 inch base. Mark a 4×4 inch square roughly in the middle of your sheet. Then, from each side of this central square, measure outwards for the height of your box – let’s say 2 inches. So, you’ll draw lines 2 inches parallel to each side of your central square, creating a larger cross-like shape. This forms the base and the side flaps. Ensure all lines are perfectly straight and your corners are 90 degrees. Precision at this stage is crucial for a symmetrical box. It should initially look something like this:
Step 2: Scoring and Cutting Your Design
Once your lines are drawn, use your scoring tool along all the interior lines that define the base and sides of your box. Scoring creates a clean crease, making folding much easier and giving your box a professional finish. After scoring, you will need to make cuts to form the flaps that will eventually be glued together. On the two opposite long sides of your cross shape, cut along the lines that extend outwards from the central square, up to the score line of the box’s height. This will create four small tabs on each corner of your design. These tabs are essential for forming the side walls of your box. You’ll make lines with your ruler that look like this, then you cut the edges as shown in the next photo. Carefully cut along these designated lines with your scissors or craft knife. Only cut where indicated to separate the corner tabs; do not cut off any part of the main box structure.
Step 3: Folding and Assembling Your Box
Now comes the exciting part – watching your box take shape! Carefully fold along all the scored lines. You’ll see the base of your box and the four side panels forming. Take those small corner tabs you created in the previous step; these are your gluing tabs. Apply a thin, even layer of your chosen glue (glue stick or glue gun) to the outside of these tabs. Then, fold the side panels upwards, bringing the gluing tabs to meet the inside of the adjacent side panels. Press firmly to secure them in place. Hold each corner for a few moments until the glue sets, ensuring a strong bond. The box will begin to take shape before your eyes, transforming from a flat piece of paper into a sturdy container.
Step 4: Crafting the Perfect Lid (Optional but Recommended)
For a complete gift box, you’ll need a lid! The process for making the lid is identical to making the base, with one crucial difference: the dimensions. To ensure the lid fits snugly over your box, you need to make it ever so slightly larger. If your box base is 4×4 inches, make your lid base 4 and 1/16 by 4 and 1/16 inches. The height of the lid can be shorter, perhaps 1 inch instead of 2, depending on your aesthetic preference. Follow the same measuring, scoring, cutting, and gluing steps. Once completed, your custom-made lid will perfectly crown your handmade gift box.
Tips for Achieving Professional-Looking Boxes
- Measure Twice, Cut Once: Precision is paramount in box making. Even a slight inaccuracy can result in a crooked box.
- Invest in a Scoring Tool: While not strictly necessary, a bone folder or scoring tool makes a world of difference in creating crisp, clean folds that elevate the look of your box.
- Choose the Right Glue: For heavier cardstock or boxes meant to be handled frequently, a stronger craft glue or hot glue will provide better durability than a standard glue stick.
- Vary Your Cardstock: Don’t be afraid to experiment! Glitter cardstock, metallic cardstock, textured cardstock, or even cardstock with beautiful patterns can completely change the look and feel of your box.
- Personalize with Embellishments: Once your box is assembled, unleash your creativity with decorations. Ribbons, bows, stamped designs, glitter, stickers, or even handwritten messages can add that extra special touch.
Beyond the Basic: Creative Variations and Embellishments
The beauty of this simple formula is that you can adapt it to create a box in any size, color, or style you desire. I’ve personally experimented with various types of cardstock – from shimmering glitter cardstock to elegant metallic finishes, and every beautiful print and solid color I could find. The results were astounding. I quickly realized that these gorgeous, custom-made gift boxes were so glamorous and complete, they served as the entire wrapping! There was no need for additional wrapping paper; the box itself was the dazzling presentation.
Consider these ideas to take your DIY gift boxes to the next level:
- Different Shapes: While the tutorial focuses on a square or rectangular box, the same principles can be adapted for triangular pyramid boxes, pillow boxes, or even hexagonal boxes with a bit more intricate scoring and cutting.
- Decorative Techniques: Enhance your cardstock with stamping, stenciling, or embossing before assembly. You can also add cut-out windows backed with clear acetate to showcase a peek of the gift inside.
- Ribbons and Bows: A classic finishing touch. Choose ribbons that complement your cardstock color or add a contrasting pop. Tie them around the box, create elaborate bows, or simply use a strip of ribbon as a decorative band.
- Gift Tags and Labels: Hand-stamped or printed gift tags tied with twine add a rustic or elegant touch. Personalized labels can also be printed directly onto cardstock and adhered to the box.
- Themed Boxes: Create boxes specifically for holidays (Christmas, Valentine’s Day), birthdays (with age-appropriate colors), weddings (elegant whites and silvers), or baby showers (pastel hues).
- Internal Dividers: For a collection of small items, you can create simple cardstock dividers to keep everything neat and organized within the box.
DIY Gift Boxes From Cardstock: Your Ultimate Guide to Personalized Packaging
In conclusion, diving into the world of DIY cardstock gift boxes is an incredibly rewarding endeavor. It’s a craft that combines practicality with artistic expression, allowing you to create truly unique and memorable packaging for every occasion. From saving money and reducing waste to adding an irreplaceable personal touch, the benefits are clear. So, gather your supplies, follow these simple steps, and let your imagination soar. The next time you have a gift to give, skip the generic store-bought options and present it in a stunning, handmade cardstock box. The joy you’ll feel in crafting it, and the delight the recipient will experience, will be a gift in itself. Happy crafting!