
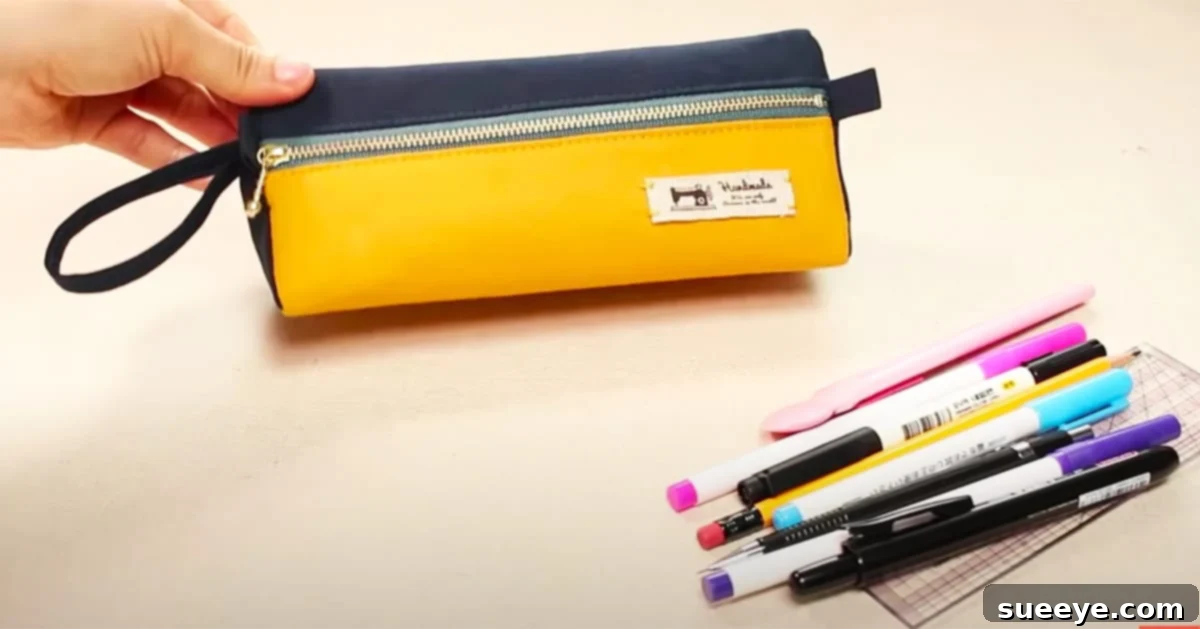
DIY Triangle Pencil Case: A Stylish and Functional Sewing Project for Everyone
Are you looking for a practical yet stylish way to organize your pens, pencils, markers, or even small craft supplies? Look no further than this fantastic DIY Triangle Pencil Case! This versatile pouch is an absolute game-changer, whether you’re heading back to school, embarking on a new art project, or simply need to keep your essentials tidy in your bag. Its unique triangular shape isn’t just a design statement; it offers surprising depth and stability, making it far more functional than traditional flat pouches.
Inspired by the incredibly clear and helpful tutorials from Sewing Times on YouTube, this project transforms simple fabric into a durable and chic accessory. The minimalist, block-color aesthetic of this design might even remind you of popular brands like Herschel, proving that handmade items can be just as fashionable. Unlike bulky alternatives, this pencil case offers generous storage capacity without sacrificing its sleek profile, making it the perfect companion for your backpack, purse, or desk.
From students of all ages to busy professionals, artists, and crafters, everyone can appreciate the utility and charm of a well-made pencil case. I’ve always had a soft spot for pencil cases, relying on them throughout my school years. But what makes this particular design stand out is its universal appeal – it’s perfectly appropriate and stylish for adults too, moving beyond the typical ‘schoolish’ designs often found in stores. Dive into this satisfying sewing project and create a personalized organizer that truly reflects your style!
Why Choose a DIY Triangle Pencil Case?
Opting to sew your own triangle pencil case offers a multitude of benefits, combining functionality with personal expression. This isn’t just another container; it’s a carefully crafted item designed to meet specific needs while looking great.
Unique Design and Aesthetics
The distinctive triangular shape sets this pencil case apart from conventional rectangular or cylindrical pouches. This geometric design provides a modern, clean aesthetic that is both eye-catching and practical. Its contemporary look, often achieved with solid colors or subtle patterns, gives it a sophisticated edge that complements any style, from academic to professional. The simplicity of the form factor allows the quality of your chosen fabric and stitching to truly shine, resulting in a high-end feel that rivals store-bought alternatives.
Superior Capacity and Organization
Don’t let its sleek appearance fool you; the triangular base provides remarkable depth and internal volume. This clever design allows the case to hold a substantial amount of items – whether it’s a full set of colored pencils, multiple highlighters, pens, small rulers, erasers, or even makeup brushes and charging cables. Unlike flat pouches where items can get lost at the bottom, the structure of this case helps keep contents more accessible and less prone to disappearing into a jumbled mess.
Enhanced Stability and Accessibility
One of the most practical advantages of the triangle design is its ability to stand upright on a desk or table. This stability means your supplies are always visible and within easy reach, eliminating the need to rummage through a floppy bag. This feature is particularly useful for students taking notes, artists working on a sketch, or professionals during meetings, providing an organized and efficient workspace wherever you are.
Durability and Customization
When you sew your own pencil case, you have complete control over the materials. Choosing high-quality fabrics like cotton linen, reinforced with fusible fleece, ensures your pouch will withstand daily wear and tear for years to come. Furthermore, the DIY aspect allows for endless customization. Select fabrics that match your personality, add a unique zipper pull, or even incorporate embroidery for a truly one-of-a-kind accessory. This level of personalization is simply not possible with mass-produced items.
Materials You’ll Need for Your Triangle Pencil Pouch
Gathering the right materials before you begin is crucial for a smooth sewing experience and a professional-looking finish. Here’s a detailed list of what you’ll need:
- Cotton Linen Outer Fabric: This fabric blend is an excellent choice for the exterior of your pencil case. Cotton offers softness and breathability, while linen provides strength, durability, and a beautiful texture. It’s relatively easy to work with and holds its shape well, making it ideal for structured projects like this pouch. Consider a medium-weight fabric for the best results.
- Cotton Linen Lining Fabric: For the interior, a matching or contrasting cotton linen fabric will provide a neat and durable finish. The lining protects the outer fabric and adds an extra layer of structure. Opt for a fabric that complements your outer choice aesthetically.
- Fusible Fleece: This essential interfacing adds body, stability, and a lovely padded feel to your pencil case. Fusible fleece has an adhesive backing that bonds to your fabric when ironed, simplifying the process of adding structure without extra stitching. It prevents your pouch from feeling flimsy and helps it maintain its triangular shape even when empty.
- Zipper: A good quality zipper is vital for the functionality of your pouch. The length will depend on the final dimensions of your pencil case, so make sure to check the tutorial’s specifications. A nylon coil zipper is often recommended for its flexibility and ease of sewing, but a metal zipper can add a more robust, vintage look if preferred.
- Sewing Machine: A standard domestic sewing machine will be perfectly adequate for this project. Ensure it’s in good working order and has a fresh needle suitable for medium-weight fabrics (a universal 80/12 or 90/14 needle is usually fine).
- Iron and Ironing Board: Pressing seams and applying fusible fleece correctly is critical for a professional finish. Don’t skip this step! A good iron will be your best friend throughout the construction process.
- Fabric Clips or Pins: These are indispensable for holding fabric layers together, especially when dealing with multiple thicknesses or slippery materials. Fabric clips are particularly useful when working with materials that might show pinholes or for holding zippers in place.
- Matching Thread: Choose a high-quality polyester all-purpose thread that matches your outer fabric for seamless stitching.
- Fabric Scissors or Rotary Cutter and Mat: Sharp tools ensure precise cuts, which are fundamental for accurately assembling your pouch.
- Ruler and Fabric Marker/Chalk: For accurate measuring and marking of your fabric pieces.
Step-by-Step Directions to Sew Your Triangle Pencil Case
Creating your very own triangle pencil case is a rewarding process, and with the expert guidance from Sewing Times, it’s surprisingly straightforward. While we’ll outline the main steps here, we highly recommend watching the full video tutorial for visual clarity and precise measurements. The Sewing Times tutorial provides incredibly detailed instructions, making it perfect for both beginners and experienced sewers.
1. Preparation: Measure and Cut Your Fabrics
The first and most important step is meticulous preparation. Begin by watching the tutorial to understand the exact dimensions needed for your outer fabric, lining fabric, and fusible fleece. Carefully measure and cut all your fabric pieces according to the tutorial’s specifications. Precision here is key to ensuring all your components fit together perfectly in later steps. Remember to transfer any markings from the pattern pieces if provided, as these will guide your sewing.
2. Apply Fusible Fleece and Form the Triangular Base
Once your fabrics are cut, it’s time to add structure. Following the tutorial, iron the fusible fleece onto the wrong side of your outer fabric pieces. This step is critical for giving your pencil case its desired shape, stability, and a professional finish. After the fleece is securely bonded, you will begin to form the distinct triangular shape of your pouch. This usually involves folding and pressing the fabric according to specific guidelines provided in the video, creating the base corners that define the case’s unique structure.
3. Installing the Zipper
Attaching the zipper can often be perceived as a challenging step, but Sewing Times breaks it down into easily digestible instructions. Continue to follow Sewing Times’ comprehensive tutorial on YouTube as she demonstrates exactly how to seamlessly integrate the zipper with your outer and lining fabrics. She shows you how to properly align the zipper, secure it with clips or pins, and sew it in place using your sewing machine’s zipper foot. Pay close attention to her technique to ensure a smooth, professional-looking zipper installation that opens and closes effortlessly.
4. Assembling the Pouch and Finishing Touches
With the zipper in place, the rest of the assembly involves sewing the sides and bottom of the pouch, carefully matching seams and corners. The tutorial will guide you through sewing the outer fabric and lining separately, then joining them together, usually by turning the bag right side out through an opening left in the lining. This technique encloses all raw edges, resulting in a clean and polished interior. Once stitched, trim any excess fabric, clip corners, and turn your completed triangle pencil case right side out, gently pushing out the corners to achieve the perfect shape. A final press with the iron will give it that crisp, professional finish.
Tips for a Successful Sewing Project
To ensure your DIY triangle pencil case turns out perfectly, keep these helpful tips in mind:
- Watch the Entire Tutorial First: Before making any cuts, watch the Sewing Times video from start to finish. This will give you a complete overview of the process and help you anticipate each step.
- Press, Press, Press: Ironing your fabric pieces before cutting, pressing seams after each stitch, and pressing the fusible fleece thoroughly will make a huge difference in the final appearance and crispness of your pouch.
- Use Sharp Tools: Sharp fabric scissors or a rotary cutter will ensure clean, precise cuts, which are vital for accurate construction.
- Take Your Time with the Zipper: Zipper installation can be tricky for beginners. Go slowly, use plenty of clips or pins, and don’t hesitate to re-sew if it’s not perfectly aligned.
- Test Your Machine: Do a test stitch on a scrap piece of your chosen fabric to check tension and stitch length before sewing on your main project.
- Clip Corners and Curves: When turning your pouch right side out, clip the seam allowance at corners (without cutting through the stitching) to reduce bulk and help the corners lie flat.
Personalize Your Triangle Pencil Case
One of the greatest joys of DIY is the ability to infuse your personality into your creations. Your triangle pencil case is a perfect canvas for customization:
- Fabric Choices: Experiment with different fabric combinations. Use a bold pattern for the outer fabric and a complementary solid for the lining, or mix and match textures. Think about seasonal themes or favorite colors.
- Embellishments: Add a unique touch with embroidered initials, a fun patch, or decorative stitching. Consider adding a small charm to the zipper pull for extra flair.
- Size Adjustments: Once you’re comfortable with the basic construction, you can adapt the dimensions to create larger pouches for art supplies, smaller ones for coins, or even a compact case for makeup.
Conclusion: Your Stylish, Handmade Organizer Awaits!
Overall, the appeal of this DIY Triangle Pencil Case is undeniable. It’s a project that delivers not just a functional item, but a stylish accessory that brings order and a touch of personal flair to your daily life. Its design is thoughtfully crafted to be universal, suiting everyone from students needing to organize their school supplies to professionals keeping their desk essentials neatly contained, and even artists carrying their favorite tools.
Gone are the days of searching for a pencil pouch that truly matches your aesthetic. With this easy-to-follow tutorial, you can create a custom piece that reflects your unique taste, avoiding the ‘too schoolish’ or uninspiring options often found in stores. The satisfaction of using something you’ve made with your own hands is truly immense.
So, whether you’re looking for a thoughtful back-to-school gift, a personal treat, or simply a fun and rewarding sewing endeavor, this DIY triangle pencil case is an excellent choice. Gather your materials, fire up your sewing machine, and let the fantastic guidance from Sewing Times lead you to create a beautiful, durable, and infinitely useful accessory. Happy sewing!