
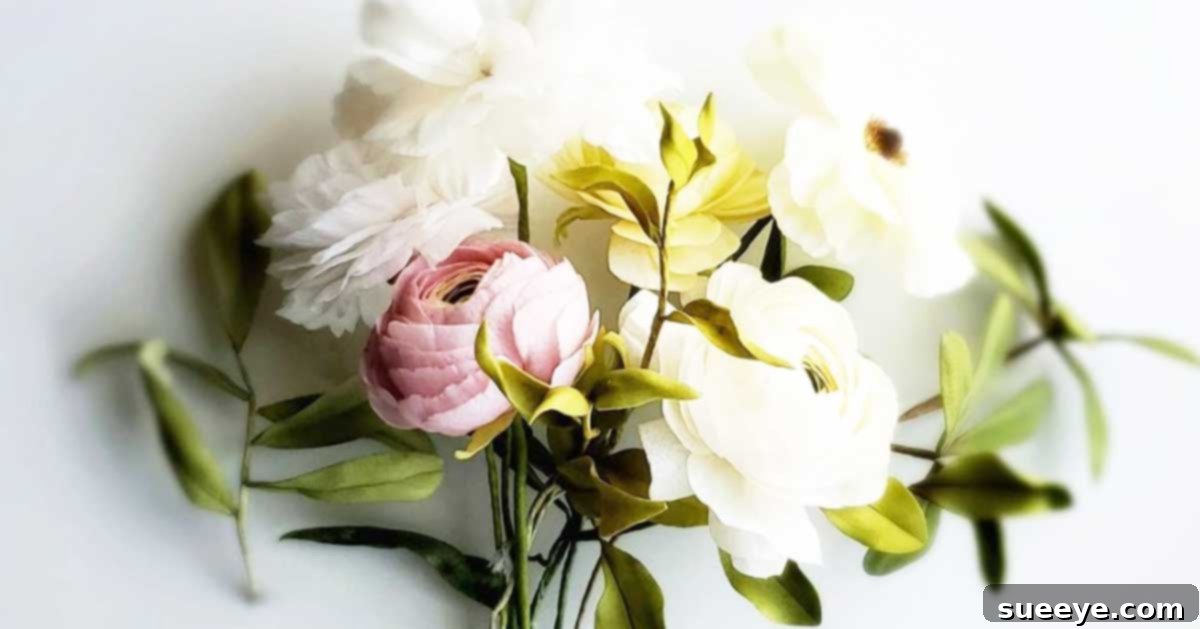
Transform ordinary coffee filters into extraordinary floral masterpieces with this incredibly simple yet stunning DIY project. Forget the constant need to replace real flowers; these handmade coffee filter flowers offer a lasting, cost-effective, and endlessly customizable alternative for any table centerpiece or home decor. Inspired by the creative genius of Suzy Rebelo, this craft allows anyone to create beautiful, realistic-looking blooms with minimal effort and materials you likely already have around the house.
The beauty of this DIY lies in its simplicity and versatility. You can unleash your creativity by experimenting with a myriad of colors using food coloring. Achieve vibrant, bold hues or soft, pastel shades by simply adjusting the amount of food coloring added to the water. Create stunning ombre effects or multi-toned petals to add depth and realism to your flowers. Whether you’re decorating for a special event, looking for a unique handmade gift, or simply want to brighten up your living space, these coffee filter flowers are the perfect solution. They are not only easy to make but also incredibly rewarding, offering a personalized touch that store-bought decorations simply can’t match.
Why Choose DIY Coffee Filter Flowers?
Beyond their undeniable charm, coffee filter flowers present a compelling alternative to fresh cut flowers for several reasons:
- Affordability: Coffee filters are incredibly inexpensive, making this craft a budget-friendly way to create lavish-looking decor. You can craft dozens of flowers for a fraction of the cost of a single real bouquet.
- Longevity: Unlike real flowers that wilt and fade within days, your coffee filter creations will last indefinitely, providing enduring beauty without the need for water or maintenance.
- Customization: The color possibilities are endless. Match your flowers perfectly to your home decor, party theme, or seasonal palette. You can also experiment with different petal shapes and sizes to mimic various flower species.
- Eco-Friendly Potential: By using readily available and often compostable materials (if using unbleached filters and non-toxic dyes), you’re engaging in a craft that can be more environmentally conscious than purchasing imported cut flowers.
- Accessibility: The materials are common household items, meaning you can often start this project without a special trip to the craft store.
Gathering Your Essential Supplies for Coffee Filter Flowers:
Before you embark on this delightful crafting journey, ensure you have all the necessary items. The beauty of this project is that the material list is short and sweet, making it accessible for crafters of all skill levels.
- Coffee Filters: The star of our show! Any standard coffee filter, whether cone-shaped or basket-style, will work. White filters are best for achieving vibrant colors, but unbleached brown filters can create a rustic, natural aesthetic. You’ll want a good stack of them, as each flower typically uses 10-15 filters for a full bloom.
- Water: Lukewarm water is ideal for dissolving food coloring and ensuring even absorption into the filters. A medium-sized bowl will be perfect for your dye bath.
- Food Coloring: This is where the magic happens! Liquid food coloring provides vivid results, and gel food coloring can offer even richer, more concentrated hues. Gather a variety of colors to experiment with, or stick to a single shade for a monochromatic look. Remember, the more drops you add, the deeper the color will be.
- Floral Wire: This will form the sturdy stems of your flowers. A medium-gauge floral wire (around 18-24 gauge) is usually sufficient. You can find this in the floral section of craft stores. Green floral wire is often preferred as it blends in with a natural look.
- Hot Glue: Essential for securely attaching your petals to the floral wire stem and to each other. Hot glue dries quickly, making assembly efficient.
- Hot Glue Gun: A reliable hot glue gun is a must-have for this project. Ensure it’s in good working order and have extra glue sticks on hand. Always exercise caution when using a hot glue gun to avoid burns.
Step-by-Step Guide to Crafting Your Coffee Filter Blooms:
Step One: Preparing Your Dye Bath
Begin by setting up your coloring station. In a shallow bowl, pour a generous amount of warm water – enough to fully submerge your coffee filters without overflowing. Warm water helps the food coloring dissolve more effectively and encourages the filters to absorb the dye evenly. Next, carefully add your chosen food coloring. A good starting point is about 10 drops for a moderately vibrant color. If you desire a deeper, more intense shade, gradually add more drops until you achieve the desired concentration. Stir the water gently to ensure the color is thoroughly mixed. If you plan to make flowers in various colors, prepare a separate bowl for each distinct shade.
Image by. Suzy Rebelo via YouTube video.
Step Two: Dyeing the Filters
Once your dye bath is ready, take a stack of approximately 10 coffee filters. Gently dip this stack into the colored water, ensuring they are fully submerged. You can soak them for about a minute or slightly longer to allow the dye to thoroughly penetrate the paper fibers. For a more variegated or ombre effect, you can dip only a portion of the filter or dip for shorter periods. If you’re working with multiple colors, make sure to keep your stacks separate to avoid color bleeding before they dry. This step is crucial for achieving the beautiful, vibrant colors that make these flowers so striking.
Step Three: Removing Excess Water
After the filters have absorbed enough dye, carefully remove the stack from the colored water. Gently squeeze out the excess water. Be firm but gentle, as the wet paper can be fragile. You want to remove as much water as possible without tearing the filters. This step helps speed up the drying process and prevents the colors from becoming too diluted. Once the majority of the water has been squeezed out, carefully separate the individual filters and lay them flat on a baking sheet or a clean, dry surface, ready for drying.
Step Four: Drying the Filters
To dry your colored coffee filters efficiently, place them on a baking pan. Preheat your oven to a low temperature, around 250 degrees Fahrenheit (120 degrees Celsius). Place the pan with the filters into the oven for approximately 5 to 10 minutes. Keep a close eye on them, as drying times can vary. The goal is for the filters to be completely dry and slightly crisp, but not burnt. Alternatively, if you prefer not to use the oven, you can air-dry them by laying them out on a clean towel or drying rack. This method will take longer, typically several hours or overnight, depending on humidity levels.
Step Five: Shaping Your Petals
Now comes the creative part of shaping your petals. Refer to example patterns if available (like those often found in the description box of DIY videos, such as Suzy Rebelo’s). If no patterns are provided, you can easily freehand your own. Stack a few dried coffee filters together (usually 3-5 at a time works well) and draw your desired petal shape onto the top filter. Think about the type of flower you want to create – rounded petals for roses, jagged edges for carnations, or more elongated shapes for lilies. Once drawn, carefully cut out the shapes through all the stacked filters simultaneously. This ensures uniformity and speeds up the process. You can cut various sizes of petals for a more realistic, layered effect.
Step Six: Assembling the Flower Stem
Take a piece of floral wire, cut to your desired stem length. This will be the sturdy backbone of your flower. Now, with your hot glue gun ready, select your first coffee filter petal. Apply a small dot or a thin line of hot glue to the very center or bottom edge of the petal. Carefully attach this initial petal to one end of the floral wire, wrapping it around the tip to form the very center bud of your flower. Hold it in place for a few seconds until the glue sets. This foundational step is crucial for the overall structure of your bloom.
Image by. Suzy Rebelo via YouTube video.
Step Seven: Building Your Blooms
Continue to add petals, working your way outwards from the central bud. For each subsequent petal, apply a ring or a line of hot glue near the base, then attach it to the stem, overlapping the previous petals slightly. Rotate the flower as you go to ensure an even distribution of petals and a symmetrical shape. For a fuller, more realistic flower, you might use smaller petals closer to the center and larger ones towards the outer edges. Continue this layering process until you’ve achieved the desired fullness and number of petals for your flower. Don’t be afraid to gently crinkle or shape the petals with your fingers to add texture and natural curves, mimicking real flower petals.
Tips for Customizing Your Coffee Filter Flowers
One of the greatest joys of this DIY project is the endless scope for personalization. Here are some ideas to make your flowers truly unique:
- Color Blending and Ombre Effects: Instead of dipping the whole filter in one color, try dipping only the edges in a different shade to create a beautiful gradient. You can also stack filters dyed in slightly different hues to achieve a natural color transition within a single bloom.
- Adding Fragrance: For a sensory experience, lightly spritz your finished flowers with a floral essential oil blend or a fabric freshener. This can give them a delightful, subtle scent, mimicking real flowers.
- Varying Flower Sizes: Don’t limit yourself to one size! Create a collection of large, medium, and small flowers by adjusting the number of filters used and the size of your petal cutouts. This variety will make your arrangements more dynamic and visually interesting.
- Creating Leaves and Stems: Dye some filters green and cut them into leaf shapes. Attach these to the floral wire stem using hot glue, just below the flower head, for an added touch of realism. You can also wrap the entire floral wire stem with green floral tape for a more finished look.
- Adding Sparkle or Texture: For special occasions or a touch of glam, lightly dust your finished flowers with fine glitter or use a spray adhesive before sprinkling glitter for better adherence. You can also experiment with decorative punches for unique petal edge designs.
Displaying Your Beautiful Creations
Once your coffee filter flowers are complete, the fun continues with finding the perfect way to showcase them. Their versatility means they can be incorporated into almost any decor style or event:
- Elegant Centerpieces: Arrange a bouquet of your handmade flowers in a vase for a stunning, long-lasting centerpiece for your dining table, coffee table, or mantle.
- Handmade Bouquets and Gifts: Craft a personalized bouquet for a loved one. They make thoughtful gifts for birthdays, anniversaries, or “just because.”
- Wreaths and Garlands: Attach your flowers to a floral foam wreath base or string them together to create a charming garland for walls, doorways, or staircases.
- Gift Toppers: Replace traditional bows with a beautiful coffee filter flower for an extra special touch on wrapped presents.
- Hair Accessories: Smaller blooms can be glued onto hairpins or headbands for a unique and whimsical accessory.
- Event Decor: Perfect for weddings, baby showers, or parties, these flowers can adorn tables, backdrops, or aisle markers, adding a bespoke charm.
Caring for Your Paper Flowers
While coffee filter flowers require minimal upkeep compared to real blooms, a little care ensures they remain vibrant and beautiful for years to come. To keep them looking their best:
- Dust Gently: Over time, dust can settle on the petals. Use a soft brush, a dry cloth, or a can of compressed air (from a safe distance) to gently remove any accumulated dust.
- Avoid Moisture: Since they are made of paper, water and high humidity are their enemies. Keep them away from damp areas like bathrooms or open windows during rain.
- Limit Direct Sunlight: Prolonged exposure to direct sunlight can cause the colors to fade over time. Display them in areas with indirect light to preserve their vibrant hues.
Conclusion: Unleash Your Inner Florist
Crafting coffee filter flowers is an incredibly rewarding and accessible DIY project that offers endless creative possibilities. From the simple act of dyeing filters to the meticulous layering of petals, each step brings you closer to creating a beautiful, lasting piece of art. Whether you’re a seasoned crafter or new to the world of DIY, this project provides a wonderful opportunity to express your creativity, save money on decor, and enjoy the satisfaction of making something truly special with your own hands. So gather your supplies, let your imagination bloom, and transform those humble coffee filters into a garden of paper perfection. Happy crafting!