
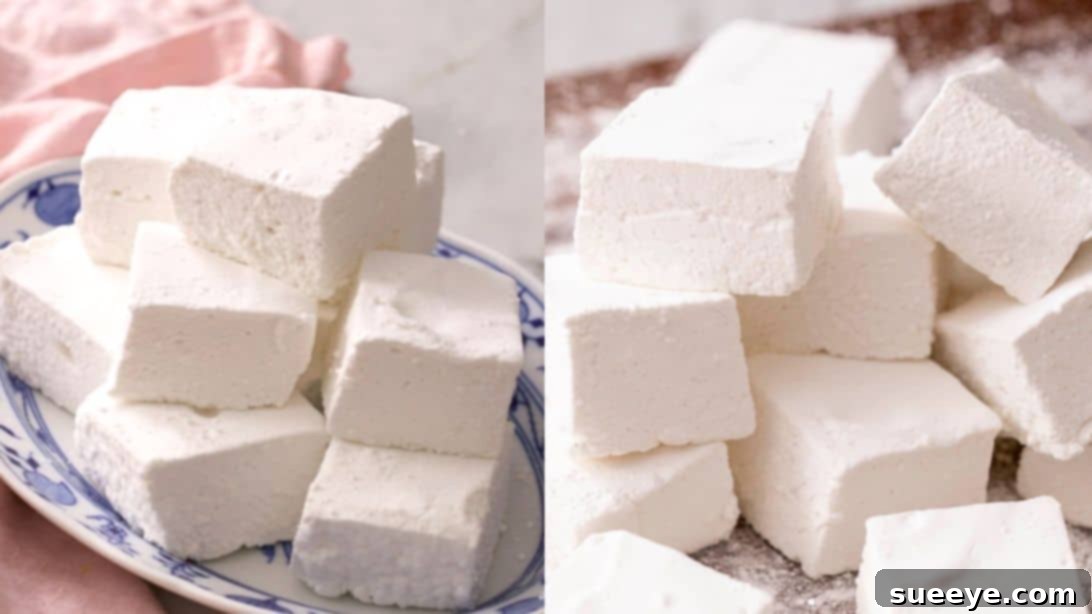
There’s an undeniable magic in a perfectly made marshmallow – that cloud-like fluffiness, the gentle sweetness, and the way it melts divinely on your tongue. While store-bought marshmallows are convenient, they often fall short of delivering that truly luxurious experience. Prepare to elevate your sweet tooth with this incredible homemade marshmallow recipe, inspired by the culinary brilliance of Preppy Kitchen. We promise, once you experience the luscious, melt-in-your-mouth texture and rich flavor of these homemade delights, you’ll never look back at the pre-packaged versions again. Whether you’re topping a steaming mug of hot chocolate or crafting the ultimate s’mores, these marshmallows are set to become your new go-to indulgence. Dive into this comprehensive guide and discover the surprisingly simple secrets to creating confectionery perfection right in your own kitchen.
The Unrivaled Joy of Homemade Marshmallows
Why go through the effort of making marshmallows from scratch when you can simply grab a bag from the store? The answer lies in an unparalleled difference in quality, taste, and texture. Homemade marshmallows are a world apart; they boast an ethereal lightness, a tenderness that allows them to practically dissolve on your tongue, and a clean, pure sweetness that store-bought varieties often mask with artificial flavors and excessive stickiness. Beyond the superior taste, making your own marshmallows offers the satisfaction of crafting something truly special. You control every ingredient, ensuring a treat free from unnecessary additives and perfectly tailored to your preferences. It’s a fun, rewarding project that transforms simple ingredients into an extraordinary confection, perfect for gifting, entertaining, or simply enjoying a moment of pure bliss.
Essential Ingredients for Perfect Pillowy Treats
Crafting these delectable marshmallows requires a handful of common pantry staples, each playing a crucial role in achieving that signature fluffy texture and delightful sweetness. Before you begin, gather all your ingredients and measure them precisely – this is a baking endeavor where accuracy truly pays off. Prepare to transform these simple items into something truly extraordinary.
- 2 tablespoons of vegetable oil: Essential for greasing your baking pan, ensuring your finished marshmallows release cleanly without sticking.
- 1 cup of confectioners’ sugar: Used for dusting the pan and, most importantly, coating the cut marshmallows to prevent them from sticking together. It also adds a touch more sweetness and a delicate finish.
- 1/2 oz of gelatin (2 envelopes powdered, unflavored): This is the structural backbone of your marshmallows. Gelatin provides the necessary stability and elasticity, allowing the marshmallows to set firm yet remain wonderfully chewy and springy. Ensure it’s unflavored to let the vanilla shine through.
- 1 1/2 cups of granulated sugar: The primary sweetening agent. When cooked into a syrup, it combines with corn syrup to create the ideal foundation for your marshmallow base.
- 1 cup of light corn syrup: A vital ingredient that prevents sugar crystallization, ensuring your marshmallows remain smooth and pliable rather than grainy or brittle. It also contributes to the desired chewy texture and overall stability.
- 1/4 teaspoon of salt: A small but mighty addition that balances the sweetness and enhances all the other flavors, making the marshmallows taste richer and more complex.
- 2 teaspoons of vanilla extract: The classic flavor for marshmallows. Use a good quality pure vanilla extract for the best aromatic and taste experience. Added at the end, its delicate notes are preserved.
- 1 cup of water (divided): Used for two key purposes: half a cup for “blooming” the gelatin and the other half for creating the sugar syrup.
Tools for Your Marshmallow Making Journey
While the process is straightforward, having the right equipment on hand will make your marshmallow-making experience smoother and more successful. Think of these as your essential allies in achieving confectionery perfection:
- 9-inch square baking pan: The perfect size for this recipe, allowing for a good thickness of marshmallow.
- Pastry brush: For evenly coating your pan with vegetable oil.
- Stand mixer with whisk attachment: Absolutely crucial for whipping the marshmallow mixture to its proper fluffy consistency. A powerful hand mixer might work, but a stand mixer is highly recommended for consistent results and ease.
- Large heavy-bottomed saucepan: Essential for cooking the sugar syrup. A heavy bottom helps distribute heat evenly and prevents scorching.
- Candy thermometer: Non-negotiable for accuracy! Achieving the correct sugar syrup temperature (240°F) is vital for the marshmallows to set correctly. Using a reliable thermometer ensures success.
- Rubber spatula: Indispensable for transferring the sticky marshmallow mixture into the pan and spreading it evenly. A little vegetable oil or water on the spatula will help prevent sticking.
- Sharp knife, pizza cutter, or cookie cutters: For portioning your cooled marshmallows. A sharp, well-oiled knife makes clean cuts, while cookie cutters add a whimsical touch.
Step-by-Step Guide to Crafting Your Marshmallows
With your ingredients and tools ready, it’s time to embark on the exciting process of making homemade marshmallows. Follow these steps carefully, and you’ll be rewarded with a batch of irresistibly fluffy treats.
Step 1: Prepare Your Baking Pan for Success
The first critical step in ensuring your marshmallows release beautifully from the pan is proper preparation. Begin by liberally brushing the entire bottom and sides of a 9-inch square baking pan with vegetable oil. Don’t be shy; a generous coating will prevent sticking. Following this, dust the oiled pan thoroughly with confectioners’ sugar, ensuring every oiled surface is lightly coated. This creates a non-stick barrier that will make removing and cutting your marshmallows a breeze. Tap out any excess sugar.
Step 2: Bloom the Gelatin for Optimal Texture
In the bowl of your stand mixer (or a large regular mixing bowl if using a hand mixer), pour in 1/2 cup of cold water. Then, carefully sprinkle the two envelopes of unflavored powdered gelatin over the water. Sprinkle evenly to avoid clumps. Do not stir vigorously at this stage; simply allow the gelatin granules to absorb the water and “bloom” or hydrate for about 5-10 minutes. This process is crucial as it ensures the gelatin dissolves smoothly into the hot sugar syrup later, creating a consistent and stable marshmallow structure without any gritty bits.
Step 3: Master the Sugar Syrup – The Heart of Your Marshmallows
In a large, heavy-bottomed saucepan, combine the light corn syrup, salt, the remaining 1/2 cup of water, and the granulated sugar. Stir these ingredients together gently until the sugar is moistened. Place the saucepan over medium heat. Allow the mixture to come to a full boil, stirring occasionally until all the granulated sugar has completely dissolved. Once boiling, insert your candy thermometer into the syrup, making sure the tip does not touch the bottom or sides of the pan. From this point forward, resist the urge to stir the syrup. Stirring can introduce sugar crystals from the sides of the pan back into the liquid, leading to a grainy texture. Let the syrup cook undisturbed until the candy thermometer registers precisely 240°F (115°C). This temperature is known as the “soft-ball stage” and is critical for achieving the perfect marshmallow consistency – firm enough to hold its shape, yet wonderfully soft and chewy.
Step 4: The Magical Transformation: Whipping into Fluffy Perfection
Once your sugar syrup reaches 240°F, immediately remove it from the heat. With your stand mixer on low speed, carefully and slowly pour the hot sugar syrup in a thin, steady stream into the bloomed gelatin mixture in the mixer bowl. Be extremely cautious as the syrup is very hot. Once all the syrup has been added, gradually increase the mixer speed to high. Beat the mixture continuously for 10 to 15 minutes, or until it transforms into a very thick, glossy, and brilliantly white consistency. The mixture will increase significantly in volume and become incredibly fluffy. It’s ready when, upon removing the whisk, the mixture forms a thick ribbon that holds its shape for a few seconds before slowly sinking back into the bowl. This indicates proper aeration and structure. Finally, reduce the mixer speed to low, add the vanilla extract, and mix for just about 30 seconds to incorporate it thoroughly without deflating the marshmallow. Adding the vanilla at this stage preserves its delicate flavor and aroma.
Step 5: Setting the Stage for Sweetness
Working quickly, as the marshmallow mixture will start to set, transfer the sticky, cloud-like mixture into your prepared 9-inch square baking pan. You’ll notice it’s quite sticky, so for easier handling, lightly oil your rubber spatula or dampen your fingers with water. Use these to spread the marshmallow mixture evenly into all corners of the pan, creating a smooth and uniform top surface. Once spread, leave the pan uncovered at room temperature for a minimum of 4 hours, or ideally overnight. It needs this time to fully set and firm up, developing that characteristic marshmallow chewiness. Do not refrigerate, as the humidity can make them overly sticky.
Step 6: The Grand Finale: Cutting and Dusting Your Masterpiece
Once the marshmallow has completely set, generously dust your cutting board or a clean counter surface with confectioners’ sugar. Gently pull the edges of the marshmallow away from the sides of the pan with a spatula or your fingers, then carefully invert the pan to release the entire slab onto the sugared surface. Dust the top of the marshmallow slab generously with more confectioners’ sugar. Now for the cutting! Using a very sharp knife (or a pizza cutter for long, clean lines), cut the marshmallow into your desired shapes and sizes – classic squares are popular, but you can also use cookie cutters for fun shapes. After each cut, dip your knife or cutter into confectioners’ sugar to prevent sticking, wiping off any accumulated goo if necessary. As you cut the pieces, roll each side in the confectioners’ sugar to fully coat them. This final dusting is essential; it not only adds a lovely finish but, more importantly, prevents the individual marshmallow pieces from sticking together, keeping them perfectly distinct and ready for enjoyment.
Unleashing Your Creativity: Flavor Variations
While classic vanilla marshmallows are undeniably delicious, the beauty of homemade treats lies in the ability to customize them. Once you’ve mastered the basic recipe, the possibilities for flavor variations are endless! Experiment with these ideas to create your signature gourmet marshmallows:
- Citrus Zest: Add 1-2 teaspoons of finely grated lemon, orange, or lime zest along with the vanilla extract for a bright, refreshing zing.
- Coffee or Espresso: Dissolve 1-2 teaspoons of instant espresso powder or strong coffee granules in the hot sugar syrup for a sophisticated coffee-flavored marshmallow.
- Chocolate Marshmallows: Whisk in 1/4 cup of unsweetened cocoa powder into the sugar syrup along with the other dry ingredients before cooking. For an extra rich flavor, you can also melt 2-3 ounces of good quality dark chocolate into the marshmallow mixture along with the vanilla.
- Nutty Flavors: Replace vanilla extract with almond, hazelnut, or pistachio extract for a distinct, rich flavor.
- Spice Infusion: Add a pinch of cinnamon, nutmeg, or pumpkin pie spice to the sugar syrup during cooking for a warm, comforting twist, especially delightful in autumn.
- Fruity Fun: A few drops of natural fruit extracts (like raspberry or strawberry) can add a playful fruity note. Consider folding in finely chopped freeze-dried fruit for texture and intense flavor.
- Minty Fresh: Add a few drops of peppermint extract for a refreshing after-dinner treat, perfect with hot cocoa.
Serving Suggestions: Beyond S’mores and Hot Chocolate
Of course, homemade marshmallows are perfect companions for hot chocolate and essential for gourmet s’mores, but their versatility extends far beyond these classics. Get creative with how you enjoy your delightful creations:
- Gourmet Hot Chocolate: Place a large homemade marshmallow on top of a rich hot chocolate, and watch it slowly melt into a creamy, sweet cloud.
- Elevated S’mores: Toast them over a campfire or broiler with gourmet chocolate and artisanal graham crackers for an unforgettable experience.
- Dessert Topping: Cut into smaller pieces and sprinkle over ice cream, puddings, or fruit salads for an added sweet and chewy texture.
- Baking Ingredient: Incorporate them into brownies, cookies, or rice crispy treats for an extra layer of sweetness and chewiness. Marshmallow fudge is also a fantastic option!
- Edible Gifts: Package them in pretty bags with ribbons as thoughtful homemade gifts for friends and family.
- Coffee Enhancer: Drop a few smaller pieces into your morning coffee or latte for a sweet, comforting touch.
- Fruit Dips: Serve them alongside a fruit platter for dipping, especially delicious with berries or apple slices.
Storage Tips for Lasting Freshness
To keep your homemade marshmallows at their fluffy best, proper storage is key. Once cut and thoroughly coated in confectioners’ sugar, store them in an airtight container at room temperature. They generally stay fresh and delightful for up to two weeks. Avoid refrigerating them, as the moisture can cause them to become excessively sticky and lose their ideal texture. For longer storage, marshmallows can be frozen for up to two months in an airtight, freezer-safe container, separated by parchment paper to prevent sticking. Thaw them at room temperature before enjoying.
Troubleshooting Common Marshmallow Miseries
Even seasoned bakers encounter challenges. Here are solutions to some common issues you might face when making homemade marshmallows:
- Marshmallows are too sticky:
- Solution: Ensure you’ve used enough confectioners’ sugar for dusting the pan, cutting board, and coating the individual pieces. If they are still sticky after cutting, re-roll them in more confectioners’ sugar. Humidity can also play a role; try making them on a dry day.
- Marshmallows are too hard or dense:
- Solution: This usually means the sugar syrup was cooked past 240°F. Always use a reliable candy thermometer and remove the syrup from heat promptly once the target temperature is reached.
- Marshmallows are not fluffy enough or won’t set:
- Solution: The sugar syrup might not have reached 240°F, or the mixture wasn’t whipped long enough. Ensure your gelatin is fresh and properly bloomed. The whipping process is crucial for incorporating air and creating volume; don’t rush it.
- Marshmallows have a gritty texture:
- Solution: This can happen if the sugar crystallizes. Avoid stirring the sugar syrup once it starts boiling. You can also “wash down” the sides of the saucepan with a wet pastry brush early in the cooking process to prevent crystals from forming.
Your Journey to Marshmallow Mastery Begins!
Congratulations! You’ve just unlocked the secrets to crafting heavenly homemade marshmallows. This recipe offers a delightful blend of simplicity and sophistication, turning basic ingredients into an extraordinary treat that will impress and delight anyone who tastes them. The sheer satisfaction of watching simple sugar and gelatin transform into pillowy clouds of sweetness is truly rewarding. Whether you’re making them for a special occasion, as a thoughtful gift, or simply to indulge your own sweet cravings, these homemade marshmallows are a game-changer. So, gather your ingredients, fire up your mixer, and prepare to embark on a delicious journey into the world of confectionery perfection. Enjoy every fluffy, flavorful bite!