
Ultimate Guide to Cleaning Your Coffee Maker for Optimal Taste and Longevity
Do you remember the last time you gave your coffee maker a thorough cleaning? If your daily ritual involves brewing a fresh pot, chances are your machine is silently accumulating mineral deposits and coffee residue. Over time, these unseen culprits can drastically alter the taste of your beloved coffee, transforming a delightful morning pick-me-up into a bitter or bland disappointment. Beyond just flavor, neglecting your coffee maker can lead to unpleasant odors, slower brewing times, and even costly malfunctions due to clogs and damage to internal components. A clean machine isn’t just about good taste; it’s about extending the life of your appliance and ensuring every cup is as fresh and flavorful as intended.
RELATED: Looking for other creative coffee-related projects? Check out this unique guide: How to Make an Insect Repellent Coffee Candle.
Why Regular Coffee Maker Cleaning is Essential for Every Coffee Lover
Many coffee enthusiasts overlook the critical importance of regular cleaning, but it’s a practice that directly impacts your coffee’s quality and your machine’s health. The primary culprit behind poor-tasting coffee and machine inefficiency is mineral buildup, commonly known as limescale. This chalky deposit comes from hard water, which is present in most tap water supplies. Over time, these minerals accumulate on the heating elements and inside the water lines of your coffee maker, leading to several problems:
- Altered Coffee Flavor: Limescale can impart a metallic or sour taste to your coffee, masking its true aroma and richness. It prevents water from reaching the ideal brewing temperature, leading to under-extraction and a weak, unsatisfying cup.
- Reduced Brewing Efficiency: A thick layer of mineral buildup forces your machine to work harder to heat water, slowing down the brewing process. It can also partially or completely clog water pipes, making your coffee maker take longer to brew, or even stop functioning altogether.
- Unpleasant Odors and Mold Growth: Stagnant water and residual coffee oils provide a perfect breeding ground for mold, yeast, and bacteria. These microscopic organisms can produce foul odors and can be unhealthy to ingest, compromising the hygiene of your machine and the safety of your beverage.
- Shorter Machine Lifespan: Constant strain on the heating element due to limescale can lead to premature wear and tear, reducing the overall lifespan of your expensive appliance. Regular descaling protects these vital components, saving you money on repairs or replacements.
By regularly cleaning and descaling your coffee maker, you ensure that fresh, clean water is heated to the optimal temperature, flowing freely through residue-free pipes, and extracting the full, rich flavor from your coffee grounds. It’s a simple act that yields significant rewards.
How Often Should You Clean and Descale Your Coffee Machine?
For most daily users, a general rule of thumb is to descale your coffee maker every 1 to 3 months. If you live in an area with particularly hard water, or if you notice your coffee tastes off, brewing takes longer, or you see visible mineral deposits, you might need to clean it more frequently, perhaps once a month. Beyond descaling, a quick rinse of removable parts after each use and a thorough wash of the carafe and filter basket weekly will go a long way in preventing residue buildup and maintaining freshness.
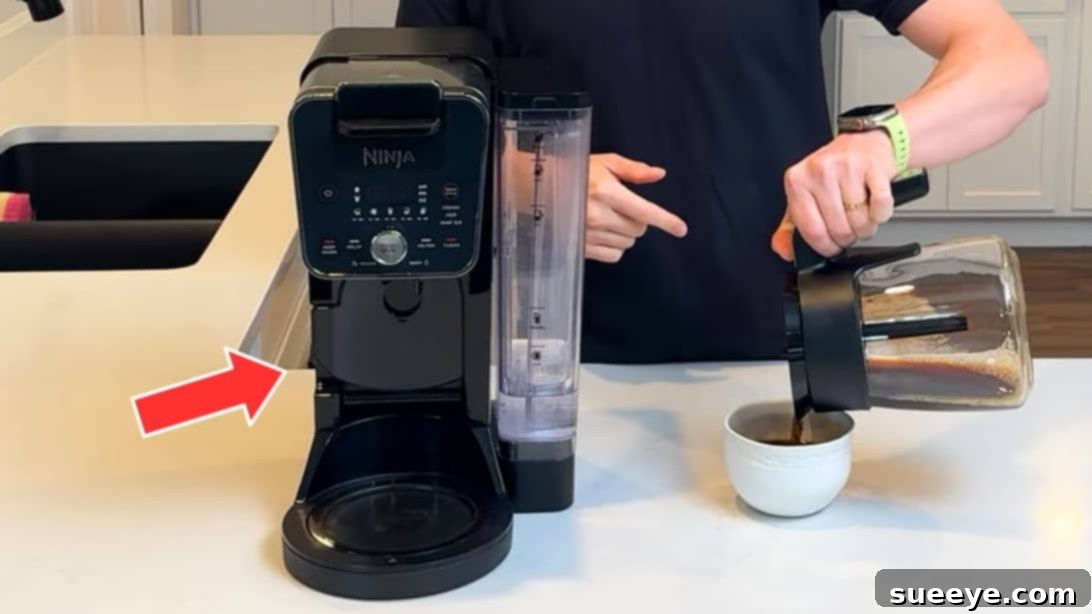
Ready to restore your coffee maker to its pristine condition? This video tutorial by Clean That Up offers an excellent visual guide to the best way to deep clean your machine. Follow along with our detailed steps below for a comprehensive cleaning experience.
Here’s another useful tip to enhance your coffee experience: Best Way to Make Instant Coffee Taste Good.
Comprehensive Step-by-Step Guide: How to Clean a Coffee Maker Effectively
Step 1: Prepare Your Coffee Maker – Empty and Rinse
Begin by ensuring your coffee maker is completely empty. Remove any used coffee grounds from the filter basket and discard them. It’s a good practice to give the filter basket and carafe a quick rinse with warm water to remove any loose coffee residue. This initial step clears the way for the descaling solution to work effectively on mineral deposits without interference from coffee oils.
Step 2: Choose and Prepare Your Descaling Solution
To effectively combat hard water buildup, you’ll need a descaling agent. You have two primary options, both highly effective:
Option A: White Vinegar
White distilled vinegar is a natural, affordable, and highly effective descaling agent due to its acetic acid content. To use vinegar, fill your coffee maker’s water reservoir approximately halfway with white vinegar. Then, fill the remaining half with cold, clean water. This creates a diluted solution that is strong enough to dissolve mineral deposits but gentle on your machine.
Option B: Commercial Coffee Maker Descaler
Alternatively, you can opt for a specialized commercial coffee maker descaler, such as Bar Keepers Friend Coffee Maker Descaler or similar products designed for this purpose. These solutions are formulated to be highly efficient in removing limescale and are often recommended by manufacturers. Follow the product’s instructions carefully. Typically, you’ll add about 8 ounces (or the recommended amount) of the descaler to the water tank, then fill the rest with cold water.
Step 3: Run the Descaling Cycle
Now it’s time to let the descaling solution work its magic. Most modern coffee machines come equipped with a dedicated “clean” or “descale” function. If your machine has this feature, simply press the button and allow it to run its programmed cleaning cycle. The machine will manage the process, often pausing to let the solution soak.
If your coffee maker does not have a specific clean function, you’ll need to run a manual descaling cycle:
- Set your coffee maker to brew the largest possible pot.
- Turn the machine on and let it run until about half of the descaling solution has brewed through and into the carafe.
- At this point, turn the machine off. This allows the hot descaling solution to sit inside the water reservoir and internal tubing, penetrating and dissolving stubborn mineral deposits. Let it sit and soak for at least 15 to 20 minutes. For heavily soiled machines, you might extend this soak time to 30 minutes or more.
- After the soaking period, turn the machine back on and allow the remaining descaling solution to complete its brewing cycle, running fully through the machine.
Step 4: Rinse Thoroughly to Remove All Traces of Cleaner
Once the descaling cycle is complete, it’s crucial to rinse your coffee maker thoroughly to eliminate any lingering traces of the descaling solution. Residue from vinegar or commercial cleaners can affect the taste of your coffee if not completely removed. Empty the thermo glass carafe, then fill the freshwater tank all the way to its maximum capacity with clean, cold water.
Run a full brewing cycle with just water. When finished, empty the carafe. You may need to repeat this rinsing process two to three more times, using fresh water each time, until the water running through the machine is perfectly clear and there’s no residual odor of vinegar or cleaner. This step is vital for ensuring your next cup of coffee tastes pure and free from any chemical aftertaste.
Step 5: Clean Removable Parts by Soaking
While the descaling solution tackles the internal components, it’s also important to clean the parts that come into direct contact with coffee grounds and brewed coffee. Carefully remove all detachable components of your coffee maker, such as the filter basket, carafe lid, and the carafe itself (if not already rinsed). Fill a sink or a large basin with warm water and add a small amount of mild dish soap. Submerge these removable parts in the soapy water and allow them to soak for about 15-30 minutes. Soaking helps to loosen stubborn coffee oils and residue, making them much easier to clean.
Step 6: Clean the Exterior of Your Coffee Machine
Before cleaning the exterior, always ensure the coffee machine is unplugged from the power outlet. This is a crucial safety precaution. For an effective and natural cleaning solution for the exterior surfaces, you can create a simple DIY mix: combine 1 cup of white vinegar, 1 cup of water, and 1 teaspoon of dish soap in a spray bottle. Shake gently to mix.
Spray this solution onto a non-scratch sponge or a clean cloth and gently scrub the exterior surfaces of your coffee maker, including the base, housing, and warmer plate. Pay special attention to any spills or stains. For rinsing, dampen a microfiber towel with clean water and wipe down all cleaned surfaces. The microfiber towel will effectively pick up any soap residue and leave the machine sparkling without streaks. For hard-to-reach crevices, use a cotton swab dipped in the cleaning solution.
Step 7: Wash and Dry Removable Parts Completely
After their soak, thoroughly wash the removable parts using a sponge or brush to scrub away any remaining coffee residue and grime. Rinse them meticulously under running water to ensure all soap is removed. It’s essential to let all parts air dry completely before reassembly. This prevents the growth of mold or mildew, especially in hard-to-reach areas. You can place them on a clean dish rack or towel.
Step 8: Reassemble Your Clean Coffee Maker
Once all parts are completely dry, carefully reassemble your coffee maker. Place the filter basket back into its housing, secure the carafe lid, and ensure the carafe is properly seated on the warming plate. Your coffee maker is now thoroughly cleaned, descaled, and ready to brew the freshest, most delicious coffee you’ve tasted in a while!
Essential Maintenance Tips for Long-Lasting Freshness and Performance
Beyond the deep cleaning process, incorporating a few simple habits into your daily routine can significantly extend the life of your coffee maker and ensure consistently great-tasting coffee:
- Daily Rinse: After each use, empty the coffee grounds and give the filter basket and carafe a quick rinse with warm water.
- Leave Lid Open: After brewing, leave the water reservoir lid open for a while to allow any residual moisture to evaporate. This helps prevent mold and mildew growth.
- Use Filtered Water: If possible, use filtered water instead of tap water. Filtered water contains fewer minerals, which slows down the rate of limescale buildup, reducing the frequency of descaling needed.
- Wipe Down Spills: Promptly wipe up any coffee spills on the exterior of the machine to prevent staining and stickiness.
Experience the Difference: The Best Way to Brew Your Coffee
A clean coffee maker is truly the best way to brew your coffee. By following this comprehensive guide, you’re not just performing a chore; you’re investing in the quality of your daily coffee experience and the longevity of your appliance. Eliminating mineral buildup and coffee residue ensures that every cup is free from off-flavors, brewed at the optimal temperature, and delivers the full, rich aroma and taste that you expect. Make regular cleaning a part of your coffee ritual, and you’ll be rewarded with consistently excellent coffee, morning after morning. Enjoy your perfectly brewed cup!