
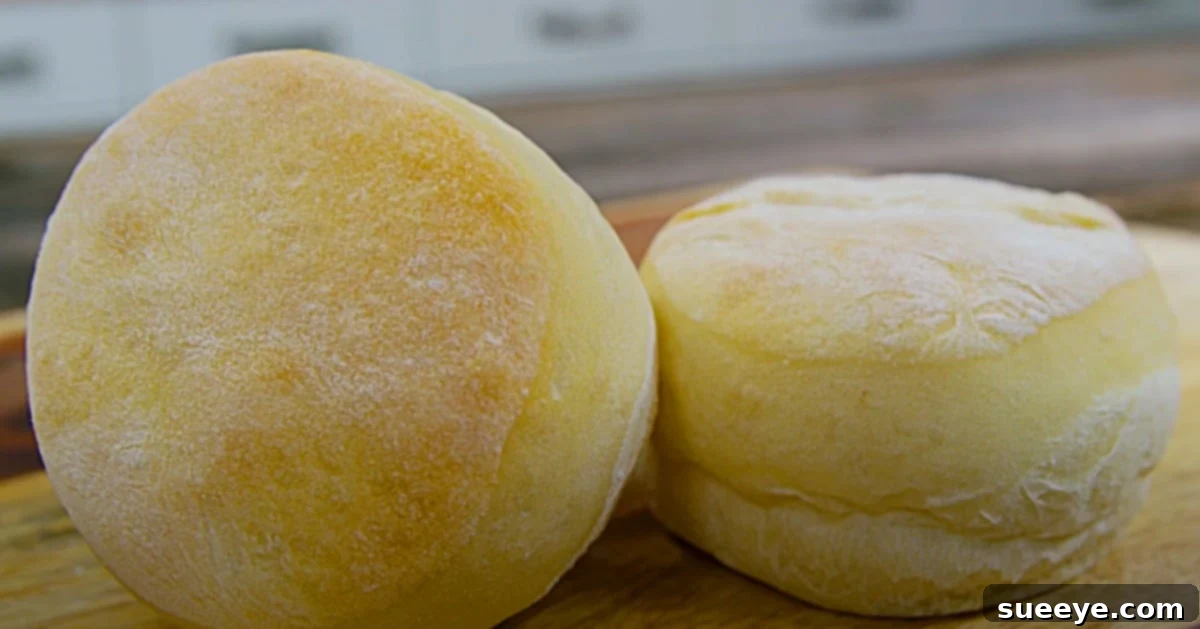
Grandma’s Secret: Baking Authentic 1930s Depression-Era Potato Buns from Scratch
There’s something profoundly comforting about the aroma of freshly baked bread. For many, it evokes cherished memories of family kitchens, warm gatherings, and the simple joy of homemade goodness. When I first encountered this authentic 1930s-style potato buns recipe, it immediately brought to mind my own grandmother, her calico apron, and the unwavering dedication she put into feeding her family with love and resourcefulness. These aren’t just any dinner rolls; they are a delicious echo of a bygone era, perfectly sized and boasting a texture that is both wonderfully soft and satisfyingly chewy. Whether you’re planning a cozy family dinner or preparing an elaborate buffet, these old-fashioned potato buns are an exceptional choice, transforming any meal into a memorable feast. Imagine them as the perfect foundation for gourmet sliders, piled high with tender brisket or succulent steak – a true culinary delight.
A Taste of History: The Enduring Appeal of Depression-Era Recipes
The 1930s were a challenging time, marked by economic hardship and the Great Depression. Yet, out of necessity, a remarkable spirit of ingenuity flourished in home kitchens across America. Recipes from this era, like these potato buns, are a testament to the resourcefulness and creativity of cooks who stretched every ingredient to its fullest potential. Potatoes, being a staple and economical crop, became a hero ingredient in countless dishes, including bread. Their inclusion in bun recipes wasn’t just about saving money; it was about enhancing the bread itself. Mashed potatoes add an incredible amount of moisture and tenderness to dough, resulting in a softer crumb and a bun that stays fresh longer – a significant advantage when food preservation was paramount. These recipes were designed for larger families, where every household member often contributed to the meal preparation, and a basic understanding of baking was a given. They often assumed a level of culinary knowledge that modern recipes might explicitly detail, a charming reminder of simpler times when home cooking was a fundamental life skill.
Baking these potato buns is more than just following a recipe; it’s an opportunity to connect with culinary history. It’s a chance to appreciate the wisdom passed down through generations and to savor the flavors that provided comfort and sustenance during difficult times. Each bite carries a story, a legacy of resilience and heartfelt home cooking. Embracing these vintage recipes allows us to recreate those nostalgic moments, bringing a piece of the past into our modern kitchens.
The Magic of Potatoes in Baking: Why They Make the Best Buns
What makes potato buns so incredibly special? The secret lies in the humble potato. When incorporated into bread dough, mashed potatoes contribute several remarkable qualities that elevate the final product far beyond what a typical flour-only bun can achieve. First and foremost, potatoes add an unparalleled level of moisture to the dough. This extra moisture ensures a wonderfully soft and tender crumb, making each bun melt-in-your-mouth delicious. This isn’t just about initial softness; the moisture also helps the buns stay fresh and soft for an extended period, a practical benefit that was highly valued in the 1930s and remains a delightful advantage today.
Beyond moisture, potatoes contribute to the texture and structure of the buns. The starches in the potato gelatinize during baking, creating a unique, almost velvety crumb that is incredibly satisfying. This also lends a subtle sweetness and earthy flavor that complements a wide range of meals, from savory roasts to sweet spreads. The dough itself becomes more pliable and easier to work with, making the baking process a true pleasure. For anyone looking to bake exceptionally soft, flavorful, and long-lasting rolls, incorporating mashed potato into the recipe is a game-changer. It’s a simple addition that yields truly extraordinary results.
Recipe for Authentic 1930s Potato Buns from Scratch
Recreating these vintage potato buns is a rewarding experience. While the original recipes often assumed a lot, we’ll guide you through each step to ensure perfect results every time. These measurements are for a generous batch, perfect for feeding a family or a gathering.
Ingredients:
- 2 tablespoons lard (or vegetable shortening for an alternative)
- 1 cup hot mashed potato (ensure it’s smooth, without lumps)
- 2 tablespoons granulated sugar
- 1 teaspoon salt
- 2 large eggs, lightly beaten
- 5 cups of warm water (approx. 105-115°F or 40-46°C)
- 1 compressed yeast cake (equivalent to approximately 2 teaspoons active dry yeast or 2 ¼ teaspoons instant yeast)
- 6 cups of all-purpose flour (plus more for dusting)
Detailed Directions:
Making these authentic potato buns is a delightful journey, blending classic techniques with a touch of modern precision. Follow these steps carefully to achieve perfectly soft and flavorful results:
- Prepare the Potato Base: In a large mixing bowl, combine the hot mashed potato, lard (or shortening), sugar, and salt. Stir vigorously until the lard has melted and all ingredients are well combined. The heat from the mashed potato will help melt the fat and dissolve the sugar and salt. Set this mixture aside to cool slightly until it’s lukewarm (around 100-110°F or 38-43°C). This is crucial; if the mixture is too hot, it will kill the yeast.
- Activate the Yeast: In a separate small bowl, dissolve the yeast in the warm water. If using active dry yeast, let this mixture sit for 5-10 minutes until it becomes foamy, indicating the yeast is active. If using instant yeast, you can proceed directly to the next step, but a brief rest can still be beneficial.
- Combine Wet Ingredients: Once the potato mixture is lukewarm, whisk in the two lightly beaten eggs. Then, pour in the activated yeast mixture. Stir everything together until it is thoroughly combined and uniform.
- Add Flour Gradually: Begin adding the flour, one cup at a time, to the wet ingredients. Mix with a sturdy spoon or a dough hook on a stand mixer. Continue adding flour until a soft, shaggy dough forms. It might still be a bit sticky, which is perfectly normal for a potato dough.
- Knead the Dough: Turn the dough out onto a lightly floured surface. Knead for 8-10 minutes until the dough becomes smooth, elastic, and less sticky. If using a stand mixer with a dough hook, knead on medium speed for 6-8 minutes. The dough should spring back slowly when poked.
- First Rise (Bulk Fermentation): Lightly grease a clean large bowl with a little oil or cooking spray. Place the kneaded dough in the bowl, turning it once to coat the entire surface. Cover the bowl with plastic wrap or a clean kitchen towel and let it rise in a warm, draft-free place for 1.5 to 2 hours, or until it has doubled in size.
- Shape the Buns: Once the dough has doubled, gently punch it down to release the air. Turn the dough out onto a lightly floured surface. Divide the dough into equal portions, typically weighing around 2-3 ounces each, to create uniform buns. Shape each portion into a smooth, tight ball. You can do this by pulling the edges of the dough under itself and rolling it against the countertop to create surface tension.
- Second Rise (Proofing): Line a baking sheet with parchment paper. Arrange the shaped buns on the prepared baking sheet, leaving some space between them to allow for expansion. Cover the buns loosely with plastic wrap or a kitchen towel and let them rise again in a warm place for another 30-45 minutes, or until they look visibly puffy and almost doubled in size.
- Bake the Buns: Preheat your oven to 350°F (175°C). Carefully place the baking sheet with the risen buns into the preheated oven. Bake for 12 to 14 minutes, or until the buns are golden brown on top and sound hollow when tapped on the bottom.
- Cool and Serve: Once baked, transfer the potato buns to a wire rack to cool slightly. Serve them warm with butter, or allow them to cool completely before storing.
Visual Guidance: A Nodal Point to History and Learning
For those who appreciate a visual walkthrough and historical insights, we highly recommend the excellent potato buns tutorial by Glen & Friends Cooking on YouTube. In this video, you’ll be guided step-by-step through the entire process of making these delicious potato buns, from creating the dough from scratch to rolling it out, cutting the buns with a biscuit cutter, and baking them to perfection. Glen not only demonstrates the techniques beautifully but also shares his vintage cookbook where this very recipe originated. His delightful anecdotal stories about the “days of old” and the assumed knowledge of cooks in the 1930s (like implicitly knowing to add flour!) add a wonderful layer of charm and historical context to the baking experience. Watching his video is not just instructive; it’s genuinely entertaining and full of heart.
Tips for Perfect Potato Buns Every Time
Achieving bakery-quality potato buns at home is easier than you think with a few key tips:
- Smooth Mashed Potatoes: Ensure your mashed potatoes are completely smooth and lump-free. Lumps can create inconsistencies in the dough’s texture. A potato ricer or a very thorough mashing will help.
- Temperature Control: Yeast is sensitive to temperature. Ensure your potato mixture is lukewarm, not hot, before adding the yeast. Similarly, provide a warm, draft-free environment for rising to encourage proper fermentation.
- Don’t Over-Flour: While you need enough flour for a workable dough, adding too much can result in dry, dense buns. Err on the side of a slightly sticky dough, as potatoes contribute a lot of moisture.
- Kneading is Key: Proper kneading develops the gluten, giving the buns their structure and chewiness. Knead until the dough is smooth and elastic.
- Gentle Handling: After the first rise, handle the dough gently to avoid deflating it too much. This helps maintain the airy texture.
- Proper Rising: Don’t rush the rising process. A slow, steady rise yields more flavorful and tender buns. Trust the dough to tell you when it’s ready (doubled in size).
- Check for Doneness: The buns should be golden brown and sound hollow when tapped on the bottom. An internal temperature of about 200-210°F (93-99°C) indicates they are fully baked.
- Storage: Store cooled potato buns in an airtight container at room temperature for 2-3 days, or freeze them for longer storage (up to 3 months). Reheat gently for fresh-from-the-oven taste.
Serving Suggestions and Creative Variations
These versatile 1930s potato buns are truly a culinary chameleon, adapting beautifully to a myriad of serving styles:
- Classic Dinner Rolls: Serve them warm with a generous smear of butter, allowing the natural flavors of the bread to shine. They are the perfect accompaniment to any comfort food meal.
- Gourmet Sliders: Their ideal size makes them phenomenal for sliders. Fill them with slow-cooked pulled pork, smoky brisket, thinly sliced roast beef, or even mini cheeseburger patties. Add your favorite toppings for a delightful party treat.
- Breakfast Sandwiches: Elevate your breakfast game! These buns are fantastic for holding scrambled eggs, bacon, sausage, or cheese, making for a hearty and satisfying start to your day.
- Picnic Perfection: Pack them as small sandwiches for picnics or lunchboxes. They hold up well and are wonderfully tender, making any simple filling feel gourmet.
- Sweet Potato Variation: For a slightly different twist, you could experiment with using sweet mashed potatoes in place of regular potatoes, adding a subtle sweetness and different nutritional profile.
- Herbaceous Infusion: Incorporate fresh chopped herbs like rosemary, thyme, or chives into the dough during the kneading stage for an aromatic savory bun.
- Cheese Lovers: Fold in some shredded cheddar or parmesan cheese during the final stages of kneading for cheesy potato buns that are irresistible.
Embrace the Joy of Homemade Baking
There’s an undeniable satisfaction that comes from baking bread from scratch, and these 1930s potato buns offer that in spades. They’re not just a recipe; they’re a connection to history, a lesson in resourcefulness, and a delicious way to bring warmth and comfort to your table. The soft, tender texture and subtle sweetness make them an instant family favorite, and their versatility ensures they’ll be a staple in your kitchen for years to come. So, gather your ingredients, clear your counter, and embark on this delightful baking adventure. Your taste buds, and perhaps even your inner grandma, will thank you. I genuinely can’t wait to bake these for my next gathering and share a taste of history with everyone.