
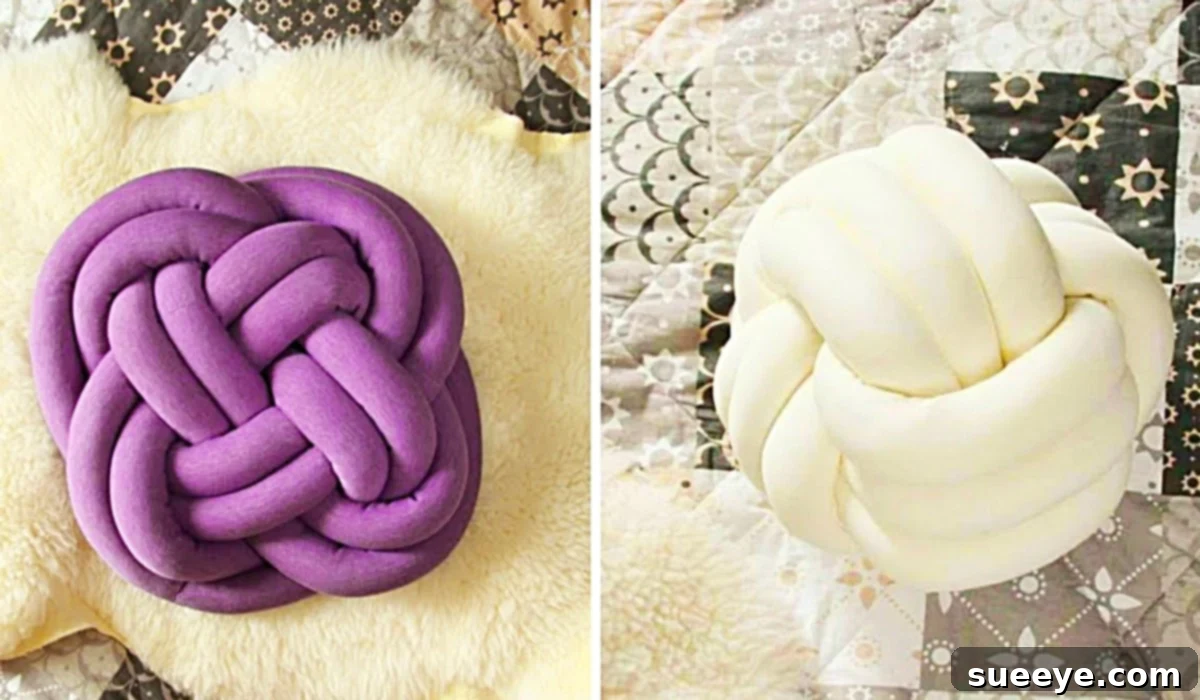
Mastering the Art of DIY Knot Pillows: Transform Your Space with Unique Fabric Creations
Embarking on a new chapter in a new home often comes with the exciting challenge of transforming empty spaces into inviting havens. When I recently settled into my new house, the prospect of decorating an additional living area, separate from my existing den, filled me with inspiration. My vision for this extra space included an abundance of comfort and unique style, starting with a statement sofa and an array of soft furnishings that truly reflect my personality.
It was during this creative quest that I stumbled upon an incredible DIY knot pillow video tutorial by Amy Family DIY on YouTube. The moment I watched the demonstration, I knew these charming, architectural pillows were the perfect addition to my new living room. The concept seemed surprisingly straightforward, requiring only a few readily available and affordable supplies. This project promised not just a decorative item, but a unique, handmade accent that would infuse character and warmth into my home. The beauty of these knot pillows lies in their modern aesthetic, offering a playful yet sophisticated touch to any interior design scheme.
Why DIY Knot Pillows Are a Must-Have for Your Home
Knot pillows have rapidly ascended in popularity within the realm of interior design, becoming a favorite for those who appreciate contemporary aesthetics with a touch of playful artistry. These unique cushions are more than just functional pillows; they are sculptural accents that add depth, texture, and visual interest to any room. Here’s why incorporating DIY knot pillows into your decor is an excellent idea:
- Unparalleled Customization: By making them yourself, you have complete control over the fabric choice, color, texture, and even the size and complexity of the knot. This allows you to perfectly match them to your existing decor or introduce a bold contrast.
- Budget-Friendly Decor: High-end knot pillows can be quite expensive in boutiques. Crafting your own significantly reduces the cost, allowing you to achieve a luxurious look without breaking the bank.
- Unique Aesthetic Appeal: Unlike traditional cushions, knot pillows stand out. Their intricate, three-dimensional form creates an immediate focal point, drawing the eye and sparking conversation. They offer a modern, minimalist yet cozy vibe.
- Versatility in Styling: Whether placed on a sofa, armchair, bed, or even as a floor cushion, knot pillows adapt seamlessly to various settings. They can complement a range of decor styles, from Scandinavian to bohemian, and contemporary to eclectic.
- Rewarding Creative Outlet: Engaging in a DIY project provides a sense of accomplishment and the satisfaction of knowing you’ve created something beautiful with your own hands. It’s a wonderful way to express your personal style.
These reasons, combined with the relative ease of construction, make DIY knot pillows an irresistible project for anyone looking to refresh their living space with a distinct, handmade charm.
Essential Materials for Crafting Your Own Knot Pillow
One of the most appealing aspects of this DIY project is the simplicity and accessibility of the required materials. You won’t need an extensive array of specialized tools or costly fabrics. With just a few key items, you’ll be well on your way to creating stunning decorative accents. Here’s a detailed look at what you’ll need:
- A Yard of Stretchy Fabric: The choice of fabric is crucial for achieving the distinctive knotted look. Stretchy fabrics like jersey knit, spandex blends, or even soft fleece work exceptionally well. These materials allow for easy manipulation and create a plush, comfortable feel. A yard (approximately 0.91 meters) is a good starting point for a standard-sized knot pillow, but you might need more for larger designs or if you plan to make multiple pillows. Consider fabrics that are soft to the touch and offer a good amount of elasticity to prevent tearing during the stuffing and knotting process.
- A Ruler or Yardstick: Precision is key when cutting your fabric strips to ensure a uniform and aesthetically pleasing finished product. A long ruler or a yardstick will help you achieve straight, even cuts.
- Thread: Choose a high-quality polyester thread that matches the color of your fabric as closely as possible. This will ensure that your seams are inconspicuous and durable.
- A Sewing Machine: While it is technically possible to hand-sew these pillows, a sewing machine will significantly speed up the process and provide stronger, more consistent seams. If you’re new to sewing, this project is a fantastic way to practice basic straight stitching.
- A Pair of Sharp Fabric Scissors: Invest in a good pair of fabric scissors dedicated solely to textiles. This will ensure clean cuts and prevent fraying, making the entire process smoother.
- Your Favorite Pillow Stuffing (Poly-fil or Dacron): This is what gives your knot pillow its plump, sculptural form. Poly-fil (polyester fiberfill) or Dacron stuffing is lightweight, hypoallergenic, and provides excellent loft. You’ll need a generous amount to ensure your fabric tubes are densely packed, allowing the knot to hold its shape effectively.
Having these materials ready before you begin will streamline your crafting experience and allow you to focus on the creative process of bringing your knot pillow to life.
Step-by-Step Guide to Crafting Your DIY Knot Pillow
Creating these distinctive knot pillows is a rewarding process that combines simple sewing techniques with a creative approach to shaping. Following the excellent guidance from Amy Family DIY on YouTube, you’ll discover just how accessible this project is. Here’s a detailed breakdown of the steps:
Step 1: Preparing Your Fabric Strips
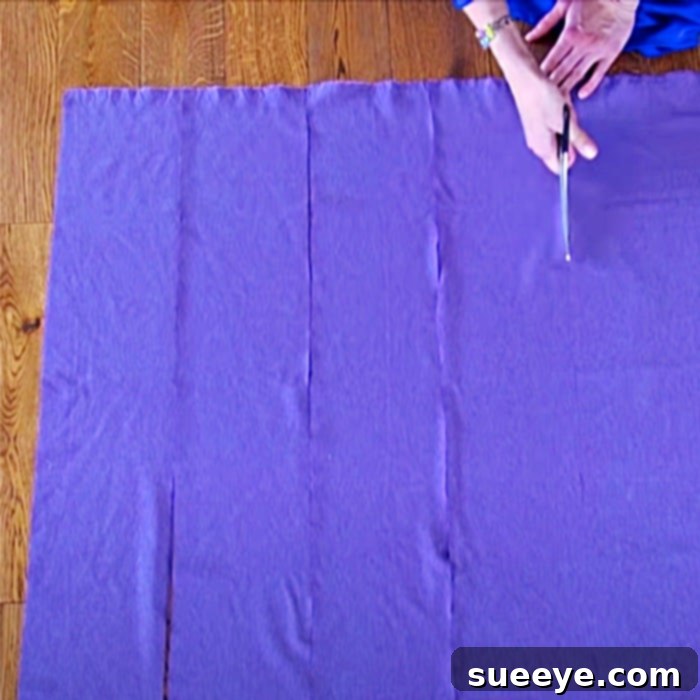
The foundation of your knot pillow begins with carefully prepared fabric strips. First, ensure your fabric is pre-washed and ironed, especially if it’s a new material, to prevent shrinkage later. Using your ruler or yardstick and sharp fabric scissors, you will need to cut your stretchy fabric into several long strips. The exact dimensions will depend on the desired size and thickness of your final pillow. For a standard knot pillow, strips approximately 6-8 inches wide and as long as your fabric allows (often the full width of the fabric after cutting into sections) are a good starting point. Aim for consistency in width to ensure your tubes are uniform.
Step 2: Sewing the Fabric into Tubes
Once your strips are cut, you’ll transform them into continuous tubes. Fold each strip lengthwise, right sides together, and pin along the raw edge. Using your sewing machine, sew a straight seam down the entire length of each strip, creating a long tube. A typical seam allowance of about 1/2 inch (1.25 cm) works well. After sewing each strip into a tube, you will then attach these tubes end-to-end. Overlap the ends slightly, right sides together, and sew them securely to create one very long, continuous tube. This extended length is essential for forming the impressive knots later on.
Step 3: Turning and Stuffing the Tube
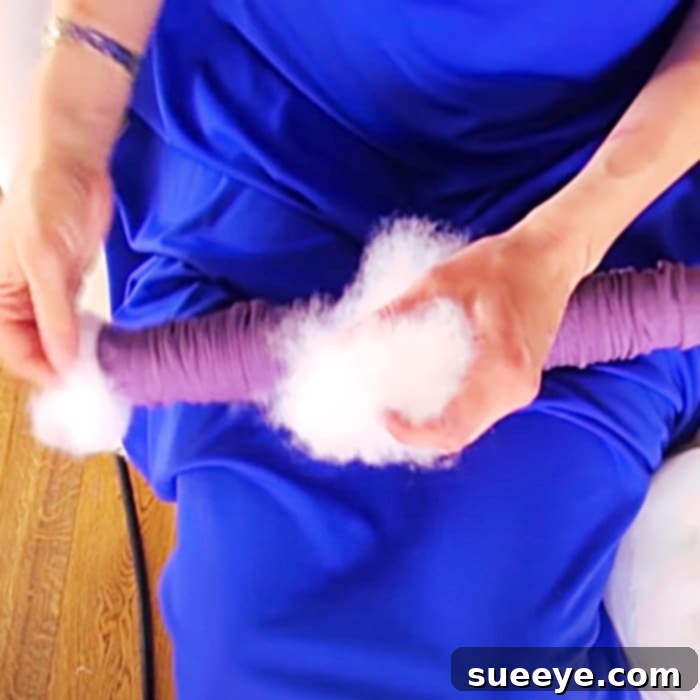
With your long fabric tube sewn, the next step is to turn it right side out. This can be done using a safety pin or a tube turner tool for longer pieces. Once turned, the right side of your fabric will be visible. Now comes the satisfying part: stuffing! Begin to feed your chosen pillow stuffing (Poly-fil or Dacron) into the continuous tube. The key here is to stuff evenly and firmly, but not so tightly that the fabric loses its stretch or ability to knot. You want the tube to be plump and smooth, without any lumpy areas. Continue stuffing until the entire length of the tube is filled to your desired density, leaving a small section at each end unstuffed for closing.
Step 4: The Art of Knotting Your Tube
This is where your creation truly takes shape! With your fully stuffed, continuous tube, you are now ready to form the knot. While there are many ways to knot, a popular and effective method is to create a simple, yet visually striking, decorative knot. Here’s a common approach:
- Lay your stuffed tube flat on a clean surface.
- Take one end of the tube and form a loose loop or “U” shape.
- Bring the other end of the tube and weave it through and around this initial loop. Imagine forming a simplified pretzel or a basic overhand knot, but with a long, stuffed tube.
- Gently tighten and adjust the knot, ensuring that the folds are even and the desired shape is achieved. You can create a simple one-tier knot, or, with a longer tube, weave it around itself multiple times to create a more intricate, multi-layered design resembling a monkey’s fist or a Celtic knot.
- Experiment with different tightness levels until you achieve a visually appealing and stable form. The elasticity of the fabric will help in shaping.
Step 5: Finishing Touches
Once you are happy with the knot’s shape and density, you’ll need to secure the ends of your fabric tube. Carefully tuck the raw edges of the unstuffed ends into the body of the knot, or neatly sew them closed by hand with a hidden stitch. The goal is to make the ends as invisible as possible, blending seamlessly into the pillow’s design. Give your knot pillow a final fluff and shape, ensuring all parts of the knot are evenly distributed and the pillow feels firm and well-formed. Your modern, architectural knot pillow is now complete!
Customizing Your Knot Pillows: Beyond the Basic
While the basic knot pillow design is wonderfully charming, the true magic of DIY lies in customization. Here are several ways you can personalize your knot pillows to perfectly match your aesthetic:
- Explore Fabric Textures and Patterns: Don’t limit yourself to plain jersey knit. Consider velvet for a luxurious feel, faux fur for a cozy touch (though it requires a different sewing approach), or even patterned knits for a more eclectic look. Just ensure the fabric retains some stretch for optimal knotting.
- Varying Sizes and Scales: Experiment with different strip widths and lengths to create a collection of knot pillows in various sizes. A smaller, tighter knot can act as a delicate accent, while a large, plush one can serve as a floor cushion or a dominant sofa statement.
- Advanced Knotting Techniques: Once comfortable with the basic knot, research more complex knots like the Celtic knot, figure-eight knot, or even a woven lattice pattern. Longer, thinner tubes will allow for more intricate designs.
- Color Play: Use contrasting colors for different sections of the same knot (if you’re comfortable sewing multiple tubes together), or create a harmonious collection of knot pillows in varying shades of the same color family for a sophisticated ombré effect.
- Embellishments (Subtle): For a truly unique touch, consider subtle embellishments after the pillow is knotted. Think small, decorative stitching, or perhaps a few carefully placed beads or fabric buttons (ensure they are securely attached and do not interfere with comfort).
Styling Your Handmade Knot Pillows
Once your beautiful knot pillows are complete, it’s time to integrate them into your home decor. Their unique shape makes them incredibly versatile:
- Sofa & Armchair Accents: Place one or two knot pillows on your sofa or armchair to break up the linearity of traditional cushions. They add a sculptural element and an instant pop of modern design.
- Bedroom Elegance: Drape a knot pillow on your bed among standard pillows for an unexpected, chic touch. It can provide a focal point or complement your bedding texture.
- Floor Cushions: Larger knot pillows can serve as stylish and comfortable floor cushions in a reading nook, child’s room, or informal living space.
- Mix and Match: Combine your knot pillows with other throw pillows of varying textures, shapes, and sizes. A mix of smooth velvet, chunky knit, and your unique knot pillow creates a visually rich and inviting arrangement.
- Seasonal Refresh: Easily swap out fabric colors to reflect the seasons—bright pastels for spring, vibrant hues for summer, warm tones for autumn, and deep jewel tones for winter.
Maintenance and Care for Your Knot Pillows
To ensure your DIY knot pillows remain beautiful and fresh, proper care is essential. Generally, most stretchy fabrics used for these pillows can be machine washed on a gentle cycle with cold water. It’s advisable to place them in a laundry bag to protect the knot’s integrity. Tumble dry on low heat or air dry to prevent shrinking or damage to the stuffing. Always check the specific care instructions for your chosen fabric before washing.
Conclusion: A Touch of Handmade Modernity for Your Home
The journey of transforming a simple yard of fabric into a stylish, sculptural knot pillow is incredibly rewarding. Not only do these handmade creations offer an affordable way to inject modern design into your living space, but they also provide a wonderful opportunity for creative expression. As I look at my new living room, adorned with these unique, architectural accents, I’m reminded of the personal touch and satisfaction that DIY projects bring. They truly elevate a house into a home, making every corner reflect a piece of your own artistry. So, gather your materials, follow these steps, and unleash your inner designer – your living space (and your creative spirit) will thank you!