
DIY Jewelry Organizer: Transform Clutter into a Chic Display
Are your beautiful necklaces tangled in a drawer? Do you spend precious minutes searching for matching earrings every morning? If so, you’re not alone! The struggle to keep jewelry organized is a common one, often leading to damaged pieces, frustrating searches, and an overall sense of clutter. But what if there was a simple, elegant, and incredibly satisfying solution that you could create yourself?
Imagine stumbling upon a gorgeous, custom-made jewelry organizer online, perhaps on a handcrafted marketplace like Etsy, only to find it sold out at a premium price of $75. This scenario isn’t just a fantasy; it’s a testament to the high demand for stylish and functional jewelry storage. This realization sparked an idea: why not create my own? And perhaps, even turn this creative endeavor into a small income stream? DIY projects like this aren’t just about saving money; they’re about unleashing your creativity and crafting something uniquely yours.
The Universal Jewelry Dilemma: From Baubles to Bedlam
For years, my jewelry collection suffered from a lack of proper organization. While my fine pieces were safely tucked away in their designated boxes, my vibrant costume jewelry had staged a full-scale takeover of my bathroom. Necklaces were strewn across my counter, bracelets coiled in a forgotten bowl, and earrings perpetually playing hide-and-seek within my linen closet. This disarray wasn’t just unsightly; it made choosing accessories a chore rather than a delight. The simple act of getting ready felt complicated by the sheer chaos of my collection.
The need for a better system became increasingly apparent. Every time I opened a drawer, I was met with a jumbled mess of chains, pendants, and charms. Not only did this make it difficult to find what I was looking for, but it also increased the risk of damage to delicate pieces. Tangled chains are a common annoyance, often leading to broken clasps or stretched links. I knew there had to be a more effective, and aesthetically pleasing, way to store and display my cherished accessories.
Why Choose a DIY Jewelry Organizer?
The journey towards an organized jewelry collection often begins with inspiration. For me, it was witnessing a friend’s ingenious solution: she repurposed an old picture frame by fitting it with chicken wire to create a rustic, yet effective, necklace holder. This simple, elegant idea was the exact catalyst I needed to embark on my own organizational adventure.
Before diving into the project, I dedicated time to online research. I scoured countless images and tutorials for jewelry organizers, trying to pinpoint the perfect design that would not only look beautiful but also accommodate my extensive collection. My primary concern was space – I have a lot of necklaces, and I worried a framed organizer wouldn’t offer enough room for all my “baubles.” It was during this research that I stumbled upon a tutorial that perfectly captured my vision, inspiring me to create a large, ornate jewelry display that truly stood out.
Cost-Effectiveness and Personalization
One of the most compelling reasons to opt for a DIY jewelry organizer is the significant cost savings. Ready-made organizers, especially those that are both stylish and functional, can be surprisingly expensive. By repurposing an old picture frame and adding a few inexpensive materials, you can create a high-quality display for a fraction of the retail price. Moreover, a DIY approach allows for unparalleled personalization. You get to choose the frame style, the paint color, the backing material, and the type of hooks, ensuring the final product perfectly matches your home decor and personal aesthetic.
Unleash Your Creativity and Enjoy the Process
Crafting your own jewelry holder is more than just a practical project; it’s a creative outlet. From hunting for the perfect vintage frame at a thrift store to selecting the ideal shade of spray paint, every step offers an opportunity for self-expression. The process itself can be incredibly rewarding, providing a sense of accomplishment that comes from creating something beautiful and functional with your own hands. It’s a chance to transform an ordinary object into a unique piece of art that also serves a purpose.
A Thought on Sustainability
Repurposing an old frame is also an eco-friendly choice. Instead of buying new, you’re giving an existing item a new lease on life, contributing to a more sustainable lifestyle. This adds another layer of satisfaction to your DIY project, knowing you’ve created something beautiful while also being kind to the environment.
Designing Your Dream Display: Style & Materials
The beauty of a DIY jewelry organizer lies in its adaptability. You can tailor every element to suit your taste and needs. My vision centered around an elegant, ornate frame, which I fortunately discovered at a local thrift store. It was absolutely perfect – large enough to hold my numerous necklaces and boasting intricate details that would add a touch of sophistication to my space. This find truly ignited my excitement for the project!
Choosing Your Frame: The Foundation
The frame is the cornerstone of your jewelry organizer. Whether you opt for a grand, ornate design from a thrift store, a sleek modern frame, or a simple, rustic one, ensure it’s sturdy and visually appealing. Larger frames are ideal for extensive collections, offering ample space for necklaces to hang freely without tangling. Consider the frame’s material as well – wood, metal, or even plastic can be transformed with the right paint.
Selecting the Perfect Backing Material
The material you choose for the frame’s backing dictates both the aesthetic and functionality of your organizer. Each option offers unique benefits:
Fabric-Covered Board: Elegant and Versatile
For a soft, elegant look, a piece of foam core or thin plywood covered with fabric is an excellent choice. You can select any fabric pattern or color to match your room. Secure the fabric tightly around the board using a staple gun or strong adhesive. This option provides a smooth surface for hooks and can be padded slightly for a plush feel.
Pegboard: Ultimate Versatility
If you have a very large collection or anticipate needing to rearrange items frequently, pegboard is an outstanding option. It allows for flexible placement of various hooks, enabling you to customize your layout for necklaces, bracelets, and even earrings. It offers an industrial or craft-room aesthetic that can be softened with paint.
Cork Board: Simple & Effective
Cork board is incredibly easy to work with and perfect for pinning lightweight items or using pushpins for earrings and rings. It’s ideal for a more casual or minimalist look and can be covered with fabric if you prefer a different texture or color.
Chicken Wire: Rustic Charm
As my friend demonstrated, chicken wire offers a wonderfully rustic and practical solution. It’s excellent for hanging hook-style earrings and can also support lightweight necklaces. For this option, ensure the wire is securely fastened to the back of the frame, and consider painting it to match or complement your frame for a cohesive look.
Hooks and Knobs: The Functional Flourish
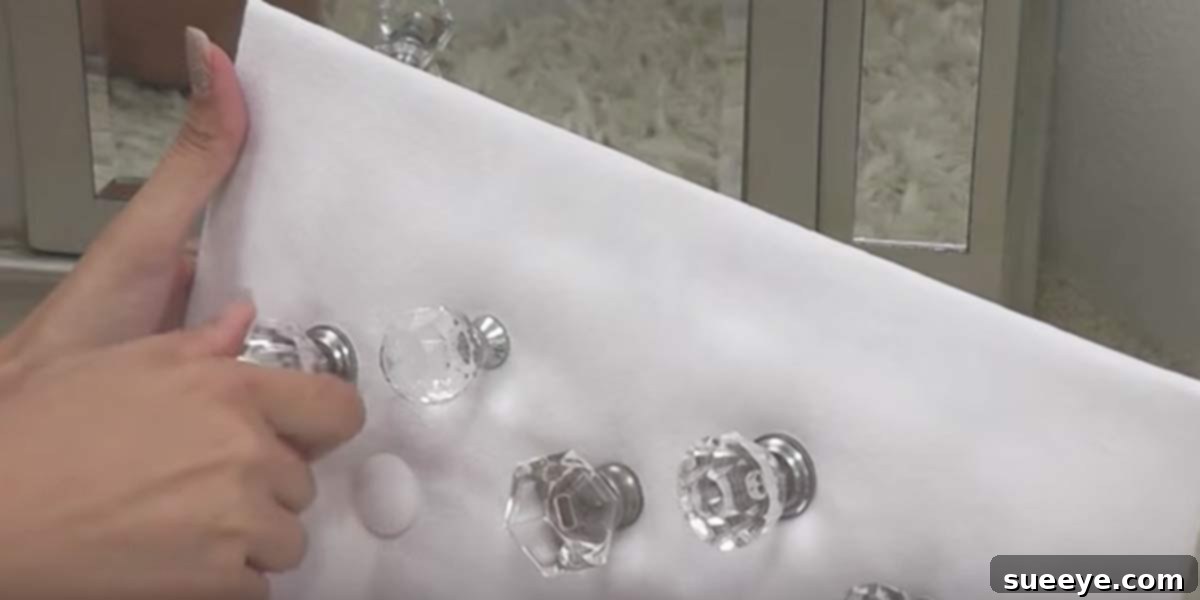
The final touch, and arguably the most exciting, is selecting the hooks or knobs from which your jewelry will hang. I knew I simply had to have some decorative glass knobs, and I was thrilled to find the perfect ones at Hobby Lobby. These not only serve a practical purpose but also add a significant decorative element to the organizer, transforming it into a statement piece. Other options include simple cup hooks for a clean look, or more elaborate cabinet pulls for a vintage feel. Consider the weight of your jewelry when choosing hooks; sturdier knobs are better for heavier necklaces.
Step-by-Step Guide: Crafting Your Custom Necklace Holder
With your materials gathered, it’s time to bring your vision to life. This project is surprisingly straightforward and can be completed in a weekend, allowing for drying times.
Materials You’ll Need:
- An old picture frame (ensure it’s sturdy and clean)
- Spray paint (primer + desired color, suitable for your frame material)
- Your chosen backing material (fabric, pegboard, cork, or chicken wire)
- Small piece of thin plywood, foam core, or cardboard (if using fabric backing)
- Decorative knobs, cup hooks, or small cabinet pulls
- Tools: Screwdriver, staple gun (with staples), scissors, measuring tape, pencil, safety glasses, drop cloth/newspaper
Step 1: Frame Preparation
Begin by carefully disassembling your frame. Remove any existing glass, backing board, or picture hangers. Clean the frame thoroughly to remove dust and grime. If your frame has a glossy finish or imperfections, lightly sand it to create a surface for the paint to adhere to. If it’s a very old frame, ensure it’s structurally sound; reinforce any loose joints with wood glue if necessary.
Step 2: Transformative Painting
Lay your frame on a drop cloth or newspaper in a well-ventilated area. Apply a coat of primer, especially if you’re changing the color drastically or painting over a dark finish. Once the primer is dry, apply your chosen spray paint in thin, even coats. Allow each coat to dry completely before applying the next to prevent drips. For intricate frames, use a swirling motion to ensure all crevices are covered. Two to three coats usually achieve a smooth, opaque finish. Let the frame cure fully for at least 24 hours.
Step 3: Installing Your Chosen Backing
Measure the inside dimensions of your frame’s opening. Cut your chosen backing material to fit snugly within this space.
- For Fabric-Covered Board: Cut your fabric about 2 inches larger on all sides than your foam core or thin plywood. Center the board on the wrong side of the fabric, fold the fabric edges over, and secure them tightly to the back of the board with a staple gun. Ensure the fabric on the front is smooth and taut.
- For Pegboard/Cork/Chicken Wire: Cut these materials precisely to fit the frame opening. You may need to use small nails, screws, or heavy-duty staples to secure them firmly to the inside edge of the frame. For chicken wire, ensure the edges are folded or covered to prevent sharp points.
Once the backing is ready, place it into the frame from the back, securing it with the frame’s original fasteners or with small nails/staples if necessary.
Step 4: Adding the Hooks and Knobs
Now for the fun part! Decide on the placement of your hooks or knobs. You can space them evenly across the bottom edge, create a grid pattern, or place them wherever they feel most visually appealing and functional for your collection. Mark your chosen spots with a pencil. Using a drill with a bit slightly smaller than your screw, pre-drill pilot holes if your backing material is thick (like wood or pegboard). Carefully screw in your decorative knobs or cup hooks. Ensure they are firmly secured and can bear the weight of your jewelry.
Step 5: The Grand Reveal
Attach hangers to the back of your frame if it doesn’t already have them. Choose a suitable spot on your wall to hang your magnificent new jewelry organizer. This is the moment to artfully arrange your necklaces, bracelets, and earrings. Stand back and admire your handiwork – your formerly cluttered jewelry is now a beautifully displayed collection, easily accessible and admired! My own organizer turned out absolutely fabulous, exceeding all my expectations!
Personalizing Your Jewelry Display
While this project focuses on necklaces, the versatility of a DIY organizer means you can customize it for all types of jewelry. Consider adding small ledges or cup hooks specifically for rings, or using fine mesh within a smaller frame for earrings. The possibilities are endless when you unleash your creativity.
Beyond Necklaces: Rings, Bracelets & Earrings
To make your organizer even more comprehensive, consider adding additional elements. Small, shallow hooks can be perfect for hanging bracelets. For rings, a small, decorative dish placed on a tiny shelf attached to the frame, or even a piece of dowel rod extending from the frame, can work wonders. Earrings can be hung directly on chicken wire or mesh, or you can add small strips of lace or ribbon stretched across the frame for stud earrings.
Theme and Aesthetic Integration
Think about the overall theme of your room. Do you want a vintage, bohemian, modern, or minimalist look? Your choice of frame, paint color, and backing material can significantly impact the final aesthetic. A distressed paint finish can create a shabby chic vibe, while a metallic spray paint can offer a contemporary edge. The organizer shouldn’t just store jewelry; it should enhance your room’s decor.
The Lasting Benefits of an Organized Collection
An organized jewelry collection offers benefits far beyond mere aesthetics. It saves you time, reduces stress, and protects your valuable accessories from damage. No more untangling knots or misplacing that favorite pendant. Everything is visible, accessible, and beautifully displayed, making your daily routine smoother and more enjoyable. It transforms a source of clutter into a source of joy and artistic expression.
Inspired to Create? Watch the Experts!
If you’re looking for further visual guidance and inspiration, there are many talented crafters who share their processes. For instance, Christine Kobzeff offers a fantastic step-by-step tutorial on making a gorgeous necklace holder. Watching her process can provide additional tips and tricks to help you confidently create your own stunning piece.
Embark on this rewarding DIY journey and reclaim your jewelry collection from the clutches of disorganization. Not only will you end up with a functional and beautiful piece of home decor, but you’ll also experience the profound satisfaction of having created something truly special with your own hands. Get ready to display your beautiful baubles with pride!