
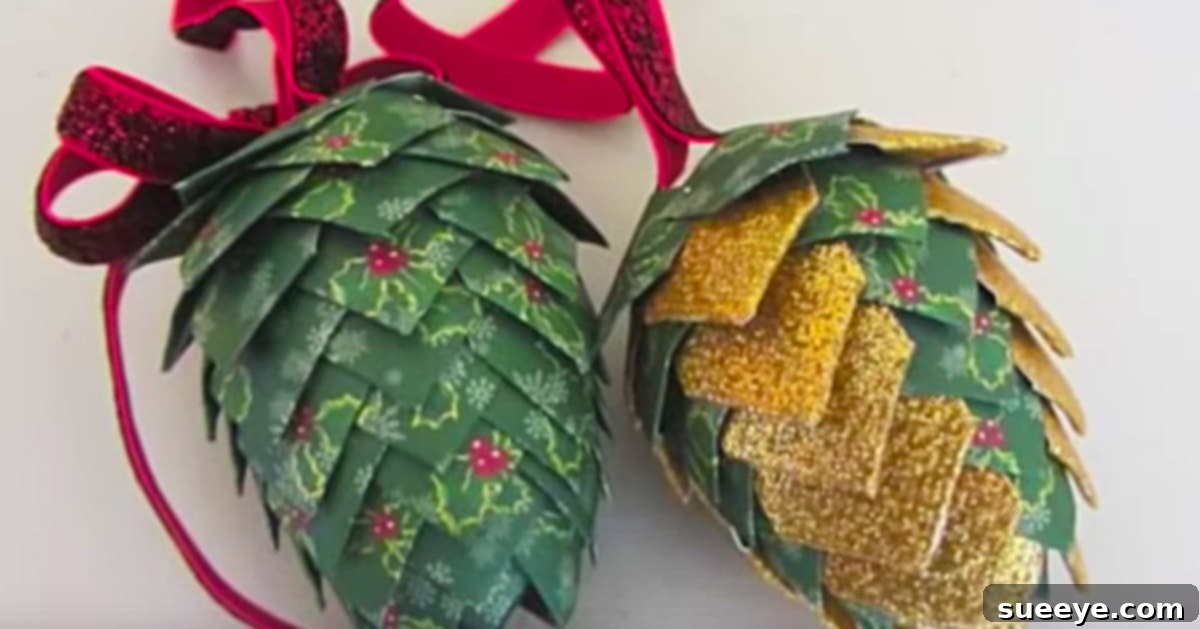
DIY Paper Pinecone Ornaments: Crafting Elegance with Simplicity
The festive season brings with it a unique charm, an undeniable magic that transforms our homes into cozy havens of joy. And when it comes to decorating for Christmas, few elements embody that classic holiday spirit quite like the humble pinecone. Their rustic beauty and natural texture evoke images of snowy forests and warm firesides. While real pinecones offer their own undeniable appeal, sometimes a craft project calls for something a little different, something that blends the organic shape of a pinecone with a touch of handmade artistry. This is where the exquisite DIY Paper Pinecone Ornament truly shines.
Imagine adorning your Christmas tree, mantelpiece, or holiday wreaths with stunning, intricately detailed pinecone ornaments that appear to be quilted or woven with painstaking effort. What if I told you these elegant creations are incredibly simple to make, requiring just a few inexpensive materials and a dash of creativity? Prepare to be amazed! This project takes the charming silhouette of a pinecone and reimagines it through the delicate layering of paper “scales” onto a humble styrofoam egg, resulting in a sophisticated, textural ornament that will surely become a cherished part of your holiday collection. It’s a craft that not only yields beautiful results but also offers a wonderfully engaging activity for the entire family.
The Allure of the Handmade: Why Choose This Paper Pinecone Craft?
In a world of mass-produced decorations, there’s a special joy in creating something with your own hands. Handmade ornaments carry a story, a memory, and a warmth that store-bought items simply can’t replicate. This particular DIY Paper Pinecone Ornament project offers a multitude of benefits, making it an ideal choice for your holiday crafting endeavors:
- Deceptively Simple Yet Visually Stunning: The finished ornaments possess a remarkable “quilted” appearance, giving the impression of complex craftsmanship. Yet, the technique itself is incredibly straightforward, perfect for crafters of all skill levels, even beginners.
- Budget-Friendly Decor: You won’t need to break the bank to create these beauties. The primary materials – card stock, pins, and styrofoam eggs – are widely available and very affordable, making this an excellent option for decorating on a budget.
- A Fantastic Family Activity: This craft is designed for shared enjoyment. Children, with a little supervision, can easily participate in cutting the paper scales and pinning them, transforming a simple afternoon into a treasured family tradition.
- Customizable to Your Style: The versatility of paper allows for endless customization. Choose card stock in colors and patterns that match your existing holiday decor, or experiment with different textures for unique effects.
- Durable and Long-Lasting: Unlike natural pinecones that can be fragile, these paper versions are quite sturdy once assembled, ensuring they can be enjoyed for many holiday seasons to come.
When I first encountered this DIY Pinecone Ornament tutorial, I was captivated by its simplicity and the impressive outcome. It truly looked far more intricate than it actually was, relying on clever layering rather than complicated techniques. I immediately knew I had to try it!
Gathering Your Crafting Essentials: What You’ll Need
One of the beauties of this craft is its reliance on readily available and inexpensive materials. Before you begin, gather the following:
- Styrofoam Eggs: These form the base of your pinecones. You can find them in various sizes at most craft stores like Michael’s, Hobby Lobby, or even general merchandise stores. Small to medium-sized eggs (around 2-3 inches) work best for typical ornament sizes, but feel free to experiment with larger ones for statement pieces. I was lucky enough to have a few leftover from Easter, proving their versatility beyond seasonal crafts!
- Card Stock: This is where the magic happens! Choose card stock that is not too thick (as it needs to be easily pinned) but sturdy enough to hold its shape. Craft paper, scrapbook paper, or even construction paper can work. Think about your desired aesthetic: white for a snowy look, browns and greens for a natural feel, metallics for a touch of glamour, or festive patterns for a playful vibe.
- Small Pins: You’ll need a good quantity of small craft pins. Dressmaker pins, sequin pins, or even small map pins work perfectly. Ensure they are short enough not to protrude too far through the styrofoam, especially on smaller eggs.
- Sharp Scissors: Essential for precise paper cutting. A paper cutter can also speed up the process if you’re making many ornaments.
- Pencil (Optional): For marking your paper before cutting.
- Ribbon or Twine (Optional): For creating a hanging loop once your ornament is complete.
Step-by-Step Guide: Crafting Your Paper Pinecone Ornament
The process of creating these stunning ornaments is delightfully straightforward. Follow these steps, and you’ll have a beautiful handmade pinecone in no time!
Step 1: Preparing Your Paper Scales
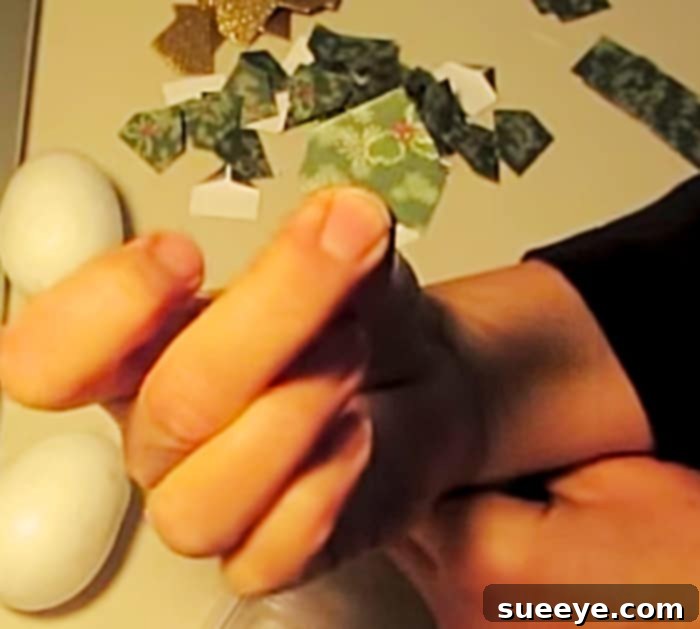
This is arguably the most time-consuming part, but it’s also where the visual magic begins. You’ll need to cut numerous small pieces of card stock. The exact size will depend on your styrofoam egg and your desired scale size, but a good starting point is squares of approximately 1×1 inch or 1.25×1.25 inches. For a consistent look, try to make them all the same size.
Once your squares are cut, the next crucial step is folding. Take each square and fold one corner down towards the opposite side, creating a pointy triangle shape at the top. The bottom edge remains straight. Imagine a small house shape: square at the bottom, with a pointy roof. This folded shape will be what gives your ornament its realistic, layered pinecone texture. You’ll need a significant number of these, so put on some holiday music and enjoy the rhythm of cutting and folding!
Step 2: Starting the Base Layer
Take your styrofoam egg. You’ll want to start pinning your paper scales from the bottom (the wider end) upwards. Take your first folded paper piece, ensuring the pointy end is facing downwards, and carefully pin it into the styrofoam egg. You want the pin to go through the folded part of the paper, securing it firmly but allowing the “house” shape to stand out slightly. Place the first few pieces around the very bottom edge of the egg, creating a neat circle. These first pieces will form the foundational layer of your pinecone.
Step 3: Building Up the “Pinecone” Effect
Now, you’ll begin layering. Work your way up the styrofoam egg, row by row. Each new row of paper scales should slightly overlap the previous one. This overlapping is key to creating that distinctive, textured pinecone look. Position each new scale so that its “pointy roof” tucks just under the bottom edge of the scale above it, concealing the pins of the previous row. This creates a seamless, natural-looking pattern.
As you progress, try to maintain a consistent spacing and overlap to ensure a uniform appearance. Rotate the egg as you work, ensuring an even distribution of scales all around. The more I made, the more intuitive the process became. It’s a wonderfully repetitive and meditative craft!
Step 4: Finishing the Top and Adding a Hanger
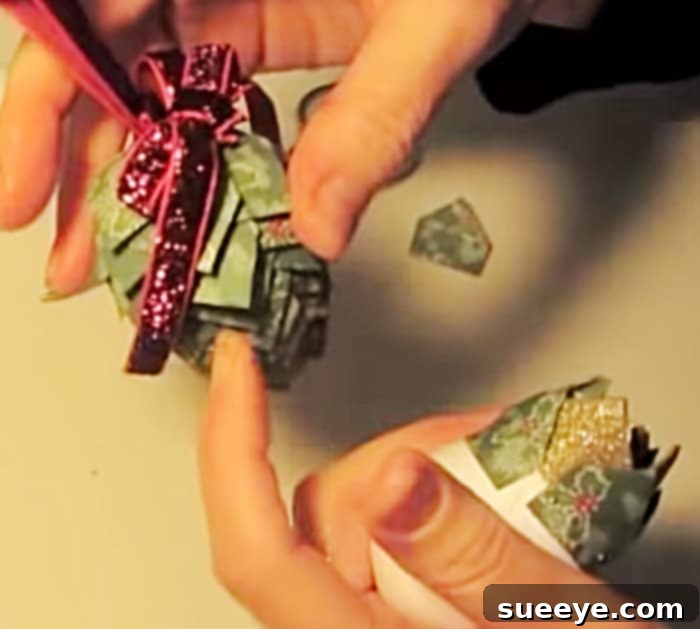
Continue layering your paper scales until you reach the top, narrower end of the styrofoam egg. For the final pieces at the very top, you might need to adjust their size slightly to fit snugly and cover any exposed styrofoam. Once the entire egg is covered with paper scales, your pinecone shape will be complete!
To turn it into a hanging ornament, take a piece of ribbon, twine, or even a paper clip bent into a hook. Create a loop and secure it firmly with a pin (or a dab of hot glue if you prefer extra security) into the very top center of the pinecone. Make sure the pin goes deep enough into the styrofoam to hold the weight of the ornament.
Tips for Success and Creative Customization
These simple DIY Pinecone Christmas Ornaments turned out even better than I imagined! The more I made, the more I wanted to make, and when the kids got home from school, they were totally eager to grab a styrofoam egg and a pair of scissors and join in. This is definitely the kind of project you can involve the whole family in, and we absolutely loved it! To elevate your crafting experience and customize your pinecones, consider these tips:
- Vary Your Paper Choices: Don’t limit yourself to plain card stock. Experiment with different textures (textured cardstock, glitter paper), patterns (plaid, polka dots, holiday motifs), or even ombre color schemes (starting with dark at the bottom and gradually lightening towards the top).
- Add Embellishments: For extra sparkle, lightly brush the edges of your finished pinecone with glitter glue, or strategically place tiny beads or sequins using a touch of craft glue. A small bow or sprig of faux holly at the top can also add charm.
- Experiment with Sizes: Create a collection of pinecones using different sized styrofoam eggs. A grouping of varied sizes creates a dynamic and interesting display.
- Consider Hanging Options: Beyond simple loops, you could use decorative hooks, or even attach them directly to garlands or wreaths without a loop. For a more sophisticated look, use thin wire hangers.
- Safety First: When crafting with children, ensure they use blunt-nosed scissors or pre-cut the paper scales for them. Supervise closely when using pins, or opt for a child-safe adhesive if preferred (though pins create the best “quilted” look).
- Display Beyond the Tree: These versatile ornaments aren’t just for the Christmas tree! Use them as unique gift toppers, string them together to create a festive garland, arrange them in a decorative bowl as a centerpiece, or incorporate them into a homemade holiday wreath.
Making Memories: A Cherished Family Tradition
Involving the whole family in holiday crafting isn’t just about the beautiful end product; it’s about the precious memories created together. The laughter, the shared focus, the satisfaction of creating something lovely with your own hands – these are the true gifts of such projects. This paper pinecone ornament craft is simple enough for younger children to contribute to (with age-appropriate tasks) and engaging enough for older kids and adults to enjoy. It fosters creativity, develops fine motor skills, and most importantly, provides quality time together during the most wonderful time of the year.
Conclusion: Embrace the Joy of Handmade Holiday Decor
As the holiday season draws near, embrace the spirit of creativity and personal touch by making these elegant DIY Paper Pinecone Ornaments. They are a testament to how simple materials, combined with a little ingenuity, can transform into stunning decorations that elevate your festive decor. Whether gracing your Christmas tree, adorning a mantel, or presented as heartfelt handmade gifts, these pinecones will add a touch of timeless beauty and warmth to your celebrations. So, gather your materials, invite your loved ones to join in, and embark on a delightful crafting journey that will yield not just beautiful ornaments, but also cherished memories. Merry Christmas and happy crafting!