
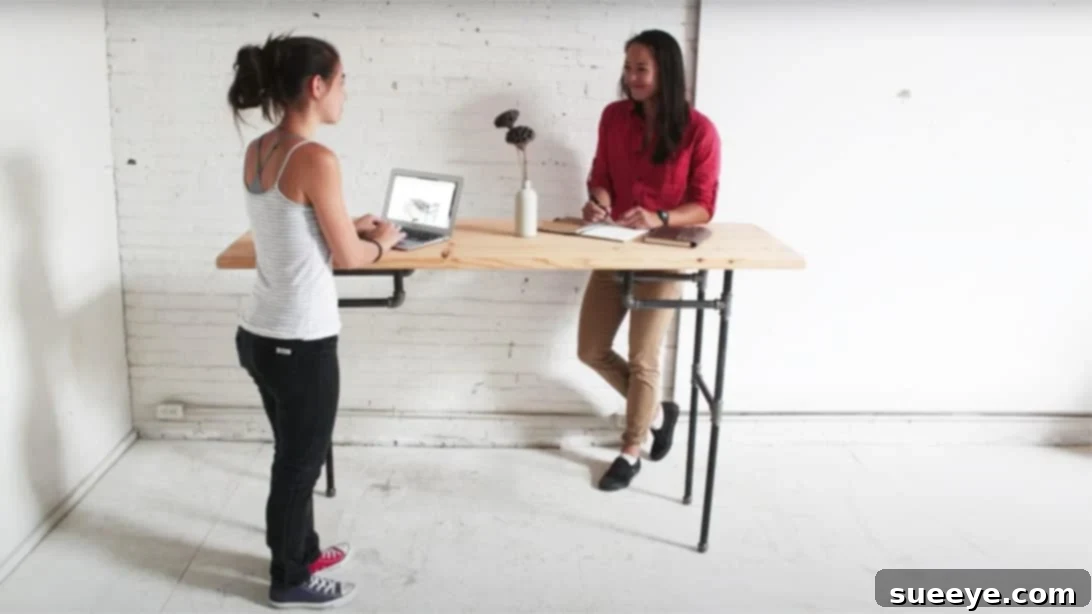
Build Your Own Ergonomic DIY Standing Desk for a Productive Home Office
In today’s dynamic work environment, a well-designed home office is crucial for productivity and well-being. At its heart lies the workstation, and increasingly, an ergonomic standing desk paired with a comfortable chair is considered a fundamental requirement. Not only do standing desks offer numerous health benefits, but they also contribute to a more dynamic and engaging work routine. While many commercial options exist, constructing your own DIY standing desk presents a fantastic opportunity to create a custom, robust, and cost-effective solution tailored precisely to your needs. This project isn’t just about saving money; it’s about the satisfaction of building something functional and beautiful with your own hands. Get ready to transform your workspace and embrace a healthier way to work.
Why Choose a DIY Standing Desk?
The benefits of incorporating a standing desk into your home office are extensive. Prolonged sitting has been linked to various health issues, including back pain, poor circulation, and increased risk of chronic diseases. A standing desk allows you to alternate between sitting and standing throughout the day, promoting better posture, increasing energy levels, and potentially boosting focus and productivity. By choosing the DIY route, you gain several advantages:
- Cost-Effectiveness: Building your own desk can often be significantly cheaper than purchasing a comparable commercial model, especially for desks made with quality materials.
- Customization: You have complete control over the dimensions, materials, and finish, ensuring the desk perfectly fits your space and aesthetic preferences.
- Durability: By selecting sturdy materials like thick lumber and black iron pipes, you can construct a desk that is exceptionally strong and built to last for years.
- Sense of Accomplishment: There’s immense satisfaction in using a piece of furniture you’ve crafted yourself, making your workspace truly personal and inspiring.
This guide will walk you through the process of building a robust and stylish standing desk using readily available materials. For a visual demonstration, you can watch the instructional video by HomeMadeModern on YouTube.
Gather Your Materials and Tools
Before you begin, ensure you have all the necessary materials and tools on hand. This will streamline the construction process and prevent interruptions.
Materials:
- 2″x12″x12′ Board: You will need a strong, straight board to form the desktop. A 2×12 is ideal for its thickness and stability, providing a solid surface for your workstation.
- 10″ Mending Plates: These flat metal plates are crucial for securely joining the two sections of your desktop, providing robust structural integrity.
- 3/4″ Diameter Black Iron Pipe: These pipes will form the adjustable and sturdy legs of your standing desk. Their industrial aesthetic also adds a unique touch.
- 3/4″ Black Iron Couplings: Used to connect sections of the black iron pipe, allowing you to create the desired leg length and structure.
- 1 1/4″ Black Drywall Screws: These screws will be used to fasten the mending plates and leg assemblies to the wooden desktop. Ensure they are long enough to provide a secure hold without penetrating through the top surface.
- Danish Oil: A penetrating oil finish that enhances the wood’s natural beauty while providing protection. It’s easy to apply and offers a durable, matte finish.
Tools You’ll Need:
- Speed Square: Essential for marking precise 90-degree cuts, ensuring your desk components are perfectly square.
- Orbital Sander: For smoothing the wood surfaces and edges, preparing them for finishing. Different grits of sandpaper (e.g., 80, 120, 220) will be useful.
- Circular Saw or Miter Saw: To accurately cut the long wooden boards to your desired desktop length. A miter saw offers more precision for crosscuts.
- Drill/Driver: For pre-drilling pilot holes and driving screws, which is vital for preventing wood splitting and ensuring secure fastenings.
- Wood Clamps: Indispensable for holding boards together securely while you join them, ensuring a tight and seamless connection.
- Tape Measure: For accurate measurements throughout the project.
- Rag or Applicator Pad: For applying the Danish oil evenly.
- Safety Glasses and Gloves: Always wear appropriate personal protective equipment (PPE) when working with power tools and applying finishes.
Step-by-Step Instructions: Building Your DIY Standing Desk
Step 1: Prepare the Wooden Desktop Boards
Your standing desk will be formed from two sections of the 2×12 board, joined together to create a wider surface. Begin by carefully measuring and marking your board. Using a speed square to ensure a precise right angle, cut the 12-foot board into two sections, each with a final length of 5 feet 6 inches (66 inches). Accuracy in this step is paramount for a professional-looking desktop. Once cut, take your orbital sander and thoroughly sand all four sides of both boards. Pay particular attention to the edges and corners, rounding them slightly to eliminate sharp points and create a smoother, more comfortable surface. Start with a coarser grit sandpaper (e.g., 80 or 120) to remove any imperfections, then move to a finer grit (e.g., 220) for a silky-smooth finish. After sanding, use a clean rag or tack cloth to remove all sawdust from the boards; any residual dust will compromise the finish.
Step 2: Apply the Wood Finish (Danish Oil)
With the boards thoroughly cleaned, it’s time to protect and enhance the wood. Apply a generous, even coat of Danish oil to all surfaces of both boards using a clean rag. Danish oil penetrates deeply into the wood fibers, offering excellent protection while bringing out the natural grain and color. Follow the product instructions for application; typically, you’ll apply the oil, let it soak in for a specified time (usually 15-30 minutes), and then wipe off any excess. Allow the first coat to dry completely, which can take several hours or overnight, depending on humidity and product. For added durability and a richer finish, you may choose to apply a second coat once the first is dry, lightly sanding with a very fine grit (e.g., 400) between coats.
Step 3: Assemble the Desktop Using Mending Plates
Once the Danish oil has fully dried and cured, it’s time to join the two 2×12 boards to form your complete desktop. Lay one board flat on your worktable, ideally clamped securely to prevent movement. Carefully position the second board alongside it, ensuring the edges are perfectly aligned and flush. This step requires precision to minimize any gaps. To keep them as close as possible and create a strong joint, use wood clamps to firmly press the two boards together. Now, attach the 10-inch mending plates across the seam where the two boards meet. Strategically place the plates: aim for approximately 4 inches in from the ends of the combined desktop and then space subsequent plates about 12 inches apart along the length of the desk. Using your drill, pre-drill pilot holes for the 1 1/4″ black drywall screws to prevent the wood from splitting. Then, screw the mending plates firmly into place, ensuring a strong and flush connection between the two boards. This creates a single, stable desktop surface.
Step 4: Construct the Pipe Legs and Base
Now, focus on assembling the black iron pipe legs. This part of the build is straightforward but requires attention to detail to ensure stability and proper alignment. Use the 3/4″ diameter black iron pipes and couplings to construct your desired leg structure. The exact configuration will depend on your desired height and stability, but typically involves vertical pipe sections connected by couplings to form sturdy legs. Thread the pipes into the couplings tightly by hand, and if necessary, use a pipe wrench for a final snug fit. Ensure that all pipes and fittings are assembled in a straight line and are securely screwed together to prevent any wobble. The beauty of pipe legs is their inherent strength and the industrial aesthetic they provide. You can experiment with different pipe lengths to achieve a standing height that suits your ergonomic needs. Remember, the final desk height can be finely tuned later.
Step 5: Attach the Legs to the Desktop
Carefully flip your assembled desktop upside down on a protected surface. Position the pipe leg assemblies on the underside of the desk. For optimal stability, place the legs approximately 6 inches in from the ends of the desktop and about 3 inches in from the sides of the outermost mending plate. This strategic placement distributes the weight effectively and prevents tipping. Attaching the legs securely to the desktop is critical. You’ll be drilling screws directly into the wood near the pipe flanges (the flat bases of the pipe legs that attach to the desktop). This can be a bit challenging due to the proximity of the pipes, so take your time and use a drill with a smaller head if needed. Pre-drill pilot holes before driving the 1 1/4″ screws to prevent the wood from splitting, especially given the thick lumber. Ensure each flange is securely fastened with multiple screws to guarantee the legs are firmly anchored to the desktop.
Step 6: Final Adjustments and Leveling
Once the legs are securely attached, carefully flip your standing desk upright. Place it in its intended location in your home office. Now comes the crucial step of ensuring the desk is perfectly level and stable. The pipe legs offer a great advantage here: if your floor is uneven, you can simply loosen or tighten the end caps or certain couplings on the pipe legs to adjust the height of individual legs. This allows for fine-tuning the desk’s levelness. Additionally, the modular nature of the pipe design means you can easily adjust the overall height of the table to suit the ergonomic needs of the person using it, whether standing or paired with a tall stool. Experiment with different heights to find what feels most comfortable and supportive for your posture. Ensure all connections are tightened once the desired height and levelness are achieved to prevent any wobbling during use. Your strong, custom-built standing desk is now ready to elevate your home office experience!
Maintenance and Customization Tips
To keep your DIY standing desk looking its best and functioning perfectly, consider a few maintenance and customization tips. Periodically wipe down the wooden surface with a damp cloth and reapply Danish oil as needed (perhaps once a year) to maintain its protective finish and luster. For the iron pipes, a light coating of wax can help prevent rust, especially in humid environments, though black iron is generally quite resilient. In terms of customization, don’t limit yourself to the initial design. You could paint or stain the wooden top a different color, add a protective clear coat, or even etch designs into the wood. The pipe legs can also be painted (after proper priming) for a different look, perhaps a metallic silver or a bold color to match your office decor. Consider adding felt pads to the bottom of the pipe legs to protect your flooring.
Building your own standing desk is a rewarding project that offers a highly functional and personalized addition to your home office. Enjoy the process and the enhanced productivity that comes with a healthier, more ergonomic workspace!