
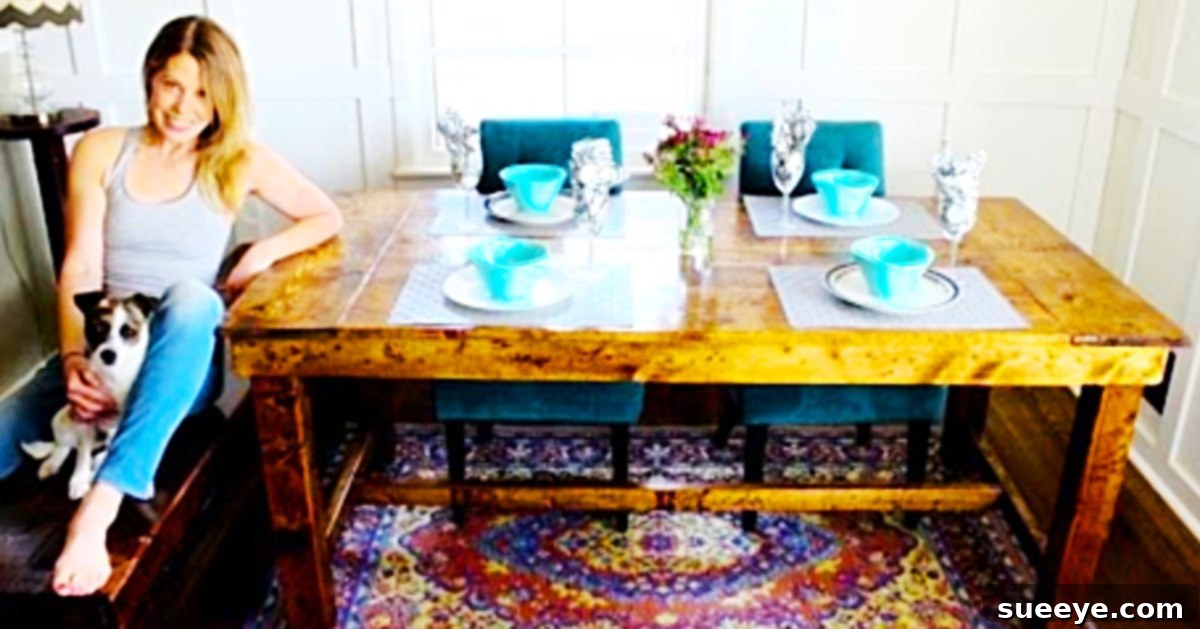
How To Build a Stunning DIY Farmhouse Table for Under $50
Dreaming of a beautiful, rustic farmhouse table to complete your home’s aesthetic? While store-bought options can be incredibly expensive, crafting your own not only saves you a significant amount of money but also imbues your living space with unparalleled character and a heartwarming sense of accomplishment. We’ve discovered an inspiring and incredibly accessible DIY farmhouse table video tutorial by The Rehab Life on YouTube, which proves that elegant, rustic furniture is well within reach for even the most novice furniture maker. This project perfectly blends the timeless elegance of a high-end piece with the authentic, raw charm of antique farmhouse furniture.
This comprehensive guide will walk you through the process of creating a sturdy and stylish farmhouse table that looks anything but homemade. The instructions are designed to be straightforward and easy to follow, ensuring a rewarding experience and a beautiful finished product that will become the focal point of your dining room or kitchen. Get ready to transform raw lumber into a cherished heirloom!
Why Choose to Build Your Own Farmhouse Table?
Beyond the simple satisfaction of a DIY project, there are numerous compelling reasons to undertake the creation of your own farmhouse table:
- Significant Cost Savings: High-quality farmhouse tables from retailers can cost hundreds, if not thousands, of dollars. Building it yourself drastically reduces the expense, often allowing you to achieve a premium look for a fraction of the price, sometimes even under $50 as demonstrated by some ingenious methods.
- Customization to Perfection: When you build your own, you have complete control over the dimensions, wood type, stain color, and finish. This means your table will perfectly fit your space and complement your existing decor, something mass-produced furniture can rarely offer.
- Unmatched Quality and Durability: Often, DIY furniture can be built with superior materials and construction methods compared to budget retail options. You can select solid, durable wood and ensure every joint is strong and secure, leading to a table that truly stands the test of time.
- A Unique Story: Every scratch, every stain, every imperfection tells a story of your effort and creativity. Your handmade table isn’t just a piece of furniture; it’s a testament to your skills and a conversation starter.
- Sense of Accomplishment: There’s immense pride in stepping back and admiring a functional, beautiful piece of furniture you’ve crafted with your own hands. It’s a tangible reward that brings joy every day.
Essential Tools and Materials for Your DIY Farmhouse Table
Before you begin, gathering all your necessary tools and materials is crucial. This not only streamlines the building process but also ensures safety and efficiency. The following list, inspired by The Rehab Life’s tutorial and enhanced for comprehensive understanding, includes everything you’ll need:
Tools:
- Miter Saw: Essential for making precise, straight, and angled cuts on your lumber, ensuring all your pieces fit together perfectly.
- Drill with an Impact Driver: A powerful combination for pre-drilling holes and driving screws quickly and securely. An impact driver significantly speeds up assembly.
- Tape Measure: Accuracy is key in woodworking. A reliable tape measure will ensure all your cuts and placements are spot-on.
- Safety Goggles: Non-negotiable eye protection to guard against wood chips, dust, and other debris during cutting and sanding.
- Ear Protection: Protect your hearing from the noise of power tools like saws and drills.
- Dust Mask: Prevents inhalation of fine wood dust and fumes from stains and sealants, crucial for respiratory health.
- Sanding Block or Electric Sander: For smoothing surfaces and preparing the wood for finishing. An electric sander (like an orbital sander) will make the process much faster and more efficient.
Fasteners and Finishing Supplies:
- Wood Screws: Various lengths and types (e.g., pocket hole screws or construction screws) for joining frame components and attaching the tabletop.
- Wood Glue: Provides an incredibly strong bond between wood pieces, enhancing the structural integrity of your table. Titebond or similar quality wood glue is recommended.
- Wood Stain (e.g., Minwax): To give your table its desired color and bring out the natural beauty of the wood grain. Minwax offers a wide range of popular shades perfect for the farmhouse look.
- Polyurethane or Other Sealer: A protective topcoat that guards against spills, scratches, and wear, ensuring the longevity and durability of your table’s finish.
Lumber (Dimensions may vary slightly based on desired table size, but these are common for a standard table):
- One (4″ x 4″) 10 foot long: This sturdy piece will be cut to form the four legs of your table, providing robust support.
- Three (1″ x 4″) 10 foot long: These boards will be used for the apron (the frame directly beneath the tabletop) and possibly some cross bracing.
- Two (1″ x 10″) 8 foot long: These wider boards are ideal for the tabletop planks. Depending on your desired width, you may need more or longer pieces.
- One (1″ x 10″) 10 foot long: Another tabletop plank, or potentially cut down for shorter table elements or additional support.
- Two (2″ x 3″) 8 foot long: These can be used for additional framing support, stretchers between legs, or other structural components to add rigidity.
Always double-check lumber dimensions and quantities based on your specific table design and desired final size. Purchasing an extra board or two for practice cuts or mistakes is often a wise investment.
Step-by-Step Guide: Building Your Rustic Farmhouse Table
Now that you have all your materials and tools ready, let’s dive into the exciting process of bringing your DIY farmhouse table to life. This section provides a detailed breakdown of the construction steps, ensuring a smooth and successful build.
1. Planning and Cutting Your Lumber
Begin by meticulously planning your cuts. Refer to the specific dimensions provided in The Rehab Life’s tutorial or create your own cut list based on your desired table size. Accuracy here is paramount.
- Measure and Mark: Using your tape measure, mark all your cut lines clearly on each piece of lumber.
- Cut the Legs: From your 4″ x 4″ x 10′ board, cut four identical pieces for your table legs. A standard dining table height is typically around 30 inches, so each leg would be cut to that length.
- Cut the Apron Pieces: From your 1″ x 4″ boards, cut two longer pieces for the side aprons and two shorter pieces for the end aprons. These will form the rectangular frame connecting the legs.
- Prepare Tabletop Planks: Cut your 1″ x 10″ boards to the desired length for your tabletop. If you want a tabletop that is 72 inches long, cut all your planks to this length.
- Cut Support Pieces: Your 2″ x 3″ boards can be cut for additional structural support within the apron frame or as stretchers connecting the legs for added stability.
Always wear safety goggles and ear protection when operating the miter saw. Take your time and double-check measurements before cutting.
2. Constructing the Base Frame and Attaching Legs
This is where your table begins to take shape. The base provides the fundamental structure and stability.
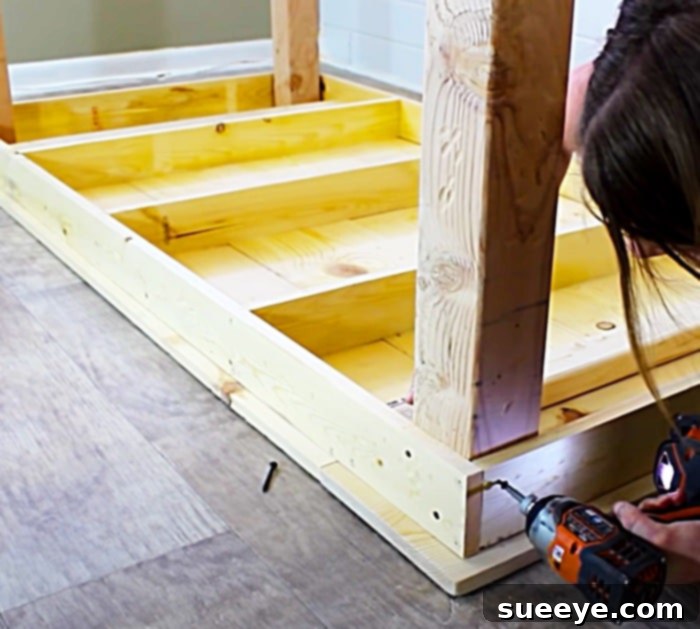
- Assemble the Apron: Create a rectangular frame using your 1″ x 4″ apron pieces. Apply wood glue to the ends of the shorter apron pieces before joining them to the longer ones. Secure them with wood screws, ideally using pocket holes for a clean, strong joint, or by screwing through the longer pieces into the ends of the shorter ones. Ensure the frame is perfectly square using a speed square or larger carpenter’s square.
- Attach the Legs: With the apron frame assembled, position a 4″ x 4″ leg at each corner. Apply wood glue to the surfaces where the leg meets the apron. Then, secure the legs to the apron using long wood screws, driving them through the apron into the leg from both adjacent sides. Ensure the legs are flush with the top edge of the apron and plumb (straight up and down).
- Add Cross Bracing (Optional but Recommended): For extra stability, especially for longer tables, consider adding 2″ x 3″ cross braces or stretchers between the legs. This will significantly reduce wobble. Secure these with wood glue and screws.
3. Assembling and Attaching the Tabletop
The tabletop is the most visible part of your creation, so precision here contributes greatly to the final aesthetic.
- Join Tabletop Planks: Lay your 1″ x 10″ tabletop planks side-by-side on a flat surface. Apply a generous amount of wood glue along the edges where the boards meet. Clamp them tightly together until the glue dries completely (follow glue manufacturer’s instructions). For added strength, you can use pocket hole screws from underneath or biscuits to align and reinforce the joints.
- Attach Tabletop to Base: Once the glue is dry and the tabletop is a single, solid piece, center it on your assembled table base. Secure the tabletop to the apron frame from underneath using wood screws. It’s often best to use “Z-clips” or “figure 8 fasteners” which allow for wood expansion and contraction, preventing cracks in the tabletop over time. If using screws directly, drill pilot holes and use slightly oversized holes in the apron to allow for movement.
The Art of Finishing: Sanding, Staining, and Sealing
The finishing process is where your table truly transforms from raw lumber into a beautiful piece of furniture. It requires patience but yields incredible results.
1. Sanding for Perfection
Sanding is critical for achieving a smooth surface that will properly absorb stain and look professional.
- Start with Coarse Grit: Begin sanding with a coarser grit sandpaper, such as 80 or 100-grit, to remove any major imperfections, glue squeeze-out, and rough spots.
- Progress to Finer Grits: Gradually work your way up through finer grits (120, 150, 180, and finally 220-grit). Each successive grit removes the scratches left by the previous one. A hand sanding block can be used for smaller areas or if you prefer a manual approach, but an electric sander will make this process significantly faster and more even.
- Clean Thoroughly: After each sanding stage, especially before applying stain, wipe down the entire table with a tack cloth or a damp rag (allowing it to dry completely) to remove all dust. Dust left on the surface can interfere with stain absorption and result in a blotchy finish.
2. Applying the Stain
Staining brings out the character of the wood and gives your table its desired color.
- Choose Your Stain: Select a wood stain that complements your home decor. Minwax offers a variety of popular shades, from light natural tones to rich, dark hues perfect for a rustic look. Test the stain on a scrap piece of the same wood to ensure you like the color.
- Apply Evenly: Apply the stain with a clean rag or a foam brush, working in small sections and always along the grain of the wood.
- Wipe Off Excess: After allowing the stain to penetrate for the recommended time (check product instructions, usually 5-15 minutes), wipe off any excess stain with a clean, dry rag. This prevents a patchy or overly dark finish.
- Allow to Dry: Let the stained table dry completely according to the manufacturer’s instructions, which can range from several hours to a full day. Good ventilation is essential.
3. Protecting with Polyurethane
A durable topcoat is essential for protecting your table from daily wear and tear.
- Apply First Coat: Once the stain is completely dry, apply a thin, even coat of polyurethane (or your chosen sealant) using a high-quality brush or foam applicator. Work in a dust-free environment if possible.
- Light Sanding Between Coats: After the first coat dries, lightly sand the entire table with very fine-grit sandpaper (e.g., 320-grit or higher). This creates a smooth surface for subsequent coats and helps with adhesion. Wipe away dust with a tack cloth.
- Apply Additional Coats: Apply two to three more thin coats of polyurethane, repeating the light sanding and cleaning process between each coat. More coats generally mean greater durability.
- Cure Time: Allow the final coat to cure fully before heavy use. While it may feel dry to the touch in a few hours, full curing can take several days or even weeks. Refer to the product’s instructions for exact curing times.
Beyond the Build: Customization and Maintenance
Your DIY farmhouse table is now complete, but the journey doesn’t have to end there. Consider these tips for personalizing your creation and ensuring its longevity.
Personalizing Your Table
- Distressing Techniques: For an even more authentic aged look, consider light distressing before staining. This could involve gently striking edges with a hammer, dragging chains, or using a wire brush to create texture.
- Paint and Stain Combinations: You might paint the legs and apron a complementary color (e.g., antique white or charcoal gray) and stain the tabletop for a popular two-tone farmhouse style.
- Adding Hardware: Incorporate unique drawer pulls if you decide to add small drawers, or even decorative metal corner brackets for an industrial farmhouse touch.
Care and Longevity
To keep your farmhouse table looking its best for years to come:
- Regular Cleaning: Wipe spills immediately. Clean the table regularly with a damp cloth and mild soap, then dry thoroughly. Avoid harsh chemical cleaners.
- Protect from Heat and Moisture: Always use coasters under drinks and trivets under hot dishes to prevent rings and heat damage to the finish.
- Avoid Direct Sunlight: Prolonged exposure to direct sunlight can fade the stain and cause the wood to dry out.
- Re-seal as Needed: Over time, if the finish starts to look dull or worn, you can lightly sand the topcoat and apply a fresh layer of polyurethane to restore its protection and shine.
Conclusion: A Timeless Piece Crafted by You
This DIY farmhouse table project is more than just building furniture; it’s about creating a piece of art that embodies the spirit of home, warmth, and rustic elegance. By following this detailed guide, inspired by The Rehab Life’s tutorial, you can achieve a stunning, durable table for under $50 that perfectly captures the raw, primitive charm of authentic farmhouse decor.
The finished product will undoubtedly look far from homemade. Instead, it will possess the character and style of a cherished antique, ready to host countless family meals, gatherings, and memories. So, gather your tools, embrace the challenge, and get ready to build a magnificent, custom-made farmhouse table that will be admired for generations. Your home is waiting for its new centerpiece!