
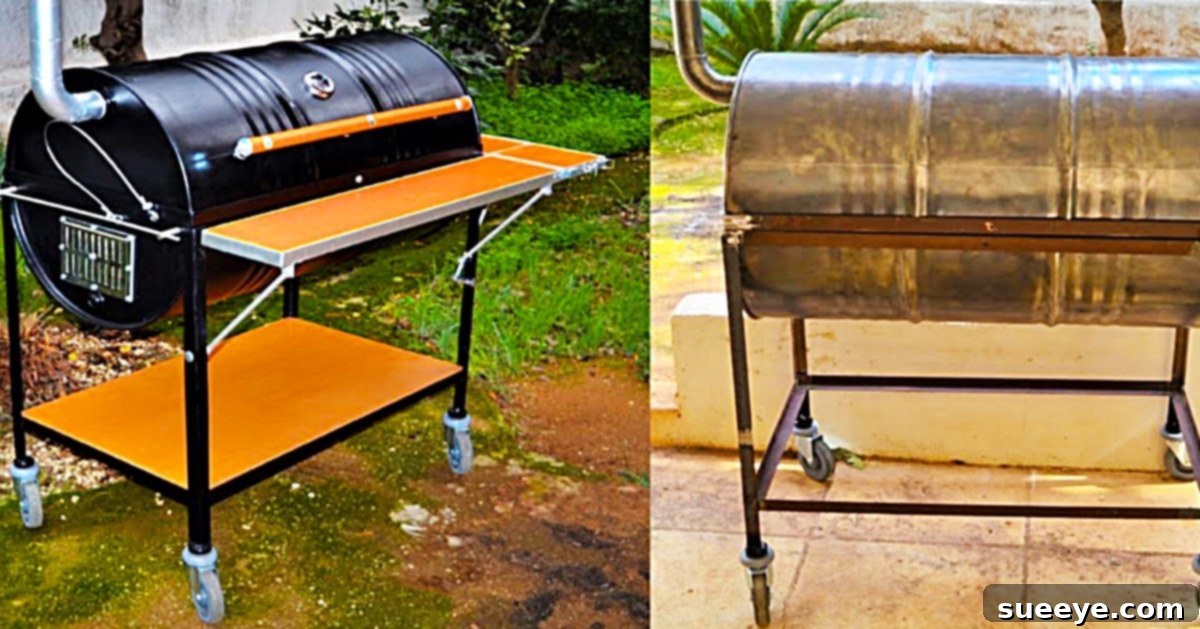
Mastering the Art of DIY: Build Your Own 55-Gallon Barrel BBQ Pit Smoker
There’s an undeniable satisfaction that comes with creating something with your own hands, especially when that creation promises delicious, smoky flavors for years to come. When I first encountered the exceptional DIY barbecue pit smoker video tutorial by Rust Is Gold on YouTube, I instantly recognized it as the blueprint for my dream outdoor cooking station. This design is not just a grill; it’s a versatile beast, perfectly engineered for both high-heat grilling with the lid open and low-and-slow smoking of a magnificent brisket with the lid sealed. It embodies what many affectionately call the “Texas special,” a robust and iconic barrel smoker design that has graced countless backyards and cookouts across the Lone Star State for generations.
The beauty of this project lies in its blend of simplicity and rugged functionality. Rust Is Gold demonstrates a method that is remarkably straightforward, yet it does call for a foundational understanding and comfort with metal-working techniques. Don’t be intimidated, however; with the right tools, proper safety precautions, and a willingness to learn, you can absolutely bring this magnificent homemade barbecue pit to life in your own backyard. Imagine the aroma of slow-smoked ribs or perfectly grilled steaks wafting through the air, all thanks to a custom smoker you built yourself. This comprehensive guide will walk you through every aspect, from gathering materials to the final touches, ensuring your DIY barrel smoker is a source of pride and countless culinary adventures.
Why Choose a DIY 55-Gallon Barrel BBQ Smoker?
Opting to build your own barbecue pit from a 55-gallon barrel offers numerous advantages over purchasing a pre-made unit. First and foremost is the cost-effectiveness. High-quality smokers and grills can be expensive, but repurposing a readily available barrel significantly reduces material costs. Beyond the financial savings, a DIY project provides unparalleled customization. You can design it to fit your specific grilling and smoking needs, from the type of grates to the placement of thermometers and vents.
Furthermore, a barrel smoker is renowned for its durability and excellent heat retention. The thick metal walls of a 55-gallon drum create a consistent cooking environment, crucial for successful smoking. This design also offers incredible versatility; it easily transitions from an open-lid grill, perfect for searing steaks and burgers, to a sealed smoker, ideal for infusing meats with deep, smoky flavors over extended periods. The satisfaction of cooking on a grill you’ve personally constructed adds an extra layer of enjoyment to every meal, making it a conversation starter at every gathering.
Essential Materials for Your Homemade Barbecue Pit Smoker
To embark on this exciting DIY journey, having the right materials and tools is paramount. While the core concept is simple, a well-equipped workshop and carefully selected components will ensure a sturdy, efficient, and long-lasting barbecue pit. Here’s a detailed list of what you’ll need, expanding on the essentials for a complete, functional barrel smoker:
- 1 55-Gallon Metal Barrel: This is the heart of your smoker. It’s absolutely crucial to source a barrel that previously contained food-grade materials (e.g., vegetable oil, syrup, fruit juice). NEVER use a barrel that held chemicals, petroleum products, or any toxic substances, as residues can be harmful even after cleaning. New, unused barrels are also an excellent, safe option.
- Heavy-Duty Hinges (2-3 units): For the lid. Look for strong, weld-on or bolt-on hinges that can withstand repeated use and the weight of the barrel lid.
- Metal Cutting Circular Saw: Equipped with a metal-cutting blade, this will be used to precisely slice the barrel. Ensure the blade is appropriate for the gauge of steel you’re working with.
- Blow Torch: While primarily used in the video for paint removal, it’s also useful for other metalworking tasks. Exercise extreme caution and good ventilation if using for paint removal, as paint fumes can be toxic. A grinder with a wire brush attachment can also be effective and potentially safer for paint stripping.
- Metal Sander/Grinder: Essential for smoothing sharp edges after cutting, removing paint, rust, and preparing surfaces for welding or painting. Various attachments like flap discs and wire brushes will be beneficial.
- Sturdy Metal Legs (4 units): Angle iron or square tubing are excellent choices for creating a stable base. Dimensions will depend on your desired cooking height.
- Heavy-Duty Casters (4 units): To make your barbecue pit mobile. Opt for locking casters that can support the weight of the barrel and its contents, allowing for easy movement and secure placement.
- Lid Handle: A heat-resistant handle for safely opening and closing the smoker lid.
- Cooking Grates (2-3 units): Stainless steel or heavy-duty cast iron grates are ideal. You’ll need at least one for cooking and potentially another for a warming rack.
- Charcoal Grate/Basket: A separate, sturdy grate or basket positioned at the bottom of the barrel to hold charcoal and allow ash to fall through.
- Thermometer: A high-quality, lid-mounted thermometer is crucial for monitoring internal cooking temperatures, especially for smoking.
- Ventilation System (Intake & Exhaust): Adjustable vents (dampers) are vital for controlling airflow and, consequently, temperature. A bottom intake vent and a top exhaust stack are standard.
- High-Heat Resistant Paint: For the exterior, choose paint specifically designed for high temperatures (e.g., engine paint or specialized BBQ paint) to prevent rust and provide a finished look.
- Safety Gear: Welding gloves, safety glasses, ear protection, respirator mask (especially when grinding or burning paint), and a leather apron are absolute must-haves for protection during the build.
- Welding Equipment (Optional but Recommended): A MIG welder for securely attaching hinges, legs, and other components. If welding isn’t an option, heavy-duty bolts and nuts with appropriate metal fasteners can be used, though welding generally offers a more robust construction.
Step-by-Step Directions: Building Your Dream Barrel BBQ Smoker
This journey from a simple barrel to a powerful barbecue pit smoker is incredibly rewarding. The following detailed steps, inspired by the excellent DIY barbecue pit smoker video tutorial by Rust Is Gold on YouTube, will guide you through the construction process. Remember to always prioritize safety and take your time with each stage.
Step 1: Thorough Barrel Preparation and Cleaning
This is arguably the most critical step. If you’re using a used 55-gallon barrel, it must be meticulously cleaned. Begin by washing the barrel thoroughly with soap and water, ensuring all internal residues are removed. For barrels that contained food products, a good scrub is often sufficient. However, for any barrel, it’s highly recommended to perform a “burn out.” This involves building a small, controlled fire inside the barrel (outdoors, away from combustibles) to burn off any remaining paint, liners, or unseen residues. Allow it to cool completely. Afterward, use your metal sander or grinder with a wire brush attachment to remove all exterior paint, rust, and any interior flaky bits. The goal is to get down to bare, clean metal, both inside and out. This ensures no toxic fumes are produced during cooking and provides a clean surface for painting.
Step 2: Precision Cutting and Edge Smoothing
Once your barrel is pristine, it’s time to transform it. Carefully mark a straight line around the circumference of the barrel, approximately one-third of the way from one end. This line will determine your lid and main cooking chamber. Use a chalk line or flexible tape measure to ensure accuracy. With your metal cutting circular saw and appropriate safety gear, slowly and steadily cut along this marked line. After the cut, the edges will be incredibly sharp. Immediately use your metal grinder or sander to smooth down all cut edges, rounding them slightly to eliminate hazards. This attention to detail prevents injuries and gives your pit a professional finish.
Step 3: Attaching Hinges and Lid Handle
Now, it’s time to create the functional lid for your smoker. Position the smaller, cut section of the barrel (which will be your lid) onto the larger base. Ensure a proper fit and alignment. Securely attach the heavy-duty hinges to one side, connecting the lid to the base. If you have welding capabilities, weld the hinges for maximum strength and durability. If bolting, drill precise holes and use robust bolts, nuts, and washers. On the opposite side of the lid, install your heat-resistant handle. Make sure it’s firmly attached and comfortable to grip, as you’ll be lifting a hot lid frequently.
Step 4: Constructing the Sturdy Frame and Attaching Legs/Casters
With the barrel now taking shape, the next crucial step is to build a robust supporting frame. This frame will not only elevate your pit to a comfortable cooking height but also provide stability and a mounting point for the casters. Fabricate a frame from angle iron or square tubing that perfectly cradles the main barrel section. Once the frame is assembled and the barrel securely set into it (either welded or bolted), attach your four metal legs to the corners of the frame. Finally, install the heavy-duty locking casters to the bottom of each leg. This setup ensures your barbecue pit is both stable during use and effortlessly mobile when you need to move it.
Step 5: Installing Internal Components – Grates, Charcoal Basket, and Vents
The internal setup is where your barrel transforms into a true smoker. Inside the main barrel section, install supports for your charcoal grate or basket. This grate should sit a few inches from the bottom to allow for proper airflow and ash collection. Above this, install supports for your cooking grates at the desired height. You might want multiple levels for different cooking zones. Cut openings and install your intake vent near the bottom of the barrel (often on one end) and your exhaust stack/damper on the lid or upper side of the barrel. These vents are critical for temperature control. Finally, drill a hole in the lid and mount your thermometer, ensuring the probe extends into the cooking chamber for accurate readings.
Step 6: Finishing Touches and Seasoning Your Smoker
With all components in place, it’s time for the final touches. Clean the entire exterior of the barrel one last time to remove any grease or debris. Apply several coats of high-heat resistant paint to the exterior, following the manufacturer’s instructions. This not only makes your pit look great but also protects it from rust. Once the paint is dry, it’s essential to “season” your new smoker. This involves building a small, slow fire inside the pit, allowing it to burn for several hours. This process cures any remaining paint, burns off manufacturing oils, and starts to build up a protective, non-stick layer inside, preparing your smoker for its first delicious cook. After seasoning, your DIY barrel barbecue pit smoker is ready for action!
Tips for Success and Longevity
- Safety Above All: Always wear appropriate personal protective equipment (PPE) when cutting, grinding, or welding. Work in a well-ventilated area.
- Choose Your Barrel Wisely: Reiterate the importance of a food-grade barrel to avoid health risks.
- Invest in Good Tools: Quality tools not only make the job easier but also safer and more precise.
- Welding vs. Bolting: While welding provides the strongest bonds, heavy-duty bolts and nuts can be used if welding equipment is unavailable. Just ensure all connections are extremely tight and secure.
- Regular Maintenance: Clean your grates after each use, empty ash regularly, and periodically inspect the paint and metal for rust spots. Touch up paint as needed.
- Experiment with Design: Don’t be afraid to add your own personal touches, such as a side shelf, tool hooks, or unique handles.
The Rewards of Your Custom Barbecue Pit Smoker
This barbecue pit is truly perfect for all your grilling and smoking needs. The ability to cook with the top up for direct grilling or closed for slow, consistent smoking opens up a world of culinary possibilities. From succulent briskets that fall apart with a touch, to perfectly seared steaks, tender ribs, and even smoked vegetables, your new DIY barrel smoker will become the centerpiece of your outdoor cooking adventures. The pride of saying, “I built this myself,” combined with the incredible flavors it produces, makes this project an immensely rewarding endeavor.
I can’t wait for you to experience the joy and delicious results of making one of these magnificent backyard pits. Gather your materials, watch the tutorial by Rust Is Gold, and get ready to elevate your outdoor cooking game to a whole new level!