
Say Goodbye to Weeds: Your Ultimate Guide to Homemade Eco-Friendly Solutions and Prevention
Are you tired of battling stubborn weeds that relentlessly invade your garden, driveway, and pathways? The quest for an effective, affordable, and environmentally conscious weed control solution often feels like an uphill battle. Chemical herbicides can be harsh on your beloved plants, pets, and the environment. But what if there was a better way? What if you could harness the power of everyday household items and simple gardening techniques to reclaim your outdoor spaces?
The solution to your persistent yard problems is finally here, offering a breath of fresh air for your garden and your wallet. This comprehensive guide, inspired by the practical wisdom of Hometalk’s insightful video tutorial on YouTube, will unveil how to craft inexpensive, eco-friendly weed killer mixtures and implement natural prevention methods. Prepare to transform your approach to weed management, ensuring your garden thrives without the burden of unwanted growth or harmful chemicals.
Materials for Your DIY Weed Solutions: Gather Your Eco-Friendly Arsenal
Embarking on your journey to a weed-free garden begins with assembling the right tools and ingredients. Many of these items are likely already in your home, making this an incredibly accessible and cost-effective approach to garden maintenance. Here’s what you’ll need:
- Spray bottle: Essential for applying liquid solutions precisely and efficiently.
- Vinegar: White vinegar (typically 5% acetic acid) is common, but for tougher weeds, consider horticultural vinegar (20% acetic acid), which offers a stronger punch.
- Table salt: A common household staple, crucial for dehydrating weeds.
- Water: For dilution and as a base for some solutions, or for the boiling water method.
- Castile soap (or dish soap): Acts as a surfactant, helping solutions stick to weed leaves.
- Funnel: Makes transferring liquids and solids into a spray bottle mess-free.
- Garden Mulch: Organic options like wood chips, straw, or shredded leaves, or inorganic choices like gravel, are vital for long-term prevention.
- Garden scissors or trimmers: For precise removal of above-ground weed growth.
- Hand trowel or small shovel: Indispensable for digging out stubborn roots and preparing soil.
Having these materials on hand will equip you for both immediate weed eradication and sustainable long-term prevention strategies, ensuring your garden remains pristine and healthy.
Crafting Your Homemade Weed Killer and Implementing Prevention Strategies
With your materials ready, let’s dive into the practical steps for creating powerful weed-killing solutions and establishing robust prevention methods. We’ll explore several effective techniques, each with its unique advantages, allowing you to choose the best approach for different weed types and garden areas.
DIY Weed Killer Solutions: Powerful and Natural Methods
These homemade concoctions leverage the power of natural ingredients to target and eliminate existing weeds without relying on harsh chemicals. Always apply these solutions on a sunny, dry day for maximum effectiveness, as rain can wash them away before they’ve had time to work.
Method 1: The Vinegar and Salt Powerhouse
This potent mixture is highly effective against many common weeds, especially annuals and young perennials. The acetic acid in vinegar acts as a desiccant, drying out plant leaves, while salt further dehydrates the plant and inhibits future growth by altering soil conditions.
- Prepare Your Solution: Begin by pouring vinegar into your spray bottle, aiming to fill it almost to the top. While white vinegar (5% acetic acid) works for many weeds, consider using horticultural vinegar (20% acetic acid) for particularly stubborn invaders. However, exercise extreme caution with stronger vinegar, as it can be more corrosive and requires protective gear like gloves and eye protection.
- Add the Salt: Using a funnel, carefully add a generous amount of table salt to the vinegar. For a standard 32oz spray bottle, 1/4 to 1/2 cup of salt is a good starting point. The salt acts as a strong desiccant, drawing moisture out of the plant cells.
- Mix Thoroughly: Secure the lid of the spray bottle tightly and shake it vigorously until the salt is completely dissolved and well mixed with the vinegar.
- Apply Directly: Go to your infested areas and spray the solution directly onto the weeds. Ensure each weed is thoroughly coated with the mixture, from leaf to stem. Precision is key here; avoid spraying desirable plants, as this solution is non-selective and will harm anything it touches.
- Observe and Reapply: Allow the solution to work its magic for approximately 24 hours. When you return, you will typically find the treated weeds dried up, shriveled, and completely gone. For very tough or mature weeds, a second application might be necessary a few days later.
Pros: Highly effective, uses common household ingredients, relatively fast results.
Cons: Non-selective (will kill desired plants), can impact soil salinity (use sparingly in areas where you plan to plant later), requires careful application. Avoid using this mixture too close to valuable garden plants or in vegetable beds where soil health is paramount.
Method 2: The Gentle Soap and Water Approach (with optional vinegar)
This method offers a slightly gentler alternative, particularly effective against young, tender weeds. The soap acts as a surfactant, breaking down the waxy cuticle of the plant leaves, allowing the water (and optional vinegar) to penetrate and dehydrate the plant more effectively.
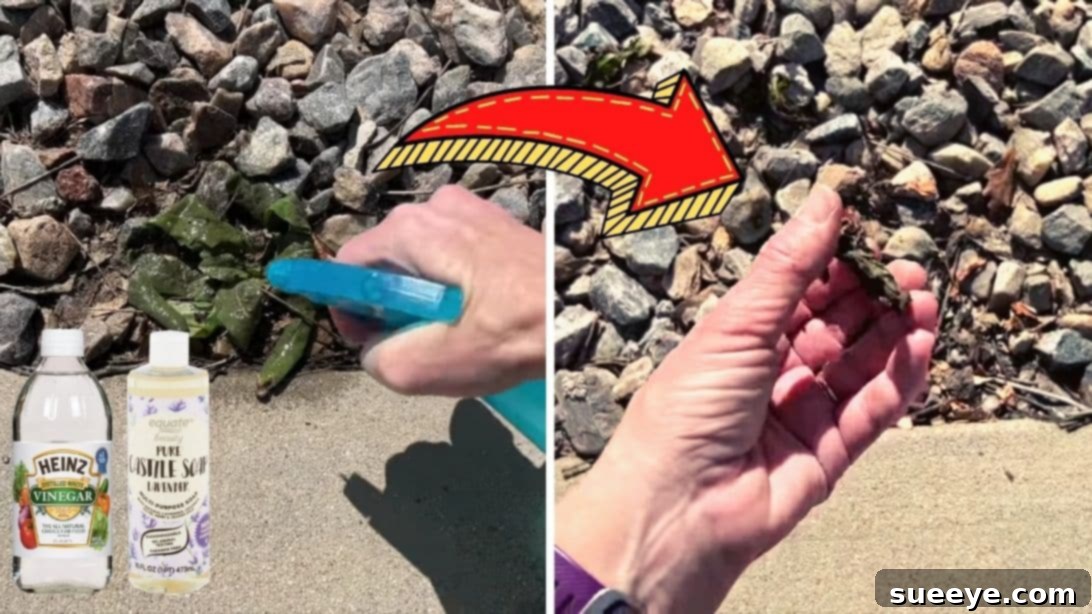
- Combine Ingredients: In a spray bottle, mix water with about 1 to 2 tablespoons of liquid Castile soap (or a biodegradable dish soap). For added efficacy, you can also include 1 cup of white vinegar to this mixture.
- Shake Well: Close the bottle and shake thoroughly until the soap is fully dispersed.
- Target Application: Spray this solution directly onto the weeds, ensuring good coverage. Like the vinegar and salt solution, this mixture is best applied directly to the unwanted plants.
- Monitor Results: Let it sit for 24 hours. You’ll observe that the weeds have dried and died back. While this method is effective, you might notice a few visible green parts remaining, particularly with more established weeds. This indicates that while the foliage has been killed, the root system might still be intact, especially if only soap and water are used.
Pros: Less harsh on the environment than chemical alternatives, safe for use around pets and children once dry, generally effective for smaller weeds.
Cons: May not kill roots of perennial weeds, slower action compared to vinegar/salt, might require repeat applications.
Method 3: The Boiling Water Shock Treatment
For a quick, simple, and entirely chemical-free solution, boiling water is surprisingly effective. The intense heat instantly scalds and ruptures the plant cells, causing immediate wilting and eventual death.
- Heat the Water: Fill a kettle with water and bring it to a rolling boil.
- Pour Directly: Carefully carry the kettle to the target weeds and pour the boiling water directly and generously onto them. Ensure you douse the entire plant, focusing on the base.
- Observe: Within minutes, you’ll see the weeds begin to wilt and shrivel. Leave them for 24 hours, and they will be completely dried up.
Pros: Immediate visual results, completely natural and chemical-free, very inexpensive.
Cons: Only kills above-ground foliage, often leaves the root intact (meaning regrowth is likely), requires careful handling to avoid burns, impractical for large areas, can harm beneficial soil microbes if applied excessively. Best used for weeds in cracks, driveways, or patio pavers where root survival is less of a concern for future plantings.
Long-Term Weed Prevention Strategies for a Pristine Garden
While homemade solutions effectively tackle existing weeds, true garden harmony comes from proactive prevention. Implementing these simple yet powerful strategies will significantly reduce the number of weeds that even get a chance to sprout, saving you time and effort in the long run.
Method 1: The Mulch Barrier Method
Mulching is one of the most effective and aesthetically pleasing ways to prevent weeds. It creates a physical barrier that blocks sunlight, preventing weed seeds from germinating and smothering any that do manage to sprout.
- Choose Your Mulch: Select an appropriate mulch for your garden. Organic mulches like wood chips, shredded bark, straw, or compost decompose over time, enriching your soil. Inorganic mulches such as gravel or crushed stone are excellent for pathways or areas where soil enrichment isn’t a priority.
- Apply Generously: Place mulch anywhere you desire to suppress weeds, such as around tree trunks, in garden beds, or along pathways. The key is depth: a layer of 2 to 3 inches is generally sufficient to smother weeds effectively. For particularly stubborn areas, you can go up to 4 inches.
- Maintain Space: When mulching around trees or shrubs, ensure you leave a small “doughnut” of space around the base of the trunk or stem to prevent moisture buildup and potential rot.
- Reapply as Needed: Organic mulches will break down over time, so plan to replenish them annually or every other year to maintain their weed-suppressing power and continue to improve soil health.
Benefits of Mulch: In addition to weed suppression, mulch conserves soil moisture, regulates soil temperature, and provides nutrients (if organic) as it decomposes, all contributing to healthier plants.
Method 2: Precision Trimming and Manual Removal
Sometimes, the simplest methods are the best. Regular inspection and prompt action can prevent small weed problems from escalating into major invasions. Manual removal is particularly effective for larger, more established weeds that might resist spray treatments.
- Early Intervention: The best time to pull weeds is when they are young and the soil is moist (after rain or watering). This makes it easier to remove the entire root system, preventing regrowth.
- Tools for Tough Weeds: For already growing weeds that are difficult to pull by hand, grab some garden scissors or trimmers. Cut them off all the way down to the ground. While this won’t kill the root, it prevents the weed from photosynthesizing, weakens it over time, and most importantly, stops it from flowering and spreading its seeds throughout your yard.
- Target the Root: When possible, always aim to remove the entire root system. Many perennial weeds will simply grow back from root fragments left in the soil. A weeding fork or a hand trowel can be invaluable for prying out deep taproots.
Tip: Always dispose of weeds carefully, especially if they have gone to seed, to prevent them from re-seeding elsewhere in your garden.
Method 3: Targeting Weeds in Unwanted Spaces (Especially Edging)
Certain areas of the garden, like the edges of lawns or along pathways, are notorious for inviting unwanted growth. Grass creeping under edging or weeds sprouting in cracks can be particularly frustrating.
- Under Edging: If you have grass or weeds growing out underneath your garden edging, a little trowel or small shovel is your best friend. Use it to carefully dig up the roots of these encroaching plants. Digging down and severing the roots will prevent them from continuing to spread into your beds.
- Cracks and Pavement: For weeds in pavement cracks, the boiling water method (Method 3 in DIY Weed Killer Solutions) is highly effective as it doesn’t leave chemical residues on hard surfaces and can provide immediate results.
- Regular Maintenance: Make it a habit to regularly inspect these transition zones. Early detection and removal are key to keeping these areas tidy and free from invasive growth.
Important Considerations and Safety Tips
While these homemade solutions are natural, it’s crucial to use them responsibly and understand their potential impacts:
- Soil Impact: Vinegar and salt solutions, particularly if used repeatedly or in large quantities, can alter soil pH and salinity, potentially harming desirable plants or making the soil inhospitable for future planting. Use these methods sparingly in areas where you plan to grow other plants. Boiling water also impacts soil biology but is less persistent.
- Targeted Application: Always aim to spray only the weeds. These solutions are non-selective and will kill any plant foliage they come into contact with. Use a shield or spray on calm days to prevent drift.
- Pets and Children: While generally safer than chemical herbicides, it’s wise to keep pets and young children away from treated areas until the solutions have dried.
- Persistence is Key: Weeds are tenacious! A single application might not be enough for deeply rooted perennials. Be prepared for follow-up applications and consistent prevention efforts.
- Protective Gear: When working with concentrated vinegar (e.g., horticultural vinegar) or boiling water, always wear gloves and eye protection.
Conclusion: Cultivating a Healthier Garden, Naturally
Embracing these inexpensive, homemade weed-blocking solutions and eco-friendly prevention methods empowers you to take control of your garden in a sustainable way. From the immediate impact of vinegar and salt to the long-term benefits of mulching, you now have a versatile toolkit to combat unwanted invaders. Not only will you save money by avoiding costly chemical products, but you’ll also contribute to a healthier environment for your family, pets, and local wildlife.
Remember, gardening is an ongoing journey of learning and adapting. By integrating these natural strategies into your routine, you’ll not only achieve a pristine, weed-free garden but also foster a deeper connection with your outdoor space, cultivating beauty and biodiversity through mindful, eco-conscious practices. Happy gardening!
*All image credit belongs to Hometalk via YouTube. Follow and subscribe to their channel for more inspiring DIY solutions!