
DIY Bobby Pin Necklace: Craft a Stunning Statement Piece in Under 30 Minutes
Are you searching for a unique accessory that reflects your personal style without breaking the bank? Imagine transforming an everyday item into a captivating piece of jewelry that sparks conversations. When I first stumbled upon the idea of making a necklace from bobby pins, I was absolutely astonished by its ingenuity and immediate visual appeal. It seemed almost too simple, yet the results were undeniably chic and sophisticated. This isn’t just a craft; it’s a fashion revelation, proving that style doesn’t have to come with a hefty price tag or countless hours of effort.
This incredible DIY project promises to deliver a show-stopping necklace in an incredibly short amount of time. While the assembly can be completed in as little as 7 minutes, accounting for optional painting and drying, you can have a completely custom, ready-to-wear statement piece in under half an hour. Forget expensive boutique jewelry; unleash your inner designer and craft a personalized accessory that is truly one-of-a-kind.
Why Bobby Pins? The Unsung Heroes of DIY Jewelry
Often overlooked, bobby pins are far more than just hair accessories. Their simple, elegant shape and metallic sheen make them an ideal candidate for creative upcycling into stunning jewelry. What makes them particularly exciting for this project is their availability in a diverse range of finishes. You can now find bobby pins in classic black, gleaming gold, sleek gunmetal, rustic copper, and even vibrant colors, offering an immediate palette to work with. This variety eliminates the need for extensive painting if you prefer a metallic aesthetic, or provides a perfect base if you wish to add your own splash of color.
Beyond their aesthetic appeal, bobby pins are incredibly affordable and accessible. You likely already have a stash of them, making this a truly budget-friendly craft. Their inherent springiness also allows for easy manipulation, enabling them to securely grip a necklace chain and hold their position, forming intricate patterns and striking designs with minimal effort.
Unlock Your Style: Benefits of Crafting Your Own Bobby Pin Necklace
Embarking on this DIY journey offers a multitude of advantages:
- Unmatched Customization: Express your individuality! With an endless array of colors, patterns, and arrangements, you can design a necklace that perfectly matches your outfit, mood, or personal aesthetic. Change the color of the pins with nail polish, vary their density, or even add small charms.
- Speed and Simplicity: In our fast-paced world, quick crafts are a treasure. This project is renowned for its rapid completion time, making it perfect for last-minute accessory needs or spontaneous creative urges.
- Budget-Friendly Fashion: Why spend a fortune on mass-produced jewelry when you can create a high-fashion look for mere pennies? This DIY saves you money while elevating your style game.
- Unique Statement Piece: Stand out from the crowd with a necklace that no one else will have. It’s a fantastic conversation starter and a testament to your creativity.
- Engaging for All Ages: This isn’t just for seasoned crafters. Teens and adults alike can enjoy the process and pride of creating something beautiful and fashionable. It’s an excellent project for a craft night with friends or a fun activity with a younger fashion enthusiast.
- Sustainable Upcycling: Give new life to an everyday item, reducing waste and embracing a more resourceful approach to fashion.
Gather Your Creative Toolkit: Materials You’ll Need
Before you dive into the fun, gather these simple supplies. Most are likely already in your home or easily found at any craft or dollar store:
- Bobby Pins: A generous handful! The exact number will depend on the desired density and length of your necklace. Consider various colors or metallic finishes (gunmetal, gold, copper, silver) for added versatility.
- Necklace Chain or Choker: A shorter chain, typically 16 to 18 inches, works best to create a prominent statement. Alternatively, a wire choker-style necklace offers a structured base. Choose a chain with links that are open enough for the bobby pins to slide onto or clip around.
- Nail Polish or Spray Paint: For custom coloring your bobby pins. Nail polish offers a vast color palette, a glossy finish, and remarkable durability for small projects. Spray paint is ideal if you want to color a large batch quickly and achieve a uniform matte or metallic finish.
- Pliers (Optional): Small jewelry pliers can be helpful for gently opening bobby pins if they are too tight, or for crimping them more securely onto the chain.
- Newspaper, Cardboard, or Drop Cloth: To protect your work surface, especially if you’re painting.
- Clear Top Coat Nail Polish (Optional): To seal painted bobby pins, add extra shine, and enhance durability.
- Jump Rings and Charms (Optional): For adding extra embellishments or to attach multiple sections of bobby pins.
Your Step-by-Step Guide to Crafting a Bobby Pin Necklace
Ready to transform humble hair accessories into a dazzling fashion statement? Follow these easy steps:
Step 1: Prepare Your Bobby Pins (Optional Painting)
- Sort and Clean: If using existing bobby pins, ensure they are clean and free of hair or residue. If painting, select the pins you wish to color.
- Paint (if desired):
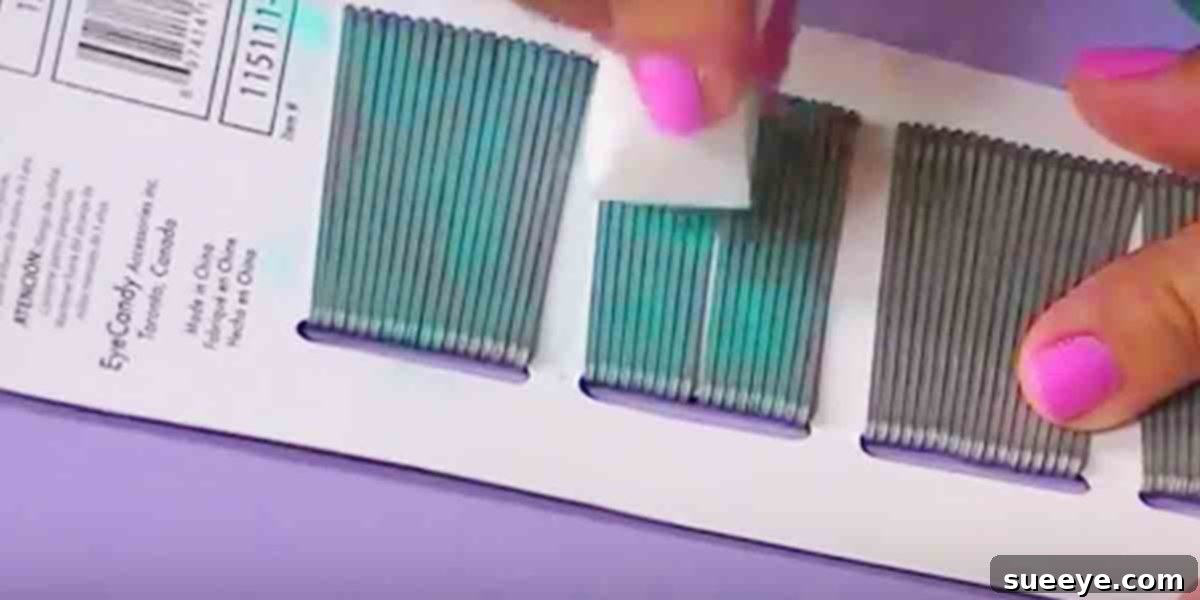
- Using Nail Polish: Lay your bobby pins flat on a protected surface. Carefully paint one side of each pin with your chosen nail polish color. Allow ample drying time (at least 15-20 minutes, or longer if needed) before flipping them over and painting the other side. For vibrant colors or a more opaque finish, apply a second coat after the first has dried completely.
- Using Spray Paint: Arrange your bobby pins on a piece of cardboard or newspaper in a well-ventilated area. Hold the spray paint can 6-8 inches away and apply light, even coats. Allow to dry thoroughly between coats. Once completely dry, flip them and repeat the process for the other side.
- Seal (Optional): Once all paint is dry, you can apply a clear top coat nail polish to add shine and extra protection to your painted pins, enhancing their longevity.
Step 2: Attach Bobby Pins to Your Chain
- Choose Your Pattern: Decide how you want your bobby pins to be arranged. Will they be tightly packed, evenly spaced, or clustered in groups? This is where your creativity shines!
- Start Attaching:
- Method 1 (Interlocking): This creates a dense, structural look. Open a bobby pin slightly and slide one leg through a link in your necklace chain. Then, open another bobby pin and slide its leg through the loop of the first bobby pin, and then through the next chain link, creating an interlocking “V” or zigzag pattern. Continue this process, building your design along the chain.
- Method 2 (Clipping/Spacing): For a more delicate or spaced-out design, simply clip the bobby pins directly onto the chain links at desired intervals. Ensure they are securely fastened to prevent them from sliding or falling off. You can use pliers to gently crimp the bobby pin ends around the chain for extra security, but be careful not to damage the chain or the pin’s finish.
- Method 3 (Clustered): Group several bobby pins together before attaching them to a single chain link or a small jump ring, then attach the cluster to the main necklace chain. This creates interesting focal points.
Step 3: Arrange and Secure
As you attach the pins, continuously adjust their position and angle to create your desired aesthetic. Ensure all bobby pins are firmly gripping the chain. If any feel loose, gently squeeze them with your fingers or a pair of pliers to tighten their hold. The goal is a necklace that looks cohesive and stays together.
Step 4: Finishing Touches and Final Inspection
Once you’ve attached all your bobby pins, hold up your necklace and admire your work! Check for any gaps, unevenness, or loose pins. Make any final adjustments. Your stunning, custom-made bobby pin necklace is now ready to wear!
Beyond the Basic: Design Variations and Inspiration
The beauty of this DIY project lies in its infinite possibilities. Don’t be afraid to experiment!
- Color Pop: Use a rainbow of nail polish colors for a playful, vibrant look. Ombre effects can also be stunning.
- Metallic Mix: Combine gold, silver, gunmetal, and copper bobby pins on a single chain for a rich, textured metallic statement.
- Pattern Play: Create geometric patterns, zigzags, or even a fan-like arrangement by varying the angle and density of the pins.
- Layering Effect: Make two or three bobby pin necklaces of slightly different lengths and wear them together for a trendy layered look.
- Embellish with Charms: Add small jump rings and attach tiny charms or beads in between some of the bobby pins for extra sparkle and detail.
- Asymmetric Appeal: Don’t feel confined to perfect symmetry. A cluster of pins off-center can create an equally striking and modern aesthetic.
For more visual inspiration, a quick search on platforms like Pinterest will reveal an astonishing array of bobby pin necklace designs, from minimalist to bohemian, helping you spark your next creative idea.
Tips for a Flawless Finish
- Patience with Paint: If painting, ensure each coat is fully dry before applying the next or handling the pins. Rushing this step can lead to smudges and a less professional finish.
- Quality Pins: While any bobby pins work, sturdier ones might offer a better grip and last longer.
- Chain Choice Matters: A chain with slightly larger or more open links will be easier to work with, especially for interlocking designs.
- Work on a Flat Surface: This helps keep your design uniform and prevents pins from rolling away.
- Don’t Be Afraid to Undo: If a section isn’t looking right, gently remove the pins and reattach them. It’s part of the creative process!
Care and Maintenance for Your DIY Masterpiece
To ensure your bobby pin necklace remains beautiful for years to come, a little care goes a long way:
- Avoid Moisture: Water and humidity can tarnish metallic pins or cause painted finishes to chip over time. Remove your necklace before showering, swimming, or exercising.
- Store Properly: Keep your necklace in a dry place, ideally hanging or laid flat, to prevent tangling or accidental bending of the pins.
- Gentle Cleaning: If needed, gently wipe with a soft, dry cloth. Avoid harsh chemicals or abrasive cleaners.
- Touch-Ups: If paint chips or pins become loose over time, a quick touch-up with nail polish or a gentle squeeze with pliers can easily refresh your necklace.
Unleash Your Inner Jeweler Today!
The bobby pin necklace project is a testament to the power of imagination and the joy of DIY. It’s an accessible, affordable, and incredibly rewarding way to create personalized fashion statements that truly reflect who you are. So gather your supplies, ignite your creativity, and prepare to turn an ordinary hair accessory into an extraordinary piece of jewelry. You’ll be amazed at what you can achieve in just a short amount of time, proving that the most stunning fashion can often be found in the simplest of transformations. Happy crafting!