
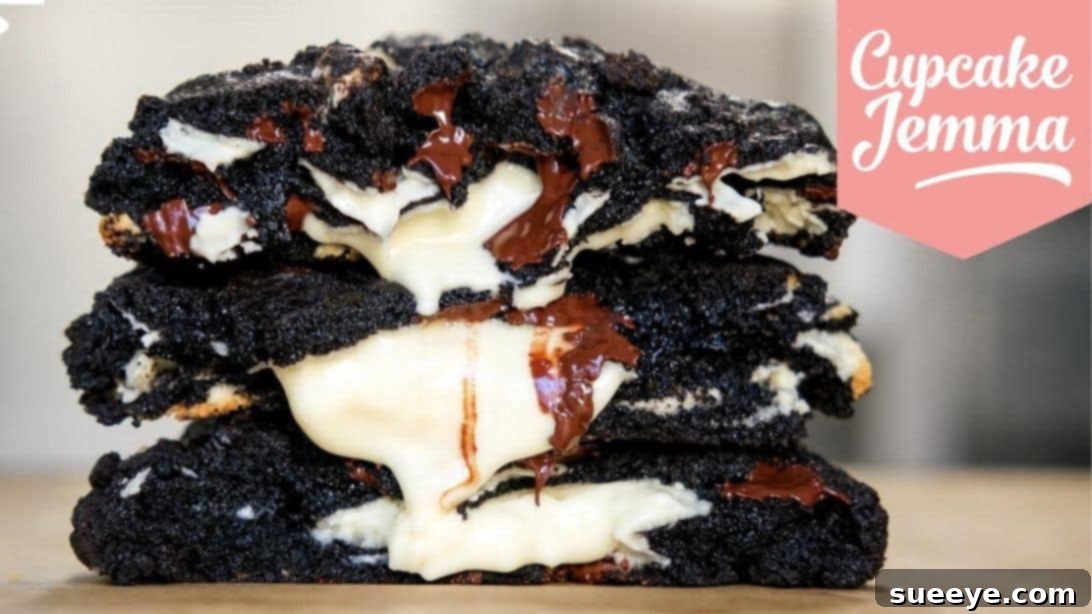
Prepare to elevate your home baking experience with a recipe that promises an unforgettable indulgence: the Cookies and Cream New York Style Cookies by CupcakeJemma. If you cherish the classic combination of cookies and cream, then these oversized, bakery-quality treats are an absolute must-try. From the very first bite, you’ll understand why this particular recipe has garnered such immense popularity and adoration. It’s a culinary revelation that consistently surprises and delights, transforming simple ingredients into a truly extraordinary dessert.
What makes these New York Style Cookies truly exceptional is their masterful blend of textures and flavors. Each cookie boasts a perfectly crisp exterior that gives way to an incredibly dense, soft, and chewy center. They are generously loaded with rich dark chocolate chips, delightful white chocolate pieces, and an abundance of crushed Oreo crumbs, ensuring a burst of flavor in every mouthful. But the real showstopper? A luscious, gooey white chocolate filling that oozes out when you break the cookie in half, creating a visual and gastronomic experience that’s simply irresistible. This is not just a cookie; it’s a sensory journey that will leave you craving more.
The allure of New York Style Cookies lies in their substantial size and complex internal structure – a perfect contrast between a slightly crisp shell and a tender, melt-in-your-mouth interior. This specific recipe captures that essence beautifully, adding the beloved cookies and cream twist. It’s a dark, double chocolate chip cookie elevated by the iconic taste of Oreo, making it one of the most sought-after items in gourmet bakeries. Now, with this meticulously detailed guide, you can recreate that same magical experience right in your own kitchen, bypassing the queues and enjoying fresh, warm cookies whenever the craving strikes.
Beyond this incredible recipe, the world of cookies and cream desserts is vast and exciting. Explore other delightful options such as Cookies and Cream Pudding Pops, these surprisingly simple 5-Ingredient Cookies and Cream Cheesecake Cookies, or a fun and unique Cookies and Cream Popcorn Recipe for a different kind of treat. However, for a truly satisfying baking project that yields spectacular results, these New York Style Cookies remain a top contender.
Essential Ingredients for Decadent New York Style Cookies
Crafting these luxurious cookies starts with gathering the right ingredients. Using high-quality components will significantly impact the final taste and texture, ensuring your homemade treats rival any bakery creation. Pay attention to the specific measurements and temperatures for optimal results.
- 12 tablespoons of white chocolate spread (for the gooey center)
- 1 cup of cold butter (chopped into small pieces for better creaming)
- 3/4 cup and 1 tablespoon of light brown sugar (packed, for moisture and chewiness)
- 3/4 cup and 1 tablespoon of caster sugar (fine-grain sugar for a crispier edge)
- 10.6 oz of white chocolate chips (good quality chips melt beautifully)
- 3.5 oz of dark chocolate chips (provides a depth of flavor)
- 1.8 oz of crushed Oreo crumbs (for inclusion in the dough)
- 1 3/4 cups and 2 tablespoons of self-rising flour (ensures proper lift and texture)
- 1/2 cup and 2 tablespoons of dark cocoa powder (for intense chocolate flavor)
- 1 teaspoon of sea salt (enhances all the sweet flavors)
- 2 teaspoons of baking powder (additional leavening for thick cookies)
- 2 large eggs (at room temperature for better emulsion)
- 1 egg yolk (adds richness and helps with chewiness)
- 3.5 oz of crushed Oreo cookies for rolling (for the signature outer coating)
Mastering the Art of Cookies and Cream New York Style Cookies
Follow these detailed steps closely to achieve perfect, bakery-style cookies every time. Precision in preparation and patience during chilling are key to their signature thick, chewy, and gooey texture.
Step 1: Prepare the White Chocolate Filling
Begin by creating the luscious white chocolate core. Take your white chocolate spread and portion it into 12 distinct blobs, each roughly the size of a large marble or a small teaspoonful. Arrange these blobs on a baking sheet that has been lined with parchment paper. This parchment paper is crucial to prevent sticking. Once portioned, transfer the baking sheet into the freezer and allow the white chocolate to firm up for a minimum of 30 minutes. This freezing step is vital as it prevents the filling from completely melting and disappearing into the cookie dough during baking, ensuring that desirable gooey center.
Step 2: Combine the Dry Ingredients
In a medium-sized mixing bowl, thoroughly combine all your dry ingredients. This includes the self-rising flour, dark cocoa powder, sea salt, and baking powder. Using a whisk, stir them vigorously until they are completely integrated. This ensures that the leavening agents and flavorings are evenly distributed throughout the cookie dough, contributing to a consistent texture and rise. Set this bowl aside for now.
Step 3: Prepare the Egg Mixture
In a separate small bowl, crack the two large eggs and add the single egg yolk. Whisk these together until the yolks and whites are fully combined and the mixture is light and uniform in color. Having your eggs at room temperature will help them incorporate more smoothly into the butter mixture later on, creating a better emulsion and a more cohesive dough.
Step 4: Cream Butter, Sugars, and Mix-ins
Into the bowl of your stand mixer, fitted with the paddle attachment, add the cold, chopped butter, light brown sugar, and caster sugar. Start mixing on a low speed to gradually break down the butter. Continue to mix, increasing the speed slightly if needed, until the butter is chunky and well combined with the sugars. Then, add the white chocolate chips, dark chocolate chips, and the 1.8 oz of crushed Oreo crumbs. Mix these in gently until they are just evenly distributed throughout the butter and sugar mixture. Be careful not to overmix at this stage.
Step 5: Incorporate Dry Ingredients into Wet
Gradually add the prepared dry ingredient mixture from Step 2 into the wet ingredients in your stand mixer. Mix on a low speed until the flour is just incorporated and the mixture takes on a sandy, crumbly texture. It will not form a cohesive dough at this point, which is perfectly normal. Avoid overmixing once the flour is added, as this can develop the gluten too much, leading to tough cookies.
Step 6: Finish the Dough and Portion
Pour the beaten egg mixture from Step 3 into the sandy dough mixture. Mix on a low speed until everything is well combined and forms a thick, sticky dough. Once mixed, transfer the dough onto a clean work surface. For each cookie, measure out approximately 4.4 oz (about 125 grams) of dough. Form each portion into a ball. The trick here is to avoid rolling it too smoothly; instead, gently squeeze and compress the dough to form a rustic ball. This technique helps create a denser, chewier cookie with those characteristic craggy edges.
Step 7: Fill, Coat, and Chill the Cookies
Take one dough ball and use your thumb to create a deep indent in the center. Retrieve a frozen white chocolate blob from the freezer and place it into this indent. Carefully gather the cookie dough from the sides, fully enclosing the white chocolate filling to create a sealed ball. Next, take the remaining 3.5 oz of crushed Oreo cookies and gently press the outside of the dough ball into these crumbs, ensuring it’s generously coated. This adds another layer of cookies and cream flavor and a delightful textural crunch. Place the finished cookie ball into an airtight container. Repeat this process for all remaining dough portions. Once all cookies are formed and coated, place the container back into the freezer for a crucial minimum of 4 hours. This extended chilling period is absolutely essential for New York Style Cookies; it prevents excessive spreading during baking, allowing the cookies to become thick and chewy, and helps deepen the flavors.
Step 8: Bake to Perfection
Preheat your oven to 374°F (190°C). Line a baking sheet with parchment paper. Remove the chilled cookie balls from the freezer and arrange them on the prepared baking sheet, ensuring generous spacing between each cookie to allow for their inevitable spread. Bake in the preheated oven for approximately 16 minutes. The exact baking time may vary slightly depending on your oven, so keep an eye on them. You’re looking for cookies that are golden brown at the edges but still appear slightly soft and underbaked in the center. This ensures they remain deliciously gooey. Once baked, remove them from the oven and let them cool on the baking sheet for a few minutes before transferring to a wire rack to cool completely. This resting period allows them to set up without breaking.
Tips for Achieving Bakery-Quality Cookies and Cream New York Style Cookies
To truly master these decadent New York Style Cookies, consider these expert tips that will elevate your baking and guarantee exceptional results every time:
- Accurate Measurements: Baking is a science. Using a kitchen scale for dry ingredients like flour and chocolate chips will yield the most consistent and accurate results, leading to the perfect texture.
- Cold Butter is Key: Starting with cold, chopped butter in Step 4 helps create pockets of steam during baking, contributing to the cookie’s lift and flaky texture on the outside while maintaining chewiness inside.
- Don’t Skip the Chill: The prolonged chilling period (minimum 4 hours, or even overnight) is non-negotiable for New York Style Cookies. It solidifies the butter, prevents excessive spreading, concentrates flavors, and ensures that thick, chewy structure.
- Perfectly Frozen Filling: Ensure your white chocolate blobs are frozen solid before embedding them. This helps them maintain their shape and melt slowly during baking, creating that irresistible gooey center.
- Avoid Overmixing: Once the dry ingredients are added, mix only until just combined. Overmixing develops gluten, which can lead to tough, dense cookies instead of the desired chewy texture.
- Oven Temperature Matters: A properly preheated oven is crucial. Consider using an oven thermometer to ensure your oven is at the correct 374°F (190°C) temperature before baking.
- Don’t Overbake: These cookies are meant to be slightly underbaked in the center when removed from the oven. They will continue to cook and set as they cool on the hot baking sheet, achieving that ideal gooey interior.
Creative Variations and Irresistible Serving Ideas
While the classic Cookies and Cream New York Style Cookie is a masterpiece on its own, don’t hesitate to experiment with variations to suit your taste or occasion:
- Different Chocolate Fillings: Instead of white chocolate spread, try a hazelnut chocolate spread, peanut butter, or even a caramel sauce for the gooey center. Just ensure they can be frozen solid enough to handle.
- Alternate Mix-ins: Feel free to swap out some of the chocolate chips for other additions like chopped nuts (walnuts, pecans), other types of chocolate (milk chocolate, mint chocolate), or even mini marshmallows.
- Glaze Topping: For an extra touch of sweetness and visual appeal, drizzle a simple white chocolate or cream cheese glaze over the cooled cookies.
- Serving Warm: These cookies are absolutely divine when served warm, allowing the chocolate chips and filling to remain molten and gooey.
- Pair with Beverages: Enjoy them with a cold glass of milk, a steaming cup of coffee, or even a scoop of vanilla bean ice cream for an ultimate dessert experience.
Experience the Ultimate Homemade Cookies and Cream Delight
Embarking on the journey of making these Cookies and Cream New York Style Cookies is more than just following a recipe; it’s about creating an unforgettable experience. The joy of baking, the intoxicating aroma filling your kitchen, and finally, the unparalleled satisfaction of biting into a warm, gooey, bakery-quality cookie you made yourself – it’s truly a reward. This recipe by CupcakeJemma has proven its worth, delivering consistent deliciousness that rivals the best gourmet bakeries. So gather your ingredients, follow these steps with care, and prepare to impress yourself and everyone lucky enough to share in this decadent delight. These aren’t just cookies; they’re a celebration of flavor, texture, and the simple pleasure of homemade goodness.