
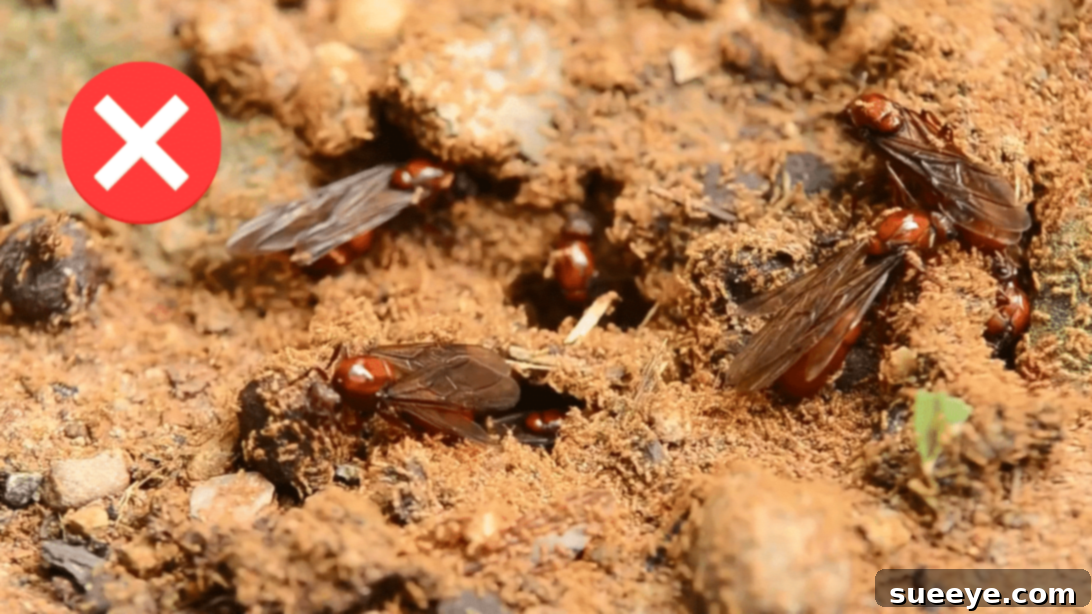
Few things can disrupt the comfort of your home quite like a sudden swarm of flying ants. While generally harmless,
these winged invaders can quickly become a significant nuisance, particularly during their mating season in warmer
months. A large presence of flying ants often signals the existence of a substantial colony nearby, which, if not
addressed promptly and effectively, can lead to ongoing pest problems. Understanding how to identify, manage, and
ultimately prevent these infestations is crucial for maintaining a serene living environment. This comprehensive
guide will walk you through proven strategies for tackling flying ants, from initial identification to long-term
prevention, ensuring your home remains a sanctuary, not an ant colony.
The key to successful pest management, especially with prolific insects like ants, lies in proactive prevention and
swift action at the first sign of trouble. While maintaining a meticulously clean home and consistently clearing
potential nesting sites are foundational steps, sometimes an infestation can still occur. When prevention falls
short, knowing the right measures to take can save you considerable stress and effort. This article will provide
you with detailed insights and practical tips, drawing from expert advice to help you regain control. For a visual
demonstration and further guidance on practical application, consider watching this insightful video tutorial by How to House on YouTube.
Understanding and Identifying Flying Ants
Before diving into removal methods, it’s essential to understand what you’re dealing with. Flying ants are typically
reproductive ants — either queens or male drones — embarking on their “nuptial flight” to mate and establish new
colonies. This usually occurs during specific periods, often coinciding with warm, humid weather, explaining their
sudden appearance in large numbers. While their presence can be alarming, it’s vital to correctly identify them,
as they are often mistaken for termites, which require a completely different and often more urgent approach.
**Key Distinguishing Features:**
-
Waist: Flying ants have a distinctly “pinched” or narrow waist, similar to regular worker
ants. Termites, however, have a broad, uniform waist. This is one of the most reliable visual cues. -
Antennae: Ant antennae are typically elbowed or bent at an angle. In contrast, termite antennae
are straight and bead-like. Observing this detail closely can prevent misidentification. -
Wings: Both flying ants and termites have two pairs of wings. However, flying ants have front
wings that are noticeably longer than their hind wings, and their wings are often translucent or slightly smoky.
Termite wings are roughly equal in length and width and are often shed easily, found in piles around windows or
doorways.
Correct identification is the first critical step because misidentifying flying ants as termites could lead to
ineffective treatments or, worse, ignoring a serious structural threat posed by termites. Once you’re certain you’re
facing flying ants, you can proceed with targeted removal and prevention strategies, ensuring your efforts are
focused and effective.
Effective Strategies to Get Rid of Flying Ants
Dealing with a flying ant infestation requires a multi-pronged approach that targets both the immediate swarm and
their underlying colony. Here’s a detailed breakdown of effective steps you can take to reclaim your space:
Step 1: Locate the Source and Nest
One of the most crucial actions you can take is to pinpoint the origin of the flying ants. They aren’t just
appearing randomly; they are emerging from a colony, often in search of new mating grounds or expanding their
territory. Common nesting sites include areas with rotting wood, excessive moisture, or decaying organic matter.
Indoors, this could mean damp basements, crawl spaces, wall voids, around leaky pipes, or even within insulation.
Outdoors, look underneath paving stones, in woodpiles, old tree stumps, compost heaps, or even within structural
timbers that have sustained water damage. Observing their flight paths can often lead you directly to their entry
points or nest locations. Taking the time to find and eliminate the source is far more effective and provides
longer-lasting results than merely treating the visible ants. Look for small piles of sawdust-like material (frass)
if carpenter ants are suspected, or tiny mounds of dirt.
Step 2: Utilize a Vinegar-Based Solution
For a natural, safe, and readily available repellent, a simple vinegar solution can be highly effective. Ants rely
heavily on scent trails, primarily pheromones, to navigate, communicate, and find food. The strong, acidic scent of
vinegar disrupts and masks these trails, disorienting the ants and making your home significantly less appealing for
foraging and nesting. To prepare this solution, mix equal parts white vinegar and water in a clean spray bottle.
Shake well and apply it directly onto flying ants you see, their suspected entry points, along baseboards, window
sills, or any areas where you’ve noticed significant ant activity. While not an immediate killer, it acts as an
excellent deterrent and helps obscure existing pheromone trails, making it harder for ants to find their way. This
solution is also generally safe for most household surfaces, though it’s always wise to test a small, inconspicuous
area first to ensure no discoloration or damage.
Step 3: Strategically Place Sticky Traps
Sticky traps offer a convenient, non-toxic, and chemical-free method for reducing the immediate number of flying
ants, especially those found indoors. These traps, often coated with a strong, non-drying adhesive, are designed to
ensnare insects upon contact. Place them strategically near windows, doors, light sources, or any area where you
observe a high concentration of flying ants. The natural attraction of many insects to light makes windows and other
bright areas prime locations for these traps. While sticky traps won’t eliminate the entire colony, they are
excellent for monitoring the extent of the infestation and for capturing individual ants, significantly reducing
the visual nuisance and preventing them from spreading further into your living spaces. They also provide valuable
information about the traffic patterns of the ants. Remember to replace the traps regularly as they fill up or lose
their stickiness.
Step 4: Apply Insecticidal Dusts or Sprays
For more severe infestations or when the nest is located in a hard-to-reach area, professional-grade insecticidal
dusts or sprays formulated specifically for ants can be highly effective. These products often contain active
ingredients like pyrethrins, synthetic pyrethroids, or boric acid, which can provide residual control, meaning they
continue to kill ants for a period after application. When using insecticidal dust, apply it carefully into cracks,
crevices, wall voids, attics, basements, or directly into the nest entrance if visible. Dusts are particularly good
for reaching deep into hidden areas where ants might be nesting, slowly spreading through the colony as ants
inadvertently carry it. Sprays can be used as a barrier treatment around the perimeter of your home or directly on
large aggregations of ants. Always read and follow the manufacturer’s instructions carefully for application rates,
safety precautions, and proper ventilation. It is crucial to wear appropriate protective gear, such as gloves and
masks, to minimize exposure to chemicals, and to keep children and pets away from treated areas. For large or
persistent infestations, or if you suspect the nest is within structural elements of your home, contacting a pest
control professional is highly advisable to ensure safe and thorough elimination, as they have access to stronger
products and specialized equipment.
Preventing Future Flying Ant Infestations
Eliminating an existing flying ant problem is only half the battle; preventing their return is key to long-term
success and maintaining a pest-free home. A proactive approach focuses on eliminating attractants and fortifying
your home against potential entry points.
**1. Seal All Entry Points:**
Inspect your home thoroughly for any potential entry points that ants could use to gain access. This includes tiny
cracks in foundations, gaps around window and door frames, utility line penetrations, and openings where plumbing
pipes enter the house. Use high-quality caulk to seal small cracks and holes, and install or repair weatherstripping
for doors and windows. Even seemingly insignificant openings can provide easy access for ants seeking shelter or
food. Pay special attention to areas around vents, electrical conduits, and cable entries, as these are common
vulnerable points. Repair any damaged window screens or door sweeps to create a robust physical barrier against
these unwanted guests.
**2. Manage Moisture Levels:**
Flying ants, particularly certain species like carpenter ants, are heavily attracted to moist or decaying wood.
Address any leaks promptly, whether they stem from plumbing fixtures, roofs, or foundations. Ensure proper
ventilation in bathrooms, kitchens, and crawl spaces to reduce humidity buildup. Consider using dehumidifiers in
damp areas like basements to lower ambient moisture levels. Outdoors, ensure rainwater drains effectively away from
your foundation by checking that gutters are clean, free of debris, and functioning correctly. Eliminating sources
of excess moisture makes your home significantly less appealing as a nesting site for ants and other pests.
**3. Maintain a Clean Environment:**
Food crumbs, liquid spills, and easily accessible food sources are major attractants for all types of ants. Keep
your kitchen meticulously clean by wiping down counters and stovetops, sweeping or vacuuming floors regularly, and
promptly cleaning up any spills. Store all food items, including pet food, in airtight containers to prevent ants
from detecting and accessing them. Regularly empty trash cans, both indoors and outdoors, and ensure they have
tight-fitting lids to contain odors and prevent foraging. A consistent routine of cleanliness makes your home far
less hospitable to scouting ants looking for their next meal.
**4. Clear Outdoor Nesting Sites:**
Beyond your home’s immediate structure, maintaining your yard and garden is crucial to remove potential outdoor
nesting sites. Remove rotting wood, old tree stumps, and any piles of leaves, debris, or organic matter from around
your foundation. Keep firewood stacked neatly and elevated away from the house, preferably on a rack, as it can be
a prime nesting location. Trim tree branches and shrubs so they don’t touch the side of your house, as these can
serve as convenient bridges for ants to access your home. Regularly inspect for any signs of ant activity in your
garden, along pathways, or around your home’s perimeter to catch potential colonies early.
**5. Regular Inspections and Monitoring:**
Even after implementing comprehensive preventive measures, it’s wise to conduct regular inspections of your home,
especially during warmer months when flying ants are most active. Look for subtle signs of ant trails, discarded
wings near windows, or small piles of sawdust (frass), which can indicate carpenter ant activity. Early detection
allows for prompt intervention before a small problem escalates into a full-blown infestation. Consider placing
ant baits or discreet monitoring traps in strategic locations around your home to detect any renewed activity and
address it immediately. Diligence in monitoring is your best defense against recurring issues.
By combining immediate treatment strategies with robust, long-term preventive measures, you can effectively manage
and prevent flying ant infestations, ensuring your home remains comfortable, hygienic, and wonderfully pest-free for
years to come.
*All image credit belongs to How to House via YouTube.
Follow and subscribe to their channel for more insightful home care tips and DIY guides!