
Mastering Carpet Stain Removal: Your Ultimate DIY Guide to a Spotless Home
There’s nothing quite like the feeling of a freshly cleaned living space – a cozy haven where comfort meets aesthetics. Yet, this serenity can be instantly shattered by the unwelcome sight of a stubborn carpet stain. Whether it’s the aftermath of a celebratory red wine spill, the muddy tracks from an unexpected guest, or the accidental splash of morning coffee, carpet stains possess an uncanny ability to disrupt an otherwise perfect environment, drawing attention and diminishing the allure of your carefully curated home.
Dealing with these unsightly blemishes can be a source of significant frustration, often leading homeowners to believe that professional intervention or expensive, harsh chemicals are the only solutions. However, the truth is far simpler and more accessible. With the right knowledge and a few common household items, you can effectively tackle most carpet stains yourself, restoring your carpet’s pristine condition and extending its life.
RELATED: Expert Tips for Removing Even the Toughest Carpet Stains
In this comprehensive guide, inspired by expert techniques from channels like The Stain Guide on YouTube, we will equip you with two remarkably effective DIY methods for eliminating virtually any carpet stain in your home. These proven solutions are designed to empower you, ensuring that no blotch, no matter how daunting, is beyond your ability to conquer. Say goodbye to the stress of carpet stains and hello to a consistently fresh and inviting living space.
Understanding Carpet Stains: The First Step to Effective Removal
Before diving into specific removal techniques, it’s beneficial to understand the nature of carpet stains. Carpets are made of various fibers, both natural and synthetic, which react differently to spills. The type of stain (e.g., oil-based, water-based, protein-based, dye-based) and how long it has sat can significantly impact the ease of removal. Acting quickly is always paramount, but even set-in stains often respond to targeted treatments. Our methods cover a broad spectrum of stain types, offering versatile solutions for common household accidents.
Preparation and Safety: Essential Steps Before You Begin
Successful carpet stain removal isn’t just about the cleaning solution; it’s also about proper preparation and ensuring safety. Always perform a patch test on an inconspicuous area of your carpet (like a closet corner or under a piece of furniture) before applying any new solution to the main stain. This verifies that the cleaner won’t discolor or damage your carpet fibers. Additionally, ensure good ventilation when working with cleaning agents, especially those involving ammonia or strong chemicals, and always wear protective gloves to safeguard your skin.
Method 1: Precision Spot Removal for Fresh Spills and General Dirt
This first method is ideal for tackling fresh spills, general dirt, and many common spots that haven’t deeply permeated the carpet fibers. It relies on a powerful yet simple DIY spotter chemical that breaks down contaminants effectively.
Step-by-Step Spot Cleaning Process:
- Prepare Your DIY Spotter Solution: In a clean spray bottle, meticulously combine 1 cup of warm water, 1 teaspoon of liquid dish soap (ensure it’s clear and dye-free to prevent additional staining), and 2 cups of 70% isopropyl alcohol. The dish soap acts as a surfactant, lifting the stain, while the isopropyl alcohol helps to dissolve oils and accelerates drying, preventing water rings.
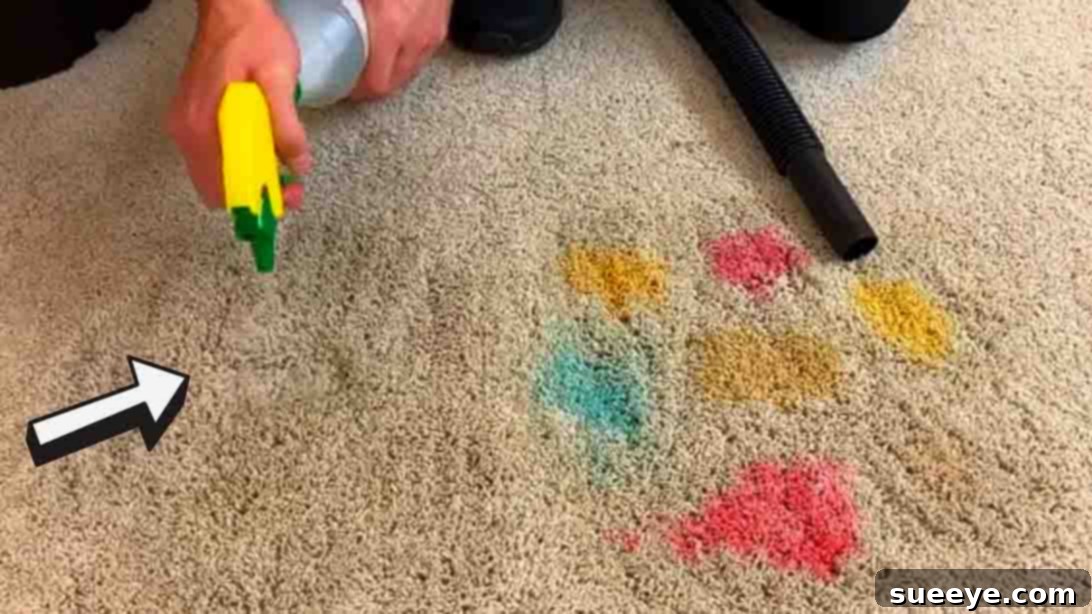
- Apply the Solution Liberally: Spray this homemade spotter solution generously over the entire stained area of your carpet. Allow it to sit for a few minutes (3-5 minutes is usually sufficient) to allow the chemicals to penetrate the fibers and start breaking down the stain. Avoid oversaturating the carpet, which can lead to longer drying times and potential mildew.
- Extract the Stain and Solution: The next crucial step is extraction. If you own a wet-dry vacuum (shop-vac) or a dedicated carpet spot extractor, use it to thoroughly extract the applied solution and the lifted contaminants from your carpet. This powerful suction removes the dirty water, soap residue, and stain particles, preventing them from resettling. Work slowly and methodically, making several passes over the treated area.
- Repeat for Stubborn Spots: For more stubborn or larger stains, repeat steps 2 and 3 two to three times. Each repetition will draw out more of the stain and further cleanse the carpet fibers. Be patient; persistence is key in carpet stain removal.
- Rinse Thoroughly: Once the stain appears to be gone, it’s vital to rinse the area with clean water. Spray a small amount of clean water onto the spot and then extract it immediately with your wet-dry vacuum or spot extractor. This step removes any remaining soap residue, which can attract dirt over time and cause the stain to reappear (this phenomenon is known as “wicking”).
- Final Drying and Inspection: If after rinsing there is still a noticeable stain, allow the carpet to completely dry before proceeding to Method 2. Sometimes, stains appear more prominent when wet and fade as they dry. Ensure the area is completely dry to assess the effectiveness and prevent mold or mildew growth. You can aid drying with fans or by opening windows.
Method 2: Advanced Stain Removal for Set-In or Persistent Stains
When Method 1 isn’t quite enough, or for particularly tough, set-in, or old stains, this advanced technique utilizes the power of oxidation and heat to break down stubborn dyes and deeply embedded grime. This method requires careful handling due to the nature of the chemicals involved.
Step-by-Step Advanced Stain Removal Process:
- Prioritize Safety – Wear Gloves: Before you begin, always wear protective gloves. This is crucial when working with hydrogen peroxide and especially household ammonia, as these chemicals can irritate skin. Ensure your work area is well-ventilated to avoid inhaling fumes.
- Apply Hydrogen Peroxide: Liberally spray 6% hydrogen peroxide (this is typically what’s found in brown bottles at drugstores, though some might be 3%) all over the stained spot on your carpet. Hydrogen peroxide is a powerful oxidizing agent that works by breaking down the chemical bonds of many dyes and organic compounds, effectively bleaching them away.
- Introduce Household Ammonia: Immediately after applying the hydrogen peroxide, spray household ammonia over the same stained area. The recommended ratio is roughly three parts hydrogen peroxide to one part ammonia. Ammonia acts as an activator, accelerating the oxidizing action of the hydrogen peroxide and making it more potent for stain removal. The combination creates a strong chemical reaction, hence the need for good ventilation.
- Create a Heat Chamber with Plastic Wrap: Once the chemicals are applied, cover the entire sprayed area with a piece of plastic wrap. This serves multiple purposes: it keeps the chemicals moist, prevents them from evaporating too quickly, and creates an enclosed environment for the next step.
- Apply Localized Heat: Place a pot of hot water directly on top of the plastic wrap, centered over the stain. The heat from the hot water significantly enhances the chemical reaction between the hydrogen peroxide and ammonia. The warmth helps the solution penetrate deeper into the carpet fibers and speeds up the stain-breaking process.
- Allow Time for Reaction: Leave the pot of hot water on the stain until the water cools down to room temperature. This typically takes several minutes to an hour, depending on the initial temperature of the water and the pot’s insulation. During this time, the chemicals are actively working to lift and neutralize the stain.
- Re-evaluate and Repeat if Necessary: Once the water has cooled, carefully remove the pot and plastic wrap. Blot the area with a clean, white cloth to absorb any remaining moisture and residue. If the stain is still noticeable, you can repeat steps 2 through 6 with a new batch of hot water. Some deeply ingrained or highly pigmented stains may require multiple applications. Remember to rinse the area with clean water and extract thoroughly after the stain is gone to remove all chemical residue.
General Best Practices for Carpet Stain Management
Beyond these specific methods, adopting a few general best practices can significantly improve your success rate in carpet stain removal and maintain your carpet’s longevity.
- Act Immediately: The quicker you address a spill, the easier it will be to remove. Fresh stains haven’t had time to set into the carpet fibers.
- Blot, Don’t Rub: Always blot stains with a clean cloth or paper towel, working from the outside in. Rubbing can spread the stain, damage carpet fibers, and push the stain deeper.
- Use White Cloths: Always use clean, white cloths or paper towels for blotting to prevent color transfer from your cleaning tool to your carpet.
- Work from the Outside In: This technique helps prevent the stain from spreading outwards, confining it to a smaller area.
- Avoid Over-Wetting: Excessive moisture can lead to mold, mildew, and damage to the carpet backing. Extract thoroughly after applying solutions.
- Complete Drying: Ensure the treated area is completely dry before walking on it or replacing furniture. Use fans or open windows to speed up drying.
Preventing Future Carpet Stains: A Proactive Approach
While effective stain removal techniques are invaluable, prevention is always better than cure. Consider these proactive measures to keep your carpets looking their best:
- Use Entry Mats: Place durable mats at all entrances to trap dirt and moisture before it reaches your carpets.
- No Shoes Indoors Policy: Implement a “no shoes” rule in your home to significantly reduce the amount of dirt, grime, and potential stains tracked onto your carpets.
- Regular Vacuuming: Frequent vacuuming removes dry soil and dust particles before they can become embedded and contribute to staining.
- Apply Carpet Protectors: Consider applying a professional-grade carpet protector (like Scotchgard) after a deep clean. These treatments create a barrier that repels spills and makes future cleaning easier.
- Be Mindful of Furniture: Use furniture glides under heavy items to prevent indentations and facilitate easier cleaning underneath.
When to Consider Professional Carpet Cleaning
While these DIY methods are highly effective for most household stains, there are instances when professional help might be necessary. If you’re dealing with extremely large stains, very old and deeply embedded stains that don’t respond to DIY efforts, or if your entire carpet needs a deep, restorative cleaning, a professional carpet cleaner has specialized equipment and stronger solutions to tackle these challenges without damaging your carpet. They can also provide expert advice on maintaining your carpet’s appearance for years to come.
Frequently Asked Questions About Carpet Stain Removal
Q1: Is it safe to mix hydrogen peroxide and ammonia?
Yes, when done carefully and in a well-ventilated area, the specific mixture and application described in Method 2 are safe for carpet stain removal. However, it’s crucial to use the recommended proportions and ensure good airflow. Never mix these chemicals in a sealed container, and avoid inhaling the fumes directly. Always wear gloves.
Q2: Can I use these methods on all carpet types?
Most synthetic carpets (nylon, olefin, polyester) are generally safe for these methods. However, natural fibers like wool or silk can be more delicate and may react differently. Always perform a patch test on an inconspicuous area first to ensure no discoloration or damage occurs, especially with Method 2 which uses stronger chemicals.
Q3: What if I don’t have a wet-dry vacuum or spot extractor?
While a wet-dry vacuum or spot extractor is highly recommended for efficient extraction and preventing re-soiling, you can still achieve results by blotting vigorously with clean, thick towels. After applying the solution, press down firmly with towels to absorb as much liquid and stain as possible. You may need to use many towels and repeat the blotting process several times. For rinsing, apply clean water to a towel and blot, rather than directly spraying the carpet with water.
Q4: How long does it take for a carpet to dry after cleaning?
Drying time can vary significantly based on the amount of moisture used, carpet type, humidity levels, and ventilation. Generally, it can take anywhere from 2 to 24 hours. To speed up drying, ensure good airflow by opening windows, using fans, or running a dehumidifier. Avoid walking on the damp area to prevent re-soiling.
Q5: Will these methods remove pet odors as well as stains?
While these methods are primarily for stain removal, the cleaning process and the oxidizing action of hydrogen peroxide can help neutralize some surface odors. For deep-set pet urine odors, which often penetrate into the padding and subfloor, you may need specialized enzymatic cleaners designed specifically for pet odor removal. These cleaners break down the uric acid crystals that cause lingering odors.
Conclusion: Reclaim Your Spotless Carpets
Don’t let unsightly carpet stains diminish the beauty and comfort of your home. With the detailed DIY methods outlined in this guide – from targeted spot removal for everyday spills to advanced techniques for challenging, set-in stains – you now possess the knowledge and confidence to tackle virtually any blemish. Remember the importance of quick action, proper preparation, and safety, and always test solutions in an inconspicuous area first. By regularly employing these powerful, yet simple, solutions, you can maintain pristine, fresh-looking carpets, ensuring your living space remains a welcoming and visually appealing sanctuary for years to come. Say goodbye to the frustration of stains and hello to consistently immaculate floors!