
Transform Your Broken Dishes into Stunning DIY Garden Stepping Stones
Do you have a collection of broken china, cracked plates, or chipped ceramic dishes tucked away, waiting for a purpose? Many of us hold onto these sentimental or beautiful fragments, knowing they have potential but unsure of the perfect DIY project. Look no further! This comprehensive guide will show you how to give those cherished pieces a new life by transforming them into exquisite, personalized mosaic garden stepping stones.
Not only is this project incredibly rewarding, but it’s also a fantastic way to practice sustainability, reduce waste, and add a unique, artistic touch to your outdoor space. Imagine strolling through your garden, each step graced by a vibrant mosaic created from your own hands and memories.
Why Repurpose Broken Dishes for Your Garden?
The idea of turning broken pieces into something beautiful is both symbolic and practical. Here are just a few compelling reasons to embark on this mosaic journey:
- Eco-Friendly Upcycling: Instead of sending broken china to a landfill, you’re giving it a second life. This sustainable approach reduces waste and contributes to a greener planet.
- Cost-Effective Decor: Why buy expensive garden decor when you can create unique pieces for free using materials you already have? This project is incredibly budget-friendly, requiring only a few basic supplies in addition to your salvaged dishes.
- Unique & Personalized Touch: Each stepping stone you create will be a one-of-a-kind masterpiece. Reflect your personal style, incorporate cherished memories, and design patterns that perfectly complement your garden’s aesthetic. No two stones will ever be identical!
- Therapeutic Creativity: The process of sorting pieces, envisioning designs, and meticulously placing each fragment can be incredibly meditative and satisfying. It’s a wonderful outlet for creativity and a great way to unwind.
- Durable & Long-Lasting Art: Once sealed, these mosaic stones are surprisingly robust and can withstand various weather conditions, becoming enduring fixtures in your garden for years to come.
I distinctly remember a moment when a cherished curio cabinet, laden with family china, toppled over in an unfortunate mishap. The sound of crashing porcelain was heartbreaking. A dear friend, upon hearing my dismay, wisely suggested saving the fragments. She introduced me to the concept of mosaic stepping stones, revealing how those broken pieces could be reborn into something truly spectacular for the garden. Her encouragement, combined with an inspiring online tutorial (like those found from creators such as “My Life”), quickly turned my misfortune into a creative opportunity.
Essential Materials You’ll Need
Gathering your materials is the first exciting step. Here’s a breakdown of what you’ll need to create your mosaic stepping stones:
- Broken China or Ceramic Dishes: This is your primary material! Collect pieces of various sizes, colors, and patterns. Saucers, plates, cups, and bowls all work well. If you don’t have enough broken pieces, local craft stores often sell bags of mosaic tiles, glass gems, or even pre-broken ceramic pieces.
- Stepping Stone Base/Mold:
- Pre-made Stepping Stone Mold: Available at craft or hardware stores in various shapes (round, square, leaf, irregular).
- Concrete Mix: A bag of ready-mix concrete is ideal. Look for a type suitable for small projects or stepping stones.
- Grout: Non-sanded grout is generally best for mosaic projects with smaller gaps, but sanded grout can be used for wider gaps. Choose a color that complements your mosaic design (e.g., grey, white, black, or a custom tinted color).
- Water: For mixing concrete and grout, and for cleaning.
- Optional Sealant: A concrete or grout sealer will protect your finished stone from moisture and wear, especially if it will be exposed to the elements.
- Optional Embellishments: Small pebbles, glass beads, mirror pieces, seashells, or other small decorative items can add extra flair to your design.
Tools for a Seamless Mosaic Experience
Having the right tools will make your project safer, easier, and more enjoyable:
- Safety Goggles: Absolutely crucial! Protect your eyes from flying fragments when breaking dishes.
- Work Gloves: Heavy-duty gloves (like gardening or work gloves) are essential to protect your hands from sharp edges.
- Hammer or Tile Nippers: If your dishes aren’t broken enough, a hammer wrapped in a cloth or tile nippers can help break them into smaller, more manageable pieces.
- Old Towel or Cloth: For wrapping dishes before breaking them to contain fragments.
- Mixing Bucket/Container: For mixing concrete and grout. An old plastic bucket works perfectly.
- Trowel or Stirring Stick: For mixing and applying concrete and grout.
- Sponge and Cloths: For cleaning excess grout and wiping down your finished stone.
- Wire Brush (Optional): For scrubbing off stubborn grout haze.
- Newspaper or Drop Cloth: To protect your work surface.
Step-by-Step Guide: Crafting Your Mosaic Stepping Stone
Now that you have your materials and tools, let’s dive into the creative process:
Step 1: Preparation and Safety First
Choose a well-ventilated work area, preferably outdoors or in a garage. Lay down newspaper or a drop cloth to protect your surface. Don your safety goggles and heavy-duty gloves before handling any broken china or starting the breaking process.
Step 2: Breaking and Arranging Your Pieces (If Needed)
If your dishes are not already in suitable mosaic pieces, it’s time to break them further. Place a dish inside an old towel or cloth bag and gently tap it with a hammer. This contains the fragments and prevents them from scattering dangerously. Aim for pieces of varying sizes and shapes to add visual interest. For more control, use tile nippers to cut specific shapes.
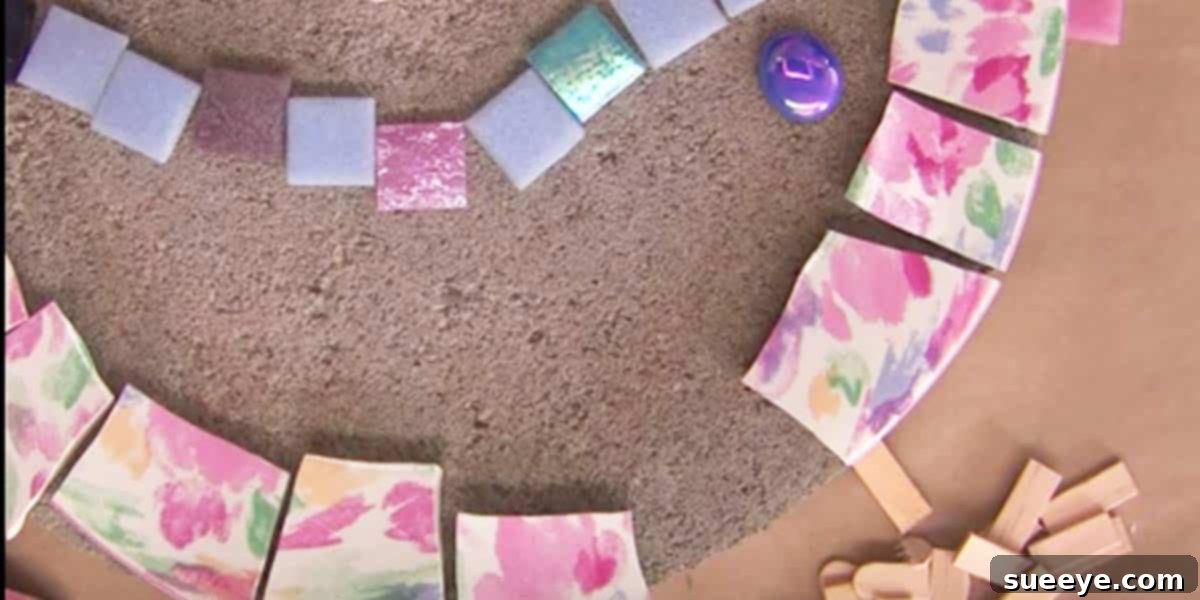
Once you have a good collection of pieces, begin arranging them dry inside your stepping stone mold. This allows you to experiment with your design, colors, and patterns before committing. Take a photo of your favorite design for reference.
Step 3: Mixing the Concrete
Carefully follow the instructions on your concrete mix packaging. In your mixing bucket, gradually add water to the dry concrete mix, stirring continuously with your trowel or stick. Aim for a consistency similar to thick oatmeal or peanut butter – wet enough to be workable but not too runny. It should hold its shape.
Step 4: Pouring and Setting Your Mosaic Pieces
Pour the mixed concrete into your stepping stone mold, filling it about two-thirds to three-quarters of the way. Gently tap the sides of the mold to release any air bubbles and level the surface. Now, carefully transfer your pre-designed mosaic pieces onto the wet concrete. Press each piece firmly into the concrete, ensuring it’s embedded slightly below the surface level. Leave a small gap (about 1/8 to 1/4 inch) between pieces for the grout.
You can also pour the concrete first and then arrange the pieces, following your reference photo. Ensure that the decorative side of your dish pieces faces upwards.
Step 5: Curing the Concrete
Once all your mosaic pieces are in place, allow the concrete to cure. This typically takes 24-48 hours, but always refer to your concrete mix’s specific drying time. During this period, keep the stone out of direct sunlight and consider lightly misting it with water occasionally, especially in hot, dry climates, to prevent cracking. The concrete should be firm and dry before moving to the next step.
Step 6: Grouting Your Stepping Stone
Once the concrete is fully cured, it’s time to grout! Mix your chosen grout color according to the package directions, aiming for a thick, paste-like consistency. Using your trowel or a rubber float, apply the grout over the entire surface of your stepping stone, pressing it firmly into all the gaps between the mosaic pieces. Ensure every crevice is filled.
Step 7: Cleaning and Finishing
Allow the grout to set for about 15-30 minutes (check specific product instructions). As the grout begins to firm up, use a damp sponge to gently wipe away the excess grout from the surface of your mosaic pieces. Be careful not to pull grout out of the joints. Rinse your sponge frequently. You might need to repeat this step a few times as the grout continues to dry and a slight haze may appear. For stubborn haze, a dry cloth or a soft wire brush can be used once the grout is fully dry.
Allow the grout to cure completely, which can take up to 72 hours. Once fully cured, you can apply a concrete or grout sealant if desired. This step adds an extra layer of protection against weathering and helps preserve the vibrancy of your mosaic.
Design Inspiration and Creative Tips
- Color Palettes: Stick to a harmonious color scheme, or go bold with contrasting colors. Blues and whites evoke a serene feel, while reds and yellows add vibrant energy.
- Patterns: Experiment with geometric patterns, floral motifs, or abstract designs. You can even try to form specific shapes like butterflies, suns, or leaves.
- Mix Textures: Combine smooth porcelain with textured ceramic, or add in pieces of colored glass, mirror fragments, or polished pebbles for varied visual interest.
- Focal Points: Consider placing a larger, particularly beautiful fragment as a central focal point, building your design around it.
- Thematic Stones: Create stones with specific themes for different areas of your garden – perhaps a “butterfly stone” near your butterfly bush or a “seascape stone” near a water feature.
Caring for Your New Garden Art
Once your mosaic stepping stones are complete and fully cured, place them carefully in your garden. While they are durable, avoiding heavy impacts or extremely harsh chemicals will ensure their longevity. In regions with severe winters, you might consider moving them to a sheltered location or indoors to prevent freeze-thaw damage.
Conclusion: Step into a World of Garden Charm
Creating DIY garden stepping stones from broken dishes is more than just a craft; it’s an act of transformation. It’s about turning something discarded into a treasure, adding personal history and artistic beauty to your outdoor sanctuary. Whether you’re repurposing cherished family china or simply experimenting with salvaged ceramic, each stone tells a unique story.
So, don’t let those broken pieces gather dust any longer. Embrace the joy of upcycling and start crafting your own enchanting mosaic stepping stones today. Your garden, and your creative spirit, will thank you!