
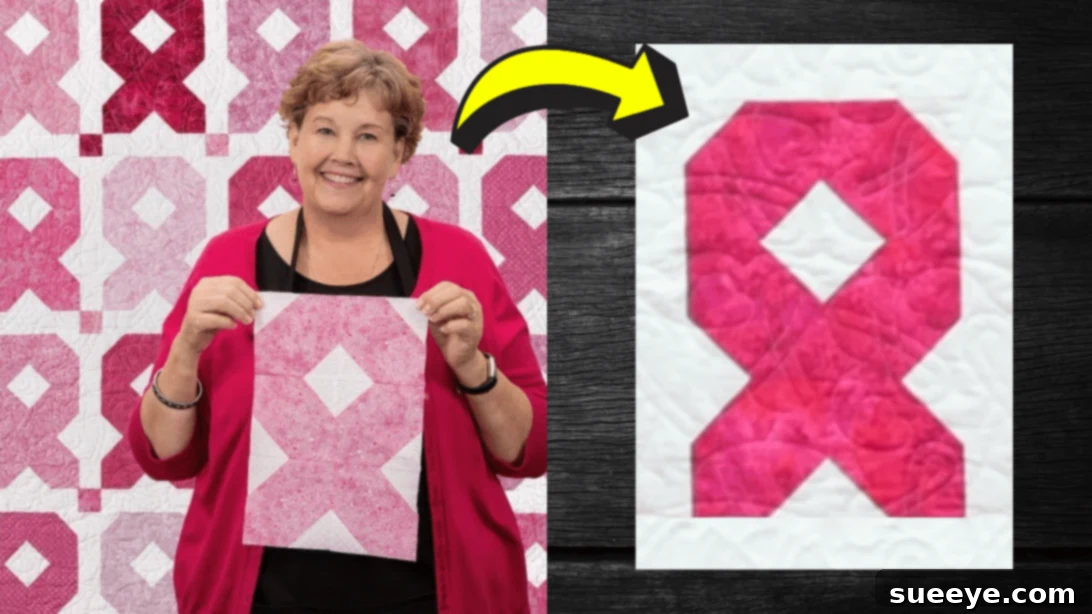
Master the Art of Quilting: Your Easy Ribbon Quilt Tutorial for Beginners
Embark on a delightful quilting journey with a design that perfectly blends simplicity with stunning visual appeal. The moment this Ribbon Quilt pattern, inspired by talented creators, appeared, it immediately earned a spot on my list of all-time favorites. Its ingenious yet straightforward concept makes it an ideal project for quilters of all skill levels, especially those just beginning their fabric adventures. This versatile block can be transformed into a myriad of beautiful items, from an elegant table topper or a stylish runner to a full-sized cozy quilt, making it a truly rewarding project.
Whether you’re new to the world of quilting or looking for a quick and satisfying project, the steps to crafting this ribbon quilt are incredibly easy to follow. You’ll find immense joy in piecing together these charming blocks, watching a beautiful design emerge with each stitch. Prepare to unleash your creativity, and let’s dive into the detailed instructions below. For visual learners, pairing these written steps with a comprehensive video tutorial will provide even greater clarity and inspiration.
Why the Ribbon Quilt is a Perfect Choice for Beginners
The Ribbon Quilt stands out as an exceptional pattern for those new to quilting, and for several compelling reasons. Its design is based on repetitive units, which means once you master the technique for one block, you can easily replicate it to create your desired quilt size. This repetition builds confidence and muscle memory, crucial for developing foundational quilting skills. Furthermore, the pattern utilizes standard precut fabric sizes, such as 5-inch print squares and 2½-inch background strips, simplifying the cutting process and saving valuable time. This pre-cut advantage allows you to jump straight into the fun part: sewing.
Beyond its beginner-friendly nature, the Ribbon Quilt offers immense satisfaction. The finished product boasts a sophisticated look that belies its simple construction, making it an impressive gift or a cherished addition to your home decor. Its clean lines and graphic appeal ensure it will remain a timeless piece, adaptable to various color palettes and fabric styles. Get ready to create something truly special with a pattern that proves quilting can be both accessible and incredibly rewarding.
Essential Materials for Your Ribbon Quilt Project
Before you begin, gathering all your supplies is key to a smooth and enjoyable quilting experience. The beauty of this quilt lies in its ability to utilize pre-cut fabrics, streamlining the preparation process significantly. Here’s a detailed list of what you’ll need, along with some considerations for choosing your fabrics:
- 3 packs of 5″ Print Squares: These pre-cut charm packs are perfect for adding variety and saving cutting time. Choose a selection of prints that complement each other or opt for a more cohesive look with fabrics from the same collection.
- 1 roll of 2½” Background Strips: Often referred to as “jelly rolls,” these pre-cut strips are ideal for the background elements and the inner border. Select a solid color or a tone-on-tone print that provides good contrast to your chosen print squares, allowing the “ribbon” design to pop.
- 1 yard of Outer Border Fabric: This fabric will frame your quilt, giving it a finished and polished look. Consider a fabric that ties together the colors in your print squares and contrasts nicely with your background strips.
- ¾ yard of Binding Fabric: The binding is the final edge of your quilt, encasing all the raw edges. It can be a contrasting color to add a pop, or a coordinating fabric to blend seamlessly with your quilt top.
- 4 yards of Backing Fabric: This forms the back of your quilt. While it won’t be seen as much as the front, choosing a comfortable and visually appealing fabric can elevate the overall quality and feel of your finished piece.
- Quilter’s Ruler: Essential for precise measurements and accurate cutting, even with pre-cuts. A clear acrylic ruler with visible markings is highly recommended.
- Marking Pen, Pencil, or Chalk: For drawing accurate lines on fabric, especially diagonal lines for your corner-to-corner stitching.
- Scissors or Rotary Cutter and a Cutting Mat: A rotary cutter with a self-healing mat offers speed and precision, particularly when cutting multiple layers or long strips. Sharp fabric scissors are also indispensable for smaller cuts or trimming.
- Needle and Thread: High-quality cotton thread that matches or blends with your fabrics is best for piecing.
- Sewing Machine: A reliable sewing machine with a ¼-inch presser foot will make consistent seam allowances much easier to achieve.
- Iron and Ironing Board: Proper pressing at each stage is crucial for flat, accurate blocks and a professional finish.
Crafting Your Ribbon Quilt: A Step-by-Step Guide
This tutorial will guide you through the process of creating beautiful ribbon blocks, which are the foundation of your quilt. Consistency and accuracy are your best friends here, ensuring your finished quilt top lies flat and looks professionally made.
Step 1: Preparing Your Fabric Squares and Marking
Begin by selecting your print squares. For each ribbon block, you will need several identical squares from your 5″ print packs. Alternatively, if you prefer, you can cut 5-inch squares from yardage of your chosen fabric. Next, prepare your background fabric. From your 2½” background strips, cut out 2½-inch squares. These smaller squares will form the distinctive ribbon effect against your main print squares. Once cut, take each background square and, on its wrong side, draw a diagonal line from one corner to the opposite corner. This line will serve as your stitching guide, so accuracy here is important. A fine-tipped fabric marker or pencil works best.
Step 2: Attaching the Corner Units – The “Stitch and Flip” Method
Now, let’s create the unique shape of our ribbon block. Take one of your 5-inch print squares. Place two of the marked 2½-inch background squares on opposite corners of the print square. Ensure that their right sides are facing each other, and align the raw edges precisely. Position them so that the diagonal lines you drew extend from the outer edge towards the center of the print square, forming a continuous line across the larger square if imagined. Stitch directly along this diagonal line on both background squares. After stitching, trim off the excess fabric, leaving a ¼-inch seam allowance from your stitching line. Carefully open the background fabric corners, pressing the newly formed triangles outwards. Always press your seams towards the darker fabric to prevent shadowing through lighter fabrics.
Step 3: Completing the Block Units and Assembling the Ribbon
Repeat Step 2 for the remaining 5-inch print squares and 2½-inch background squares until you have created all the necessary units for your ribbon blocks. The pattern often involves using four of these modified print squares per completed ribbon block. Once all your individual units are prepared, it’s time to arrange them. Lay out your four units on a flat surface, carefully rotating and positioning them to form the distinct ribbon pattern. This step is crucial for visualizing your final design and ensuring all elements are correctly oriented. Once satisfied with the arrangement, stitch the units together in pairs, paying close attention to your ¼-inch seam allowance. Then, stitch these two pairs together to complete your ribbon block. After each seam, press the block nice and flat, again pressing seams in a consistent direction, or pressing them open if preferred, to minimize bulk. Your individual ribbon blocks are now complete!
Step 4: Assembling the Quilt Top – Sashing and Borders
With your beautiful ribbon blocks complete, it’s time to assemble your quilt top. The next step involves adding sashing, which are fabric strips placed between your blocks to separate and frame them. Cut sashing strips from your background fabric or a coordinating solid, according to your desired width. Stitch your ribbon blocks together into rows, inserting sashing strips between each block. Then, stitch these rows together, adding sashing strips between the rows as well. This creates a cohesive grid for your quilt. Once your sashed quilt center is complete, it’s time for the borders. Start with the inner border, typically cut from your 2½” background strips. Attach these strips around the perimeter of your quilt center. Finally, add your outer border fabric, cut to your desired width, to give the quilt a grand finish. Press all seams meticulously.
Step 5: Layering, Quilting, and Finishing
Once your quilt top is assembled and pressed, the next phase is layering and quilting. First, lay your backing fabric flat on a large surface, wrong side up, and secure it with painter’s tape. Next, place your batting (the fluffy middle layer) smoothly on top of the backing. Finally, center your finished quilt top, right side up, on top of the batting. Create a “quilt sandwich” by basting all three layers together. You can use safety pins, basting spray, or long hand stitches for this. The basting prevents the layers from shifting during the quilting process.
Now, it’s time for the actual quilting! This is where you stitch through all three layers to secure them together and add texture. For beginners, simple straight lines, diagonal cross-hatching, or “stitch-in-the-ditch” (stitching along existing seam lines) are excellent choices. You can use your sewing machine or even hand-quilt for a traditional touch. Quilt however you want, letting your creativity guide you. Once the quilting is complete, square up your quilt by trimming the edges, making sure they are even and straight.
Step 6: The Final Touch – Binding Your Quilt
The last step to completing your stunning Ribbon Quilt is adding the binding. This fabric strip encases the raw edges of your quilt, providing durability and a professional finish. Cut your binding fabric into 2½-inch wide strips. Join these strips together diagonally to form one long continuous strip. Fold this strip in half lengthwise and press. Attach the raw edge of your folded binding strip to the raw edge of your quilt top, stitching with a ¼-inch seam allowance. Miter the corners for a crisp, clean look. Once sewn to the front, wrap the binding around to the back of the quilt and hand-stitch or machine-stitch it into place. Take your time with this step, as a neatly applied binding significantly enhances the overall appearance of your finished quilt.
*All image credit belongs to Missouri Star via YouTube. Follow and subscribe to their channel for more inspiring quilting tutorials!
Tips for Quilting Success: Elevate Your Craft
Achieving a beautiful, professional-looking quilt is within reach, especially with a beginner-friendly pattern like the Ribbon Quilt. Here are some essential tips to help you succeed and enjoy your quilting journey:
- Accurate Seam Allowance: The most crucial tip in quilting is maintaining a consistent ¼-inch seam allowance. Even a slight deviation can cause your blocks to not fit together properly. Consider investing in a ¼-inch presser foot for your sewing machine, which has a guide that helps you sew perfectly straight and consistent seams.
- Pressing Matters: Pressing is not ironing. When you press, you lift the iron and place it down, rather than sliding it. Pressing after each seam helps your blocks lie flat and square, which is essential for assembling a neat quilt top. Generally, pressing seams towards the darker fabric prevents lighter fabrics from showing through. However, for bulky intersections, pressing seams open can reduce bulk.
- Square Up Your Blocks: After assembling each quilt block, take the time to square it up using your ruler and rotary cutter. This ensures all your blocks are the same size and perfectly square, which makes assembling the quilt top much easier and prevents wavy borders.
- Choose Quality Fabrics: While it might be tempting to save money on fabric, investing in good quality, 100% cotton quilting fabric will make a significant difference. High-quality fabrics are easier to work with, fray less, and hold up better to washing and wear, ensuring your quilt lasts for years.
- Pre-wash or Not? Some quilters pre-wash their fabrics to prevent shrinkage and color bleeding, while others prefer not to, to maintain crispness and avoid extra steps. If you choose not to pre-wash, always use a color catcher in the first wash of your finished quilt, especially if you have highly contrasting colors.
- Take Your Time: Quilting is a journey, not a race. Don’t rush through the steps. Enjoy the process of creating. If you make a mistake, don’t be afraid to use a seam ripper – it’s an essential quilting tool!
- Stay Organized: Keep your cut fabric pieces organized, perhaps in small labeled piles or containers. This prevents confusion and keeps your workspace tidy, especially when working on a larger project with many identical units.
Unleash Your Creativity: Variations and Customization
One of the most exciting aspects of quilting is the ability to personalize your projects. The Ribbon Quilt pattern is wonderfully adaptable, allowing for endless creative variations. Here are some ideas to make your quilt truly unique:
- Color Palette Exploration: Experiment with different color schemes. A monochromatic palette (various shades of one color) can create a sophisticated, subtle ribbon effect. A vibrant, rainbow selection of fabrics will result in a playful and cheerful quilt. Consider seasonal colors for holiday-themed quilts, or match the decor of a specific room.
- Fabric Choices: Beyond standard quilting cottons, consider incorporating other fabric types if you’re feeling adventurous. Flannel can make for an extra cozy quilt, while batiks offer a rich depth of color and unique texture. Just be mindful that mixing fabric types can sometimes require different handling.
- Size and Layout: While this tutorial might lead to a specific size, you can easily adjust the quilt’s dimensions. Make fewer blocks for a smaller table runner or wall hanging, or create many more for a large bed quilt. You can also experiment with the layout of the blocks, perhaps rotating some to create secondary patterns, or arranging them in an asymmetrical fashion for a modern twist.
- Sashing and Border Play: The sashing and border fabrics don’t have to be plain. You could use striped fabrics, pieced sashing (small squares sewn together), or add piping to your borders for an extra touch of elegance.
- Quilting Designs: The quilting stitches themselves can add another layer of design. While simple straight lines are perfect for beginners, as you gain confidence, try free-motion quilting, stippling, or outlining the ribbon shapes with your stitches to make them stand out even more.
Don’t be afraid to experiment! Each quilt you make is a reflection of your personal style and creativity. The Ribbon Quilt provides a fantastic foundation upon which you can build and explore new ideas, making each project a unique masterpiece.
Conclusion: Your Journey to a Beautiful Ribbon Quilt
Congratulations on embarking on the wonderful journey of creating your very own Ribbon Quilt! This pattern, celebrated for its elegant simplicity and striking visual impact, is truly a joy to construct. From selecting your fabrics to piecing the individual blocks, and finally bringing it all together with borders and binding, each step offers a rewarding experience, especially for those new to quilting.
By following these detailed instructions and applying the helpful tips provided, you are well on your way to crafting a beautiful and lasting piece of textile art. The Ribbon Quilt is more than just a collection of fabric squares; it’s a testament to patience, precision, and the joy of handmade creation. Whether you choose to keep it as a cherished heirloom, gift it to a loved one, or simply adorn your home with its charm, your finished quilt will undoubtedly bring warmth and beauty wherever it goes. So, gather your materials, fire up your sewing machine, and start creating a masterpiece that will be admired for years to come!