
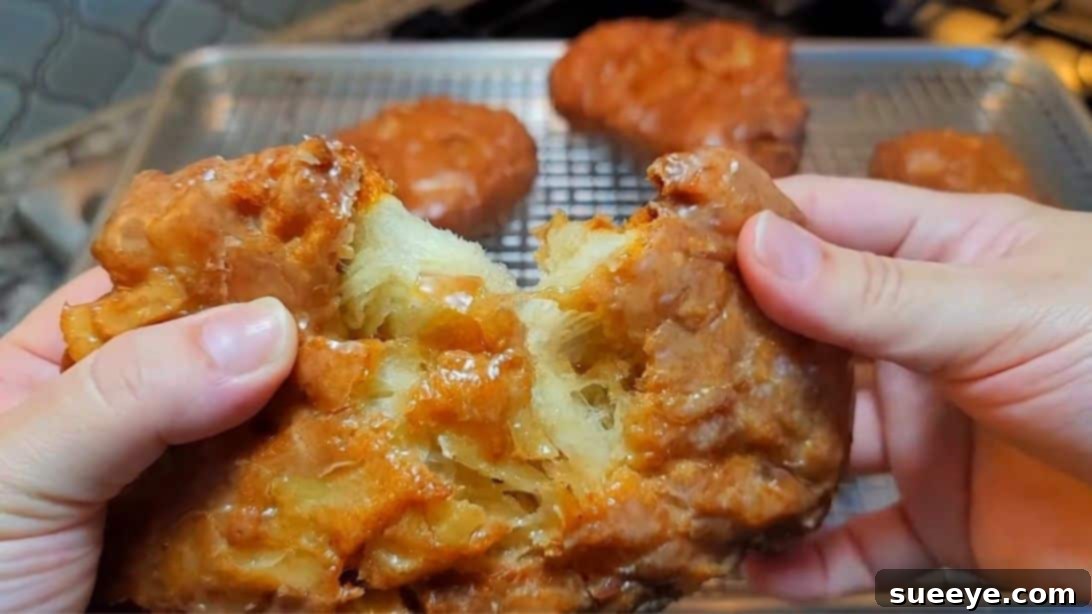
As the crisp air of autumn approaches, signaling the arrival of vibrant foliage and cozy evenings, there’s no better way to embrace the season than with the comforting aroma and delightful taste of homemade apple fritters. These golden-brown treats, bursting with warm apple chunks and a sweet, delicate glaze, are the quintessential fall indulgence. Forget the complicated bakery versions; today, we’re diving into an incredibly simple yet supremely delicious apple fritter recipe that will revolutionize your autumnal baking. We drew inspiration from the wonderful Simply Mamá Cooks YouTube channel, and the results exceeded all expectations. Prepare for a flavor-packed experience that captures the very essence of fall in every single bite.
RELATED: Easy & Crispy Apple Turnovers: Your New Favorite Fall Pastry!
What makes this particular recipe stand out from the crowd? The secret lies in a brilliant shortcut: using canned biscuit dough. That’s right – you can achieve perfectly fluffy and tender fritters without the fuss of preparing dough from scratch. This ingenious method drastically cuts down on preparation and cooking time, making homemade apple fritters accessible to everyone, regardless of their baking experience. If you’ve ever dreamt of sinking your teeth into warm, sweet, apple-filled goodness but felt intimidated by the process, this recipe is your golden ticket. It’s perfect for a quick breakfast treat, a delightful dessert, or a comforting snack on a chilly afternoon.
Looking for more apple-inspired delights? Don’t miss this one: Scrumptious Apple Hand Pies Recipe for Easy Snacking
Gather Your Ingredients: The Ultimate Easy Apple Fritters
Crafting these delectable apple fritters requires only a handful of readily available ingredients. The beauty of this recipe lies in its simplicity, proving that you don’t need exotic items to create something truly extraordinary. Here’s what you’ll need to transform simple components into a sensational fall treat:
- 8-count can of refrigerated biscuit dough: This is our star ingredient, simplifying the entire process and providing a consistent, tender base for our fritters.
- 1 medium Granny Smith apple: Known for its tartness and firm texture, Granny Smith apples hold up beautifully during frying, providing a delightful contrast to the sweet dough and glaze.
- 3 tablespoons of all-purpose flour: A small amount of flour helps bind the ingredients and prevents the dough from becoming too sticky, ensuring perfectly manageable fritters.
- Oil for frying: Choose a neutral oil with a high smoke point, such as vegetable oil, canola oil, or peanut oil, to achieve that perfect golden crisp.
For the Irresistible Glaze:
No apple fritter is complete without a luscious, sweet glaze. This simple homemade glaze comes together in minutes and adds the perfect finishing touch, enveloping each fritter in a thin, crackly layer of sugary goodness.
- 2 cups of Confectioner’s sugar (powdered sugar): The base for our smooth, quick-setting glaze.
- 1/2 teaspoon of ground cinnamon: Elevates the fall flavor profile, complementing the apples beautifully.
- A pinch of salt: A tiny touch of salt balances the sweetness and enhances all the other flavors.
- 1 teaspoon of vanilla extract: Adds a warm, aromatic depth to the glaze.
- 2 to 3 tablespoons of cold water: Used to achieve the ideal glaze consistency – start with less and add more if needed.
Step-by-Step Guide: How to Make Apple Fritters Using Canned Biscuit Dough
Follow these straightforward steps, and you’ll be enjoying warm, glazed apple fritters in no time. The process is designed to be quick and easy, making it perfect for a spontaneous baking session or a fun activity with family.
Step 1: Preparing the Biscuit Dough
Begin by carefully opening your can of refrigerated biscuit dough. Separate each biscuit individually. Once separated, take each biscuit and tear it roughly in half, then continue to chop or tear these pieces into smaller, bite-sized fragments. The goal here is to create irregular pieces that will form the unique texture of the fritters. For an extra layer of flavor and warmth, this is an excellent point to sprinkle a pinch of ground cinnamon and a tiny dash of nutmeg over your chopped biscuit pieces. Gently toss them to ensure an even distribution of the spices. These small pieces are crucial for mixing well with the apples and achieving that classic fritter shape and texture.
Step 2: Preparing the Apples
Next, focus on your Granny Smith apple. Thoroughly wash the apple before you begin. Using a vegetable peeler, carefully remove the skin. Once peeled, core the apple to remove the seeds and fibrous center. Finally, chop the apple into small, uniform pieces. Aim for pieces that are roughly the same size as your biscuit dough fragments. This consistency ensures that the apples cook evenly and are distributed throughout each fritter, providing a burst of fruity flavor in every bite. Smaller pieces also integrate better with the dough, preventing large, uncooked apple chunks.
Step 3: Combining Dough and Apples
In a large mixing bowl, combine the chopped biscuit dough pieces with your prepared apple chunks. Now, sprinkle the 3 tablespoons of all-purpose flour over the mixture. The flour serves a critical purpose: it helps to absorb any excess moisture from the apples and coats the biscuit pieces, preventing them from sticking together excessively during mixing and frying. Using your hands, gently but thoroughly mix the ingredients. The warmth from your hands will help incorporate everything beautifully. Ensure the apples are well distributed throughout the dough. Once mixed, lightly flour your work surface and your rolling pin. Turn the dough mixture out onto the floured surface and gently roll it into a somewhat flattened shape, about 1/2 to 3/4 inch thick. Don’t worry about perfection; rustic is part of the fritter charm! Flour your knife and cut the flattened dough into four roughly equal sections.
Step 4: Shaping the Fritters
Take each of the four dough sections you just cut. Gently press and spread each piece out, aiming for an irregular, somewhat flattened shape. The key here is not to make them perfectly round or uniform; the beauty of fritters lies in their rustic appearance. To create the ideal texture for frying—crispy on the outside and tender within—you want to “punch” or dimple the dough slightly. This technique helps to thin out certain areas, allowing for quicker, more even cooking and creating more surface area for that delightful crispy crust. Think of gently stretching and flattening them without making them too thin or tearing them apart. This step ensures a superior frying experience and a more satisfying final product.
Step 5: Preparing the Frying Oil
Select a heavy-bottomed pan, such as a Dutch oven or a deep skillet, which is ideal for frying. Pour enough cooking oil into the pan to reach a depth of about 2 to 3 inches. Place the pan over medium-high heat and allow the oil to come up to temperature. It’s crucial to reach the correct frying temperature for the best results, as oil that isn’t hot enough will result in greasy fritters, while oil that’s too hot will burn the outside before the inside is cooked. Allow it to heat for several minutes before testing.
Step 6: Crafting the Sweet Glaze
While your oil is heating, it’s the perfect time to prepare the delectable glaze that will crown your apple fritters. In a medium-sized bowl, combine the confectioner’s sugar, ground cinnamon, a pinch of salt, and vanilla extract. Gradually add 2 tablespoons of cold water, whisking continuously until the mixture is smooth and all lumps are gone. The consistency should be pourable but thick enough to coat the back of a spoon. If it’s too thick, add the remaining tablespoon of water, half a teaspoon at a time, until you reach your desired consistency. Avoid adding too much water, as this will make the glaze too thin and runny. Set the finished glaze aside.
Step 7: Frying the Apple Fritters to Golden Perfection
To confirm your oil is ready, use the wooden spoon test: dip the end of a wooden spoon into the hot oil. If small bubbles immediately form around the wood and gently sizzle, your oil is at the ideal temperature, typically around 360-375°F (180-190°C). If you have a deep-fry thermometer, this is the most accurate way to monitor the temperature. Once the oil is hot and ready, carefully and gently drop 2-3 of your prepared apple fritters into the pan, ensuring not to overcrowd it. Overcrowding will lower the oil temperature and lead to uneven cooking. Cook for 1 to 2 minutes on each side, or until they achieve a beautiful, deep golden-brown color and appear thoroughly cooked through. Use a slotted spoon or tongs to carefully remove the cooked fritters and transfer them to a wire cooling rack placed over a baking sheet. The baking sheet will catch any excess oil. Repeat this process with the remaining dough, adjusting the heat as necessary to maintain a consistent oil temperature.
Step 8: Glazing the Warm Fritters
Once your fritters have slightly cooled on the rack (they should still be warm to the touch, but not scorching hot), it’s time for the grand finale: glazing! Take each fritter and generously dip it into your homemade cinnamon-vanilla glaze, ensuring all sides are coated. Lift the fritter, allowing any excess glaze to drip back into the bowl for a few seconds. Then, place the glazed fritter back onto the cooling rack. This allows the glaze to set properly, forming a thin, slightly crunchy shell. Continue with all remaining fritters. Allow them to sit for about 10-15 minutes, or until the glaze has fully set. The anticipation will only make that first bite even more rewarding!
Expert Tips for Perfecting Your Apple Fritters
While this recipe is incredibly forgiving, a few expert tips can elevate your apple fritter game even further:
- Maintain Oil Temperature: Consistency is key. Use a thermometer if possible. If the oil gets too cool, the fritters will absorb too much oil and be greasy. If it’s too hot, they’ll burn outside and be raw inside. Adjust heat as needed between batches.
- Don’t Overcrowd: Fry in small batches to maintain oil temperature and allow fritters to cook evenly.
- Drain Well: Always place fried fritters on a wire rack over a baking sheet to allow excess oil to drip off, ensuring a crispy exterior.
- Serve Warm: Apple fritters are best enjoyed fresh and warm, right after the glaze has set.
- Apple Choice Matters: While Granny Smith is recommended for its tartness and firmness, you can experiment with other baking apples like Honeycrisp, Fuji, or Braeburn for different flavor profiles. Just ensure they are firm varieties that won’t turn mushy when cooked.
Variations and Serving Suggestions
These easy apple fritters are delicious as is, but feel free to get creative:
- Spice It Up: Add a pinch of nutmeg, allspice, or cardamom to the dough mixture for a more complex flavor.
- Nutty Crunch: Fold in a tablespoon or two of finely chopped walnuts or pecans with the apples for added texture.
- Citrus Zest: Add a teaspoon of orange or lemon zest to the glaze for a bright, tangy counterpoint.
- Serving Ideas: Enjoy them for breakfast with a cup of coffee, as an afternoon snack, or a delightful dessert with a scoop of vanilla bean ice cream or a drizzle of caramel sauce. They also make a fantastic addition to any fall brunch spread.
Storage and Reheating Homemade Apple Fritters
While apple fritters are undeniably best enjoyed fresh, you might find yourself with a few leftovers (though we doubt it!). Store cooled fritters in an airtight container at room temperature for up to 2 days, or in the refrigerator for up to 4 days. To reheat, place them on a baking sheet in a preheated oven at 300°F (150°C) for about 5-7 minutes, or until warmed through. This method helps to crisp them up again without making them greasy. Avoid the microwave, as it tends to make them soft and chewy.
Easiest Apple Fritters Recipe: Your New Fall Favorite!
There you have it – a recipe for the easiest and most incredibly delicious apple fritters, all thanks to the magic of canned biscuit dough. This simple approach makes it possible for anyone to enjoy the comforting flavors of fall without spending hours in the kitchen. Whether you’re whipping up a batch for a special breakfast, a cozy dessert, or simply to satisfy a sweet craving, these apple fritters are guaranteed to bring smiles and warmth. So, go ahead, gather your ingredients, and get ready to experience the joy of homemade goodness. Happy baking, and enjoy every delightful bite of these irresistible autumnal treats!