
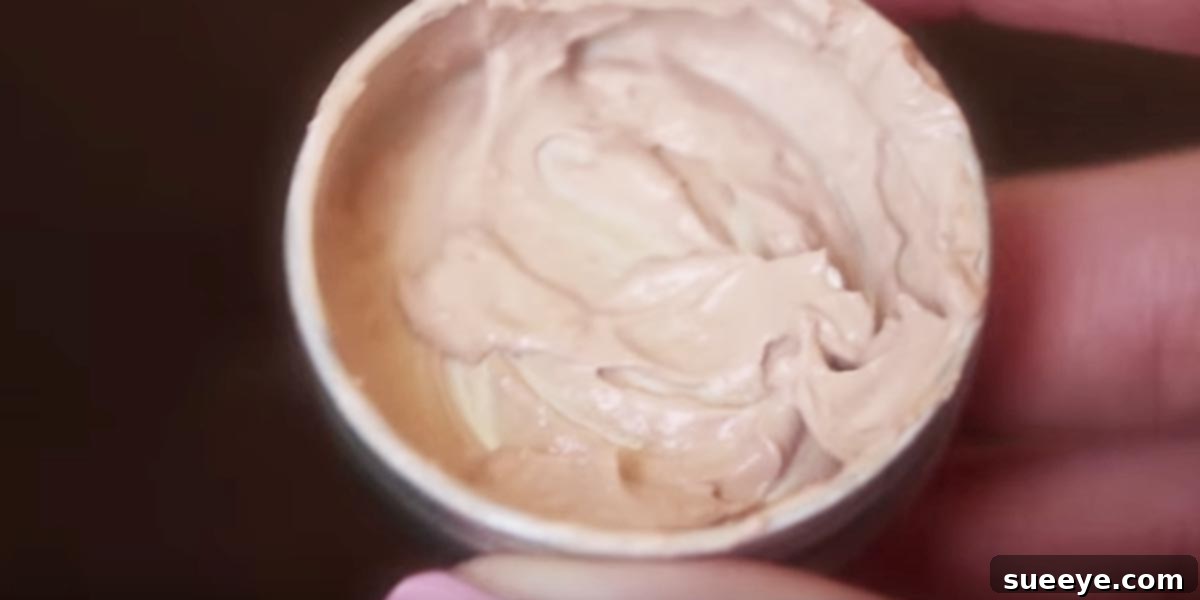
Unlock the Secret to Flawless Skin: DIY Concealer That Will Revolutionize Your Beauty Routine!
Imagine discovering a beauty hack so profound, so effective, and so incredibly simple that it makes you question everything you thought you knew about makeup. That’s exactly how I felt when I stumbled upon this game-changing method for creating your own concealer at home. For years, I, like many others, have spent a significant amount of money on various concealers, constantly searching for that perfect shade and texture to banish dark circles, hide blemishes, and even out my skin tone. The realization that I could achieve professional-level results with ingredients I might already have in my pantry – or could easily acquire – was nothing short of mind-blowing. This isn’t just about saving money; it’s about empowerment, ingredient control, and a customizable solution tailored precisely to your unique skin needs.
The online world is a treasure trove of innovative ideas, and this particular find truly left me speechless. It’s no wonder I dedicate so much time to exploring the digital landscape; there’s an endless supply of brilliant concepts that not only keep me engaged but also offer practical ways to enhance my life, including significant savings on everyday essentials. While I have to admit there was a slight moment of feeling a bit silly for not knowing this simple trick sooner, it merely fuels my curiosity for what other incredible beauty secrets are waiting to be unearthed. This discovery is more than just a recipe for makeup; it’s an invitation to take control of your beauty regimen, embrace natural alternatives, and craft products that are genuinely good for your skin.
Why Embrace the World of DIY Concealer?
The allure of homemade beauty products extends far beyond novelty. Crafting your own concealer offers a multitude of compelling advantages that can transform your approach to makeup and skincare. It’s an exciting journey into understanding what truly goes into the products you apply to your face every day.
Cost-Effectiveness You Can’t Ignore
One of the most immediate and impactful benefits of making your own concealer is the substantial cost savings. High-quality concealers from reputable brands can be surprisingly expensive, and finding the perfect one often involves a costly trial-and-error process. By utilizing common, inexpensive ingredients, you can produce a superior product for a fraction of the cost. This financial relief allows you to reallocate your beauty budget or simply enjoy the satisfaction of being savvy with your spending.
Unparalleled Ingredient Control
Commercial concealers, while effective, can sometimes contain a long list of synthetic chemicals, fragrances, and preservatives that might not agree with sensitive skin. When you formulate your own, you have complete oversight of every single ingredient. This means you can opt for natural, organic, and skin-friendly components, avoiding potential irritants or allergens. This level of transparency is invaluable, especially for those with sensitive, acne-prone, or reactive skin types.
Customizable Shades for Every Skin Tone
Finding the absolute perfect concealer shade can be a lifelong quest. Many brands offer a limited range, making it challenging to match unique undertones or seasonal skin changes. DIY concealer eliminates this frustration entirely. You gain the power to mix and blend pigments until you achieve a shade that is absolutely indistinguishable from your natural skin tone, creating a truly seamless finish that professional makeup artists strive for.
Eco-Friendly and Sustainable Beauty
In an increasingly environmentally conscious world, DIY beauty aligns perfectly with sustainable living. By creating your own products, you reduce reliance on plastic packaging and minimize waste. Reusing containers and sourcing ingredients responsibly contribute to a greener beauty routine, allowing you to feel good about your environmental impact while looking fabulous.
An Empowering and Fun Experience
There’s a unique sense of accomplishment and joy that comes from crafting something with your own hands. Making your own concealer is a creative outlet, a practical skill, and a deeply empowering act. It transforms a routine chore into an engaging hobby, fostering a deeper connection with your beauty products and a greater appreciation for natural ingredients.
Understanding Concealer: Your Secret Weapon Against Imperfections
Before we dive into the creation process, it’s helpful to understand the fundamental role of concealer in a flawless makeup application. Concealer is essentially a concentrated pigment designed to camouflage specific imperfections on the skin. While foundation provides an overall even base, concealer targets areas that require extra coverage, creating an illusion of perfection.
It effectively addresses a variety of common skin concerns:
- Dark Circles: Brightening and neutralizing the bluish or purplish tones under the eyes.
- Blemishes and Redness: Covering acne spots, redness around the nose, or broken capillaries.
- Hyperpigmentation: Minimizing the appearance of sunspots, age spots, or post-inflammatory hyperpigmentation.
- Highlighting: A lighter shade can be used to subtly highlight high points of the face, bringing dimension.
Understanding its function helps you better tailor your DIY recipe to meet your specific coverage needs.
Essential Ingredients for Your DIY Concealer Masterpiece
Crafting your own concealer involves combining a few key components that work synergistically to provide coverage, blendability, and skin benefits. The beauty of this process lies in the flexibility to choose ingredients that resonate with your skin type and ethical preferences.
-
The Nourishing Base: Oils and Butters
This forms the emollient, spreadable foundation of your concealer. Choose oils and butters known for their skin-loving properties:
- Shea Butter: Rich in vitamins A, E, and F, shea butter is deeply moisturizing, anti-inflammatory, and creates a creamy texture. It’s excellent for dry or mature skin.
- Coconut Oil: A popular choice for its antimicrobial properties and smooth consistency. Use it in moderation if you have acne-prone skin, or opt for fractionated coconut oil, which is less comedogenic.
- Jojoba Oil: Mimics the skin’s natural sebum, making it highly compatible with most skin types, including oily and sensitive. It’s lightweight and non-comedogenic.
- Almond Oil: A gentle, nourishing oil packed with vitamin E, ideal for hydrating the delicate under-eye area.
A blend of these can offer a balanced base, providing hydration without feeling greasy.
-
The Thickener and Binder: Waxes
Waxes give your concealer its structure, help it adhere to the skin, and improve its longevity and consistency.
- Beeswax: A natural emulsifier and thickener, beeswax creates a protective barrier on the skin and helps solidify the concealer. It’s a classic choice for its stability.
- Candelilla Wax: An excellent vegan alternative to beeswax, providing similar binding and hardening properties. It’s slightly harder than beeswax, so you might use a little less.
-
The All-Important Colorants and Pigments
This is where the magic happens for shade matching! Natural pigments allow you to customize your concealer perfectly.
- Cocoa Powder (Unsweetened): Fantastic for adding warm, brown tones. Start with a tiny pinch and gradually add more to deepen the shade.
- Turmeric Powder: A powerful ingredient for counteracting purple/blue undertones (like dark circles) due to its yellow hue. Use very sparingly as it’s highly potent.
- Bentonite Clay / Kaolin Clay: These natural clays can lighten the mixture and help absorb excess oil, providing a matte finish and better coverage. They can also contribute to opacity.
- Arrowroot Powder / Cornstarch: Used to adjust consistency, reduce greasiness, and provide a smoother finish. They also help lighten the base.
- Mineral Makeup Powders: If you have an old mineral foundation or loose powder that’s the right shade, you can use a small amount to add color and coverage. Ensure it’s finely milled.
- Zinc Oxide (Non-Nano): Provides excellent opaque coverage and offers natural SPF benefits. Always use non-nano zinc oxide to avoid skin penetration.
The key here is gradual addition and constant testing to achieve your desired shade.
-
Optional Additives for Enhanced Benefits
These can boost your concealer’s performance and skincare benefits.
- Vitamin E Oil: A powerful antioxidant that helps preserve the concealer and nourish the skin.
- Essential Oils (e.g., Lavender, Tea Tree – sparingly): A drop of skin-safe essential oil can add a subtle scent or offer additional skin benefits (e.g., tea tree for blemishes, lavender for soothing), but use with extreme caution and in very low concentrations.
Step-by-Step Tutorial: Crafting Your Own Radiant Concealer
Now that you understand the components, let’s get down to the exciting part: making your very own personalized concealer. This process is straightforward and incredibly rewarding.
Step 1: Gather Your Materials and Ingredients
Before you begin, ensure all your tools are clean and sanitized. You will need:
- A small heat-safe bowl or glass jar (for the double boiler method)
- A small saucepan (for the double boiler)
- Measuring spoons
- A stirring stick or small spatula
- Small, clean containers for your finished concealer (e.g., small pots, empty lip balm tubes)
- Your chosen base oils/butters (e.g., 1 tsp shea butter, 1/2 tsp jojoba oil)
- Your chosen wax (e.g., 1/4 tsp beeswax or candelilla wax)
- Your chosen colorants (cocoa powder, turmeric, clays, zinc oxide, etc.)
- Optional: Vitamin E oil
Start with small quantities for your first batch. You can always scale up once you perfect your formula.
Step 2: The Gentle Melting Process
The safest and most effective way to melt your base ingredients is using a double boiler. Fill the saucepan with a couple of inches of water and place the heat-safe bowl inside, ensuring the bottom of the bowl doesn’t touch the water. Bring the water to a gentle simmer over low to medium heat.
Add your chosen butter (like shea butter) and wax (beeswax or candelilla wax) to the heat-safe bowl. Allow them to slowly melt, stirring occasionally, until completely liquefied and combined. Once melted, remove the bowl from the heat and carefully wipe off any condensation from the bottom.
Now, add your chosen liquid oil (like jojoba or almond oil) to the melted mixture and stir well to combine. This helps cool the mixture slightly and ensures even distribution.
Step 3: The Art of Adding Color
This is the most crucial step for achieving your perfect shade. Working quickly, begin adding your dry pigments *very gradually*. Start with a tiny pinch of your primary lightening agent (e.g., arrowroot powder or clay) and then incrementally add your darker pigments (cocoa powder) and correcting pigments (turmeric) while continuously stirring. Remember, a little goes a long way, especially with potent colorants like turmeric.
Testing for Shade Match: As you mix, frequently test the color by dabbing a tiny amount onto your jawline or the back of your hand. The color will appear slightly darker when liquid. Allow it to cool for a few seconds on your skin to get a more accurate representation. Continue to adjust by adding more lightener or darkener until you achieve a shade that seamlessly blends into your skin.
Once you are satisfied with the color, you can add a drop or two of Vitamin E oil if desired, stirring it in thoroughly.
Step 4: Pouring and Setting Your Creation
Once your concealer is perfectly blended and colored, carefully pour the liquid mixture into your clean, empty containers. Fill them close to the top, but leave a tiny bit of space. The mixture will begin to set quickly as it cools.
Allow the filled containers to sit undisturbed at room temperature for a few hours, or place them in the refrigerator for about 30 minutes, to help the concealer fully solidify. Once firm, your homemade concealer is ready to use!
Step 5: Storage and Shelf Life
Store your DIY concealer in a cool, dry place away from direct sunlight. Because it contains natural ingredients and no harsh preservatives, its shelf life will be shorter than commercial products. Typically, it will last anywhere from 3 to 6 months, depending on the freshness of your ingredients and how cleanly it’s handled. Always use clean fingers or a spatula to retrieve the product to prevent bacterial contamination.
Tips for Customizing Your Concealer to Perfection
The beauty of DIY is the ability to tweak and perfect. Here are some advanced tips for custom tailoring your concealer:
- Adjusting Coverage: For more opaque coverage, increase the amount of zinc oxide or clay. For a sheerer finish, reduce these and increase your oil base slightly.
- Matching Undertones: If your skin has strong pink undertones, a touch more yellow pigment (turmeric) can help neutralize redness. For sallow skin, a hint of peach pigment can brighten.
- Adding Skincare Benefits: Consider infusing skin-specific ingredients like a drop of rosehip oil for anti-aging benefits or a tiny amount of non-nano titanium dioxide for added sun protection and brightness.
- Consistency Control: If your concealer is too firm, melt it down and add a tiny bit more liquid oil. If it’s too soft, melt and add a bit more wax or clay.
How to Apply Your Homemade Concealer for the Best Results
Even the best concealer needs proper application. Here’s how to make your DIY creation perform its best:
Preparation: Always start with a clean, moisturized face. This creates a smooth canvas and prevents your concealer from looking cakey or settling into fine lines.
Application Techniques:
- Under-eye: Dot a small amount under your eyes, focusing on the darkest areas. Gently pat and blend with your ring finger (which has the lightest touch), a damp beauty sponge, or a small, fluffy brush. Avoid dragging or rubbing.
- Blemishes: Apply a tiny dot directly onto the blemish. Pat gently around the edges to blend, ensuring not to wipe off the product from the center.
- Redness: Lightly apply to areas of redness and blend outwards until seamless.
Setting Your Concealer: For extended wear, especially in humid conditions or for oily skin, lightly set your concealer with a translucent setting powder using a small brush. This locks it in place and prevents creasing.
Beyond Concealer: The Expansive World of DIY Beauty
This journey into crafting your own concealer is often just the beginning. The principles of ingredient control, cost savings, and customization can be applied to a myriad of other beauty products. From lip balms and foundations to facial serums and body lotions, the world of DIY beauty is vast and rewarding. It encourages a more mindful approach to consumption and a deeper appreciation for the power of natural ingredients.
This amazing discovery has truly transformed my perspective on beauty products, offering a sustainable, personalized, and budget-friendly alternative to commercial options. It’s an incredibly exciting way to take control of what you put on your skin and rediscover the joy of creation. I wholeheartedly encourage you to try this simple yet powerful tutorial and experience the magic of homemade concealer for yourself. Once you’ve mastered it, don’t forget to SHARE this incredible beauty hack with your family and friends!