
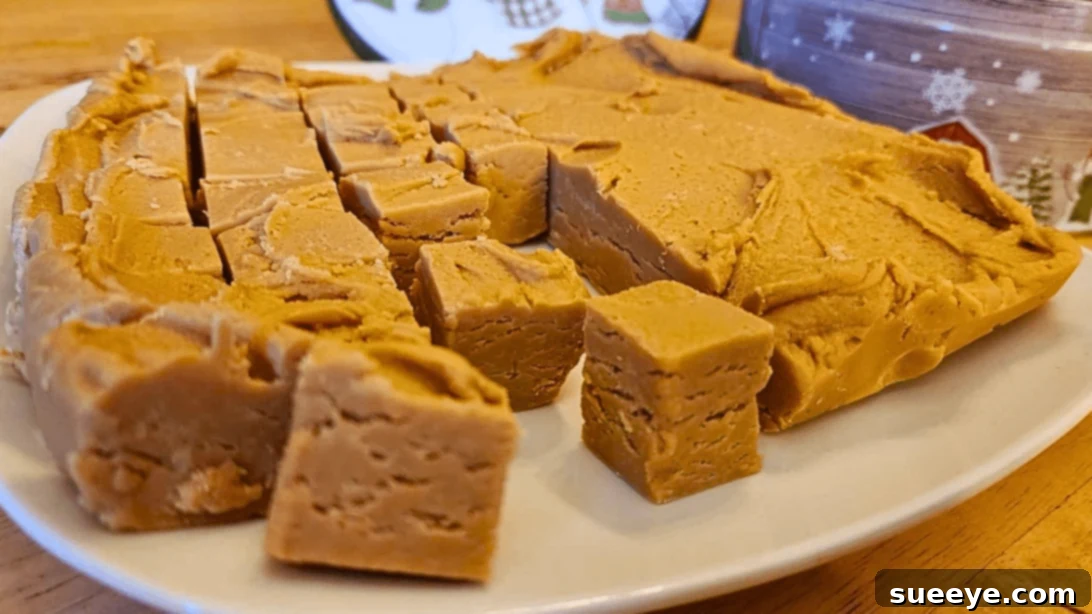
The Ultimate 2-Ingredient Peanut Butter Fudge: Quick, Easy & Irresistible Microwave Recipe
Welcome to the world of effortless confectionary! If you’ve ever dreamt of whipping up a delectable batch of homemade fudge but were intimidated by complex instructions, constant stirring, or the need for a candy thermometer, your quest ends here. This 2-ingredient peanut butter fudge recipe is a game-changer, proving that incredible taste doesn’t require endless effort. It’s not just easy; it’s astonishingly fast, transforming simple pantry staples into a rich, creamy, and utterly satisfying treat in under 10 minutes of active prep time.
What sets this recipe apart is its brilliant simplicity and guaranteed success. Forget the meticulous temperature checks and arm-aching stirring sessions traditionally associated with fudge making. With just your microwave, a couple of bowls, and two readily available ingredients, you’re on your way to peanut butter perfection. This “no-fail” approach makes it ideal for budding bakers, busy parents, or anyone looking for a quick fix for their sweet tooth.
This microwave peanut butter fudge isn’t just a delightful dessert for your own enjoyment; its simplicity makes it an excellent candidate for various occasions. Impress your friends and family by bringing a batch to a party, potluck, or cookout. Package it beautifully, and it transforms into a thoughtful, homemade gift for birthdays, holidays, or as a simple token of appreciation. Or, simply enjoy it as a luxurious after-dinner treat or a satisfying snack anytime the craving strikes. Once you try this recipe, you’ll wonder why you ever bothered with more complicated methods!
RELATED: 4-Ingredient Chocolate Fireball Fudge Recipe – For another delightful fudge adventure!
The Magic Behind This Simplified Fudge
At its core, traditional fudge relies on precise sugar crystallization, often a daunting process. This revolutionary 2-ingredient method cleverly bypasses all that fuss. The secret lies in the synergistic properties of your two key ingredients: pre-made frosting and peanut butter.
- Pre-Made Frosting: This acts as the backbone of our fudge. It’s already sweetened, flavored, and contains the necessary stabilizers and fats to provide a smooth, creamy base. When melted and combined with the peanut butter, its structure helps the mixture set beautifully without any additional sugar or complex cooking.
- Peanut Butter: Beyond its iconic flavor, peanut butter contributes fats and proteins that interact with the frosting, creating that desirable firm yet melt-in-your-mouth texture that defines excellent fudge. Its inherent creaminess ensures a smooth consistency, eliminating the need for extensive mixing or beating.
Together, these two ingredients create a luscious, rich treat that sets up perfectly in the refrigerator, delivering all the satisfaction of homemade fudge with none of the stress. It’s a truly brilliant shortcut that every dessert lover should have in their repertoire.
Essential Ingredients for Your No-Fail Fudge
The beauty of this recipe truly shines in its minimalist ingredient list. You’ll only need two primary items, making grocery shopping a breeze.
- 1 (16 oz) can of Vanilla or Cream Cheese Frosting: This is your foundational ingredient. While classic vanilla frosting yields a wonderfully straightforward peanut butter flavor, a cream cheese frosting can add a delightful tangy note that beautifully complements the richness of the peanut butter. Ensure you’re using a standard, shelf-stable canned frosting, not a homemade or specialty whipped variety, as its specific composition is key to the fudge setting correctly. Any reputable brand will work perfectly.
- 1 (16 oz) jar of Creamy Peanut Butter: For the best results and the smoothest texture in your fudge, opt for a creamy, processed peanut butter like Jif or Skippy. Natural peanut butter, which often separates with oil on top, can sometimes yield a slightly different texture due to variations in its oil content. The emulsifiers in processed peanut butter help create that consistent, velvety smooth fudge consistency we’re aiming for. Avoid crunchy peanut butter unless you specifically desire a chunky texture, and even then, be aware it might alter the overall smoothness.
Optional Enhancements for Personalized Fudge:
While the core recipe is perfect as is, you can always add a touch of your personal flair:
- A pinch of sea salt: To enhance the peanut butter flavor and provide a delightful salty-sweet contrast.
- 1 teaspoon of vanilla extract: To deepen the overall flavor profile.
- Mini chocolate chips: Stirred in at the end for a classic peanut butter chocolate combination.
- Chopped roasted peanuts: For extra crunch and nutty flavor.
Step-by-Step Guide to Perfect Microwave Peanut Butter Fudge
Follow these simple steps, and you’ll have a batch of incredible peanut butter fudge ready for chilling in minutes. The entire process is designed for speed and ease, making it genuinely foolproof.
Step 1: Gently Melt the Frosting
Begin by spooning the entire can of vanilla or cream cheese frosting into a large, microwave-safe bowl. Heat the frosting in the microwave for a total of 60 seconds. However, it’s crucial not to do this all at once. Heat it in 20-30 second intervals, stirring well after each interval. This gradual approach ensures even melting and prevents any scorching or overheating. You want the frosting to be completely melted and smooth, with a liquid-like consistency, making sure there are no lumps remaining.
Step 2: Carefully Melt the Peanut Butter
In a separate microwave-safe bowl, scoop out the entire jar of peanut butter. Start by heating it on a high setting for 30 seconds. After this initial burst, continue heating in shorter intervals of 10 to 15 seconds, stirring thoroughly in between each interval. The goal here is to melt the peanut butter just enough so it becomes fluid and easy to mix, but not so much that it gets extremely hot or too runny. Overheating can cause the peanut butter to separate or become oily, which might affect the final texture of your fudge. Continue until it reaches a smooth, pourable consistency.
Step 3: Combine and Mix Thoroughly
Once both the melted frosting and the melted peanut butter are ready, pour the melted peanut butter directly into the bowl with the melted frosting. Using a sturdy spatula or a whisk, mix these two ingredients together thoroughly. Continue mixing until the mixture is completely uniform, smooth, and well combined, with no streaks of individual ingredients visible. The mixture should be thick, creamy, and have a consistent color and texture throughout. This step is critical for ensuring your fudge sets properly and has that signature smooth mouthfeel.
Step 4: Prepare, Pour, Chill, and Serve
Prepare a 9×9-inch square pan. For easy removal, first grease the pan lightly with butter or non-stick spray, then line it with parchment paper, leaving an overhang on two sides. This parchment paper sling will make lifting the set fudge out of the pan incredibly simple. Carefully pour the warm fudge mixture into the prepared pan, using your spatula to spread it evenly to all sides and corners, creating a smooth, flat surface. Once leveled, place the pan into the refrigerator. Allow the fudge to chill for approximately 1 to 2 hours, or until it is completely hardened and fully set. The chilling time is crucial for developing its firm, sliceable texture. Once firm, use the parchment paper overhang to lift the fudge block out of the pan onto a cutting board. For clean, neat slices, use a sharp knife, wiping it clean between each cut if necessary. Now, your irresistible 2-ingredient peanut butter fudge is ready to be enjoyed!
Pro Tips for Flawless Fudge Every Time
While this recipe is incredibly forgiving, a few expert tips can elevate your 2-ingredient peanut butter fudge from great to absolutely extraordinary.
- Don’t Overheat: This is the most crucial tip. Both the frosting and especially the peanut butter should be melted just until smooth and pourable, not boiling or excessively hot. Overheated peanut butter can become oily and separate, which can lead to a greasy or crumbly fudge.
- Stir Thoroughly: When combining the two ingredients, ensure you mix until every last streak of frosting and peanut butter has disappeared. A uniform mixture is key to a consistent, smooth fudge.
- Grease and Line Your Pan: Don’t skip the parchment paper! It’s your best friend for effortless removal. Lightly greasing underneath helps the parchment stick, preventing it from shifting when you pour the mixture.
- Even Spreading: Once poured into the pan, quickly spread the fudge mixture evenly. This ensures that every piece of fudge sets with the same perfect consistency.
- Chill Adequately: Patience is a virtue when it comes to chilling. While 1-2 hours is a good guideline, if your kitchen is warm, or if you prefer a firmer fudge, chilling for an extra hour won’t hurt. You can even pop it in the freezer for about 30 minutes for a quicker set, but be careful not to freeze it solid.
- Clean Cuts: For professional-looking squares, use a sharp, thin knife. Running the knife under hot water and wiping it dry between cuts can help achieve exceptionally clean edges.
Creative Variations to Elevate Your Fudge
This basic 2-ingredient peanut butter fudge recipe is a fantastic canvas for your culinary creativity. Feel free to experiment with these delicious twists:
- Chocolate Swirl Peanut Butter Fudge: Melt about 1/2 cup of chocolate chips (milk, dark, or semi-sweet) and drizzle it over the peanut butter fudge in the pan. Use a skewer or knife to gently swirl the chocolate into the peanut butter mixture before chilling.
- Salty-Sweet Perfection: Sprinkle a generous pinch of flaky sea salt over the top of the fudge before it sets. The salt crystals provide a delightful textural contrast and perfectly balance the sweetness.
- Nutty Crunch Fudge: Fold in 1/2 to 1 cup of chopped roasted peanuts, cashews, or pecans into the fudge mixture just before pouring it into the pan for an added layer of crunch and flavor.
- Peanut Butter Cup Inspired Fudge: Mix in 1/2 cup of mini peanut butter cups (chopped) into the fudge or press them onto the top before chilling.
- Cookies and Cream Fudge: Crush about 1 cup of Oreo cookies and gently fold them into the mixture for a delightful cookies and cream twist.
- Different Frosting Flavors: Experiment with chocolate frosting for a richer, more decadent peanut butter chocolate fudge, or even a strawberry frosting for a unique fruity note.
Serving and Storage Suggestions
Once your easy peanut butter fudge is perfectly set and sliced, it’s ready to be savored. This versatile treat is wonderful served chilled straight from the refrigerator, allowing its rich, dense texture to shine. It also makes an excellent addition to dessert platters, a delightful treat for school lunchboxes, or a much-appreciated edible gift.
For storage, keep your peanut butter fudge in an airtight container. It will last beautifully in the refrigerator for up to 2-3 weeks. If you prefer to enjoy it at room temperature, it can sit out for a few days, especially if your home isn’t too warm. For longer storage, this fudge freezes exceptionally well. Simply wrap individual pieces or blocks tightly in plastic wrap, then place them in a freezer-safe bag or container. It will keep in the freezer for up to 3 months. Thaw in the refrigerator or at room temperature before serving.
The Sweet Conclusion
This 2-ingredient peanut butter fudge recipe truly is a culinary marvel. It shatters the myth that homemade candy must be complicated, offering a quick, dependable, and incredibly delicious path to satisfaction. Whether you’re a seasoned baker or a complete novice, the simplicity of this microwave method ensures a perfect batch every single time, making it truly “no-fail.” The rich, creamy texture and comforting flavor of peanut butter make it an instant crowd-pleaser and a staple for any occasion.
So, gather your two simple ingredients, dedicate a mere few minutes to preparation, and get ready to indulge in the easiest, most delightful peanut butter fudge you’ve ever made. It’s a sweet escape, a perfect gift, and a testament to the fact that sometimes, the best things in life are indeed the simplest. Try it today and experience the magic for yourself!
*All images in this article are credited to The Hillbilly Kitchen – Down Home Country Cooking via YouTube. We highly recommend visiting her channel and subscribing for more amazing down-home country cooking inspiration!