
Master Professional Garden Bed Edging with Just a Shovel: The Ultimate DIY Guide
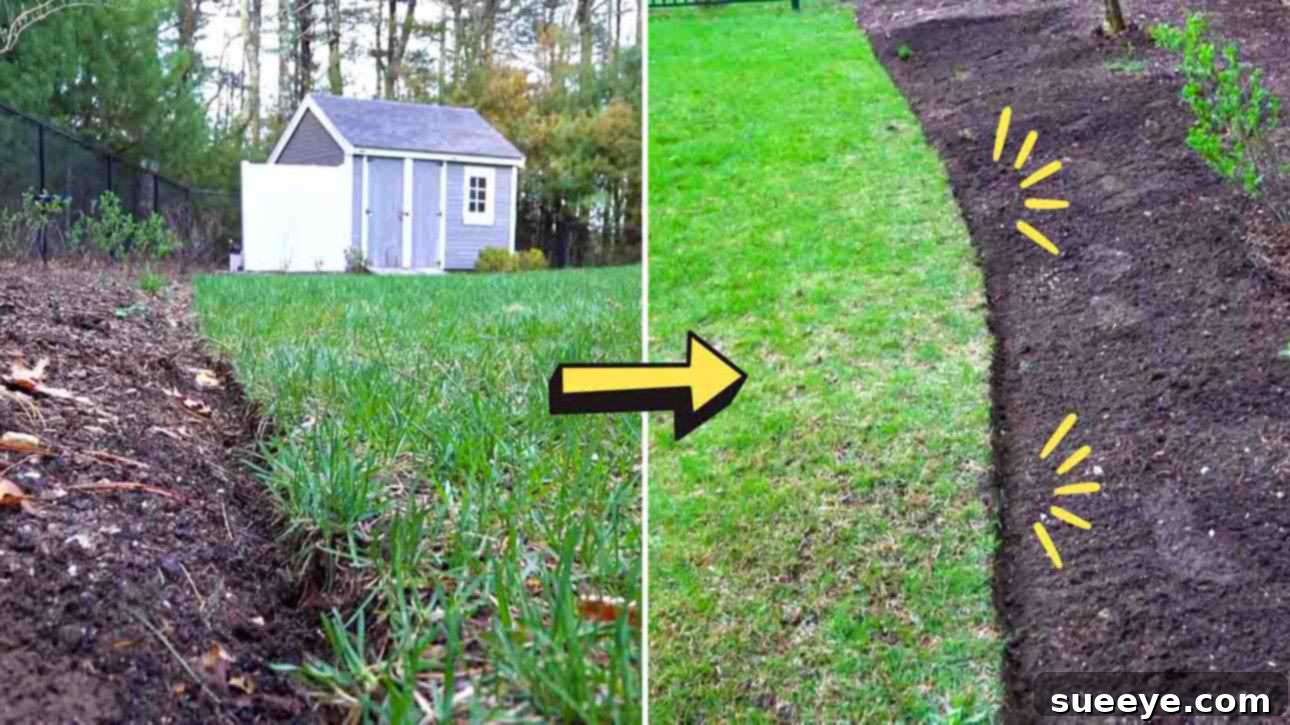
Are you tired of your garden beds looking untidy, blending seamlessly into your lawn, and lacking that crisp, professional finish? Achieving beautifully defined garden borders doesn’t require expensive tools or hiring a professional landscaper. With the right technique and a standard garden shovel, you can transform your outdoor space, creating sharp, clean edges that elevate your home’s curb appeal and simplify garden maintenance. This comprehensive guide, inspired by the ingenious method from Silver Cymbal on YouTube, will walk you through everything you need to know to edge your garden beds like a seasoned pro.
Discover how to leverage the power of a simple garden spade to achieve stunning results quickly, easily, and without breaking the bank. This technique emphasizes efficiency and precision, ensuring that even gardening novices can create envy-inducing garden borders. Say goodbye to unruly grass creeping into your flower beds and hello to impeccably defined landscaping that makes your garden truly shine.
Why Professional Garden Bed Edging Matters for Your Landscape
Beyond mere aesthetics, well-defined garden bed edging offers a multitude of benefits for any homeowner. A crisp edge acts as a clear boundary between your lawn and planting areas, preventing grass and weeds from encroaching into your garden beds. This significantly reduces weeding time and maintains the health of your plants by minimizing competition for nutrients and water. Furthermore, a clean edge provides a finished look that instantly elevates the overall appearance of your property, contributing to enhanced curb appeal and making your garden feel more intentional and organized.
Professional garden bed edging also helps contain mulch and soil within your beds, preventing runoff onto pathways or your lawn during heavy rains or watering. This not only saves you money on replacement materials but also keeps your hardscaping cleaner. For those who enjoy lawn care, a clearly defined edge makes mowing easier and more precise, eliminating the need for string trimming right up against delicate plants. It’s an investment in your garden’s beauty, health, and your own enjoyment of your outdoor sanctuary.
Essential Preparations Before You Begin Your Edging Project
Before you grab your shovel and get started, a little preparation can make a big difference in the ease and success of your garden bed edging project. Choosing the right time and ensuring you have the correct tools will set you up for flawless results. This method is incredibly forgiving, but these initial steps will make the process even smoother.
Materials You’ll Need:
- A standard garden spade type shovel (preferably with a sharp edge)
- Gardening gloves (optional, but recommended for comfort and preventing blisters)
- A sturdy rake for clearing debris
- A hose or string (optional, for marking a straight line)
The Optimal Time for Edging
The secret to effortless garden bed edging lies in the soil condition. The absolute best time to edge your garden beds is after a good rain or when the ground is damp. Moist soil is far more pliable and easier to cut through than dry, compacted earth. Attempting to edge dry soil can be incredibly strenuous, damaging to your shovel, and lead to jagged, uneven lines. If there hasn’t been any rain, consider watering the area thoroughly the day before you plan to edge.
Choosing the Right Shovel
While various edging tools exist, a standard, sharp garden spade is all you truly need for this technique. The flat, square-ended blade is ideal for cutting clean lines. Ensure your shovel is relatively clean and its edge is as sharp as possible. A dull shovel will require more effort and produce less precise cuts. You can sharpen a shovel edge with a metal file if needed, though most new spades are sufficiently sharp.
The Silver Cymbal Method: Step-by-Step Guide to Perfect Edges
Now, let’s dive into the core technique that will transform your garden beds. This method emphasizes leverage, precision, and efficiency, allowing you to create sharp, professional-looking edges with minimal effort. Follow these steps to master the art of shovel edging.
Step 1: The Initial Cut – Master the Shovel Technique
The key to this incredibly effective edging method lies in how you engage the shovel with the ground. Instead of simply plunging the shovel straight down, you’ll use a dynamic, walking motion that utilizes your body weight for maximum cutting power. Begin by positioning yourself along the edge of your garden bed where you want to create your new border.
Place your foot firmly on the right-hand side of the shovel’s top edge (assuming you are right-footed, reverse if left-footed). This placement is crucial as it allows you to direct your body’s weight efficiently. Rather than using the flat front of the shovel, position the very corner of the shovel’s blade against the ground. This “razor-sharp” corner acts like a precision tool, making the initial cut incredibly clean and reducing resistance.
Now, here’s the clever part: instead of stopping and starting, “walk” the shovel along the bed. As you press down with your foot on the corner of the shovel, take small steps forward, allowing the shovel to smoothly slice through the soil as you move. This continuous motion, combined with putting your full body weight onto that sharp corner, makes the process incredibly quick and significantly less strenuous than traditional methods. Aim for a consistent depth, typically around 3-4 inches, to create a strong, lasting edge. For those who might struggle with balance, you don’t necessarily have to “walk” the shovel. You can still apply the same technique by pressing down on the corner, making a cut, lifting the shovel, moving it slightly forward, and repeating the process in sections. This segmented approach offers more control and stability while still benefiting from the shovel’s sharp edge and your body weight.
Step 2: Refining the Edge – Back-Cutting and Clearing
Once you’ve made your initial continuous or segmented cut around the entire perimeter of your garden bed, it’s time to refine the edge and clear away the cut sod. This step is crucial for achieving that crisp, clean line and preventing grass regrowth in unwanted areas. Go back along the line you just created and perform a “back-cut” on each piece of sod. A back-cut involves angling your shovel blade slightly inward towards the lawn side of the cut and making a shallow, secondary cut. This helps to loosen the soil and turf that you’ve just separated from the bed, making it easier to remove.
As you back-cut, carefully lift and remove the strips of sod. A common mistake to avoid is flipping the grass or sod directly into your garden beds and leaving it there. While it might seem like a quick way to add organic matter, it often introduces grass seeds and roots back into your beds, leading to future weeding headaches. Instead, gather all the removed sod and debris into a pile. A sturdy rake is excellent for sweeping up these bits of grass and loose soil, ensuring a clean finish. Dispose of the sod in your compost pile (if suitable) or a designated green waste bin. Once all the unwanted material is cleared, step back and admire your perfectly edged garden bed. The result will be a much cleaner, faster, and more professional-looking edge than you’d typically achieve with less efficient methods.
Tips for a Flawless Finish and Long-Lasting Edges
While the core technique is straightforward, a few additional tips can help you achieve truly exceptional results and maintain them over time. These insights will help you address common challenges and ensure your garden beds remain pristine.
- Maintain a Straight Line: For perfectly straight edges, especially on long runs, consider laying down a garden hose or a string line as a guide. This visual reference will help you keep your shovel cuts consistent and prevent wavy lines.
- Consistency is Key: Strive for a consistent depth and angle throughout the entire bed. Uniformity is what gives a professional edge its polished appearance.
- Regular Maintenance: Edges don’t last forever. Depending on your grass type and growth rate, you might need to re-edge your beds once or twice a year to keep them looking sharp. Early spring and late summer are often ideal times.
- Deal with Obstacles: If you encounter roots or rocks, gently work around them or use a root saw for stubborn roots. Don’t force your shovel, as this can damage the blade or cause injury.
- Keep Your Shovel Sharp: A sharp shovel makes all the difference. Periodically clean and sharpen your shovel blade with a file or grinder to ensure it cuts efficiently.
- Consider Mulch: Once your beds are perfectly edged, adding a fresh layer of mulch will further enhance their appearance, suppress weeds, retain moisture, and protect plant roots. The clean edge will effectively contain the mulch.
Common Mistakes to Avoid When Edging Your Garden Beds
Even with the best technique, certain pitfalls can hinder your results. Being aware of these common mistakes will help you steer clear of frustration and ensure your garden edging project is a success.
- Edging Dry Soil: As mentioned, attempting to cut through dry, hard-packed soil is incredibly difficult and produces rough, uneven edges. Always work with damp soil.
- Using the Wrong Tool: While specialty edging tools exist, using an inappropriate shovel (e.g., a round-point digging shovel for edging) can make the job harder and less precise. A standard garden spade is ideal.
- Inconsistent Depth or Angle: Varying the depth or angle of your cuts leads to an uneven, unprofessional look. Strive for uniformity.
- Neglecting Back-Cutting: Skipping the back-cut makes it harder to remove the sod and often leaves behind loose bits of grass that can quickly regrow, compromising your clean edge.
- Flipping Grass into Beds: Resist the temptation to simply flip removed sod into your garden beds. This can introduce weeds and grass seeds, undoing your hard work in the long run.
- Rushing the Process: While this technique is fast, taking a moment to ensure your line is straight and your cuts are clean will yield far better results than rushing through it.
- Not Clearing Debris: Leaving cut grass and soil along the edge can make the area look messy and can also provide a breeding ground for weeds to establish themselves right at your new border.
Transform Your Garden: The Power of a Perfect Edge
With this simple yet incredibly effective shovel edging technique, you have the power to transform your garden beds from unruly to immaculate. This DIY approach not only saves you money but also gives you the satisfaction of knowing you’ve created a beautifully manicured landscape with your own hands. The crisp, clean lines achieved by professional garden bed edging dramatically enhance the visual appeal of your entire property, making your lawn appear wider and your planting areas more vibrant.
Embrace the challenge, follow these steps, and prepare to be amazed by the professional-grade results you can achieve with just a standard garden shovel. Your neighbors will wonder if you hired a landscaper, and you’ll know the secret to effortless, stunning garden borders. Get ready to enjoy a more beautiful, easier-to-maintain garden all season long!