
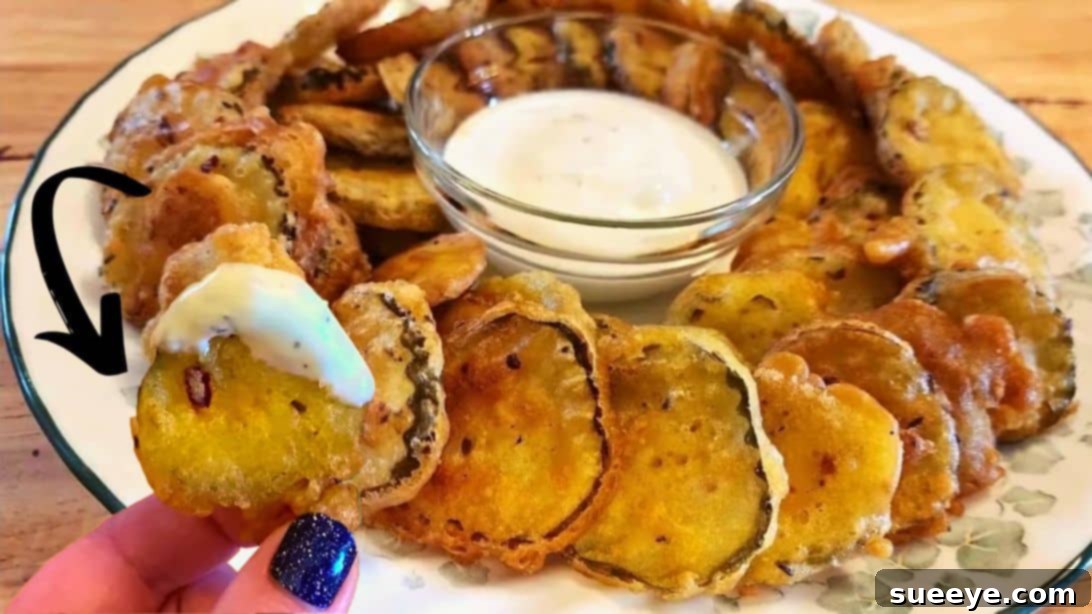
The Ultimate Guide to Crispy Fried Pickles: An Easy Homemade Recipe
Pickles, often an underrated culinary delight, possess a distinctive tang and satisfying crunch that makes them a perfect snack on their own. However, when these humble dill slices are transformed by a golden, crispy batter and a deep-fryer, they reach an entirely new level of deliciousness. For years, the idea of attempting homemade fried pickles seemed daunting to me, primarily due to the fear of not achieving that coveted, restaurant-quality crispiness. The numerous video tutorials I watched often left me questioning my ability to replicate such perfection.
That hesitation dissolved the moment I stumbled upon an incredible version shared by The Hillbilly Kitchen – Down Home Country Cooking on YouTube. Her straightforward approach, coupled with a treasure trove of invaluable tips, demystified the process and empowered me to create the most incredibly crispy and flavorful fried pickles I’d ever tasted. This recipe isn’t just about frying pickles; it’s about unlocking a simple culinary secret that will elevate your snack game to extraordinary heights. Get ready to impress your taste buds and your guests with this surprisingly easy, utterly addictive dish!
Why Fried Pickles Are an Absolute Must-Try
Fried pickles have rapidly grown in popularity, evolving from a regional Southern delicacy to a beloved appetizer across the globe. What makes them so irresistible? It’s the delightful contrast of textures and flavors. You get the salty, sour punch of the dill pickle, perfectly complemented by a warm, crunchy, and savory batter. Each bite offers a satisfying “snap” followed by a tender, briny interior. They are the epitome of comfort food – indulgent yet surprisingly refreshing. Whether served as a party appetizer, a unique side dish, or simply a treat for yourself, fried pickles deliver a unique gastronomic experience that’s hard to beat. Forget your preconceived notions about pickles; once they’re fried, they transform into an entirely different, incredibly delicious entity.
Essential Ingredients for Perfectly Crispy Fried Pickles:
Creating the ultimate crispy fried pickles begins with selecting the right ingredients. Each component plays a crucial role in achieving that sought-after golden crunch and irresistible flavor. Here’s what you’ll need, keeping in mind that quality dill pickle slices are key to the best outcome:
- 16 ounces of quality dill pickle slices (chips or spears work well, ensure they are well-drained)
- ¾ cup of self-rising flour or cornmeal mix (self-rising flour adds a lighter, crispier texture, while cornmeal mix offers a classic Southern crunch)
- ¾ cup of whole milk (or buttermilk for an extra tangy batter)
- 1 large egg, beaten
- 1-2 tablespoons of pickle juice (this secret ingredient enhances the pickle flavor in the batter)
- Freshly ground black pepper and other preferred spices, to taste (paprika, garlic powder, or cayenne pepper can add a fantastic kick)
- 1/3 cup of cornstarch (essential for ensuring maximum crispiness and a protective coating)
- High-quality oil for frying (vegetable oil, canola oil, or peanut oil are excellent choices with high smoke points)
Step-by-Step Directions to Achieve Fried Pickle Perfection:
Step 1: Prepare the Pickles and Batter
The journey to crispy fried pickles begins with meticulous preparation. First, thoroughly drain your dill pickle slices. This step is crucial, as excess moisture is the enemy of crispiness. Once drained, arrange the pickle slices in a single layer on a plate generously lined with several layers of paper towels. Using additional paper towels, gently but firmly pat the pickles completely dry. Take your time with this; the drier the pickles, the crispier your final product will be. After drying, transfer the pickles to a bowl and toss them with the 1/3 cup of cornstarch until each piece is uniformly coated. This cornstarch layer acts as a barrier, preventing the pickle’s natural moisture from making the batter soggy and ensuring an extra layer of crunch. Set the dredged pickles aside while you prepare the batter and preheat your frying oil.
For the oil, place a large, deep skillet or Dutch oven on your stove over medium-high heat. Allow the pan to heat sufficiently before pouring in enough oil to submerge the pickles when frying (typically 2-3 inches deep). Continue preheating the oil as you prepare the batter. To make the batter, start by adding the 1-2 tablespoons of pickle juice to the ¾ cup of milk – this infusion of pickle juice amplifies the overall flavor. In a separate bowl, lightly beat the egg, then incorporate it into the ¾ cup of self-rising flour or cornmeal mix. Gradually pour in the pickle-infused milk mixture, whisking continuously until a smooth, lump-free batter forms. Season the batter generously with freshly ground black pepper and any other spices you prefer, such as paprika for color, garlic powder for depth, or a pinch of cayenne for a subtle kick. Stir well to ensure all seasonings are fully combined and incorporated. Finally, pour this delectable batter over your cornstarch-dredged pickles, gently flipping each piece to ensure it is thoroughly coated. Allow the coated pickles to rest in the batter for a few minutes, which helps the batter adhere better.
Step 2: Fry to Golden Crispy Perfection and Serve
With your pickles coated and your oil heating, it’s time for the most exciting part: frying! Before you start, ensure your oil is at the optimal temperature, typically around 350-375°F (175-190°C). If you don’t have a thermometer, a simple test is to drop a tiny dollop of batter into the hot oil. If it immediately sizzles and floats to the surface, the oil is ready. If it sinks without much activity, the oil needs more time to heat. If it burns instantly, it’s too hot and needs to cool slightly before proceeding.
Once the oil is at the correct temperature, carefully drop each individual pickle slice into the hot oil. Avoid overcrowding the pan, as this will lower the oil temperature and result in soggy, rather than crispy, pickles. Fry them in small batches, giving each piece enough space to cook evenly. Cook for approximately 2-4 minutes per side, or until each pickle is beautifully golden brown and undeniably crispy. Use tongs or a slotted spoon to carefully flip the pickles to ensure even cooking on all sides. As each batch finishes frying, transfer the golden-brown pickles to a wire cooling rack placed over a sheet pan. This setup is crucial for allowing any excess oil to drain off and for air to circulate, which prevents steam from building up and keeps your pickles delightfully crispy. Resist the urge to place them directly on paper towels, as this can trap steam and lead to sogginess.
Once all the pickles have been fried to perfection and allowed to drain briefly, arrange them on a serving platter. These crispy delights are best served immediately while still warm and crunchy. They pair wonderfully with a variety of dipping sauces. Classic ranch dressing is a popular choice, but feel free to experiment with sriracha mayo, a creamy comeback sauce, or even a spicy remoulade. Share them with friends and family, or savor them all yourself – either way, prepare for a truly delicious and satisfying experience!
Expert Tips for Unbeatable Crispy Fried Pickles
Achieving consistently perfect fried pickles involves a few key techniques and considerations. Master these tips, and you’ll be making restaurant-quality snacks every time:
- Drain and Dry Thoroughly: This cannot be stressed enough. Moisture is the number one enemy of crispy fried foods. Patting the pickles dry with paper towels is a non-negotiable step. The drier they are before dredging in cornstarch, the crispier they will be.
- The Cornstarch Advantage: Don’t skip the cornstarch dredge. It creates a thin, dry layer that helps the wet batter adhere better and contributes significantly to the crispiness, forming a protective barrier against the pickle’s moisture.
- Optimal Oil Temperature: Maintain a consistent oil temperature between 350-375°F (175-190°C). Too cool, and the pickles will absorb too much oil and be greasy. Too hot, and the outside will burn before the inside is properly cooked. A thermometer is highly recommended.
- Don’t Overcrowd the Pan: Frying in small batches is essential. Overcrowding lowers the oil temperature rapidly, leading to soggy pickles. Give each pickle space to fry evenly and achieve that perfect golden hue.
- Batter Consistency: The batter should be thick enough to coat the pickles but still pourable. If it’s too thin, add a little more flour; if it’s too thick, a splash more milk. The added pickle juice in the batter subtly enhances the overall pickle flavor.
- Season Your Batter: While the pickles themselves are flavorful, the batter benefits immensely from seasoning. Black pepper is a given, but consider garlic powder, onion powder, paprika, or even a pinch of cayenne for extra zest.
- Use a Wire Rack: Once fried, immediately transfer pickles to a wire rack set over a baking sheet. This allows air circulation on all sides, preventing steam from accumulating and keeping them crispy. Avoid placing them directly on paper towels for extended periods.
- Serve Immediately: Fried pickles are at their absolute best when served hot and fresh. While they can be reheated in an air fryer or oven, nothing beats them straight out of the fryer.
Delicious Variations and Serving Suggestions
While the classic crispy dill fried pickle is a marvel on its own, don’t hesitate to explore variations to suit your taste. For a sweeter profile, try using bread and butter pickles; the sweet and savory combination is surprisingly delightful. You can also experiment with your batter seasonings – add a touch of Cajun spice for a Louisiana kick, or some Old Bay seasoning for a coastal twist. Gluten-free flour blends can often be substituted in the batter for those with dietary restrictions, though the texture might vary slightly.
When it comes to serving, the possibilities are endless. Fried pickles are a fantastic appetizer for any gathering, from casual game nights to backyard barbecues. They make a unique and exciting side dish for burgers, sandwiches, or grilled chicken. The key to truly elevating them is the dipping sauce. Beyond the ever-popular ranch dressing, consider a zesty sriracha mayo, a tangy remoulade, a creamy blue cheese dip, or even a homemade comeback sauce. For a simple yet effective dip, mix mayonnaise with a squeeze of lemon juice, a dash of hot sauce, and finely chopped fresh dill. The combination of warm, crispy pickles with a cool, creamy dip is simply irresistible, making every bite an explosion of flavor and texture.
Conclusion: Your New Favorite Snack Awaits!
From a simple jar of dill slices to an extraordinary, golden-fried delicacy, homemade crispy fried pickles are a testament to the magic of simple ingredients and thoughtful preparation. This recipe, inspired by the wonderful insights from The Hillbilly Kitchen, proves that achieving that coveted restaurant-quality crispiness at home is not only possible but also surprisingly easy. By following these steps – from thoroughly drying your pickles and mastering the cornstarch dredge to maintaining optimal oil temperature and frying in batches – you’ll unlock a snack that’s addictive, satisfying, and bound to become a staple in your culinary repertoire.
Whether you’re looking for a crowd-pleasing appetizer, a unique side dish, or simply a treat to satisfy your cravings, these crispy fried pickles deliver every time. So, gather your ingredients, fire up your fryer, and prepare to indulge in a truly unforgettable flavor experience. Your journey to homemade fried pickle perfection starts now. Enjoy every single crispy, tangy bite!
*All image credit belongs to The Hillbilly Kitchen – Down Home Country Cooking via YouTube. Follow and subscribe to her channel for more delicious recipes!