
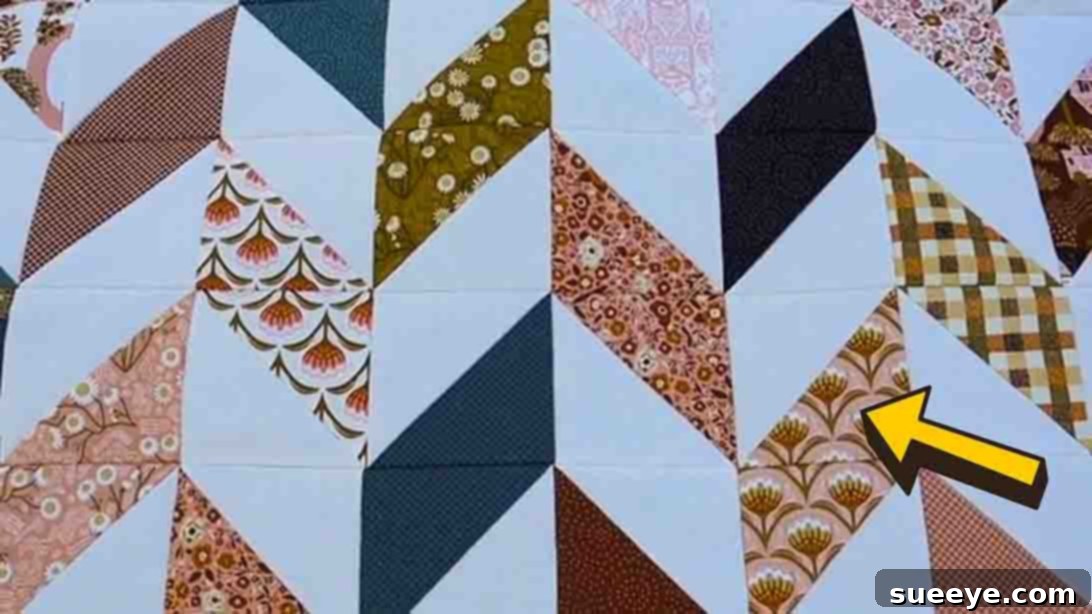
Welcome, fellow crafters, to an exciting journey into the world of quilting! Are you searching for your next inspiring quilt project that’s both beautiful and surprisingly simple to make? Look no further! This comprehensive guide will walk you through creating a charming herringbone quilt, a design that looks intricate but is incredibly beginner-friendly. We’re thrilled to feature a fantastic project from Hailey Stitches on YouTube, renowned for her clear and engaging quilting tutorials. This particular project utilizes just two charm packs, making it an ideal choice for those new to quilting, or seasoned quilters seeking a quick, satisfying make for a weekend or a thoughtful handmade gift.
The herringbone pattern, with its distinctive V-shaped design, adds a touch of modern elegance to any quilt. While it might appear complex, the method shared by Hailey Stitches simplifies the process into easily manageable steps. You’ll be amazed at how quickly you can transform a couple of fabric charm packs into a stunning finished quilt. This project is not only quick and easy but also highly rewarding, perfect for creating personalized gifts for friends and family, or simply adding a cozy touch to your own home decor.
RELATED: How to Make Magic No-Scraps Herringbone Quilt!
In this detailed, step-by-step tutorial, we’ll delve into the techniques demonstrated by Hailey Stitches, guiding you through every stage from fabric selection to assembling your beautiful quilt top. You’ll appreciate how accessible and enjoyable this project is, making it a definite contender for your list of favorite quilt patterns. Get ready to unleash your creativity and construct a beautiful herringbone quilt with confidence. Let’s gather our supplies and begin this delightful quilting adventure!
Materials and Preparation for Your Herringbone Quilt
Before diving into the exciting world of cutting and sewing, it’s essential to gather all your materials. Having everything ready at hand ensures a smooth and enjoyable quilting experience. For this delightful herringbone quilt, the material list is refreshingly minimal, focusing on the efficiency and charm of pre-cut fabrics.
- 2 Charm Packs: These bundles of pre-cut 5-inch fabric squares are the stars of our project, offering a convenient and coordinated selection of fabrics.
- Rotary Cutter: An indispensable tool for quilters, a sharp rotary cutter ensures precise and clean cuts, vital for accurate piecing.
- Quilting Rulers: Clear acrylic rulers with distinct measurement markings are crucial for accurate cutting and squaring up your fabric pieces.
- Marking Pen: A fabric-safe marking pen (like a Frixion pen or chalk marker) is needed for drawing diagonal lines on your fabric squares, which will serve as sewing guides.
- Cutting Mat: This protects your work surface and provides a stable, self-healing base for your rotary cutter.
- Free Pattern: For visual guidance and precise measurements, be sure to grab the free pattern from Hailey Stitches by clicking here.
Fabric Requirements and Selection Tips
Choosing your fabrics is one of the most enjoyable parts of any quilting project. For this herringbone quilt, the use of two charm packs simplifies the selection process while still allowing for beautiful contrast and design.
- Fabric A – One Charm Pack (Printed): This charm pack will typically consist of various patterned fabrics. These will form the “color” or “patterned” sections of your herringbone design, providing visual interest and personality to your quilt. Consider coordinating colors or a specific theme.
- Fabric B – One Charm Pack (Solid): This charm pack should ideally be a single, solid color. This fabric will act as the “background” of your herringbone pattern, allowing the printed fabrics to truly pop. A neutral solid like white, cream, light grey, or even a contrasting dark color can create dramatic effects. The interplay between the printed and solid fabrics is key to achieving the distinctive herringbone look.
- Backing – 1 1/3 Yards: The backing fabric is what gives your quilt its finished look from the reverse side. Choose a fabric that complements your quilt top, either by matching colors or offering a subtle contrast. Ensure it’s wide enough to accommodate your finished quilt top with a few inches to spare on all sides for quilting.
- Binding – 3/8 Yard: The binding fabric provides a neat, durable edge to your quilt and frames the entire design. It’s an opportunity to add a final touch of color or contrast. You can choose a fabric that matches one of your charm pack fabrics, or introduce a new accent color.
Accurate Cutting for a Perfect Quilt
Precision in cutting is the foundation of a well-made quilt. Taking the time to cut accurately will save you frustration during the piecing process.
- Binding Strips – (4) 2 1/2″ x WOF strips: “WOF” stands for “Width of Fabric,” typically around 40-44 inches. You’ll cut four strips, each 2 1/2 inches wide, from the entire width of your binding fabric. These strips will later be joined together to create one continuous length for binding your quilt.
With your materials prepped and your binding strips cut, you’re now ready to move onto the core steps of constructing your stunning two-charm pack herringbone quilt. Remember, careful preparation leads to beautiful results!
Directions: Crafting Your Two Charm Pack Herringbone Quilt
Now that all your materials are ready and cut, it’s time to bring your herringbone quilt to life. This section will guide you through the two main stages of creating your quilt: making the Half-Square Triangles (HSTs) and assembling them into the iconic herringbone pattern.
Step 1: Creating the Half-Square Triangles (HSTs)
Half-Square Triangles are fundamental building blocks in quilting, and mastering their creation is key to many beautiful designs, including our herringbone pattern. This method is efficient and yields two HSTs from each pair of squares.
- Pairing Your Squares: Begin by pairing one square from your printed charm pack (Fabric A) with one square from your solid background charm pack (Fabric B). You should have 40 such pairs if you have 40 squares in each charm pack.
- Marking Your Sewing Line: Take one of the background (solid) squares from your pair. Using your marking pen and a quilting ruler, draw a diagonal line from one corner to the opposite corner on the wrong side of the fabric. This line will serve as a guide for trimming later.
- Prepare for Sewing: Place the marked background square on top of the printed square, right sides together. Ensure all edges are perfectly aligned. You may wish to pin them together to prevent shifting while sewing.
- Sewing the Seams: Now, using your sewing machine, sew a 1/4-inch seam allowance on either side of the diagonal line you just drew. This is a crucial step that allows you to create two HSTs efficiently. Ensure your stitch length is appropriate for quilting (usually around 2.0-2.5mm).
- Trimming the HSTs: Once both seams are sewn, take your rotary cutter and quilting ruler. Carefully cut along the centered marked diagonal line. This will separate your sewn square into two triangle units.
- Pressing Open: Take each triangle unit to your ironing board. Carefully press the seam open. Pressing seams open helps to reduce bulk, making your quilt lie flatter and providing a smoother surface for subsequent piecing. Pressing evenly is key to preventing distortion.
- Squaring Up the HSTs: This step is paramount for a precise quilt. After pressing, each HST will be slightly larger than its finished size. Using your quilting ruler and rotary cutter, trim each HST to a perfect 4 1/2 inches square. To do this accurately, align the 45-degree line on your ruler with the seam line of your HST, and trim two sides. Then rotate the HST and trim the remaining two sides to achieve the 4 1/2-inch dimension. Consistency in squaring up is vital for your blocks to fit together perfectly in the next step.
- Repeat for All Pairs: Continue these steps for all your paired charm squares. Since each pair yields two HSTs, and you have 40 pairs, you will end up with a total of 80 half-square triangles. This batch production method makes the process quite efficient.
Congratulations! You’ve successfully created the building blocks for your herringbone quilt. The next stage involves arranging these beautiful HSTs to reveal the stunning pattern.
Step 2: Assembling the Quilt Top into the Herringbone Pattern
With all 80 half-square triangles squared up and ready, the magic begins as you start to assemble them into the distinctive herringbone design. This stage is where your quilt really starts to take shape!
- Designing Your Layout: Lay out all your HSTs on a design wall or a large flat surface (like your floor or a bed). The key to the herringbone pattern is the consistent direction of the diagonal seams. You’ll arrange your HSTs so that the “V” shapes of the herringbone pattern flow in a specific direction, either horizontally or vertically. Pay close attention to how the light and dark (or printed and solid) fabrics interact to create the interlocking effect. Experiment with the arrangement until you are happy with the visual flow and pattern repetition.
- Assembling in Rows or Columns: You can assemble the blocks in two primary ways:
- By Rows: Arrange your HSTs into horizontal rows. Ensure that the diagonal lines of the HSTs are oriented correctly to form the herringbone pattern within each row, and that these patterns align seamlessly from one row to the next. Once a row is arranged, carefully sew the HSTs together, one by one, using a 1/4-inch seam allowance.
- By Columns: Alternatively, you can arrange your HSTs into vertical columns. Again, focus on the consistent orientation of the diagonal seams to form the herringbone design vertically. Sew the HSTs together within each column.
The most critical aspect here is to maintain the correct placement and orientation of each HST. Each “pair” (where two different fabrics meet at a diagonal) needs to be working together to form the continuous V-shape of the herringbone. Misplaced blocks can disrupt the entire pattern, so take your time during the layout phase.
- Sewing Rows/Columns Together: Once you have sewn all the individual HSTs into rows (or columns), it’s time to join these larger strips together to form the complete quilt top.
- Nesting Seams: As you join rows (or columns), try to “nest” your seams. This means pressing the seams of adjacent rows in opposite directions (e.g., seams in row 1 pressed to the left, seams in row 2 pressed to the right). When you place these rows right sides together, the seam allowances will interlock, creating a flatter seam and better alignment. Pin generously at these nested seam intersections to ensure they match up perfectly.
- Consistent Seam Allowance: Continue to use your precise 1/4-inch seam allowance. This consistency is crucial for your quilt top to come out square and flat.
- Pressing the Quilt Top: After sewing all the rows (or columns) together, press the entire quilt top thoroughly. You can press the final seams open or to one side, whichever helps the quilt top lie the flattest. A well-pressed quilt top makes the subsequent quilting and finishing stages much easier.
Once all your rows or columns are sewn together and pressed, you will have a beautiful and complete quilt top showcasing the striking herringbone pattern. Take a moment to admire your work! You’ve accomplished a significant step in your quilting journey.
Beyond the Quilt Top: Finishing Your Herringbone Masterpiece
Congratulations on completing your stunning herringbone quilt top! But the journey isn’t quite over. To transform your beautiful pieced fabric into a cozy, durable quilt, you’ll need to go through a few more essential steps: basting, quilting, and binding. These stages give your quilt its structure, warmth, and finished appearance.
Basting Your Quilt Sandwich
Basting is the process of temporarily securing the three layers of your quilt – the quilt top, the batting, and the backing fabric – together so they don’t shift during quilting. This “quilt sandwich” needs to be flat and smooth to prevent puckering or uneven stitches.
- Prepare Your Space: Find a large, clean, flat surface, like a dining table or a cleared floor.
- Lay the Backing: Spread your backing fabric wrong side up, ensuring it’s smooth and taut, without any wrinkles. You might use painter’s tape to secure the edges to your surface.
- Add the Batting: Lay your batting evenly on top of the backing fabric. The batting should be a few inches larger than your quilt top on all sides. Smooth it out carefully.
- Place the Quilt Top: Finally, center your herringbone quilt top right side up on top of the batting. Again, smooth it out from the center outwards, ensuring there are no wrinkles or folds.
- Secure the Layers: There are several methods for basting:
- Pin Basting: Use curved safety pins, placed every 3-4 inches across the entire quilt. Start from the center and work your way out.
- Spray Basting: Use a temporary fabric adhesive spray to glue the layers together. This is a quick method but requires good ventilation.
- Thread Basting: Use a large needle and thread to make long, loose stitches across the quilt.
Choose the method you find most comfortable and effective. The goal is to keep all three layers firmly in place for quilting.
Quilting Your Herringbone Design
Quilting is the process of stitching through all three layers of the quilt sandwich to secure them permanently and add texture and dimension to your project. This is where your quilt truly becomes a “quilt.”
- Choose Your Method:
- Machine Quilting (Straight Lines): For beginners, stitching straight lines parallel or perpendicular to your herringbone design can be very effective and manageable. You can follow the diagonal lines of your HSTs or quilt in simple grid patterns.
- Machine Quilting (Free Motion): More experienced quilters might opt for free-motion quilting, allowing you to create intricate designs like stippling, loops, or custom patterns.
- Hand Quilting: For a traditional touch, hand quilting with a needle and thread creates a beautiful, soft texture and a unique charm.
- Start Quilting: Begin quilting from the center of your quilt and work your way outwards. This helps prevent fabric distortion. If machine quilting, use a walking foot for even feeding of all layers. Experiment with thread colors that complement your fabric choices.
Binding Your Quilt
Binding is the final step that frames your quilt, protects its edges, and gives it a professional, finished look. You already cut your binding strips in the preparation phase.
- Join Binding Strips: Take your four 2 1/2″ x WOF binding strips. Sew them together on the short ends at a 45-degree angle to create one long continuous strip. Trim the excess seam allowance and press the seams open.
- Prepare the Binding: Fold the entire long binding strip in half lengthwise, wrong sides together, and press well.
- Attach to Quilt: Starting on one side (leaving a tail of about 8-10 inches), align the raw edges of your folded binding strip with the raw edge of your quilt top. Sew the binding to the quilt using a 1/4-inch seam allowance. When you reach a corner, stop 1/4 inch from the end, backstitch, remove the quilt, and fold the binding to create a mitered corner before continuing.
- Finish Joining: When you’re nearing the starting point, join the two tails of the binding strip together to create a continuous loop, then finish sewing it to the quilt.
- Flip and Hand Stitch: Flip the folded binding over to the back of the quilt, covering the raw edge and the stitching line. Hand stitch the binding in place, using a neat invisible stitch. This creates a clean, durable finish. Alternatively, you can machine stitch the binding to the back, though hand stitching often results in a more polished look.
Two Charm Pack Herringbone Quilt: Your Next Quilting Adventure
Congratulations! You have successfully created a beautiful and unique Two Charm Pack Herringbone Quilt! From selecting your charming fabrics to cutting, piecing, basting, quilting, and binding, you’ve mastered each step of this rewarding project. This isn’t just a quilt; it’s a testament to your creativity, patience, and growing skills in the art of quilting.
This project is truly a gem for several reasons: it’s incredibly beginner-friendly, requiring only basic quilting skills and minimal specialized equipment. Its efficiency, utilizing pre-cut charm packs, means less time spent on cutting and more time enjoying the sewing process. The herringbone pattern, while appearing sophisticated, is surprisingly easy to achieve with the Half-Square Triangle method. This makes it an ideal project for a weekend sew, or when you need a quick, heartfelt gift. Imagine the delight on a friend’s or family member’s face when they receive a handmade quilt, crafted with love and care!
Don’t stop here! The world of quilting offers endless possibilities. You can customize this herringbone pattern by experimenting with different color palettes – perhaps a high-contrast black and white for a modern look, or soft pastels for a baby quilt. Consider adding a simple border to your finished quilt top to increase its size or frame the design. The techniques you’ve learned, especially creating Half-Square Triangles, are foundational and can be applied to countless other quilt patterns.
We encourage you to share your finished herringbone quilt with the quilting community! Post photos on social media, tag Hailey Stitches, and inspire others to embark on their own creative journeys. Remember to revisit Hailey Stitches on YouTube for more fantastic tutorials, and download the free pattern for this project if you haven’t already. Happy quilting, and may your next project be as joyful and rewarding as this one!