
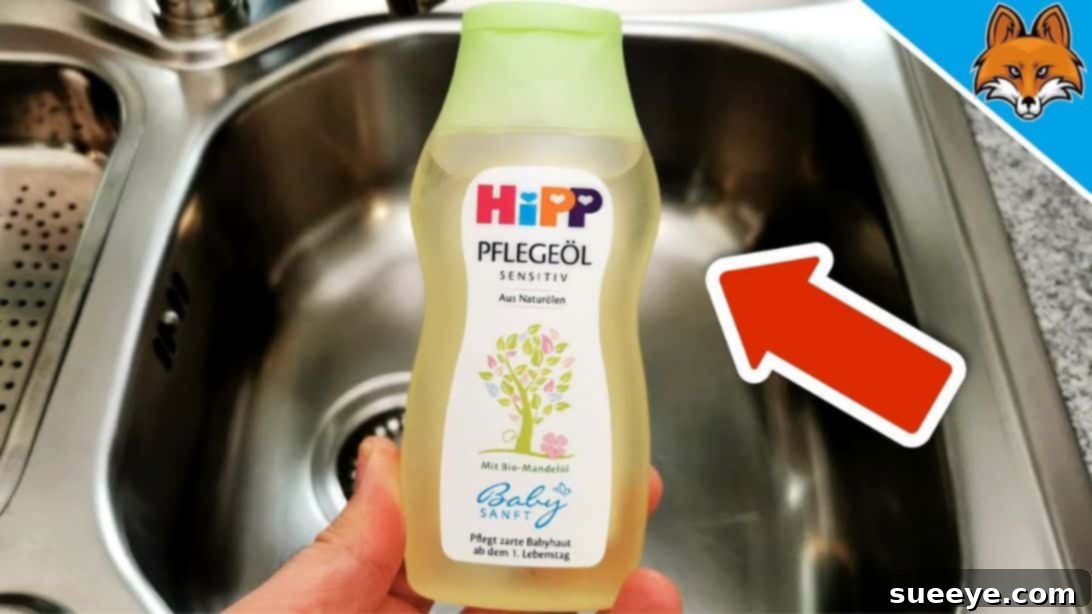
Unlock the Hidden Potential: 5 Brilliant Baby Oil Hacks for Home and Life
Baby oil, a product primarily known for its role in infant care, harbors a remarkable secret: its incredible versatility extends far beyond the nursery. Its gentle, lubricating, and non-abrasive properties make it an unexpectedly powerful and economical tool for a myriad of tasks around your home, car, and even for personal care. Inspired by the clever insights shared by Smart Fox on YouTube, this comprehensive guide will reveal five ingenious ways to harness the potential of baby oil. Prepare to be amazed by these simple yet highly effective tips that can help you clean, polish, protect, and refresh various items, simplifying your daily routine and saving you money.
Essential Materials You’ll Need:
- Baby oil (any brand or type will suffice)
- Several clean, soft cloths or paper towels
- Baking soda (specifically for stainless steel cleaning)
- White vinegar (specifically for stainless steel cleaning)
Step-by-Step Directions and Expert Application Tips:
1. Achieve Sparkling, Water-Repellent Bathroom Tiles and Shower Screens
One of the most frustrating aspects of bathroom maintenance is the relentless battle against water spots, soap scum, and the dull film that inevitably builds up on tiles and shower screens. Baby oil provides a surprising yet highly effective solution. It not only polishes these surfaces to a brilliant shine but also creates a subtle, hydrophobic barrier that actively repels water, drastically reducing the formation of unsightly mineral deposits and making your bathroom look cleaner for longer.
How to Apply for Best Results:
- Thorough Initial Cleaning: Start by cleaning your bathroom tiles, grout, and shower glass thoroughly with your preferred bathroom cleaner. Ensure all existing soap scum and grime are removed, then rinse the surfaces well with clean water.
- Ensure Complete Dryness: Using a clean, dry microfibre cloth, meticulously wipe down all surfaces until they are completely dry. Any residual moisture will hinder the baby oil from creating an effective, long-lasting barrier.
- Gentle Oil Application: Dispense a small amount of baby oil onto a fresh, soft paper towel or a clean, lint-free cloth. Remember, a little goes a long way; you don’t need to saturate the cloth.
- Wipe and Buff to Brilliance: Gently wipe the baby oil over your bathroom tiles, glass shower doors, and even metal fixtures like faucets. Aim for an even, thin coat across the entire surface. You’ll immediately notice a renewed luster. Follow up by using a separate, clean, dry cloth to buff the treated areas to a high sheen, removing any excess oil and ensuring a streak-free, sparkling finish.
With this simple treatment, you’ll observe water beading up and rolling off your tiles and glass with ease, significantly minimizing future water stains. Applying baby oil every few weeks or as needed will help maintain this protective layer, keeping your bathroom looking pristine with minimal effort.
2. Infuse Your Bathroom with a Subtle, Continuous Fragrance Using Your Toilet Paper Roll
Achieving a consistently fresh and inviting scent in your bathroom without relying on overpowering sprays or expensive plug-ins can be tricky. Baby oil offers an innovative and remarkably discreet method to maintain a pleasant aroma throughout the day. The secret lies in the porous cardboard core of your toilet paper roll, which acts as a natural diffuser for the oil’s subtle scent.
Simple Application for Lasting Freshness:
- Access the Cardboard Core: With the toilet paper roll still positioned on its holder, carefully locate the central cardboard tube.
- Precise Oil Application: Gently add approximately 3-5 drops of baby oil directly onto the cardboard core. It is crucial to exercise caution and ensure that the oil does not come into contact with the toilet paper itself, as this could lead to staining or affect its texture and absorbency.
- Effortless Diffusion: As the toilet paper is used and the roll spins, the slight friction and air movement will cause the subtle, clean scent of the baby oil to be gradually released into the surrounding air. This provides a continuous, mild fragrance that is never overwhelming, enhancing the bathroom’s ambiance.
This clever hack creates a welcoming environment through a constant, delicate aroma, offering a more natural and long-lasting alternative to conventional air fresheners. For those who desire a customized scent, a few drops of your favorite essential oil can also be added to the baby oil before application, though the inherent clean scent of baby oil is often perfectly delightful on its own.
3. Restore the Gleam and Shine to Your Stainless Steel Sink and Oven
Stainless steel appliances are a cornerstone of modern kitchen design, prized for their sleek appearance and durability. However, they are also infamous for attracting fingerprints, watermarks, and gradually losing their initial luster, often appearing dull and smudged. While specialized stainless steel cleaners abound, baby oil presents an incredibly effective, budget-friendly, and simple method to not only clean and polish these surfaces but also to protect them, leaving them brilliantly gleaming and streak-free.
The Two-Step Process for a Pristine Finish:
- Deep Cleaning with Baking Soda and Vinegar:
- Preparation of Cleaning Paste: For stainless steel surfaces that are heavily soiled, greasy, or have stubborn water stains, begin with a powerful, natural cleaning paste. Mix a generous amount of baking soda with just enough white vinegar to form a thick, spreadable paste. The effervescence generated by this combination is excellent for breaking down tough grime, grease, and hard water deposits without harsh chemicals.
- Application and Gentle Scrubbing: Apply this paste directly onto your stainless steel sink, stovetop, or oven door. Using a soft sponge or a non-abrasive cloth, gently rub the mixture over the surface, always moving in the direction of the grain of the stainless steel. This technique is vital for effectively lifting dirt from the microscopic grooves in the metal and preventing scratches.
- Soaking and Rinsing: Allow the cleaning paste to sit on the surface for approximately 15 to 20 minutes, giving it ample time to dissolve and loosen stubborn residues. Following this, thoroughly rinse the surface with clean water, ensuring every trace of baking soda and vinegar residue is completely removed.
- Complete Drying: With a clean, lint-free cloth or paper towel, meticulously wipe the stainless steel surface until it is bone dry. This step is critical; any residual moisture will prevent the baby oil from achieving a perfect, streak-free polish.
- Polishing and Protecting with Baby Oil:
- Minimal Oil Application: Once your stainless steel is immaculately clean and dry, dab a small amount of baby oil onto a fresh, soft paper towel or a clean microfibre cloth. Remember, a very thin, even coat is all that’s required.
- Polish Along the Grain: Gently rub the baby oil over the entire stainless steel surface. Crucially, always move your cloth in the direction of the grain of the metal. This ensures a uniform, streak-free shine and helps to prevent the appearance of swirl marks or an uneven finish.
- Buff to a Mirror Finish: Use a separate, clean, dry cloth to buff the surface until it achieves a brilliant, mirror-like gleam. This final buffing step removes any excess oil and enhances the natural luster of the stainless steel, leaving behind a protective barrier that actively resists new fingerprints and smudges, keeping your kitchen looking immaculate.
This comprehensive method not only cleans and polishes your stainless steel but also leaves a subtle, protective layer that makes future maintenance significantly easier. Your appliances will appear brand new, reflecting light beautifully and adding a touch of sophisticated brilliance to your kitchen décor.
4. Revitalize Faded Plastic Parts of Your Car’s Interior and Exterior
The plastic components found in your car, both within the interior (dashboard, door panels, console) and on the exterior (trim, bumpers, mirror casings), are constantly exposed to harsh elements like sunlight and temperature fluctuations. Over time, this exposure can lead to fading, dullness, and a chalky appearance, significantly detracting from your vehicle’s overall aesthetic. Instead of investing in specialized and often expensive car detailing products, baby oil offers a surprisingly simple, effective, and budget-friendly solution to restore the original richness and luster of these faded plastic surfaces, bringing life back to your car’s appearance.
Step-by-Step Restoration Process:
- Pre-Clean the Surface: Before applying baby oil, it is essential to ensure that the plastic surfaces are thoroughly clean and free of dust, dirt, and any existing grime. Wipe them down with a damp cloth and allow them to dry completely. A clean surface ensures better adhesion and an even finish.
- Apply a Small Amount of Baby Oil: Dab a small, controlled amount of baby oil onto a clean, soft cloth or a foam applicator pad. Avoid using too much oil at once to prevent an overly greasy finish.
- Rub and Restore Evenly: Gently rub the oil onto the faded plastic parts. You will observe an immediate transformation as the plastic begins to regain its deep, rich color and a healthy, subtle sheen. Work the oil into the surface evenly, covering all affected areas. For textured plastics, ensure the oil gets into all the crevices.
- Buff for a Perfect Finish (If Necessary): If, after application, the surface feels overly greasy or appears too shiny for your preference, use a separate, clean, dry cloth to lightly buff the area. This step helps to remove any excess oil, ensuring a smooth, non-greasy finish while preserving the revitalized look.
This clever hack works wonders on a wide array of plastic components, including dashboards, interior door trim, center consoles, exterior bumper trim, and even side mirror casings. Not only does it make your car’s plastic parts look significantly refreshed and well-maintained, enhancing the vehicle’s aesthetic appeal, but the oil also provides a degree of nourishment and helps to protect against further fading from harmful UV rays, potentially extending the lifespan of these components.
5. Experience Pain-Free Removal of Plasters and Band-Aids
The act of removing a plaster or band-aid is often met with dread, particularly by children or individuals with sensitive skin. The strong adhesive can stubbornly cling to skin and body hair, causing considerable discomfort, irritation, and frequently leaving behind sticky residue. Baby oil emerges as a gentle yet remarkably effective solution to this common dilemma. Its lubricating properties work to dissolve and weaken the adhesive bond, transforming a potentially painful ordeal into a virtually pain-free and hassle-free experience.
How to Remove Plasters with Ease Using Baby Oil:
- Saturate the Adhesive Area: Begin by generously applying baby oil directly onto the fabric or plastic edges of the plaster or band-aid, specifically targeting the areas where the adhesive is in contact with the skin. You can use a cotton ball soaked in baby oil for precise application or carefully pour a few drops from the bottle onto the edges.
- Allow Sufficient Soaking Time: Let the baby oil sit on the plaster for a few minutes, typically between 2 to 5 minutes. This crucial waiting period allows the oil ample time to penetrate through the plaster’s material and begin to dissolve the adhesive, significantly weakening its grip on your skin.
- Gentle and Slow Peeling: After the oil has had time to work its magic, gently and very slowly begin to peel the plaster off. You should notice a significant reduction in resistance, and it should come away much more easily and without the usual painful pulling sensation. If you encounter any stubborn areas, apply a little more baby oil to that specific spot and wait another minute before attempting to peel again.
- Clean Any Remaining Residue: Should there be any lingering sticky residue on your skin after removal, it can be effortlessly wiped away with a little more baby oil on a cotton pad. Follow this with a quick wash using mild soap and water to leave your skin completely clean and free of oil.
This method is exceptionally beneficial for individuals with delicate skin, those with body hair, or when needing to remove plasters from young children who might be apprehensive or fearful of the removal process. It transforms what can often be a traumatic experience into a smooth, tear-free event, leaving your skin unharmed and comfortable.
Conclusion: The Unseen Versatility of Baby Oil
As we’ve explored, baby oil is far more than just a skincare product for infants. From effortlessly transforming the cleanliness and aesthetics of your bathroom and kitchen to revitalizing the plastic components of your car and providing incredibly gentle solutions for personal care, its versatility is truly remarkable. These five innovative hacks, inspired by the creative insights of Smart Fox, vividly demonstrate the immense potential held within this simple, affordable household item, extending its utility well beyond its conventional role. By integrating these clever tips into your daily routine, you can achieve impressive results with minimal effort, expense, and often with products you already have on hand.
We heartily encourage you to put these innovative uses for baby oil to the test and experience the tangible benefits for yourself. You might just find yourself reaching for that little bottle of baby oil more frequently than you ever imagined, discovering new ways to simplify chores, enhance your living spaces, and solve everyday problems with surprising ease. What are your own favorite unconventional uses for baby oil? We’d love to hear your creative tips and tricks in the comments below, further expanding our collective knowledge of this amazing multi-purpose product!
*These amazing images and the original inspiration for these insightful tips are all credited to Smart Fox via YouTube. We highly recommend checking out his other content and following for more ingenious ideas and practical life hacks!