
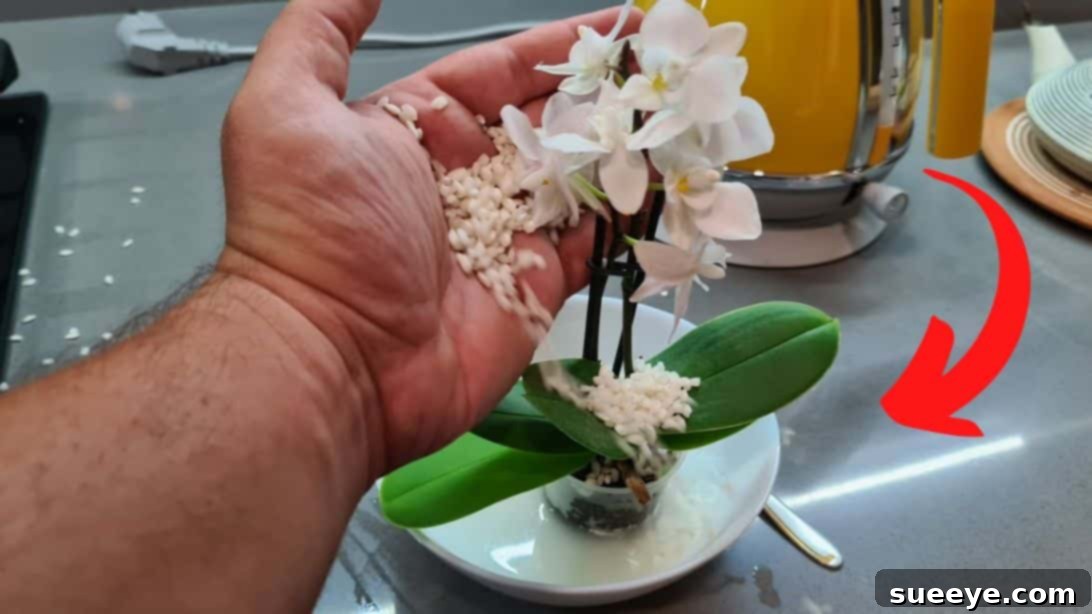
Unlock Thriving Orchid Blooms with Homemade Rice and Potato Water Fertilizer
Discovering the secret to vibrant, healthy orchids doesn’t always require expensive store-bought solutions. In fact, some of the most potent and beneficial nutrients for your beloved orchids can be found right in your kitchen! The very water you use to cook rice and potatoes, often discarded without a second thought, is a treasure trove of essential vitamins and minerals that can dramatically boost your orchid’s growth, flowering, and overall vitality. This article will guide you through creating a simple yet incredibly effective DIY fertilizer, transforming kitchen waste into a powerful elixir for your exotic plants.
Orchids, with their delicate beauty and sometimes challenging care requirements, thrive on a balanced diet. While commercial fertilizers are readily available, they often come with a significant cost and can sometimes contain synthetic compounds. Our homemade alternative offers a natural, cost-effective, and sustainable approach to orchid care, harnessing the power of common kitchen ingredients. Not only is this method environmentally friendly, but it also allows you to consistently provide your orchids with a gentle, nutrient-rich feeding solution. Plus, it’s incredibly simple to collect and store, making it a convenient addition to your regular plant care routine. For a visual guide demonstrating just how easy and effective this hack is, you can watch a helpful video tutorial on YouTube by iKnow.
The Nutritional Powerhouse: Why Rice and Potato Water Are Perfect for Orchids
Understanding why rice and potato water are so beneficial for orchids begins with a look at their nutritional profiles:
The Benefits of Rice Water for Orchids
Rice water is particularly rich in B vitamins, which are crucial for plant metabolism and overall health. Vitamin B1 (thiamine), for instance, plays a vital role in root development, helping orchids establish a robust root system capable of absorbing nutrients more efficiently. It also aids in stress resistance, making your plants more resilient to environmental changes. Beyond vitamins, rice water also contains starches and carbohydrates. While not directly absorbed by the orchid, these compounds act as a food source for beneficial microorganisms in the potting medium. These microbes break down organic matter, making other nutrients more accessible to your orchid and fostering a healthier root environment. This gentle, sustained release of nutrients supports steady growth and promotes lush foliage.
The Benefits of Potato Water for Orchids
Potato water, on the other hand, is an excellent source of calcium and potassium. Calcium is essential for strengthening cell walls, leading to sturdier leaves and flower spikes, and improving the plant’s structural integrity. It also plays a key role in nutrient transport within the plant. Potassium is a critical macronutrient involved in various physiological processes, including water regulation, enzyme activation, and disease resistance. Adequate potassium levels contribute to vibrant blooms, enhanced flowering, and overall plant vigor. By using potato water, you’re providing your orchids with vital building blocks for robust growth and spectacular floral displays.
Together, rice and potato water create a comprehensive, natural fertilizer that supports every aspect of your orchid’s life cycle, from strong roots to stunning flowers. This DIY approach avoids the harsh chemicals often found in synthetic fertilizers, offering a gentle yet effective way to nourish your precious plants.
Essential Materials for Your Homemade Orchid Fertilizer
Gathering the right materials for this natural orchid booster is straightforward and involves items you likely already have in your kitchen.
- Rice: Any type of rice (white, brown, jasmine, basmati) will work. The key is the starch and nutrients it releases.
- Water: For cooking or for mixing the powdered rice. Tap water is usually fine, but filtered water can be used if your tap water is very hard.
- Food Processor (optional, for raw rice method): Essential for grinding raw rice into a fine powder. A coffee grinder can also be used.
Step-by-Step Directions: Crafting and Applying Your DIY Orchid Food
There are two primary methods to create this beneficial orchid fertilizer: utilizing leftover cooking water or preparing a fresh mixture from raw rice. Both are highly effective and easy to implement.
Method 1: Harnessing Leftover Cooking Water (Rice & Potato)
This method is the epitome of sustainability, turning kitchen waste into valuable plant food. It’s an excellent way to provide a consistent, gentle feeding for your orchids.
Step 1: Collection and Storage
Whenever you boil or cook rice and potatoes, make it a habit to save the nutrient-rich water. After cooking, carefully drain the water into a clean container. Allow it to cool completely to room temperature before storing. You can then place this liquid gold inside the refrigerator, where it can be stored for up to two weeks. This makes it convenient to accumulate a sufficient amount over time without waste.
Application Best Practices: Before applying the stored water to your orchids, it is crucial to allow it to warm to room temperature. Cold water can shock the roots of your orchids, which are sensitive to temperature fluctuations. A good feeding schedule is approximately every two weeks. Orchids require regular, consistent feeding, but it’s vital to avoid over-application, which can lead to nutrient burn or root damage. Start with a conservative amount, perhaps using about 1 to 2 cups of the diluted solution for medium-sized orchids, depending on their pot size and watering needs. It’s often recommended to dilute the cooking water with an equal part of plain water, especially if you’re just starting, to ensure it’s not too concentrated.
Observe your orchids closely for any signs of improvement or stress. Remember, consistency is key, but so is moderation. You can alternate between rice water and potato water feedings, or even combine them in a diluted solution, to provide a full spectrum of nutrients.
Method 2: Crafting Fertilizer from Raw Rice for Consistent Supply
If you don’t have any leftover rice or potato water from recent cooking, or if you prefer a more controlled mixture, you can easily make your own potent fertilizer from raw rice.
Step 2: Preparing the Raw Rice Mixture
Begin by lightly toasting a small amount of rice (e.g., a quarter cup) in a clean, dry pan over medium heat. Toasting the rice helps to enhance the release of nutrients and can also reduce the likelihood of spoilage when the mixture is stored. Keep the rice moving to prevent burning. Once it has a slightly golden hue and a subtle aroma, remove it from the heat and let it cool.
Transfer the toasted rice to a food processor or a coffee grinder. Process or blend it until it turns into a very fine powder. The finer the powder, the more easily the nutrients will be released into the water. Once powdered, combine it with a generous amount of water – a good starting ratio is about 1 tablespoon of rice powder per 1-2 cups of water. Stir them together thoroughly until the mixture is uniform and the powder is well dispersed. Allow the mixture to sit for at least 30 minutes, or even a few hours, to allow the nutrients to steep into the water.
Application and Storage: Use this freshly prepared mixture to water your orchids. As with the cooking water method, ensure the solution is at room temperature. If you have prepared too much, you can save the excess in a sealed container in the refrigerator for future use, typically for up to two weeks. Remember to bring it back to room temperature before the next application. This method provides a reliable way to ensure your orchids always have access to this beneficial food source, regardless of your cooking schedule.
Advanced Tips for Using Rice and Potato Water Fertilizer
Dilution is Key
While natural, these solutions are still potent. For young or sensitive orchids, consider diluting the rice or potato water with an equal part of plain water. This ensures a gentle feeding and reduces the risk of root burn.
Frequency and Observation
A feeding schedule of once every two weeks is a good starting point. However, always observe your specific orchid’s response. Signs of healthy growth include new roots, firm leaves, and developing flower spikes. If you notice any yellowing leaves, soft spots, or a sudden decline, temporarily reduce or stop fertilization and assess other care factors.
When to Fertilize and When to Pause
Fertilize your orchids actively during their growing season, which is typically when they are producing new leaves or roots, or preparing to bloom. During dormancy periods, or if your orchid is stressed or sick, it’s best to reduce or halt fertilization. The plant needs to conserve energy, and additional nutrients might do more harm than good.
Preventing Mold and Pests
Because these are organic solutions, there’s a slight chance of mold or attracting pests if applied excessively or left to sit too long in the potting medium. Ensure good air circulation around your orchids and avoid saturating the medium to the point of being constantly soggy. Always dispose of any unused, old solution that develops an odor or visible mold.
Integrating Homemade Fertilizer into a Holistic Orchid Care Routine
While natural fertilizers are fantastic, they are just one piece of the puzzle for healthy orchids. For truly thriving plants, consider these additional factors:
- Light: Most orchids prefer bright, indirect light. Avoid direct harsh sunlight, which can scorch leaves.
- Watering: Water thoroughly, allowing the potting medium to almost dry out between waterings. Avoid letting orchids sit in standing water, which leads to root rot.
- Potting Medium: Use a specialized orchid potting mix that provides excellent drainage and aeration, such as bark chips, sphagnum moss, or a mix of both.
- Humidity: Orchids are tropical plants and appreciate high humidity. Consider using a humidity tray or a room humidifier, especially in dry indoor environments.
- Air Circulation: Good air flow prevents fungal issues and helps roots breathe.
By combining these holistic care practices with your homemade rice and potato water fertilizer, you’ll create an optimal environment for your orchids to flourish, rewarding you with their spectacular and long-lasting blooms.
This simple, natural, and cost-effective method offers a fantastic way to nourish your orchids, contributing to stronger plants and more prolific blooms. By utilizing something as common as cooking water or raw rice, you’re not only giving your orchids a boost but also embracing a sustainable approach to gardening. Give this hack a try and watch your orchids transform! For more innovative and helpful plant care tips, make sure to visit and subscribe to iKnow’s YouTube channel, where you can find the original video tutorial and many other inspiring ideas.
How To Use Rice As Fertilizer For Orchids: A Summary
In summary, using rice as a fertilizer for orchids involves two main approaches: collecting the water from cooked rice or making a powdered rice mixture. For cooked rice water, simply save the water after boiling rice, cool it, store it in the refrigerator, and apply it (at room temperature and potentially diluted) to your orchids every two weeks. This method leverages the vitamin B and other beneficial compounds released during cooking. For a raw rice fertilizer, lightly toast rice, grind it into a fine powder, mix it with water, let it steep, and then use the liquid to water your orchids. This provides a consistent, DIY nutrient source rich in plant-boosting elements. Both methods offer a natural, cost-effective way to enhance orchid health, promote strong root development, and encourage stunning blooms, supporting a more sustainable and vibrant orchid collection.