
Indulge in Homemade Bliss: The Ultimate No-Churn Oreo Ice Cream Recipe
There’s a special kind of magic in a scoop of ice cream, a nostalgic delight that transports us back to simpler times. For years, I adored ice cream, yet the idea of crafting it myself at home felt like a daunting task, reserved only for professional chefs or those with fancy, expensive equipment. That perception completely shattered last weekend when I stumbled upon The Cooking Foodie’s incredibly simple homemade Oreo ice cream recipe. My mind was truly blown – could something so rich and delicious really require just three basic ingredients and absolutely no ice cream machine? The answer, I discovered, was a resounding yes!
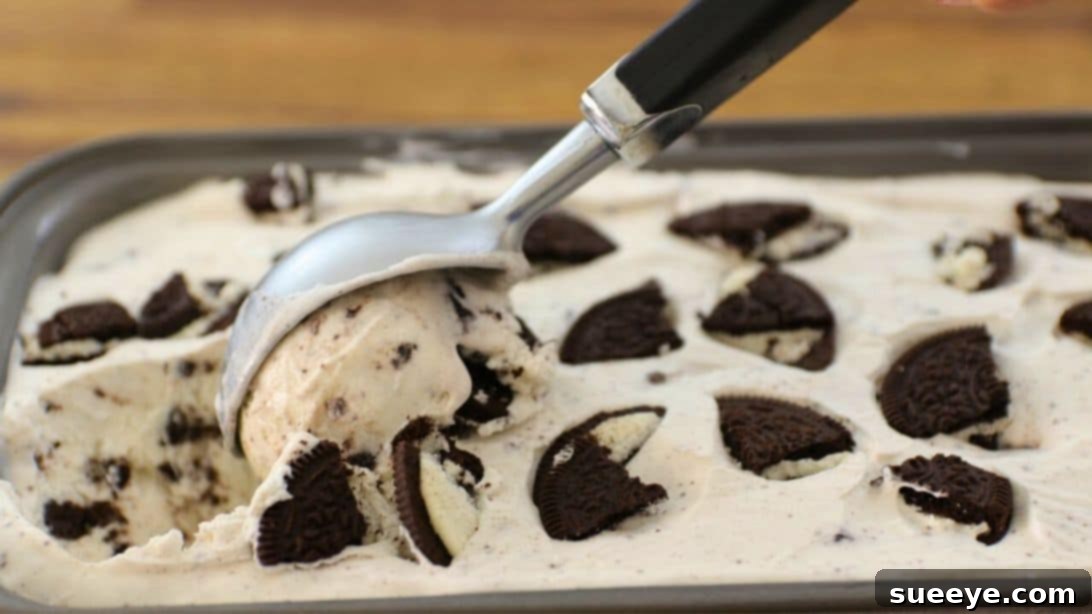
The process was not only surprisingly straightforward but genuinely enjoyable. From gathering the minimal ingredients to the satisfying moment of mixing everything together, it was a culinary adventure accessible to anyone. The anticipation while it chilled in the freezer was almost unbearable, but the reward? Pure bliss. As soon as it was firm, I scooped out a generous portion, settled in, and savored every creamy, cookie-filled bite. It was beyond good; it was phenomenal – easily rivaling store-bought versions. This isn’t just a recipe; it’s an invitation to rediscover the joy of homemade treats without the fuss. In fact, it was such a hit that I’m already planning to make three more batches this week for my entire family and friends! If you’re ready to create your own irresistible, no-churn Oreo ice cream masterpiece, keep reading for the full step-by-step guide, or feel free to watch the inspiring video.
Essential Ingredients for Your Dreamy Oreo Ice Cream
One of the most remarkable aspects of this recipe is its incredible simplicity, calling for just a handful of readily available ingredients. Don’t let the short list fool you; each component plays a crucial role in creating that unbelievably rich, creamy, and satisfying texture you crave.
- 18 Oreo Cookies (divided): The star of our show! Oreos provide not only their iconic chocolatey crunch but also a distinct flavor that defines this ice cream. Dividing them allows for some to be incorporated into the base and others reserved for that delightful topping. Feel free to use classic Oreos, Double Stuf, or even seasonal variations if you’re feeling adventurous!
- 1 Can (14 oz) Sweetened Condensed Milk: This magical ingredient is the key to our no-churn success. It’s thick, sweet, and provides the necessary body and creaminess, preventing the ice cream from becoming too icy. It also sweetens the mixture perfectly, eliminating the need for additional sugar.
- 2 Cups of Heavy Cream (cold): The foundation of our luxurious base. When whipped, cold heavy cream transforms into a light, airy, and stable foam, which then freezes into that wonderful, scoopable ice cream texture. Ensuring it’s very cold is crucial for achieving stiff peaks quickly and efficiently.
That’s it! Just three humble ingredients combine to create an extraordinary dessert. Gather these simple items, and let’s get ready to whip up some magic.
Step-by-Step Guide to Your Homemade Oreo Ice Cream
Creating this decadent dessert is surprisingly simple and requires minimal effort. Follow these detailed steps to ensure your no-churn Oreo ice cream turns out perfectly creamy and delicious every single time.
Step 1: Prepare Your Oreo Crumbs
From your total of 18 Oreo cookies, take 14 of them. Gently break them into smaller pieces before placing them into a food processor. Pulse the food processor a few times until the cookies are crushed into large, coarse crumbs. The key here is to avoid overmixing; you want a variety of textures, from fine crumbs to noticeable chunks, which will add incredible mouthfeel to your finished ice cream. If you process them too finely, you’ll lose that delightful Oreo crunch. Don’t have a food processor? No problem! Place the Oreos in a sturdy ziplock bag, seal it, and use a rolling pin or even the bottom of a heavy glass to crush them. Once you’ve achieved your desired crumb consistency, set these aside. We’ll use the remaining 4 Oreos for a beautiful topping later!
Step 2: Whip the Heavy Cream to Perfection
Pour the 2 cups of very cold heavy cream into a large mixing bowl. Using a hand mixer (or a stand mixer fitted with the whisk attachment), begin whipping the cream on medium-high speed. Continue to whip, steadily increasing the speed, until the cream forms stiff peaks. This means when you lift the beaters, the cream should stand straight up without collapsing. The colder your cream is, the faster and more efficiently it will whip, resulting in a stable base for your ice cream. Be careful not to over-whip, as it can turn into butter. This step is crucial for incorporating air and creating the light, fluffy texture of homemade ice cream.
Step 3: Gently Fold in Sweetened Condensed Milk
Once your heavy cream has reached stiff peaks, gently add the entire can (14 oz) of sweetened condensed milk to the whipped cream. Switch your mixer to a low speed, or even better, use a spatula for a folding motion. Mix until the condensed milk is just incorporated into the whipped cream. Be careful not to deflate the whipped cream; its airiness is vital for the ice cream’s final texture. This step combines the sweetness and creamy body of the condensed milk with the airy lightness of the whipped cream, forming the perfect ice cream base.
Step 4: Incorporate the Crushed Oreo Goodness
Now for the star flavor! Add the previously crushed Oreo cookies to the whipped cream and condensed milk mixture. Using a spatula, gently fold the crushed cookies into the base until they are evenly distributed. You want to ensure every spoonful of ice cream will have those delightful Oreo pieces, but again, be gentle to maintain the airy texture of the whipped cream. Avoid overmixing, as this can crush the cookie pieces further and reduce the volume of your mixture. This step transforms your creamy base into a true Oreo ice cream delight.
Step 5: Freeze for Ultimate Creaminess
Carefully transfer your beautiful Oreo ice cream mixture into a freezer-safe container. A loaf pan or a deep plastic container with a lid works perfectly. Use a spoon or spatula to spread the mixture evenly, ensuring a consistent freeze. Now, take the remaining 4 Oreo cookies, crush them slightly more coarsely, and sprinkle them generously over the top of the ice cream mixture. This not only adds extra visual appeal but also provides another layer of texture and flavor. To prevent ice crystals from forming on the surface, press a piece of cling wrap directly onto the surface of the ice cream before securing the container lid. Place the container in the freezer for at least 6 hours, or ideally overnight, to allow it to firm up to the perfect scoopable consistency. Patience is a virtue here!
Step 6: Scoop, Serve, and Savor!
Once your homemade Oreo ice cream is perfectly frozen and firm, it’s time for the best part! Remove it from the freezer about 5-10 minutes before serving to allow it to soften slightly, making it easier to scoop. Dive in with an ice cream scoop and serve generous portions into bowls or cones. Garnish with a few extra Oreo crumbs, a drizzle of chocolate sauce, or a dollop of whipped cream if desired. Share with loved ones, or keep it all to yourself – you’ve earned it! Enjoy every glorious, creamy bite of your incredible homemade creation.
Why You’ll Love Making Your Own No-Churn Oreo Ice Cream
Beyond the sheer delight of tasting something you’ve made yourself, there are numerous compelling reasons to choose homemade over store-bought when it comes to Oreo ice cream. This no-churn method, in particular, offers a fantastic blend of convenience and quality that’s hard to beat.
- Unbeatable Freshness and Flavor: Nothing compares to the taste of freshly made ice cream. Without the need for preservatives or artificial flavors, you get a pure, vibrant Oreo taste that truly shines.
- Customization at Your Fingertips: This is where homemade really wins! Want more Oreos? Add them! Prefer a different cookie or mix-in? Go for it! You control the intensity of the flavor and the amount of “stuff” in your ice cream.
- No Fancy Equipment Required: The biggest hurdle for many home ice cream makers is the ice cream machine. This recipe completely bypasses that need, making it accessible to anyone with a mixer and a freezer.
- A Fun and Rewarding Activity: Making ice cream, especially with kids, can be a wonderful experience. It’s simple enough for beginners but yields professional-level results, bringing a great sense of accomplishment.
- Cost-Effective: While a single batch might seem comparable to a premium pint, making larger quantities at home often proves more economical in the long run, especially for family consumption or parties.
- Control Over Ingredients: You know exactly what goes into your dessert. This is particularly appealing for those with dietary concerns or who prefer to avoid certain additives found in commercial ice creams.
Embracing the no-churn method means you can enjoy the luxury of homemade ice cream whenever the craving strikes, without any fuss or expensive equipment.
Pro Tips for Achieving the Perfect No-Churn Ice Cream
While this recipe is incredibly forgiving, a few expert tips can elevate your homemade Oreo ice cream from good to absolutely phenomenal. Pay attention to these details for the best possible results:
- Chill Your Equipment: For best results when whipping cream, place your mixing bowl and whisk attachment (if using a stand mixer) or beaters (for a hand mixer) in the freezer for 10-15 minutes before you begin. This helps the cream whip faster and achieve stiffer peaks.
- Use Very Cold Heavy Cream: As mentioned in the instructions, cold cream is essential. Ensure your heavy cream has been in the refrigerator until just before you start whipping it.
- Don’t Overmix the Oreos: Resist the urge to turn your Oreos into fine dust. Those larger chunks are what give the ice cream its delightful texture and ensure you get a real bite of cookie with every spoonful.
- Gentle Folding is Key: When incorporating the condensed milk and especially the crushed Oreos, use a gentle folding motion with a spatula rather than vigorous mixing. This preserves the air you’ve whipped into the cream, which is crucial for a light and airy ice cream.
- Optimal Freezing Container: Use a shallow, wide freezer-safe container (like a loaf pan) rather than a very deep one. This allows the ice cream to freeze more evenly and quickly. Ensure it has a tight-fitting lid.
- Prevent Ice Crystals: Press plastic wrap directly onto the surface of the ice cream before covering it with the lid. This creates a barrier against air and moisture, significantly reducing the formation of ice crystals and keeping your ice cream smooth and creamy.
- Patience During Freezing: While 6 hours is the minimum, freezing overnight often yields the best, firmest consistency. Resist the urge to check it too often!
- Soften Before Scooping: For the smoothest scoop, take your ice cream out of the freezer about 5-10 minutes before you plan to serve it. This allows it to soften just enough.
Delicious Variations and Creative Add-Ins
While classic Oreo ice cream is a timeless favorite, the beauty of homemade lies in the freedom to experiment! Once you’ve mastered the basic recipe, consider these exciting variations and add-ins to create your own signature frozen treat:
- Different Oreo Flavors: Explore the vast world of Oreo flavors! Mint Oreos make a refreshing mint chocolate chip ice cream, Golden Oreos create a delightful vanilla cookie flavor, or even seasonal varieties can add a unique twist.
- Chocolate Drizzle Swirl: After folding in the Oreos and transferring to the container, drizzle melted chocolate (dark, milk, or white) over the top and swirl gently with a knife for a beautiful and delicious marble effect.
- Caramel or Fudge Swirl: Similarly, warm caramel sauce or hot fudge can be swirled through the mixture before freezing for an extra layer of sweetness and richness.
- Nutty Crunch: Add chopped nuts like pecans, walnuts, or almonds for an additional layer of crunch and flavor. Toasting them lightly beforehand will enhance their taste.
- Candy Crush: Incorporate crushed candy bars such as Snickers, Heath bars, or Reese’s Peanut Butter Cups for an indulgent mix.
- Coffee Infusion: For coffee lovers, dissolve a tablespoon of instant espresso powder in a tiny bit of hot water, let it cool, then stir it into the condensed milk mixture before combining with the whipped cream for a mocha-Oreo flavor.
- Cream Cheese Swirl: Whip softened cream cheese with a little powdered sugar and milk until smooth, then swirl it through the ice cream base for a cheesecake-like twist.
- Extra Extracts: A dash of peppermint extract (with mint Oreos!), almond extract, or even a touch of rum extract can completely transform the flavor profile.
Don’t be afraid to get creative! Start with small amounts of new ingredients and adjust to your taste preferences. The possibilities are endless!
Serving Your Homemade Delight & Storage Tips
Once your irresistible no-churn Oreo ice cream is perfectly frozen, it’s time to enjoy the fruits of your labor! But beyond simply scooping it into a bowl, there are many ways to elevate the experience, and equally important, to ensure your leftovers stay fresh and delicious.
Creative Serving Suggestions:
- Classic Cone or Bowl: The simplest and often best way to enjoy it! Top with a few extra Oreo crumbs, a cherry, or a dollop of whipped cream.
- Milkshake Magic: Blend scoops of your Oreo ice cream with a splash of milk and perhaps a little extra chocolate syrup for an epic milkshake.
- Ice Cream Sandwiches: Sandwich a scoop between two large chocolate chip cookies or even extra-large Oreos for a homemade ice cream sandwich.
- Brownie or Cookie A La Mode: Serve a scoop over a warm, gooey brownie or a freshly baked chocolate chip cookie. The contrast of warm and cold is pure heaven.
- Dessert Parfait: Layer your Oreo ice cream with chocolate syrup, whipped cream, and more crushed Oreos in a tall glass for an impressive parfait.
- Affogato Twist: For adults, a scoop of this creamy ice cream pairs wonderfully with a shot of hot espresso poured over it.
Optimal Storage for Freshness:
To keep your homemade no-churn Oreo ice cream tasting its best and prevent the formation of ice crystals:
- Airtight Container is Key: Always store your ice cream in an airtight, freezer-safe container. This minimizes exposure to air, which can cause freezer burn and icy textures.
- Plastic Wrap Barrier: Before putting on the lid, press a layer of plastic wrap directly onto the surface of the ice cream. This creates an extra barrier against air and moisture, helping maintain that smooth, creamy consistency.
- Deep Freeze: Store your ice cream in the coldest part of your freezer, typically at the back, rather than near the door where temperatures fluctuate more.
- Shelf Life: Homemade no-churn ice cream generally stays fresh and delicious for about 1-2 weeks. While it might still be safe to eat after that, its texture and flavor may start to degrade.
With these serving and storage tips, you can extend the enjoyment of your delightful homemade creation!
Your Homemade Dessert Journey Begins!
And there you have it – a wonderfully simple, incredibly delicious, and utterly satisfying recipe for homemade no-churn Oreo ice cream. Gone are the days of believing you needed special equipment or advanced culinary skills to whip up this classic treat. With just three ingredients and a few straightforward steps, you can create a creamy, cookie-filled masterpiece that will impress everyone who tries it.
From the first delightful crunch of Oreo to the smooth, rich base, every spoonful is a testament to the joy of making things from scratch. Whether you’re making it for a special occasion, a casual movie night, or simply to satisfy a sudden craving, this recipe is guaranteed to become a go-to in your dessert repertoire. So, gather your ingredients, follow these easy instructions, and prepare to embark on a delicious journey into the world of homemade frozen delights. Don’t forget to experiment with variations and make it your own! Happy scooping!