
Indulge in Creamy Bliss: The Ultimate Easy Baked Oreo Cheesecake Bars Recipe
A truly memorable meal always culminates with an exceptional dessert. And when it comes to sweet endings, few treats can rival the sheer delight of a perfectly baked cheesecake. Today, we’re not just making any cheesecake; we’re diving into a recipe that combines the beloved crunch of America’s favorite cookie with the smooth, rich decadence of a classic cheesecake: the Easy Baked Oreo Cheesecake Bars. This particular recipe, inspired by the fantastic creation from The Cooking Foodie on YouTube, is a staple in my kitchen, and I promise, it will quickly become one in yours too.
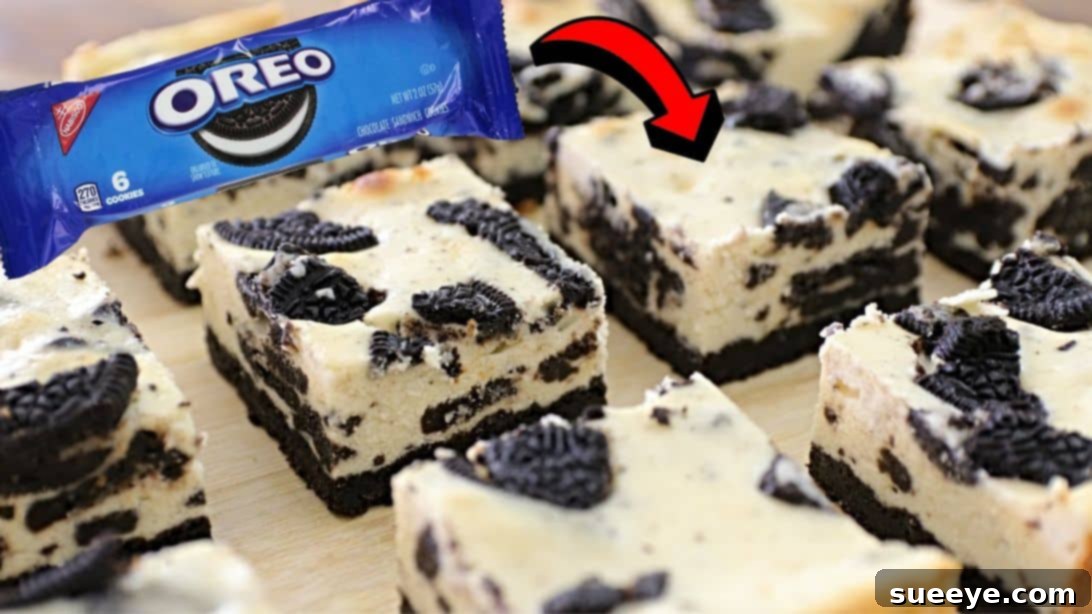
What makes these Oreo cheesecake bars so special? Beyond their irresistible flavor, they are surprisingly simple to prepare, yet yield a dessert that tastes like it came straight from a gourmet bakery. Imagine a thick, buttery Oreo cookie crust serving as the perfect foundation for a velvety smooth, rich, and creamy cheesecake filling, generously studded with chunks of crushed Oreos. Each bite offers a delightful contrast of textures and an explosion of sweet, familiar flavors.
Whether you’re planning a celebratory gathering, a cozy family dinner, or simply craving a luxurious treat, these baked Oreo cheesecake bars fit every occasion. They are robust enough to impress guests and comforting enough to enjoy on a quiet afternoon. So, tie on your apron, gather your ingredients, and prepare to create a dessert that will earn you rave reviews and satisfy every sweet tooth!
Why You’ll Love This Oreo Cheesecake Recipe
There are countless reasons why this specific Oreo cheesecake bar recipe stands out. Firstly, its simplicity means that even novice bakers can achieve professional-looking and tasting results. The steps are straightforward, and the ingredients are readily available. Secondly, the flavor profile is a harmonious blend of classic cheesecake tanginess and the iconic chocolatey goodness of Oreo cookies. The full-fat cream cheese provides an unparalleled richness, while the sour cream adds a subtle tang that balances the sweetness perfectly.
Furthermore, these bars are incredibly versatile. You can serve them chilled as a refreshing summer dessert, or at room temperature for a softer, melt-in-your-mouth experience. They are also portable and easy to portion, making them ideal for potlucks, picnics, or school events. Say goodbye to the fuss of slicing a whole cheesecake and hello to perfectly sized, delightful bars. Get ready to experience dessert perfection!
Essential Ingredients for Perfect Oreo Cheesecake Bars
Crafting these delectable Oreo cheesecake bars begins with selecting quality ingredients. While the list is relatively short, each component plays a crucial role in achieving that perfect balance of flavor and texture. Pay attention to the details, like bringing certain ingredients to room temperature, as this significantly impacts the final consistency of your cheesecake.
For the Irresistible Oreo Crust:
- 26 pieces of Oreo cookies: These are the star of our crust, providing the deep chocolate flavor and a delightful crunch. Ensure you use regular Oreos, not Double Stuffed or Thins, for the best crumb-to-filling ratio.
- ¼ cup of unsalted butter, melted: The butter acts as the binding agent, holding the cookie crumbs together to form a sturdy, flavorful base. Using unsalted butter allows you to control the overall saltiness of the dessert.
For the Silky Smooth Cheesecake Filling:
- 2½ cups of full-fat cream cheese, at room temperature: This is the backbone of your cheesecake. Full-fat cream cheese is essential for achieving that characteristic rich, dense, and creamy texture. Ensuring it’s at room temperature is crucial for a smooth, lump-free batter.
- 2/3 cup of sour cream: Adding sour cream contributes a lovely tangy note that cuts through the richness of the cream cheese, adding depth of flavor and an incredibly silky texture. Also, have it at room temperature.
- 12 to 16 pieces of Oreo cookies, crushed: These crushed pieces will be folded into the filling, distributing bursts of Oreo flavor and texture throughout every bite of the cheesecake.
- 1 tsp of pure vanilla extract: A dash of vanilla enhances all the other flavors, adding a warm, aromatic dimension to the cheesecake.
- ¾ cup + 2 tbsp of granulated sugar: Provides the perfect amount of sweetness without overpowering the other ingredients.
- 3 large eggs, at room temperature: Eggs are vital for the cheesecake’s structure and richness. Using room temperature eggs helps them incorporate smoothly into the batter, preventing overmixing and potential cracks in the finished product.
Step-by-Step Guide: How to Make Easy Baked Oreo Cheesecake Bars
Follow these detailed steps to create your own batch of heavenly baked Oreo cheesecake bars. Precision and patience are key, but the process is straightforward and incredibly rewarding.
Step 1: Crafting the Perfect Oreo Crust
Begin by preheating your oven to 165°C (325°F). This ensures your oven is at the correct temperature when the crust is ready, preventing under-baking. Next, take your 26 Oreo cookies and place them into a food processor. Pulse the cookies until they are transformed into fine, uniform crumbs. This fine texture is crucial for a cohesive crust. Once crumbed, pour in the ¼ cup of melted butter. Continue to pulse the mixture until the butter is fully incorporated and the crumbs resemble wet sand. This indicates that the butter has evenly coated all the cookie particles, ready to bind them together.
Prepare a 9×9-inch baking pan by lining it with parchment paper, leaving an overhang on two sides to easily lift the cheesecake out later. Pour the buttery Oreo crumb mixture into the prepared pan. Using the bottom of a flat glass or a measuring cup, firmly press the crust down to create an even, compact layer across the bottom of the pan. A well-pressed crust will prevent crumbling when sliced. Place this crust into your preheated oven and bake for approximately 10 minutes. This quick bake helps to set the crust, making it less likely to get soggy once the filling is added.
Step 2: Preparing the Velvety Cheesecake Batter
While your crust is baking, you can begin preparing the luscious cheesecake filling. In a large mixing bowl, combine the room temperature full-fat cream cheese, vanilla extract, and granulated sugar. Using an electric mixer (either hand-held or stand mixer with a paddle attachment), beat these ingredients together on medium-low speed until the mixture is completely smooth and well combined. Scrape down the sides of the bowl frequently to ensure no lumps remain. The smoothness of this initial mixture is paramount for a perfectly creamy cheesecake.
Once smooth, add the room temperature sour cream to the bowl. Continue beating on low speed until the sour cream is fully incorporated and the batter is once again smooth and creamy. Be careful not to overmix at this stage; we want to incorporate ingredients, not whip too much air into the batter, which can lead to cracks during baking.
Step 3: Incorporating Cookies and Baking to Perfection
Now it’s time to add the eggs. This step requires a gentle touch. Add the large eggs one at a time to the cream cheese mixture. After each egg addition, beat on very low speed, just until it is incorporated into the batter. Overmixing the eggs can incorporate too much air, which can cause the cheesecake to puff up in the oven and then fall and crack as it cools. The goal is simply to combine.
Once all the eggs are gently mixed in, add your 12 to 16 pieces of crushed Oreo cookies. Using a spatula, gently fold the crushed cookies into the cheesecake batter until they are evenly distributed. Be careful not to crush them further; we want distinct pieces for textural contrast. Retrieve your baked crust from the oven (it should be lightly golden) and pour the luxurious cheesecake filling evenly over the top. Use the back of a spoon or an offset spatula to spread the filling smoothly across the crust.
If you desire, you can sprinkle a few extra crushed Oreos over the top for an enhanced visual appeal and an extra crunch. Carefully place the baking pan back into the preheated oven and bake for 40 to 45 minutes, or until the cheesecake is mostly set. You’ll know it’s done when the edges are firm but the very center still has a slight jiggle when gently shaken. This slight jiggle is normal and indicates that the cheesecake will continue to set as it cools.
Step 4: Chilling and Serving Your Masterpiece
Once baked, resist the urge to immediately remove the cheesecake from the oven. Instead, turn off the oven and leave the cheesecake inside with the door slightly ajar for about an hour. This gradual cooling process helps prevent cracking. After an hour, remove it from the oven and allow it to cool completely to room temperature on a wire rack. This could take another 1-2 hours.
Once cooled to room temperature, the most crucial step for achieving the perfect texture begins: chilling. Place the cheesecake in the refrigerator to chill for at least 4 hours, though overnight is ideal. This chilling period allows the cheesecake to fully set, firm up, and develop its rich, dense consistency. Once thoroughly chilled, use the parchment paper overhangs to carefully lift the entire cheesecake out of the pan. Place it on a cutting board, then slice it into neat bars. Serve your homemade baked Oreo cheesecake bars and prepare for pure enjoyment!
Tips for the Best Oreo Cheesecake Bars
- Room Temperature Ingredients are Key: This cannot be stressed enough. Cream cheese, sour cream, and eggs at room temperature blend together effortlessly, creating a silky-smooth batter free of lumps. Cold ingredients will result in a lumpy mixture and require more mixing, potentially incorporating too much air.
- Don’t Overmix: After adding the eggs, mix just until combined. Overmixing introduces excess air, which can cause the cheesecake to rise rapidly and then crack as it cools.
- Prevent Cracks: Beyond not overmixing, ensuring a slow, gradual cooling process (as described in Step 4) is crucial. Some bakers also use a water bath (bain-marie) for extra insurance, which provides a humid environment and even heat distribution, though this recipe is designed to work well without one.
- Use Full-Fat Cream Cheese: For the ultimate rich and creamy texture, always opt for full-fat block cream cheese. Low-fat varieties contain more water and stabilizers, which can affect the texture and flavor.
- Parchment Paper Overhang: This simple trick makes removing the baked cheesecake from the pan incredibly easy and mess-free.
- Patience During Chilling: The chilling time is not optional. It allows the flavors to meld, the cheesecake to firm up, and ensures clean, beautiful slices.
Variations and Customizations for Your Oreo Cheesecake Bars
While this classic Oreo cheesecake bar recipe is perfect as is, it also serves as an excellent canvas for your creativity. Here are a few ideas to customize your next batch:
- Different Cookie Crusts: Experiment with other cookie bases! Graham crackers, Nilla wafers, or even chocolate chip cookies can be swapped for Oreos in the crust.
- Add-ins to the Filling: Beyond crushed Oreos, consider folding in mini chocolate chips, chopped nuts, a swirl of caramel, or a hint of peppermint extract for a festive twist.
- Exciting Toppings: Once chilled, drizzle your bars with chocolate ganache, a caramel sauce, fresh berry compote, or a dollop of whipped cream. A sprinkle of cocoa powder or extra Oreo crumbs also adds a nice finishing touch.
- Seasonal Flavors: In the fall, a touch of pumpkin spice can transform this into a seasonal delight. In the summer, a lemon zest addition can brighten the flavor profile.
Serving and Storage Suggestions
These baked Oreo cheesecake bars are best served chilled. Their rich, creamy texture and delightful cookie crunch make them a fantastic standalone dessert. Pair them with a cup of hot coffee, a glass of cold milk, or even a scoop of vanilla bean ice cream for an extra indulgent experience.
To store any leftover cheesecake bars, place them in an airtight container and refrigerate for up to 5-7 days. For longer storage, you can freeze individual bars. Wrap each bar tightly in plastic wrap, then place them in a freezer-safe bag or container. They will keep well in the freezer for up to 1-2 months. Thaw them in the refrigerator overnight before serving for the best texture.
This recipe for Easy Baked Oreo Cheesecake Bars is more than just a dessert; it’s a delightful experience waiting to happen. It combines the comforting familiarity of Oreos with the sophisticated allure of a creamy cheesecake, all wrapped up in a simple, achievable package. Whether you’re a seasoned baker or just starting your culinary journey, this recipe offers a foolproof path to a truly spectacular treat. So go ahead, whip up a batch, and savor every single decadent bite. You deserve this deliciousness!
*All images featured in this article are credited to The Cooking Foodie via YouTube. We highly recommend visiting their channel and subscribing for more amazing recipes and culinary inspiration!