
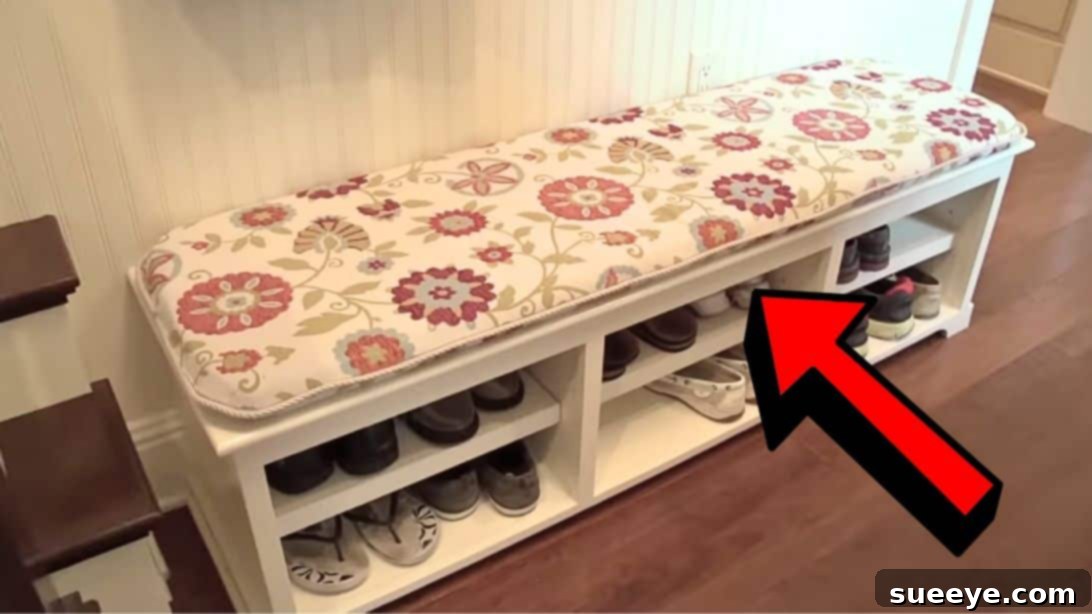
How to Sew a Custom Bench Cushion: A Comprehensive DIY Guide
Have you ever found yourself searching endlessly for the perfect bench cushion, only to be met with disappointment? Whether it’s the wrong size, an unsuitable fabric, or a design that just doesn’t complement your home décor, finding that ideal fit can be a real challenge. This was precisely my dilemma, and after countless hours browsing stores and online shops, I realized the most satisfying solution was right at my fingertips: to create one myself!
Embarking on a DIY bench cushion project not only guarantees a flawless fit tailored specifically to your furniture but also opens up a world of customization. Imagine selecting the exact fabric, color, and texture that speaks to your aesthetic, adding personalized touches like decorative piping, and enjoying the immense satisfaction of a handmade item. This comprehensive guide, inspired by the fantastic step-by-step instructions from Sailrite on YouTube, will walk you through the entire process, making it easy for even beginners to achieve professional-looking results.
Why Choose to DIY Your Bench Cushion?
The decision to sew your own bench cushion offers a multitude of benefits that off-the-shelf options simply cannot match. Customization is, without doubt, the primary advantage. You are in complete control of every design element, from the firmness and type of foam to the pattern and durability of the upholstery fabric. This means you can ensure your cushion not only fits your bench’s exact dimensions but also perfectly matches your interior design scheme.
- Perfect Fit: No more ill-fitting cushions that slide around or leave unsightly gaps. Your DIY cushion will be made to measure.
- Personalized Style: Choose from an infinite array of fabrics, colors, and patterns. Want a vibrant pop of color, a sophisticated neutral, or a durable outdoor fabric? The choice is yours.
- Quality Control: By selecting your own materials, you can ensure the highest quality foam and fabric, leading to a more durable and comfortable cushion that lasts for years.
- Cost-Effective: Often, creating your own cushion can be more budget-friendly than purchasing a custom-made one, especially if you have some basic sewing supplies already.
- Sense of Accomplishment: There’s a unique joy and pride that comes from creating something beautiful and functional with your own hands.
Before You Begin: Planning & Preparation for Your Custom Cushion
Careful planning is the cornerstone of any successful sewing project. Before you even touch a pair of scissors, take the time to accurately measure your bench and gather all necessary materials and tools. This upfront preparation will save you time and prevent potential frustrations down the line.
Accurate Measurements are Key
Using a reliable tape measure, take precise measurements of your bench. You’ll need:
- Length: Measure from one end of the bench to the other.
- Width/Depth: Measure from the front edge to the back edge.
- Thickness/Height: Decide how thick you want your cushion to be. This will determine your foam’s thickness.
Remember to double-check all your measurements to ensure accuracy. It’s always a good idea to write them down clearly.
Choosing the Right Foam
The foam is the heart of your cushion, providing both comfort and structure. For bench cushions, a medium to firm density polyurethane foam is often recommended. The original tutorial suggests anti-microbial polyurethane foam, which is excellent for preventing mold and mildew, especially if your bench is in a humid environment or used outdoors.
- Density: Higher density foam generally means a firmer, more supportive cushion that holds its shape longer.
- Thickness: This should align with your desired cushion height, typically ranging from 2 to 4 inches for benches.
Selecting Your Upholstery Fabric
Your fabric choice will dictate the aesthetic and durability of your bench cushion. Consider where the bench will be located and how frequently it will be used.
- Indoor Benches: Upholstery-grade cotton, linen blends, velvet, or chenille can offer comfort and style. Look for fabrics with a higher ‘rub count’ for durability.
- Outdoor Benches: Sunbrella or other weather-resistant fabrics are essential. These are designed to withstand UV rays, moisture, and fading.
- Pattern and Scale: If choosing a patterned fabric, consider how the pattern will lay on your cushion and if you need extra fabric for pattern matching.
Essential Materials and Tools for Your DIY Bench Cushion
Gathering all your supplies before you start will make the sewing process much smoother. Here’s a detailed list of what you’ll need:
- Anti-microbial Polyurethane Foam: The core of your cushion. Choose a thickness and density appropriate for your bench and comfort preference.
- Upholstery and Decor Fabric: Select a durable fabric that complements your space. Ensure you purchase enough for the top, bottom, and any side panels if you opt for a boxed cushion style (though this tutorial focuses on a simpler envelope style).
- Seamstick 3/8″ Basting Tape for Canvas: This double-sided adhesive tape is a game-changer for holding fabric layers together, especially when working with piping, as it eliminates the need for pins and creates a crisp seam.
- Sunbrella Decorative Piping Trim ¼”: Adds a professional, tailored finish to your cushion. While the tutorial specifies Sunbrella, you can choose any decorative piping that matches your fabric and style.
- Thread V69 Polyester or Nylon: A strong, durable thread is crucial for upholstery projects. Polyester or nylon threads are resistant to UV light and abrasion, making them ideal for long-lasting cushions.
- Cushion Wrap Silk Film Center Fold 54″: This slick film is designed to make inserting foam into tight covers much easier. It reduces friction, allowing the foam to slide smoothly.
- Sewing Machine: A standard home sewing machine is usually sufficient, but a heavy-duty machine might be beneficial if working with very thick fabrics.
- Ruler: For accurate measuring and marking.
- Pencil or Fabric Marker: For marking cutting lines on foam and fabric.
- Tape Measure: For precise bench and fabric measurements.
- Sharp Fabric Scissors: Essential for clean, straight cuts through your chosen fabric.
- Hot Knife Cutter for Fabric (Optional but Recommended for Foam): Provides a clean, smooth cut through foam without the jagged edges that traditional knives can leave. Exercise caution when using.
- Roping Zipper Foot for Sewing Machine (or Piping Foot): This specialized foot has a groove that allows you to sew very close to piping cord, ensuring a neat and professional finish.
Step-by-Step Guide to Sewing Your Bench Cushion
Now that you have all your materials ready, let’s dive into the creation process. Follow these steps carefully for a beautifully finished custom bench cushion.
Step 1: Measuring and Cutting the Foundation
The success of your cushion starts with precise measurements and cuts. Accuracy here is paramount for a professional-looking result.
- Measure Your Bench: Re-measure the length and width of your bench one last time to confirm.
- Transfer to Foam: Lay your anti-microbial polyurethane foam flat. Using your ruler and pencil, carefully transfer the exact length and width measurements of your bench onto the foam. Ensure your lines are straight and parallel.
- Cut the Foam: For the cleanest cut, use a hot knife cutter if available. This tool melts the foam as it cuts, preventing crumbling and creating smooth edges. If using a serrated knife, ensure it’s very sharp and cut slowly and evenly. Take your time to achieve a perfectly shaped foam insert.
- Cut the Fabric Pieces: Now, prepare your upholstery fabric. For a simple envelope-style cushion, you’ll need two main fabric pieces: one for the top and one for the bottom.
- Add 2 inches to both the total width and total length of your foam measurements. This 2-inch allowance provides a 1-inch seam allowance on all sides.
- Carefully cut two identical rectangles from your fabric using these increased dimensions. These will be your top and bottom cushion panels. If your fabric has a directional pattern, ensure it runs correctly on both pieces.
Step 2: Crafting the Cushion Cover: Corners and Piping
This step involves shaping the corners and adding the decorative piping, which gives your cushion a refined, finished look.
- Create a Curved Corner Template: Bench cushions often look best with gently curved corners. To achieve this consistently, make a template. You can use a piece of cardboard or heavy paper. Determine your desired corner radius (e.g., 2-4 inches), mark it on the cardboard, and cut out the curve.
- Cut Fabric Corners: Place your template on each of the four corners of both fabric pieces (top and bottom panels). Trace the curve with a fabric marker or pencil, then carefully cut along the line using sharp fabric scissors. This ensures all eight corners (four on each fabric piece) match perfectly.
- Prepare for Piping: Lay one of your fabric pieces (this will be the bottom of your cushion cover) with its right side facing up. Take your Seamstick basting tape. Starting from one of the shorter sides, peel off a small section of the paper backing and begin applying the tape along the very edge of the fabric, following the curve of the corners. Apply it all around the perimeter, making sure to leave the paper backing on as you go.
- Attach Decorative Piping: Carefully unroll your decorative piping trim. Beginning at a discreet spot on one of the shorter sides (where you’ll eventually have your opening), align the piping’s fabric flange with the edge of your fabric panel, directly on top of the basting tape. As you peel away the paper backing from the tape, press the piping firmly onto the adhesive. Work slowly and precisely, ensuring the piping cord is snug against the edge and follows the curves smoothly. Overlap the ends of the piping slightly at the start/finish point for a seamless look.
- Place Top Fabric: Lay the second fabric piece (your top panel) directly on top of the first piece, with its right side facing down. Align all edges and corners perfectly, creating a fabric “sandwich” with the piping in between.
Step 3: Sewing, Stuffing, and Finishing Touches
This final stage brings your cushion cover together and gets the foam securely inside, ready for display.
- Prepare for Sewing: Before you sew, ensure your sewing machine is fitted with a roping zipper foot (or a piping foot). This specialized foot allows you to stitch incredibly close to the piping cord, creating a neat, professional finish.
- Sew the Cushion Cover: Starting from one of the shorter sides, begin sewing around the perimeter of your cushion cover. Remember to leave an opening of about 12-18 inches on one of the shorter sides. This opening is crucial for inserting the foam later. Stitch slowly and steadily, following the line of the piping. Backstitch at the beginning and end of your seam for added strength.
- Trim Seam Allowance & Clip Curves: Once sewn, trim your seam allowance to about half an inch. Clip the curved corners carefully (making small V-shaped cuts into the seam allowance, not through the stitching) to ensure they lie flat and smooth when turned right side out.
- Turn Right Side Out: Gently turn your cushion cover right side out. Use a blunt object (like a chopstick or turning tool) to push out the corners and ensure the piping is nicely defined. Iron the seams if your fabric allows, to give a crisp finish.
- Wrap the Foam: Now for the foam insertion! Take your cushion wrap silk film. Lay your cut foam block on the film and carefully wrap it. The slickness of the film significantly reduces friction.
- Vacuum Seal the Foam (Trick for Easy Insertion): This is a brilliant trick! Place your wrapped foam into a large, sturdy garbage bag. Use a vacuum cleaner hose to suck the air out of the bag, effectively shrinking the foam. As the foam compresses, quickly slip it into the cushion cover through the unsewn opening. Once the foam is inside the cover, release the vacuum seal, and the foam will expand to fill the cover. This method makes insertion incredibly easy, especially for tight-fitting covers.
- Adjust and Align: Once the foam is fully expanded inside, gently adjust it to ensure it’s centered and fills the cover evenly, pushing out into all corners.
- Close the Gap: Finally, tuck the raw edges of the opening inward, aligning them with the sewn seam. You can either machine stitch this gap closed (for a more durable, but visible, seam) or hand-sew it using an invisible ladder stitch for a professional, seamless look. Backstitch at the beginning and end to secure.
Tips for Success and Troubleshooting
Even with clear instructions, every DIY project can present unique challenges. Here are some additional tips to help you achieve the best possible results and overcome common hurdles:
- Double-Check Everything: Before making any cuts, always double-check your measurements. Measure twice, cut once!
- Use Sharp Tools: Dull scissors can fray fabric and make uneven cuts. A sharp hot knife or serrated knife is crucial for clean foam edges.
- Go Slow: Especially when sewing around curves and attaching piping, take your time. Rushing can lead to uneven stitches or misaligned piping.
- Test Stitches: Before sewing on your actual project fabric, do a test stitch on a scrap piece using the same fabric layers and thread. This helps you adjust tension and stitch length.
- Consider a Zipper: While this tutorial uses a sewn-closed opening, for easier cleaning and foam removal in the future, consider adding a zipper to one of the sides. This is a slightly more advanced step but well worth the effort for longevity.
- Fabric Grain: Always cut fabric along the grain unless specific design elements require a bias cut. This ensures your cushion holds its shape and prevents stretching.
- Iron as You Go: Pressing seams open or to one side as you sew creates a much more professional and crisp finish.
Conclusion: Enjoy Your Custom-Made Bench Cushion!
And there you have it – a beautiful, custom-fitted bench cushion made entirely by you! This project is incredibly rewarding, transforming a simple bench into a comfortable and stylish seating area that perfectly reflects your personal taste. You’ve not only solved the common problem of finding the right size but also added a unique, handcrafted touch to your home decor.
The satisfaction of seeing your vision come to life, from selecting the materials to the final stitch, is truly unparalleled. We hope this detailed guide empowers you to tackle this project with confidence. A huge thank you once again to Sailrite via YouTube for providing such an inspiring and clear tutorial that served as the foundation for this comprehensive guide. Now, sit back, relax, and enjoy your perfectly padded, personalized bench!
*These amazing images are all credited to Sailrite via YouTube. Check their other content and follow for more!