
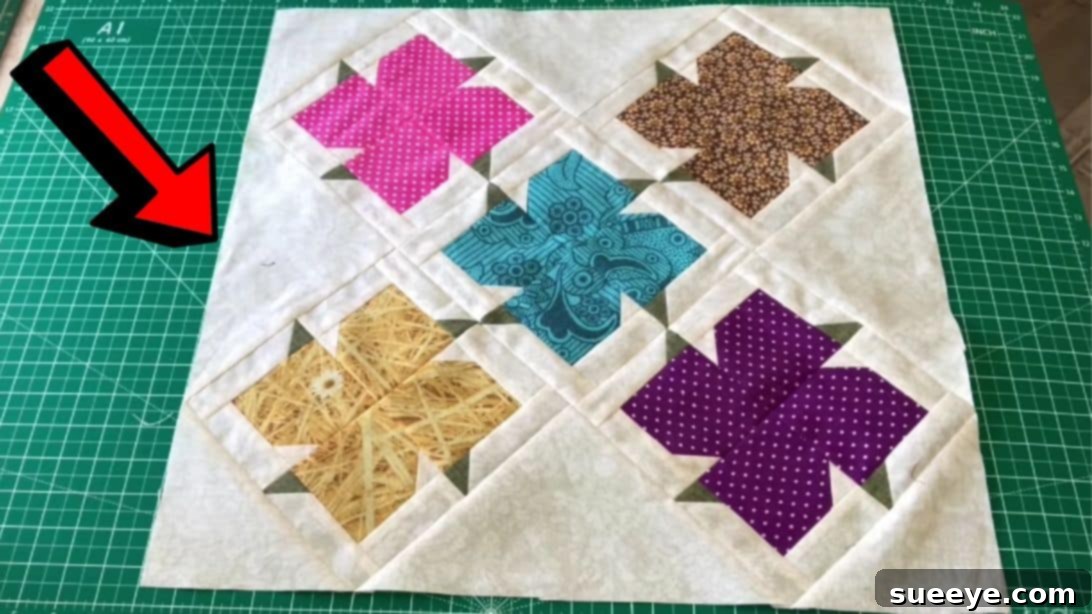
Master the Easy Patchwork Flower Quilt Block: A Beginner-Friendly Tutorial
Embark on a delightful quilting journey with this charming patchwork flower block tutorial, inspired by the creative genius of The Melody of Sewing. Initially, the intricate appearance of this block might seem daunting, suggesting a complicated construction process that only seasoned quilters could master. However, upon watching the clear, step-by-step video tutorial, you’ll be pleasantly surprised to discover just how incredibly simple and straightforward it is to assemble. This design is so accessible that even absolute beginners can achieve beautiful results on their very first attempt. Get ready to transform various fabric scraps into a gorgeous floral motif that can brighten any quilt, cushion, or wall hanging. Dive in and see for yourself – we’re confident you’ll fall in love with this project!
Quilting is a wonderful craft that allows you to create lasting keepsakes, express your creativity, and work with beautiful fabrics. This specific flower block pattern is an excellent starting point for new quilters, as it introduces fundamental techniques like accurate cutting, precise seam allowances, and careful pressing, all while building confidence. Experienced quilters will also appreciate its quick assembly, making it a perfect choice for stash-busting or producing a vibrant quilt in record time. Let’s gather our materials and begin creating your own stunning patchwork flower!
Materials Required for Your Patchwork Flower Block
Before you begin sewing, it’s crucial to gather all your materials. Selecting the right fabrics can significantly impact the final look of your quilt block. We recommend using high-quality quilting cottons, as they are easy to work with, hold their shape well, and offer a wide range of colors and patterns. For this flower block, you’ll need three distinct fabric types:
- Main Fabric: This fabric will form the petals of your flower, so choose a color or pattern that stands out and truly represents the bloom.
- Background Fabric: This fabric will provide the backdrop for your flower, making it pop. A solid light color like white, cream, or a pale pastel works wonderfully to highlight the main fabric.
- Green Fabric: This fabric will represent the leaves or stem of your flower, adding a touch of natural realism. A vibrant green is ideal, but feel free to experiment with different shades.
Ensure your fabrics are pre-washed and pressed before cutting to prevent shrinking or warping after your project is complete. This step is essential for maintaining the integrity and appearance of your finished quilt block.
Precise Cutting Requirements for Your Quilt Block
Accuracy in cutting is paramount in quilting, as it directly affects how well your pieces fit together and the overall crispness of your final block. Take your time with this step, using a rotary cutter, a self-healing mat, and a quilting ruler for the best results. All measurements are provided in inches and assume a standard 1/4-inch seam allowance.
- 4 squares of Main Fabric: Cut these to 3½ x 3½ inches. These will form the core elements of your flower petals.
- 4 squares of Background Fabric: Cut these to 1½ x 1½ inches. These small squares will be used in conjunction with the main fabric to create crucial corner units.
- 4 rectangles of Background Fabric: Cut these to 1½ x 3½ inches. These rectangles will extend certain sections of your block.
- 4 rectangles of Background Fabric: Cut these to 1½ x 4½ inches. These longer rectangles will further frame and define the structure of your block.
- 4 squares of Green Fabric: Cut these to 1½ x 1½ inches. These will create the distinctive green leaf elements within your flower.
- 1 square of Background Fabric: Cut this to 8¼ x 8¼ inches. This larger square will serve as a central background or sashing piece for the assembled block.
- 1 square of Background Fabric: Cut this to 6 x 6 inches. This piece will be used for another background element within the block’s construction.
Careful measurement and cutting will ensure that all your pieces align perfectly, making the sewing process much smoother and more enjoyable. Organize your cut pieces by type to avoid confusion as you move through the construction steps.
Step-by-Step Directions for Sewing Your Patchwork Flower Block
Step 1: Constructing the Petal Corner Units
Begin by laying out your freshly cut fabric pieces. For this initial step, retrieve your four main fabric squares (3½ x 3½ inches) and four small background fabric squares (1½ x 1½ inches). Take one main fabric square and place one background fabric square on its bottom-left corner. Ensure that their right sides are facing each other, and align the raw edges precisely. Using a fabric marker or pencil, draw a diagonal line from one corner to the opposite corner on the wrong side of the smaller background square. This line will serve as your sewing guide.
Carefully sew along this diagonal line using a consistent ¼-inch seam allowance. This precision is key to ensuring your blocks come out the correct size. Once sewn, trim away the excess fabric, leaving a ¼-inch seam allowance outside your stitched line. Press the seam open to create a flat, neat unit. Repeat this process for all four main fabric squares, attaching a background square to the bottom-left corner of each. You should now have four identical units, each with a small background triangle extending from the main fabric square.
Next, take your background rectangles measuring 1½ x 3½ inches. Place one of these rectangles onto one of the units you just created, aligning their right sides together along one edge, as demonstrated in the video tutorial. Sew these two pieces together with a ¼-inch seam allowance. Again, precision is crucial here. Repeat for all four units, attaching one 1½ x 3½ inch background rectangle to each.
Step 2: Incorporating Green Leaf Elements and Assembling Units
After sewing the background rectangles in Step 1, gently press the seams open to ensure your pieces lie flat. Set these four units aside temporarily. Now, pick up your four green fabric squares (1½ x 1½ inches). On the wrong side of each green square, draw a diagonal line from corner to corner. These will form your “leaf” elements.
Take your remaining background rectangles (1½ x 4½ inches). Place one green fabric square on top of one background rectangle, aligning their right sides together at one end, just as you did with the main fabric squares. The drawn diagonal line on the green square should be positioned for sewing across the corner of the background rectangle. Sew along this diagonal line, then trim off the excess fabric, leaving a ¼-inch seam allowance. Press the seam open. Repeat this for all four green squares and four background rectangles.
Now, it’s time to assemble these newly formed units. You should have two distinct types of units: the main fabric units with background extensions, and the background rectangles with green corners. Carefully arrange these pieces according to the diagram or video tutorial, visualizing the formation of your flower block. Begin sewing these various pieces together into smaller segments first, ensuring that seams align perfectly. When joining pieces, always ensure right sides are facing, and use a consistent ¼-inch seam allowance. Press seams after each join, pressing to one side or open, depending on which method results in a flatter, less bulky seam for your design.
Step 3: Assembling the Flower Block and Expanding to a Quilt
With all your smaller units prepared, it’s time to bring them together into the complete patchwork flower block. Arrange your sewn units into distinct rows. Typically, this block will form a 3×3 grid of units. Once you are satisfied with the layout and orientation of each piece, begin sewing the units together, one row at a time. Sew the first unit of a row to the second, then press the seam. Then, sew the third unit to the second, pressing again. This approach helps maintain accuracy. Ensure all raw edges are aligned, and sew with a precise ¼-inch seam allowance.
After sewing each individual row, press the seams open or to one side – often, pressing alternating rows in opposite directions helps seams “nest” when you join the rows, reducing bulk. Once all your rows are complete and pressed, carefully sew the rows to each other, again ensuring right sides are together and matching all intersections meticulously. Take your time to align seam lines perfectly; a slight pin at each intersection can make a significant difference. Press the final seams of the block, and behold your completed patchwork flower block!
This single block is a beautiful accomplishment, but it’s often just the beginning! You can continue to make more of these stunning flower blocks to create a larger project. To assemble a full quilt, you’ll typically join these completed blocks together, often with additional background squares or sashing strips (like the 8¼ x 8¼ inch and 6 x 6 inch background squares you cut) placed between them to create visual separation and an overall design. First, sew your blocks and sashing into long rows, then sew those rows together to form the quilt top. Finally, once your quilt top is complete, layer it with batting and a backing fabric, then quilt it using your preferred method – whether it’s free-motion quilting, straight-line quilting, or tying. The possibilities are endless, allowing you to create a truly unique and personalized textile art piece!
Whether you’re creating a single decorative block or an entire quilt, this easy patchwork flower pattern is a rewarding project for any skill level. Its simple construction belies its intricate appearance, making it a joy to sew. Experiment with different fabric combinations and colors to achieve a variety of moods and styles for your flowers. You could create a garden of vibrant blooms or a sophisticated arrangement of muted tones. The beauty of quilting lies in its versatility and the personal touch you bring to each stitch.
We encourage you to share your creations and inspire others! Don’t forget to visit The Melody of Sewing’s YouTube channel for the original video tutorial and to explore more fantastic quilting and sewing projects. Her clear instructions and inspiring designs are an invaluable resource for the crafting community.
*All image credit for this inspiring tutorial belongs to The Melody of Sewing via YouTube. Be sure to follow and subscribe to her channel for an abundance of fantastic quilting and sewing content!