
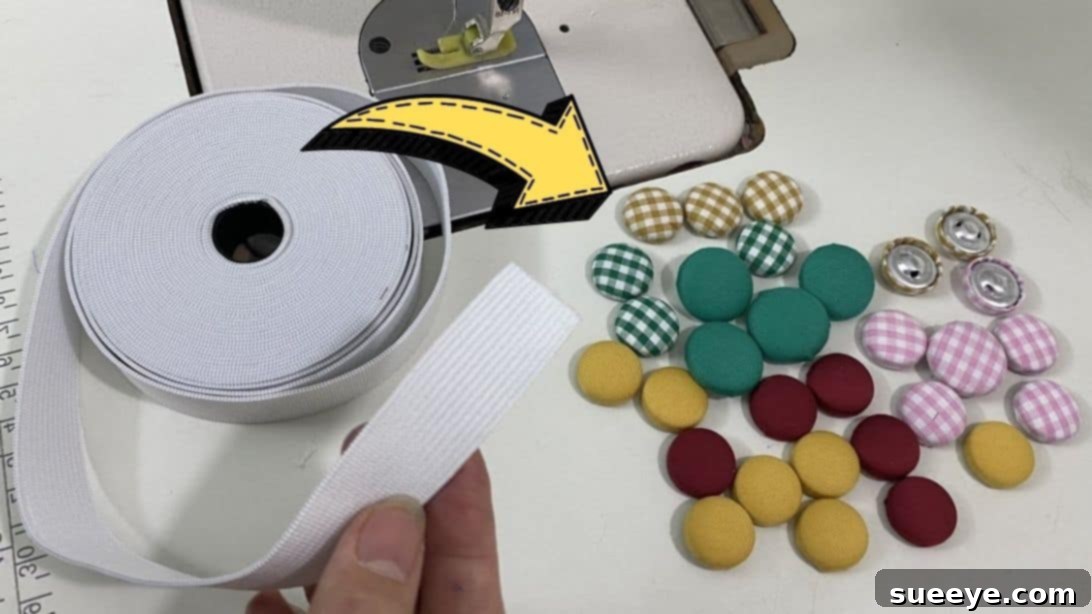
Mastering Fabric Buttons: The Easiest Way to Create Custom Snaps for Your Sewing Projects
Are you tired of the tedious and often frustrating process of making fabric buttons? Do you dream of perfectly coordinated buttons that seamlessly blend with your sewing projects, adding that professional, handmade touch? If so, prepare to revolutionize your crafting experience! This comprehensive guide introduces a brilliant, straightforward technique by the acclaimed Trefa Craft on YouTube. With this clever sewing hack, you can effortlessly create a multitude of custom fabric buttons, faster and with impressive results. Say goodbye to the struggles and hello to beautifully crafted buttons that elevate your garments, accessories, and home decor items. We promise this tutorial will become your go-to method for achieving flawless fabric buttons every time.
Fabric buttons are more than just functional fasteners; they are an essential design element that can transform an ordinary piece into something extraordinary. They offer unparalleled customization, allowing you to match your fabric choices perfectly, create delightful contrasts, or express your unique style. Whether you’re a seasoned seamstress or a budding DIY enthusiast, this easy-to-follow method will empower you to produce high-quality, durable fabric snaps with minimal effort and no specialized equipment. Dive in and discover how simple and rewarding making your own fabric buttons can be, and how they can add that perfect finishing touch to all your textile creations.
Essential Materials for Effortless Fabric Button Making
Gathering the right tools is the first step towards a successful and enjoyable crafting session. Fortunately, this ingenious method requires only a few basic items, many of which you likely already have in your sewing kit. Opting for quality materials will ensure your custom fabric buttons are both durable and professional-looking.
- Fabric: The heart of your custom button! Choose a fabric that complements your project. Medium-weight woven fabrics like cotton, linen, broadcloth, or even upcycled scraps from old garments work wonderfully. Consider the fabric’s stretch and thickness; for very thin or sheer fabrics, you might want to use a double layer or apply lightweight interfacing to prevent the button shell from showing through.
- Button Snaps: These are the foundational components of your button. They typically come in two parts: the top shell (the visible part) and the back snap (which secures the fabric). Ensure you select the correct size for your desired button. Plastic snaps are often easier for beginners to work with, while metal snaps offer a more traditional or robust feel.
- Elastic Band or Fabric Strips: A narrow elastic band, ideally about 1/4 to 1/2 inch wide, is crucial for creating the reusable button template. Its flexibility and ability to hold shape make it perfect for this purpose. If an elastic band isn’t available, you can alternatively cut thin strips from a slightly stretchable fabric, ensuring it’s pliable enough to form a snug and stable circular template.
- Scissors: A pair of sharp fabric scissors is indispensable for achieving clean, precise cuts. Jagged or uneven edges on your fabric circles can make assembly more challenging and result in a less professional finish.
- Marking Pen or Pencil: A fabric-safe marking tool is essential for accurately tracing your template onto your chosen fabric. Options include tailor’s chalk, a washable fabric marker, or a fine-tip disappearing ink pen. Always test your marker on a scrap piece of fabric first to ensure it doesn’t leave permanent marks.
- Needle and Thread: A hand-sewing needle and a strong, all-purpose polyester thread are required to secure the elastic template. Choose a thread color that blends with the elastic band or is inconspicuous. For the final button assembly, the thread is not directly used, but strong thread for the template ensures its longevity.
- Pointy Tool (Optional but Highly Recommended): An awl, a small flat-head screwdriver, the blunt end of a knitting needle, or any sturdy, narrow object with a somewhat flat or rounded tip can be incredibly helpful for pressing the snap back securely into place, ensuring a tight fit.
Step-by-Step Guide: Crafting Your Custom Fabric Buttons with Ease
Follow these detailed instructions carefully to create stunning fabric buttons that will enhance any garment or craft project. Precision and a methodical approach are key to achieving consistent, high-quality results with Trefa Craft’s ingenious method.
Step 1: Crafting Your Reusable Button Template from an Elastic Band
The secret to consistently sized and perfectly shaped fabric buttons, especially when making a batch, lies in creating a reliable template. This method ingeniously uses an elastic band, which is inherently flexible yet capable of holding a stable shape once sewn, making it an excellent guide for countless buttons.
- Prepare Your Base Button Snap: Begin by taking just one of your desired button snaps (specifically the top shell, not the back). This will serve as the initial sizing guide for your elastic template. It dictates the exact circumference your fabric circle needs to cover.
- Gently Wrap the Elastic Band: Take your narrow elastic band and carefully roll it around the circumference of the button shell. The crucial point here is to avoid stretching the elastic at all. Simply lay it gently around the button, allowing it to conform naturally to the button’s shape without tension. This technique ensures your template will accurately reflect the button’s size without any distortion. Hold the ends of the elastic securely in place where they meet, overlapping them slightly.
- Carefully Remove the Button Shell: While maintaining the circular shape of the elastic loop, carefully slide the button shell out from the center. You should now have a loose elastic circle that perfectly matches the button’s circumference.
- Verify Size and Secure the Ends: Briefly place the button shell back into the elastic loop to double-check that the size is still correct and that the elastic fits snugly. If it’s too loose, gently re-wrap it more carefully. Once confirmed, overlap the ends of the elastic by approximately 1/4 to 1/2 inch. Using your needle and strong thread, securely sew these overlapped ends together. A simple whip stitch, backstitch, or even a small zigzag stitch will work well here, creating a strong, closed loop that won’t unravel. Trim any excess elastic close to your stitches.
- Build a Sturdy Template: Now, you’ll want to build up the thickness and stability of your template for better handling and consistent tracing. Continue to roll the elastic band around itself, inside the initial sewn loop. Each pass should create a tighter, more substantial circle. Aim to build it up until it forms a ring approximately 2 inches in diameter, or until the template feels sufficiently sturdy and holds its shape well. The goal is to create a firm, yet slightly flexible, ring that is easy to hold and trace around.
- Reinforce the Template: Once you’ve achieved the desired thickness and sturdiness for your template, sew the end of the elastic securely into the existing structure with several firm stitches. To further enhance its durability and prevent it from losing its shape, make several additional stitches across the sides of your newly formed elastic ring, essentially tacking the layers together at multiple points. This completed elastic ring will now serve as your durable and reusable template for tracing perfect fabric circles for all your future fabric buttons.
Step 2: Assembling Your Custom Fabric Button with Precision
With your reliable, custom-made elastic template ready, it’s time to bring your fabric buttons to life. This step involves carefully cutting your fabric circles, positioning them accurately, and then securing the button snap for a professional, durable finish.
- Trace and Cut Your Fabric Circles: Lay your chosen fabric smoothly and flat on your work surface. Place your newly created elastic template on top of the fabric. Using your fabric marking pen or pencil, carefully trace around the outer edge of the template. Ensure your tracing is consistent and clear, creating a perfect circle. Once traced, use your sharp fabric scissors to precisely cut out the fabric circle. Aim to cut directly on the traced line for a neat, even edge. Repeat this tracing and cutting process for each button you wish to make, ensuring all fabric circles are identical in size.
- Position the Fabric and Button Shell: Take one of your freshly cut round fabric pieces. Center it carefully over your elastic template. The template provides a slight dome shape and a helpful guide for positioning. Now, take the top shell of your button snap (the visible front part) and place it directly in the center of the fabric circle, which is still resting over the template. The fabric should completely envelop the button shell, with the raw edges of the fabric extending evenly beyond the button’s circumference.
- Encase the Button Neatly: Gently but firmly push the button shell downwards into the center of the fabric and template. The goal here is to smoothly gather the fabric neatly around the button’s edges, pulling the raw fabric edges towards the back of the button. Continue to push and manipulate the fabric until the button shell almost “pops out” or is fully visible and smoothly covered by the fabric on the other side. The elastic template helps to hold the fabric in place and assists in creating the characteristic dome shape of a fabric button. Ensure there are no major wrinkles on the front of the button.
- Attach the Snap Back Securely: Once the fabric is neatly wrapped around the button shell and held in place by the template, take the back part of the button snap. Align it carefully over the fabric-covered back of the button. You’ll notice small prongs or a rim on the snap back that are designed to securely fit over the gathered edges of the fabric and the rim of the button shell.
- Secure the Snap Using a Pointy Tool: This is where your chosen pointy tool (awl, small screwdriver, etc.) becomes invaluable. Place the snap back firmly over the gathered fabric and button shell. Then, use your tool to press the snap back firmly into place. Work your way around the entire circumference, applying even pressure to ensure the snap back latches securely onto the button shell, effectively trapping the fabric between the two pieces. You should hear a satisfying “snap” or feel it lock firmly into place. Double-check that all raw edges of the fabric are neatly tucked in and that the snap is fully closed and securely fastened.
- Inspect and Repeat for a Batch: Once secured, carefully inspect your finished fabric button. Check for any loose threads, uneven fabric folds on the back, or a wobbly snap. If everything looks good and feels secure, you’re done with one perfect button! Repeat this entire process for all your remaining fabric circles and button snaps. Feel empowered to experiment with different fabric designs, textures, and button sizes to create a diverse and personalized collection for all your crafting needs.
Why This Fabric Button Method Is a Game-Changer for Crafters
While various methods exist for making fabric buttons, Trefa Craft’s technique truly stands out for its exceptional ease, efficiency, and consistent results. It addresses common frustrations associated with traditional button-making and offers several compelling advantages that make it a favorite among DIY enthusiasts and seasoned sewers alike:
- Unmatched Simplicity and Speed: The process is remarkably straightforward, eliminating the need for complex machinery or intricate hand-sewing. You can produce multiple buttons in a fraction of the time compared to other methods, making it ideal for large projects or batch production.
- Incredibly Cost-Effective: This method utilizes readily available, inexpensive materials like elastic bands and basic sewing supplies. You won’t need to invest in expensive, specialized button-making kits or tools, making it a budget-friendly DIY solution accessible to everyone.
- Professional and Consistent Finish: Despite its simplicity, this technique yields beautifully finished buttons with smooth, evenly wrapped fabric and securely attached snaps. The elastic template ensures consistent sizing and a perfectly rounded shape every single time, giving your projects a polished, store-bought quality.
- Limitless Customization Potential: The ability to use virtually any fabric means your buttons can perfectly match or provide a stunning contrast to your main project fabric. From subtle blends and complementary textures to bold statements with vibrant patterns, the creative possibilities for personalization are truly endless.
- Enhanced Durability: When assembled correctly with firm pressure on the snap back, these fabric buttons are surprisingly robust and durable. They can withstand regular handling and wear, making them suitable for garments, bags, and other frequently used items.
- No Special Equipment Required: Unlike some button-making techniques that demand presses or specific dies, this method relies on everyday sewing tools and a clever hack, making it accessible even if you have a minimalist craft setup.
Tips for Achieving Perfect Fabric Buttons Every Time
To ensure your custom fabric buttons are consistently flawless, durable, and beautiful, consider these expert tips gleaned from experienced crafters. A little attention to detail can make a big difference in your final results:
- Strategic Fabric Selection:
- Weight Matters: Medium-weight woven fabrics like quilter’s cotton, linen, chambray, or light canvas are ideal. They offer enough body to cover the snap without being bulky. Avoid very thick fabrics (e.g., upholstery fabric, heavy denim) as they are difficult to wrap neatly, and very thin or slippery fabrics (e.g., silk, chiffon) which can fray easily or reveal the button shell underneath.
- Consider Stretch: While non-stretch fabrics work perfectly, a fabric with a very slight stretch (like some broadcloths or lightweight knits) can sometimes make wrapping around the button shell even easier, leading to a smoother, tauter finish.
- Pattern Placement: If using patterned fabric, take a moment to strategically place your elastic template. This allows you to center a specific motif, align a stripe, or ensure a pleasing design element is showcased on the finished button’s surface.
- Always Use Sharp Tools: This cannot be overstated. Very sharp fabric scissors are crucial for cutting clean, crisp fabric circles. Dull scissors will tear or fray the edges, leading to a messy finish and making it much harder to tuck the fabric neatly during assembly.
- Reinforce Delicate Fabrics: For very lightweight, sheer, or loosely woven fabrics, consider fusing a lightweight interfacing (like Pellon SF101 Shape-Flex) to the back of your fabric before cutting the circles. This adds body, prevents fraying, and ensures the button shell doesn’t show through, resulting in a more professional appearance.
- Practice Makes Perfect: If you’re new to making fabric buttons, don’t hesitate to try a few practice runs with scrap fabric and button snaps. This will help you get a feel for the wrapping, positioning, and snapping process before you commit to your final project materials.
- Even Pressure for Snapping: When pressing the snap back into place, apply firm and even pressure all around the circumference. This ensures that the snap locks securely and evenly, preventing one side from being loose or the fabric from coming undone. A satisfying “click” or firm resistance indicates a good seal.
- Mind the Fabric Bulk: When wrapping the fabric around the button shell, ensure the gathered fabric on the back is as evenly distributed and flat as possible before attaching the snap back. Excessive bulk can prevent the snap from closing properly or make the button sit unevenly.
Creative Applications for Your Custom Fabric Buttons
Once you’ve mastered this incredibly easy and efficient technique for making custom fabric buttons, a world of creative possibilities opens up. These personalized embellishments can elevate almost any project, adding a unique, handmade touch that truly sets your creations apart.
- Garment Embellishment: This is arguably the most popular application. Replace boring, mass-produced plastic buttons on blouses, cardigans, dresses, skirts, or coats with custom-made ones that perfectly match or provide a stylish, eye-catching contrast to your fabric. They’re also excellent for children’s clothing, allowing for playful patterns and colors.
- Accessory Upgrades: Transform mundane accessories into bespoke pieces. Adorn handbags, clutches, tote bags, headbands, or even fabric-covered jewelry (like earrings or brooches) with your unique fabric buttons. Imagine a simple denim jacket instantly upgraded with buttons made from a vibrant, patterned fabric!
- Home Decor Accents: Bring a personalized touch to your living spaces. Use custom fabric buttons on throw pillows, cushion covers, fabric storage bins, or as decorative elements on curtains and valances. They can help tie together a room’s color scheme, add a pop of texture, or introduce a thematic element.
- Quilting and Patchwork Projects: Integrate fabric buttons into quilts as decorative elements, especially on art quilts or those with a whimsical design. They can act as eyes for fabric animals, centers for fabric flowers, or simply as interesting tactile embellishments.
- Scrapbooking and Paper Crafts: While primarily textile-based, fabric buttons can be charming and tactile embellishments for scrapbook pages, handmade greeting cards, gift tags, or journal covers, adding a unique dimension beyond traditional paper elements.
- Children’s Crafts and Toys: Create adorable eyes for fabric dolls or stuffed animals, secure closures on child-friendly fabric books, or add decorative features to play mats and other soft toys. They are often safer and softer than plastic buttons for little hands.
- Keychains and Zipper Pulls: Design small, unique fabric buttons and attach them to keyrings or use them as decorative zipper pulls for bags and coats, adding a personal flair.
Frequently Asked Questions About Making Fabric Buttons
To further assist you in your fabric button-making journey, we’ve compiled answers to some of the most common questions crafters have about this versatile technique.
- What type of fabric is best for making fabric buttons?
- Medium-weight woven fabrics like cotton, linen, broadcloth, poplin, or even quilting cottons are ideal. They are stable enough to hold their shape but pliable enough to wrap neatly around the button shell. Avoid overly thick or stiff fabrics, as they can be difficult to manage, and very thin, slippery fabrics, which may fray easily or show the snap underneath. For very thin fabrics, consider fusing a lightweight interfacing to add body.
- Can I use this method for different sizes of button snaps?
- Absolutely! This technique is highly adaptable. Simply use the desired size of button snap (the top shell) as your initial guide for creating the elastic template. The key is to make sure your elastic template is created to be snug around the specific button shell you plan to use, ensuring consistent results for any size.
- How do I ensure my fabric buttons are durable and don’t fray?
- Using very sharp scissors for a clean, non-frayed cut is crucial. For fabrics naturally prone to fraying (like linen or loosely woven cottons), you can apply a tiny amount of fray check liquid to the raw edges after cutting and before assembly. Additionally, ensure the snap back is securely and evenly closed, firmly trapping the fabric in place around the button shell.
- What if I don’t have an elastic band for the template?
- While an elastic band is highly recommended for its flexibility and shape retention, you can improvise. A sturdy, non-stretch fabric strip (e.g., from an old t-shirt that has some give, or bias tape) or even a thick piece of cord could potentially be used to create a template. However, these alternatives might require more careful shaping and additional stitching to maintain their circular form and sturdiness.
- Is this method suitable for beginners?
- Definitely! This technique is renowned for its ease and simplicity, making it perfect for beginners in sewing and crafting. The clear, step-by-step instructions and minimal requirement for specialized tools mean that anyone can achieve great results with just a little practice and patience.
- Can I wash garments with these fabric buttons?
- Yes, generally. However, the washability and care instructions will depend largely on the type of fabric you used for the buttons and the material of your button snaps (e.g., plastic vs. metal). Always pre-wash your fabric if shrinkage is a concern. For delicate fabrics, hand-washing or a gentle cycle in a mesh laundry bag is recommended. If your snaps are metal, ensure they are rust-resistant. Always refer to your fabric’s care instructions for the best guidance.
- How do I attach the finished fabric buttons to my project?
- Once your fabric buttons are complete, they can be attached just like any standard shank button. Use a strong needle and a durable thread (matching your project fabric) to sew through the holes in the button’s back snap, securing it firmly to your garment or item. Create a thread shank for a professional finish if needed, allowing space for the fabric underneath.
Conclusion: Your Go-To Method for Beautiful, Custom Fabric Buttons
Gone are the days of struggling with store-bought buttons that don’t quite match your vision, or laboring over tedious, complex button-making processes. With Trefa Craft’s ingenious elastic template technique, creating beautiful, custom fabric buttons has never been easier, faster, or more rewarding. This smart sewing hack empowers you to add a truly personalized, professional, and consistent finish to all your textile projects, from bespoke garments and charming accessories to unique home decor items.
We sincerely hope you’ve found this detailed guide incredibly useful and feel inspired to start making your own collection of fabric buttons today. Embrace the joy of customization and witness firsthand how these small, thoughtful details can make a monumental difference in the overall appeal and perceived quality of your handmade creations. Try out this method now and experience the immense satisfaction of crafting perfect fabric buttons with unparalleled ease!
*A huge thank you to Trefa Craft via YouTube for generously sharing these incredible images and this invaluable sewing hack with the crafting community. If you were as impressed as we are with this clear and effective tutorial, we highly recommend visiting her channel, subscribing for more creative content, and exploring her other fantastic videos for an abundance of inspiration!