
The Ultimate Guide: How to Clean Your AirPods Safely and Effectively to Maintain Sound Quality
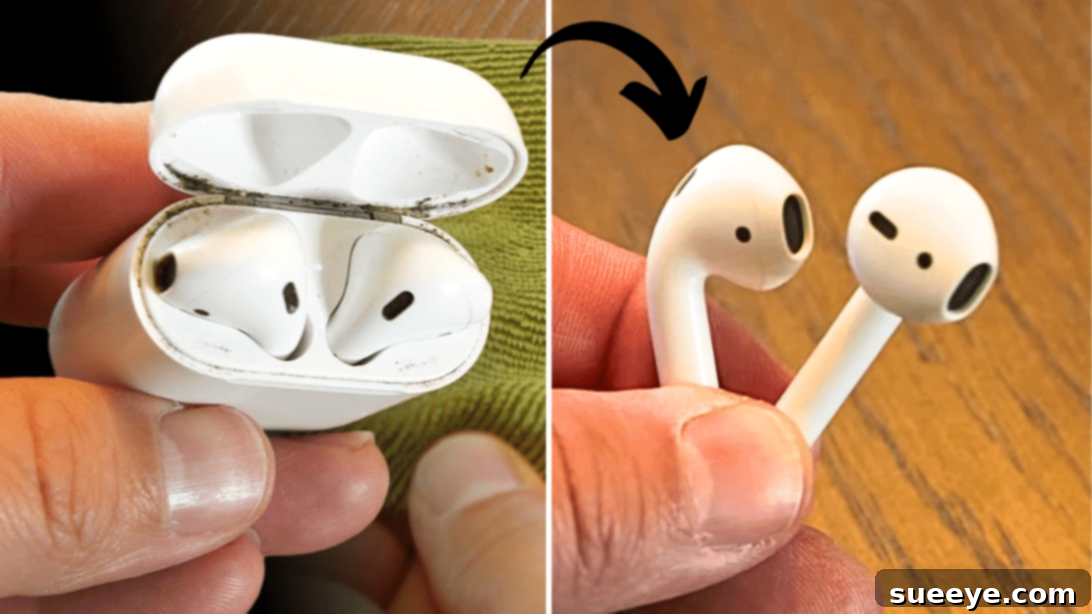
Your Apple AirPods are more than just headphones; they are an essential part of your daily life, delivering music, podcasts, and calls directly to your ears. Given their constant proximity to your ear canal, it’s inevitable that they accumulate earwax, dirt, and debris over time. While this buildup can be unsightly, its impact extends beyond aesthetics. Neglecting regular cleaning can severely diminish sound quality, potentially lead to ear infections, and even shorten the lifespan of your valuable device. Proper cleaning is not just about hygiene; it’s about preserving your audio experience and protecting your investment.
Many users shy away from cleaning their AirPods, fearing damage or using incorrect methods. The good news is that cleaning them is quite straightforward, provided you follow the right guidelines and use appropriate tools. Attempting to clean them with harsh chemicals, abrasive materials, or excessive moisture can cause irreparable damage to the sensitive internal components and delicate mesh speakers, ultimately ruining their sound performance and functionality. This comprehensive guide will walk you through a safe, effective, and detailed cleaning process, ensuring your AirPods remain pristine and deliver exceptional sound.
While specialized AirPods cleaning kits are available online, they can often be expensive. Fortunately, you can achieve professional results using common household items. This article draws inspiration from expert advice, including methods demonstrated by CNET on YouTube, to show you how to give your AirPods the thorough cleaning they deserve using tools you likely already own.
RELATED: Effective Strategies to Remove Wax Buildup from Earphones or Earbuds
Why Regular AirPods Cleaning is Crucial for Optimal Performance and Hygiene
Understanding the importance of cleaning goes beyond simply making your AirPods look new. Here’s why it’s a non-negotiable part of owning them:
- Preserves Sound Quality: Earwax and dirt can accumulate on the speaker mesh, physically blocking sound output. This leads to muffled audio, reduced volume, and an overall degraded listening experience. A clean mesh ensures sound waves can travel unimpeded, restoring the clear, crisp audio your AirPods are designed to deliver.
- Enhances Hygiene: Your ears naturally produce earwax, which can harbor bacteria. Transferring these bacteria back and forth between your ears and AirPods creates an unhygienic cycle. Regular cleaning minimizes bacterial growth, reducing the risk of ear infections and maintaining personal hygiene.
- Extends Device Lifespan: Over time, accumulated grime can seep into crevices and even affect charging contacts in the case. This can lead to charging issues, connection problems, and premature wear and tear on your device. Diligent cleaning helps prevent such issues, extending the life of your valuable AirPods.
- Maintains Aesthetic Appeal: Let’s face it, dirty AirPods don’t look good. A clean pair not only performs better but also maintains its sleek, premium appearance, reflecting better care for your device.
Gathering Your Essential Cleaning Tools: What You’ll Need to Clean Your AirPods Safely
Before you begin the cleaning process, ensure you have these simple, yet effective, tools ready. Using the right tools prevents damage and ensures thorough cleaning:
- Soft, Dry, and Lint-Free Cloth: A microfiber cloth is ideal for gently wiping down the exterior of your AirPods and case. It effectively removes smudges, dirt, and oils without leaving behind any fibers or scratches.
- Soft-Bristled Toothbrush: A new, clean toothbrush with very soft bristles is perfect for dislodging stubborn earwax and debris from the speaker mesh and microphone grilles. Its fine bristles can reach into tiny openings without causing damage.
- Cotton Swabs (Q-tips): These are excellent for cleaning around the edges of the AirPods, inside the charging case, and for applying rubbing alcohol precisely. Ensure they are not overly saturated with liquid.
- Clean Water: Used sparingly and only for lightly dampening a cloth to remove certain substances. It is crucial never to submerge AirPods in water.
- Rubbing Alcohol (Isopropyl Alcohol, 70% or higher): This is a powerful, fast-evaporating disinfectant and cleaning agent. It’s safe for electronics when used in small amounts on a cloth or swab, effectively dissolving earwax and sanitizing surfaces.
- Wooden Toothpick or Dental Pick (Optional, use with extreme caution): For very stubborn, hardened earwax deep within the mesh, a wooden toothpick can be used. However, this is a last resort and requires immense care to avoid piercing the mesh or components. Never use metal objects.
How to Clean Your AirPods Properly: A Step-by-Step Guide Without Damage
Follow these detailed steps carefully to clean your AirPods and charging case, ensuring both their longevity and your listening pleasure.
Step 1: Initial Wipe-Down of Your AirPods
The most crucial rule to remember when cleaning your AirPods is to never use water directly on them or submerge them. Water can easily seep into the tiny crevices, damaging the internal electronics and permanently impairing sound quality, leading to muffled audio or complete failure. Instead, start with a soft, dry, and lint-free cloth. Gently wipe down the entire exterior surface of each AirPod. This will remove superficial dirt, oils, and loose gunk. Pay attention to the stem and the main body, ensuring all visible external grime is removed.
Step 2: Addressing Exposure to Liquids or Chemicals
If your AirPods ever come into contact with substances like sweat, shampoo, detergent, lotion, or sunscreen, it’s vital to clean them immediately. Do not rinse them under water. Instead, take a soft, lint-free cloth and lightly dampen a small section with fresh, clean water. Carefully wipe down the affected areas of the AirPods. After cleaning, promptly wipe them completely dry with a different, dry part of the same lint-free cloth. Do not attempt to use your AirPods until they are absolutely bone-dry. Allow them to air dry for several hours, or even overnight, to ensure all moisture has evaporated before placing them back in their case or using them.
Step 3: Tackling Stubborn Earwax and Debris on the Speaker Mesh and Microphones
This step requires precision and patience. Earwax buildup on the speaker mesh is the primary culprit for diminished sound. Using a clean, dry, and soft-bristled toothbrush, gently brush over the speaker mesh and microphone grilles. Hold the AirPod with the mesh facing downwards to allow any dislodged debris to fall out naturally. Brush lightly in small, circular motions, being careful not to push the earwax deeper into the mesh. For more stubborn or hardened earwax, you can slightly dampen a cotton swab with a tiny amount of rubbing alcohol (ensure it’s not dripping wet) and gently dab or wipe the mesh. The alcohol helps to dissolve wax. Immediately follow up with a dry part of the cotton swab or a clean, dry toothbrush. Under no circumstances should you use sharp objects like needles, paper clips, or abrasive materials to pick at the mesh, as this will inevitably cause irreparable damage to the speaker components or perforate the protective mesh.
Step 4: Cleaning the AirPods Charging Case
Your AirPods case also collects lint, dust, and grime, especially within the charging ports and hinge. To clean the exterior of the case, use a soft, dry, and lint-free cloth, which can be slightly dampened with rubbing alcohol for a more thorough clean. Gently wipe all external surfaces. For the tricky interior, particularly the Lightning charging port or USB-C port (depending on your model) and the charging wells where the AirPods sit, use a clean, dry cotton swab. For deeper grime in the charging port itself, a soft-bristled toothbrush can carefully dislodge debris. Again, avoid any moisture inside the charging ports or wells. If lint is stubbornly stuck inside the Lightning port, you can carefully use a wooden toothpick, making sure not to apply pressure that could damage the charging pins.
Step 5: Final Inspection and Drying
After cleaning both your AirPods and the charging case, perform a final visual inspection under good light. Ensure there are no lingering signs of debris or moisture. Allow all components to air dry completely for at least 30 minutes, especially if you used any rubbing alcohol, which evaporates quickly. This guarantees that no residual moisture or cleaning agent remains before you put your AirPods back in their case or use them again.
Preventative Maintenance Tips for Cleaner AirPods
Maintaining clean AirPods isn’t just about reactive cleaning; it’s also about proactive prevention. Here are some tips to keep your AirPods cleaner for longer:
- Wipe Regularly: Get into the habit of giving your AirPods a quick wipe with a dry, lint-free cloth after each use, or at least at the end of the day. This prevents dirt and earwax from hardening and accumulating.
- Store Properly: Always store your AirPods in their charging case when not in use. This protects them from dust, lint, and physical damage from being loose in a bag or pocket.
- Clean Your Ears: Maintaining good ear hygiene can significantly reduce the amount of earwax transferred to your AirPods.
- Avoid Direct Contact with Liquids: While AirPods Pro and some newer models offer water resistance, they are not waterproof. Avoid wearing them in heavy rain, during showers, or exposing them to excessive sweat if possible.
- Handle with Clean Hands: Before putting your AirPods in, ensure your hands are clean and free of lotions, oils, or other substances that could transfer to the device.
Frequently Asked Questions About AirPods Cleaning
How often should I clean my AirPods?
The frequency depends on your usage. If you use them daily for extended periods, a light wipe-down after each use and a thorough cleaning once a week or bi-weekly is recommended. Casual users might find once a month sufficient.
Can I use hand sanitizer to clean my AirPods?
It’s best to avoid hand sanitizer. While it contains alcohol, it often has other additives, moisturizers, and fragrances that can leave a residue or potentially damage the AirPods’ finish. Stick to pure rubbing alcohol (isopropyl alcohol) for effective and safe sanitization.
What if my AirPods get wet?
If your AirPods get wet, immediately wipe them dry with a soft, lint-free cloth. Do NOT attempt to charge them or use them until they are completely dry, which can take several hours. Place them in a dry, open area. Avoid using heat sources like hair dryers, as extreme heat can cause damage. For significant water exposure, contact Apple support.
Will cleaning affect the sound quality of my AirPods?
On the contrary, proper cleaning should improve sound quality! By removing blockages like earwax from the speaker mesh, you restore the original audio output. Improper cleaning, however, can damage the speakers and degrade sound quality.
Can I clean the silicon ear tips of my AirPods Pro?
Yes, and you should! Remove the ear tips from the AirPods Pro. Rinse the ear tips with clean water and wipe them with a soft, dry, lint-free cloth. Ensure they are completely dry before reattaching them to your AirPods Pro.
*All image credit belongs to CNET via YouTube. Follow and subscribe to their channel for more insightful tech guides and videos!
Conclusion: Maintain Your AirPods for a Superior Audio Experience
Cleaning your AirPods properly is a simple yet vital maintenance task that protects your investment, enhances your listening experience, and promotes good hygiene. By following the guidelines outlined in this comprehensive guide and using the recommended household tools, you can effectively remove earwax and dirt without risking damage to your valuable device. Remember, patience and gentle precision are key. Incorporate these cleaning practices into your routine, along with preventative measures, to ensure your AirPods continue to deliver crisp, clear audio for years to come. A little care goes a long way in keeping your tech pristine and performing at its best.