
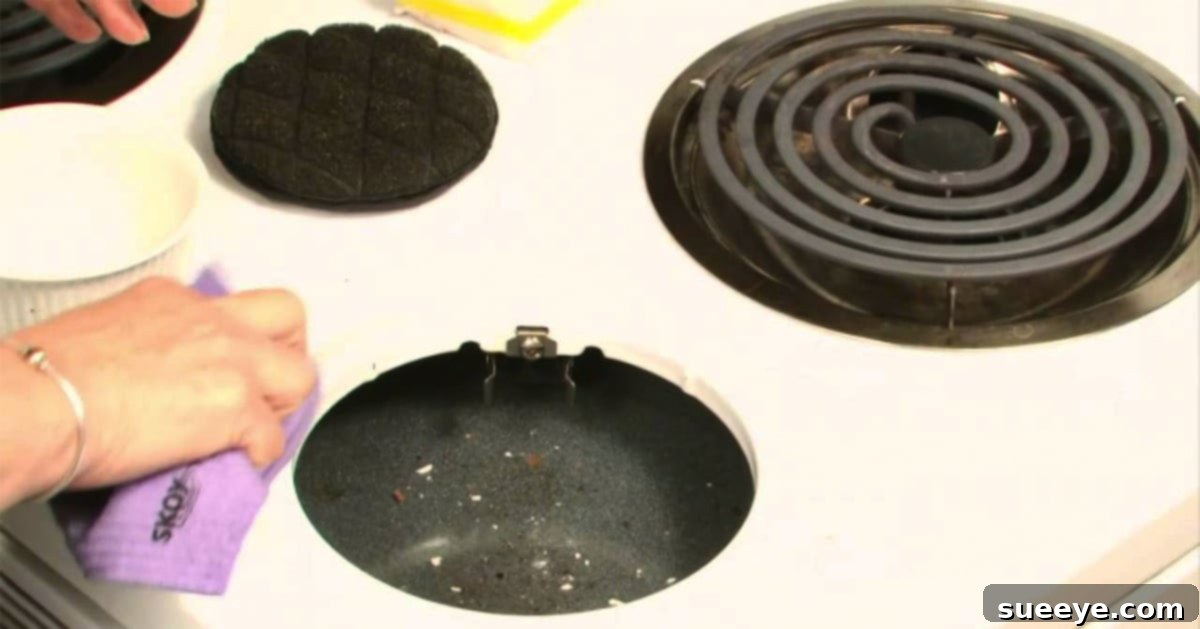
Enamel stovetops are a classic choice for many kitchens, offering a sleek, glossy finish that can significantly enhance your cooking space’s aesthetic. However, their beautiful, often light-colored surface, is notoriously prone to accumulating baked-on food, grease splatters, and stubborn stains during everyday cooking. If not cleaned properly and promptly, these stains can become permanent fixtures, diminishing your stove’s appeal and potentially harboring bacteria. The challenge lies in cleaning these delicate surfaces effectively without causing damage – a common pitfall that can lead to unsightly scratches and a dull finish.
Many homeowners dread the task of cleaning their enamel stove, fearing that harsh chemicals or abrasive scrubbing will inevitably ruin its pristine surface. I recall the struggles of keeping a white enamel stovetop clean in my childhood home; it always seemed to end up with scratches despite our best efforts. The good news is that achieving a sparkling clean enamel stovetop, free from baked-on grime, doesn’t require harsh chemicals or aggressive scrubbing. This comprehensive guide will walk you through a gentle yet highly effective method using common, natural household products, primarily baking soda, to lift even the most stubborn stains safely. By following these steps, you can restore your enamel stove to its former glory and maintain its elegant appearance for years to come.
Why Gentle, Natural Cleaning is Best for Enamel Stovetops
Enamel is essentially a form of glass fused to metal, creating a smooth, non-porous surface that is both durable and easy to clean – in theory. In practice, this glass-like coating can be surprisingly susceptible to scratching from abrasive cleaners, steel wool, or even vigorous scrubbing with a rough sponge. Once scratched, the enamel loses its protective layer, becoming even more prone to staining and more challenging to clean in the future. Furthermore, harsh chemical cleaners can sometimes leave behind residues or even discolor the enamel over time. Choosing natural products like baking soda offers several advantages:
- Effectiveness: Baking soda is a mild abrasive that can gently lift cooked-on food and grease without scratching. Its alkaline nature helps break down acidic food stains.
- Safety: It’s non-toxic, making it safe for use in food preparation areas and around children and pets.
- Eco-Friendly: Baking soda is biodegradable and doesn’t contribute to water pollution, making it an environmentally conscious choice.
- Affordability: It’s an inexpensive staple found in most kitchens, eliminating the need for specialized, costly cleaners.
This approach not only protects your stovetop but also promotes a healthier home environment by minimizing exposure to harsh chemicals. Let’s gather our simple supplies and embark on the journey to a spotlessly clean enamel stove.
Essential Supplies for a Sparkling Enamel Stove
Before you begin, ensure you have all the necessary items at hand. These are common household products and tools designed to be gentle on delicate surfaces.
- Baking Soda: The star of our cleaning show. Its gentle abrasive and alkaline properties are perfect for tackling baked-on grime.
- Wet Rag (Soft Microfiber Cloth Recommended): Essential for initial application and wiping. A microfiber cloth is ideal as it’s highly absorbent and gentle.
- Eco Sponge or Non-Scratch Sponge for Nonstick Pans: These sponges are specifically designed to be non-abrasive, making them safe for enamel. Avoid any sponges with a scourer side unless explicitly labeled as “non-scratch.”
- Dish Soap and Water: For a final wash and rinse to remove any baking soda residue and leave a streak-free finish.
- Spray Bottle (Optional but Recommended): For misting water over baking soda to create a paste or keep surfaces damp.
- Dry Cloth (Microfiber Recommended): For drying the stovetop completely after rinsing, preventing water spots.
Step-by-Step Directions to Clean Your Enamel Stovetop
Follow these instructions carefully to achieve the best results without damaging your beautiful enamel surface. Patience and gentleness are key!
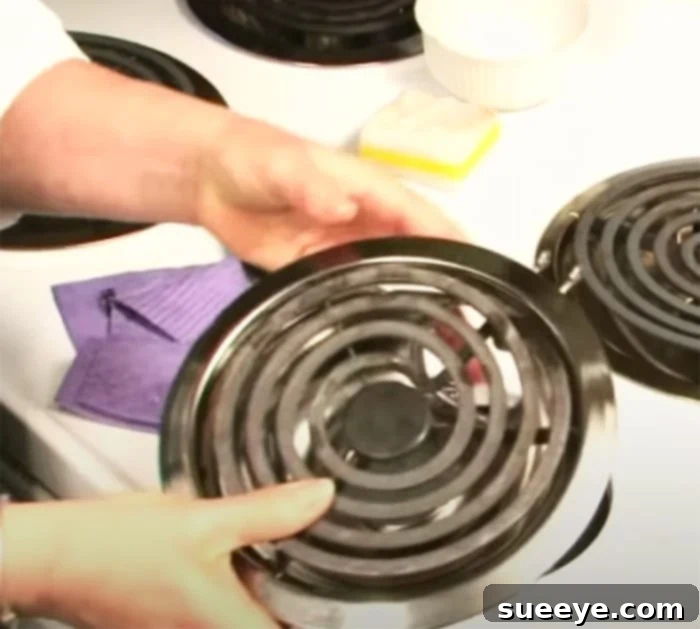
1. Prepare Your Stovetop: Remove Grates and Burners
Safety first! Before starting any cleaning, ensure your stovetop is completely cool. Never attempt to clean a hot stove. Once cool, begin by removing all the burner grates and burner caps. Most stovetop burners, especially on older enamel models, come off as a single unit or in easily removable pieces. Place these components aside, perhaps in a sink filled with warm soapy water for a preliminary soak if they are also greasy. This step exposes the entire enamel surface, allowing for thorough cleaning.
2. Initial Stain Treatment: The Baking Soda Paste Method
Once the stovetop is clear, identify the areas with baked-on stains and grease. There are a couple of methods that work wonderfully, but let’s start with the most common and effective one: creating a baking soda paste.
- Sprinkle Baking Soda: Liberally sprinkle baking soda directly over the stained areas. Don’t be shy; aim for a thick, even layer.
- Add Water to Form a Paste: Using a wet rag or a spray bottle, lightly mist water over the baking soda. You want to create a thick paste, similar to the consistency of toothpaste. The goal is to get the baking soda damp enough to adhere to the stains and start working, but not so wet that it becomes a runny liquid.
- Let it Sit: For best results, allow the baking soda paste to sit on the stains for at least 15-30 minutes. For particularly stubborn, heavily baked-on grime, you might need to let it sit for several hours or even overnight. The longer it sits, the more time the baking soda has to break down and lift the grime.
3. Gently Scrub and Lift Stains
After the sitting period, it’s time to gently work on the stains. Remember, the key here is gentleness to protect your enamel.
- Use a Wet Rag (First Attempt): Dip your soft, wet rag into some fresh baking soda (or use the paste already on the stove). Gently rub over the stained areas in small circular motions. You should notice the built-up grease and grime beginning to lift away.
- For Stubborn Spots (Eco Sponge/Non-Scratch Sponge): If the wet rag isn’t quite enough for certain spots, switch to an eco sponge or a sponge specifically designed for nonstick pans. These sponges have a slightly more abrasive texture than a cloth but are still gentle enough for enamel. Continue to rub gently in circular motions, applying only light pressure.
- Important Warning: Absolutely *do not* use harsh scrubbers, steel wool, abrasive scouring pads, or metal scrapers. These will scratch the enamel surface, causing irreversible damage. Avoid chemical oven cleaners unless specifically formulated and approved for enamel stovetops, as they can be too harsh.

4. Rinse Thoroughly and Dry Completely
Once the stains are lifted, the final steps are crucial for a streak-free shine and to prevent future issues.
- Wipe Away Baking Soda: Use a clean, wet rag (rinsed frequently) to wipe away all baking soda residue from the stovetop. Ensure no gritty particles remain. You may need to wipe several times with a freshly rinsed cloth.
- Wash with Dish Soap and Water: For an extra clean and to remove any lingering grease films, mix a few drops of dish soap with warm water. Use a clean cloth or sponge to gently wipe down the entire enamel surface.
- Final Rinse: Use another clean, damp cloth (water only) to wipe away all soap residue.
- Dry Completely: Immediately after rinsing, use a clean, dry microfiber cloth to thoroughly dry the entire stovetop. Drying prevents water spots and streaks, leaving your enamel gleaming. It also prevents any moisture from lingering under the burners, which can cause rust over time.
Preventative Measures for a Long-Lasting Clean Enamel Stove
While the cleaning process described above is highly effective, prevention is always easier than cure. Adopting a few simple habits can significantly reduce the frequency and intensity of deep cleaning sessions for your enamel stovetop.
- Wipe Spills Immediately: The moment a spill or splatter occurs, gently wipe it up with a damp cloth. Fresh spills are much easier to remove than baked-on ones. If the stovetop is hot, wait for it to cool down slightly, then proceed with caution.
- Use Splatter Guards: When frying or cooking dishes prone to splattering, use a mesh splatter guard over your pans. This simple tool can prevent a significant amount of grease and food particles from landing on your stovetop.
- Regular Light Cleaning: Don’t wait for heavy build-up. After each cooking session, once the stove is cool, give it a quick wipe-down with a damp cloth and a drop of dish soap. This routine maintenance will keep grime from accumulating.
- Inspect and Address: Periodically lift your grates and burner caps to inspect the enamel underneath. If you notice any small stains forming, address them promptly with a sprinkle of baking soda and a damp cloth before they become a major problem.
- Proper Cookware: Ensure your pots and pans have flat bottoms to prevent rocking and spills. Avoid dragging heavy or rough-bottomed cookware across the enamel surface, as this can cause scratches.
By incorporating these preventative measures into your kitchen routine, you’ll not only preserve the pristine condition of your enamel stovetop but also reduce the time and effort required for deep cleaning. The goal is to keep your stove looking its best with minimal fuss, allowing you more time to enjoy cooking and less time scrubbing.
The Importance of Gentle Care for Enamel Stovetops
Overall, enamel stovetops are delicate appliances that demand consistent, gentle care. Ignoring minor spills or using abrasive cleaning methods can quickly lead to irreversible damage, such as deep scratches that mar the surface and make it even harder to keep clean. I genuinely wish I had known these tips years ago when our family’s enamel stovetop became a victim of improper cleaning techniques, ending up scratched and looking perpetually worn. It’s a testament to how crucial proper methodology is.
My parents, who are avid cooks, actually have two different types of stovetops to accommodate their extensive cooking needs. Interestingly, my mom particularly dislikes the lingering smell of fried food in the main house, which led to an innovative solution: they have an additional enamel stovetop installed downstairs in the garage for certain types of cooking! This highlights not only the versatility of these appliances but also the varied challenges and preferences associated with kitchen maintenance. Regardless of where your enamel stove is located or how frequently it’s used, adhering to these gentle, natural cleaning practices will ensure its longevity and aesthetic appeal. Remember, a little consistent care goes a long way in maintaining the beauty and functionality of your enamel stovetop.
For a visual demonstration of these techniques and additional tips, we highly recommend watching the full tutorial by ehowhome on YouTube. Visual aids can often clarify steps and provide confidence in tackling those tough baked-on stains.