
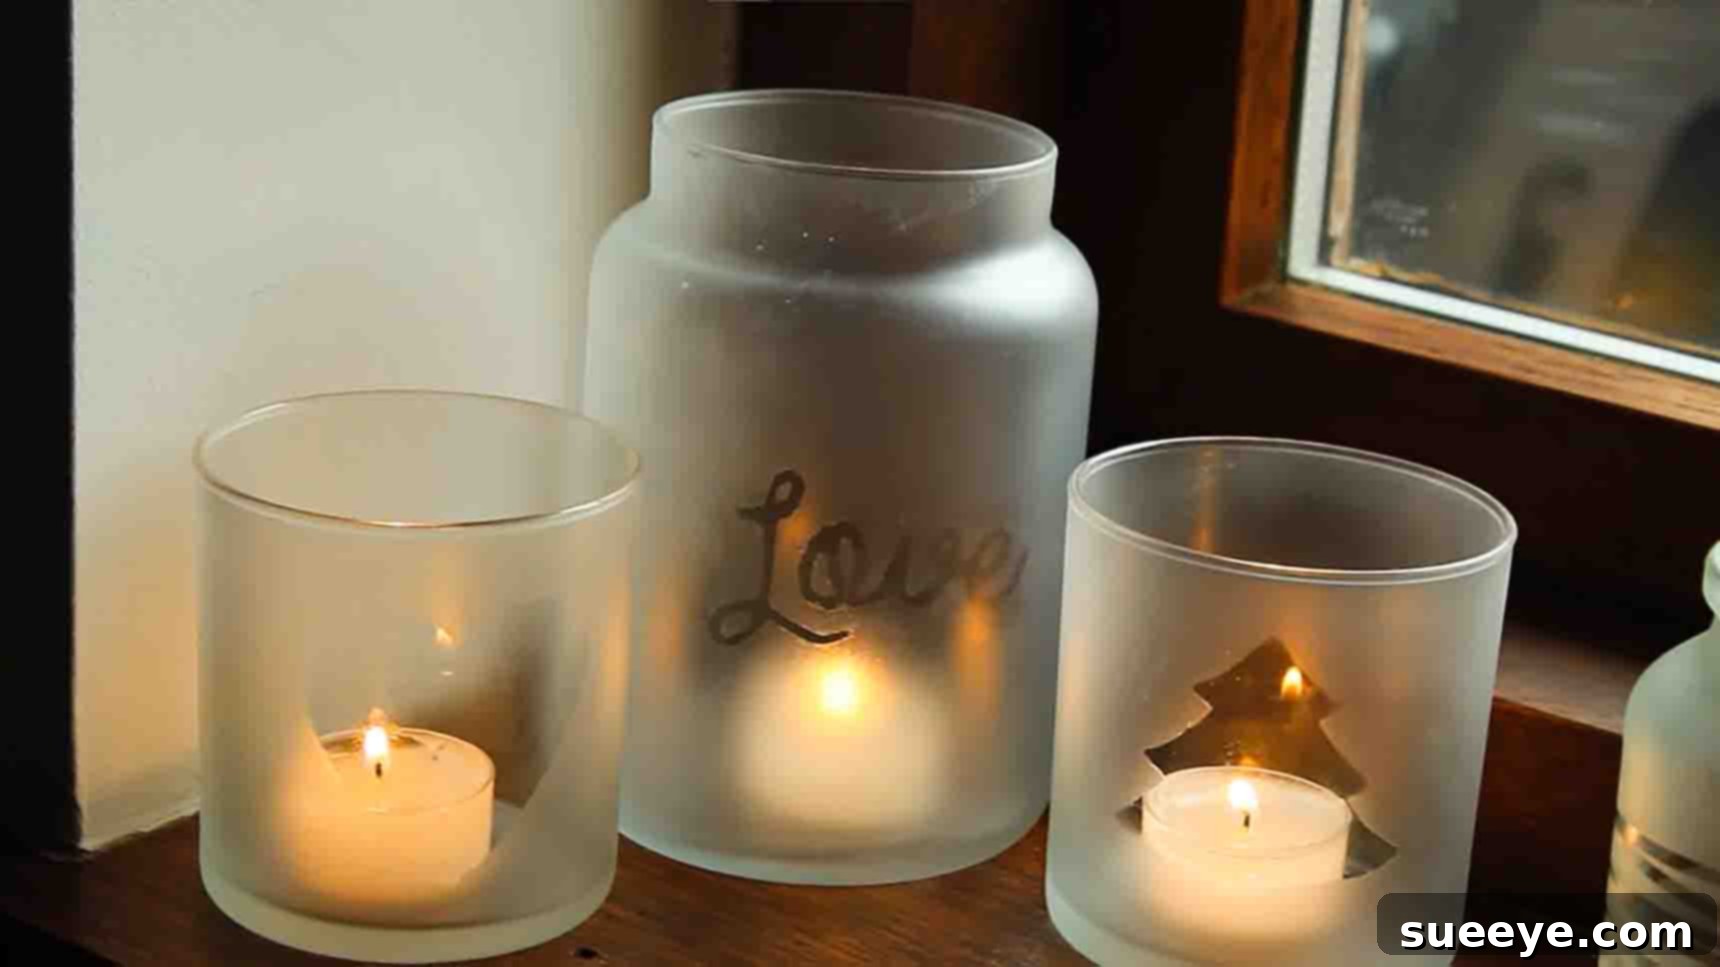
DIY Frosted Candle Jars: Transform Your Home with Cozy, Upcycled Decor for Fall & Holidays
There’s an undeniable charm in a beautifully lit candle, casting a soft, inviting glow across a room. This ambiance becomes even more special when the candle holder itself is a piece of art you’ve crafted with your own hands. Enter the world of DIY frosted candle jars – a delightful, cost-effective, and wonderfully sustainable way to enhance your home decor. These versatile creations are perfect for infusing a sense of warmth and coziness, making them an ideal addition to your fall decorating scheme and a staple you’ll want to keep around through the festive holiday season.
Imagine your mantelpiece, dining table, or entryway adorned with these elegant, softly glowing jars, each telling a story of your creativity. Not only do they look exquisite, but they also contribute significantly to that sought-after cozy atmosphere. The best part? This project is incredibly straightforward and serves as a fantastic opportunity to upcycle glass jars that might otherwise end up in the recycling bin. We’re inspired by the wonderful tutorial from Nilla Forever on Youtube, which brilliantly showcases just how easy it is to bring this charming project to life. Follow along with our detailed guide to create your very own collection of frosted candle jars.
Why Choose DIY Frosted Candle Jars for Your Home?
Beyond their aesthetic appeal, making your own frosted candle jars offers a myriad of benefits:
- Sustainable Crafting: Give new life to old jam jars, pickle jars, or even empty candle containers. Upcycling reduces waste and promotes eco-friendly living.
- Cost-Effective Decor: Achieve high-end decorative looks without breaking the bank. Most materials are inexpensive, and you’re repurposing items you already own.
- Personalized Touch: Customize your jars to perfectly match your home’s aesthetic or seasonal themes. Experiment with different shapes, ribbons, and embellishments.
- Easy & Rewarding Project: This craft is suitable for all skill levels, offering a satisfying sense of accomplishment as you transform simple jars into beautiful decorative pieces.
- Versatile Decor: While perfect for candles, these frosted jars can also serve as small vases, pen holders, or decorative storage for various trinkets.
Materials You’ll Need:
Gathering your supplies is the first step towards transforming ordinary glass into extraordinary decor. Here’s what you’ll need for your frosted candle jar project:
- Empty Glass Jars: Clean and label-free. Mason jars, old jam jars, or even empty candle jars work perfectly. The shape and size are entirely up to your preference and what you have on hand.
- Glass Frosting Spray: This is the key ingredient for achieving that elegant frosted look. Available at most craft stores or hardware stores. Choose a matte finish for a classic frosted effect.
- Cut-out Paper Shapes/Stencils: Get creative with your designs! Leaves, stars, hearts, pumpkins, or even custom letters can be cut from paper or purchased as stencils.
- Ribbons/Twine: For decorative accents. Satin, burlap, jute twine, or grosgrain ribbons in fall or holiday colors will add an extra touch of charm.
- Craft Glue: A temporary, non-permanent adhesive that cleans up easily, or a strong permanent glue if you plan to keep certain embellishments. Make sure it dries clear.
- Cleaning Supplies: Rubbing alcohol or glass cleaner, and clean cloths to ensure your jars are spotless.
- Protective Gear: Gloves and a face mask for spraying, and newspaper or a drop cloth to protect your work surface.
Step-by-Step Directions: Creating Your Frosted Candle Jars
Ready to get crafty? Follow these detailed steps to create your stunning frosted candle jars.
Step 1: Prepare and Decorate Your Jars
The foundation of any great DIY project is thorough preparation. Start by ensuring your glass jars are impeccably clean. Any smudges, dust, or adhesive residue will show through the frosting, compromising the final look. Wash them with soap and water, remove all labels, and then give them a final wipe-down with rubbing alcohol or glass cleaner to eliminate any grease or fingerprints. Allow them to dry completely.
Once clean, it’s time for the preliminary decoration. This step involves attaching your chosen cut-out paper shapes or stencils to the jars. Apply a small amount of craft glue to the back of your paper shapes and carefully press them onto the desired areas of your jar. If you’re using ribbons or twine as part of your design to be frosted over, now is the time to secure them. Be meticulous about cleaning up any excess glue immediately; dried glue can prevent the frosting spray from adhering properly, creating an uneven finish. Ensure all elements are firmly in place before moving on.
With your jars decorated, it’s time to head outdoors or to a well-ventilated area for spraying. Place your jars on a protected surface, such as newspaper or a drop cloth. Shake your glass frosting spray can thoroughly for at least a minute. Holding the can about 8-12 inches away from the jar, apply a light, even coat of spray, moving the can smoothly from side to side. Avoid oversaturating one area, as this can lead to drips. It’s better to apply several thin coats than one thick one. Allow each coat to dry for the time recommended on the spray can (usually 10-15 minutes) before applying the next, until you achieve your desired level of frosting. A generous amount typically means 2-3 even coats.
Step 2: Reveal Your Design and Add the Candle
Once you’ve applied the final coat of frosting spray, it’s crucial to let the jars cure completely. This drying process can take anywhere from a few hours to 24 hours, depending on humidity and the specific product. Refer to your spray can for exact drying and curing times. Patience is key here; rushing this step can result in smudges or a less durable finish.
After the frosting has fully set and cured, it’s time for the exciting reveal! Carefully peel off the cut-out paper shapes and gently remove any ribbons you used to create masked areas. You’ll be left with beautiful clear glass patterns contrasting elegantly with the frosted surface. This creates a stunning negative space effect that truly makes your designs pop.
Now, your beautifully frosted jars are ready to hold their illuminating companions. Place a tea light candle, votive, or even a battery-operated LED candle inside each jar. The soft glow of the candle will beautifully diffuse through the frosted glass, highlighting your intricate designs and casting a warm, inviting light. Arrange them on your favorite surfaces and enjoy the cozy atmosphere you’ve created!
Tips for Success and Creative Customization
Mastering the Frosting Spray
- Even Coats: The secret to a smooth finish is applying multiple thin, even coats rather than one thick one. This prevents drips and ensures consistent frosting.
- Ventilation is Key: Always work in a well-ventilated area, preferably outdoors. Wear gloves and a mask to protect yourself from fumes.
- Test First: If you’re new to frosting spray, practice on an inconspicuous area of a scrap piece of glass first to get a feel for the spray pattern and distance.
Beyond Basic Shapes: Unleash Your Creativity
- Nature’s Stencils: Use real leaves from your garden for natural, organic patterns. Simply press them onto the jar with a light adhesive before spraying.
- Lace and Fabric: Delicate lace patterns can create stunning frosted designs. Secure a piece of lace around the jar before spraying.
- Layering Frost: Experiment with partial frosting. Frost the bottom half, then remove a stencil and frost the top half for a two-toned effect.
- Embellish Post-Frosting: Once dry, add extra ribbons, twine, burlap, faux berries, small pinecones, or even glitter for added sparkle, securing them with permanent craft glue.
- Seasonal Themes: For fall, think maple leaves, acorns, or spooky silhouettes. For holidays, consider snowflakes, stars, or festive sayings.
Choosing the Right Light Source
- Tea Lights: Classic and affordable, perfect for a subtle glow.
- Votive Candles: Offer a slightly larger flame and longer burn time than tea lights.
- LED Candles: For safety and longevity, battery-operated LED candles or fairy lights are an excellent choice, especially if you have pets or children, or want to place the jars where real flames might be a concern. They flicker realistically and last for many hours.
Caring for Your Frosted Jars
To ensure your beautiful frosted candle jars last for seasons to come, a little care goes a long way. Avoid scrubbing the frosted surface, as this can scratch or remove the finish. If they get dusty, gently wipe them with a soft, dry cloth. For interior cleaning, use a damp cloth, being careful not to let too much water seep onto the frosted exterior. If using real candles, always ensure they are placed securely and are not too close to any flammable embellishments like ribbons.
Conclusion: Illuminate Your Home with Handmade Charm
Creating DIY frosted candle jars is more than just a craft project; it’s an invitation to bring personalized warmth and light into your home. It’s an act of transforming the ordinary into the extraordinary, embracing sustainability, and adding a unique touch that store-bought decor simply can’t replicate. Whether you’re aiming for a cozy fall atmosphere, festive holiday sparkle, or year-round gentle illumination, these upcycled glass jars are sure to become a beloved element of your decor.
So, gather your materials, let your imagination lead the way, and get ready to enjoy the enchanting glow of your very own handmade frosted candle jars. Don’t forget to check out Nilla Forever’s original video for a visual guide to this inspiring project!