
Refrigerator Not Cooling? The Ultimate DIY Reset & Troubleshooting Guide to Fix Your Fridge
There’s nothing quite as unsettling as discovering your refrigerator or freezer has stopped working. The thought of perishable food going bad and the potential cost of repairs can quickly turn a normal day into a stressful one. However, before you panic or rush to call a professional technician, it’s important to know that many common refrigerator issues, especially those occurring after a power surge or outage, can be resolved with surprisingly simple DIY steps.
This comprehensive guide will walk you through an effective, easy-to-follow reset hack that often restores your appliance to full working order. Beyond the reset, we’ll delve into other crucial troubleshooting techniques, common causes of cooling failure, essential safety precautions, and when it’s truly time to enlist the help of a professional. Empower yourself to diagnose and potentially fix your refrigerator, saving significant time and money.
RELATED: How to Deodorize a Stinky Fridge Like a Pro
The Power of a Simple Reset: A First-Line Defense Against Refrigerator Malfunctions
Often, a refrigerator that has suddenly stopped cooling is merely experiencing a minor electrical glitch or a temporary issue with its internal systems. This is where the “reset” hack comes into play. A reset essentially clears the appliance’s memory, cycles power to its critical components like the compressor, and can kickstart the cooling process anew. This straightforward method, championed by experts such as DIY with Michael Borders on YouTube, is an excellent initial step for any homeowner facing a non-cooling fridge.
Before attempting any repair or troubleshooting, always prioritize your safety. Ensure you fully understand each step and execute them with caution to prevent accidental damage to your appliance or, more importantly, personal injury. Let’s explore the various methods for effectively resetting your refrigerator.
Method 1: Utilizing the Internal Reset Button (Model Dependent)
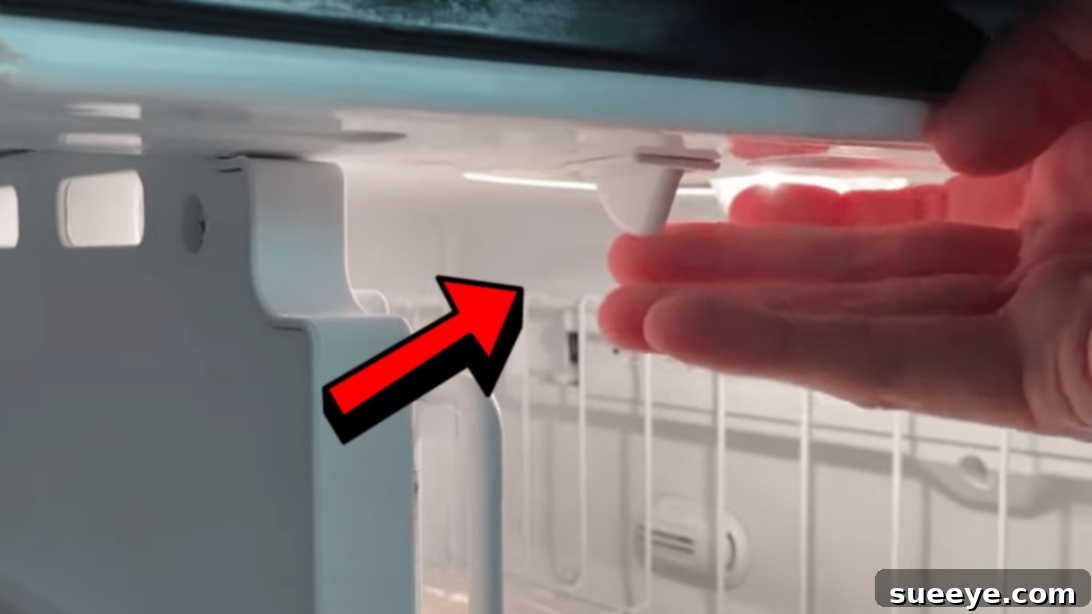
Some modern refrigerators are designed with a dedicated reset button, offering a convenient way to cycle the system without unplugging the entire unit. This button is specifically intended to resolve minor operational hiccups by restarting the compressor and control board.
- Locate the Button: The placement of the reset button varies by manufacturer and model. Refer to your refrigerator’s owner’s manual for its precise location. It can often be found on the control panel, near the compressor at the back, or sometimes within the ice/water dispenser interface.
- Press Three Times Consecutively: Once you’ve located the button, press it firmly and quickly three times in a row. This sequence is typically required to activate the reset function.
- Observe and Listen: After pressing, listen carefully for any sounds, particularly the hum of the compressor restarting. Give the appliance a few moments to respond and begin its cooling cycle.
If your refrigerator doesn’t have an obvious reset button, or if this method doesn’t yield immediate results, proceed to the more universally applicable power cycle methods.
Method 2: The Full Power Cycle (Unplugging for a Hard Reset)
A complete power cycle, often called a “hard reset,” is arguably the most effective way to clear any persistent electrical issues or software glitches. This method ensures all residual electricity is drained from the system, allowing the control board and other components to perform a true, clean restart.
- Safely Unplug the Refrigerator: Carefully pull your refrigerator away from the wall just enough to access its power cord. Grasp the plug firmly and pull it straight out of the electrical outlet. Avoid pulling on the cord itself, as this can cause damage.
- Wait for the Reset Period (5-10 Minutes): This waiting period is critical. It allows capacitors to discharge and all internal systems to fully de-energize and reset. While 5 minutes is often sufficient, waiting a full 10 minutes provides a more comprehensive reset and is highly recommended for stubborn issues. Use this time to briefly inspect the area behind and around your fridge.
- Plug It Back In Securely: After the waiting period, firmly plug the refrigerator back into the wall outlet. Ensure the connection is snug and secure.
- Monitor for Cooling Resumption: You should soon hear the compressor start its characteristic hum. Close the refrigerator and freezer doors and avoid opening them frequently during the initial cool-down phase. It may take anywhere from 5 to 10 minutes for some models to show initial signs of cooling, and several hours for the internal temperature to reach its set point.
Method 3: Resetting via the Circuit Breaker (When the Plug is Inaccessible)
If your refrigerator is built-in, or if its power cord is simply out of reach, you can perform a power cycle by using your home’s main electrical panel. This method achieves the same effect as unplugging the appliance directly.
- Locate Your Home’s Circuit Breaker Panel: This panel is typically found in a garage, basement, utility room, or a discreet closet.
- Identify the Correct Breaker: Look for the circuit breaker specifically labeled for your “Refrigerator,” “Kitchen,” or “Appliances.” If your panel isn’t clearly marked, you may need to systematically test breakers (e.g., by checking which lights turn off) to identify the correct one. Important: If you are uncertain which breaker controls your fridge, or if your electrical panel seems complex, consider calling an electrician for assistance to avoid inadvertently affecting other critical systems.
- Turn the Breaker OFF: Once identified, firmly flip the corresponding circuit breaker to the “OFF” position. This will cut power to your refrigerator.
- Observe the Waiting Period (5-10 Minutes): As with unplugging, allow a minimum of 5 to 10 minutes for a complete system reset.
- Turn the Breaker ON: Flip the circuit breaker back to the “ON” position.
- Confirm Operation: After power is restored, if your refrigerator also features an internal reset button, it’s wise to press it three times now. Close the doors and give the refrigerator time to restart its cooling process, as described in Method 2.
Beyond the Reset: Deeper Diagnostics When Your Fridge Still Won’t Cool
While the reset hacks are incredibly effective for many issues, sometimes the problem lies with a physical component or a more persistent fault. If your refrigerator continues to stubbornly refuse to cool after trying the reset methods, it’s time to conduct a more thorough investigation. Addressing these common culprits can often prevent the need for professional repair.
1. Verify Thermostat Settings
This is often overlooked but surprisingly common. Accidentally nudging the thermostat dial or having a curious child play with it can change the settings. Ensure your refrigerator’s thermostat is correctly set. For the fresh food compartment, the ideal range is typically 35°F to 38°F (1.7°C to 3.3°C), and for the freezer, it should be 0°F (-18°C).
2. Inspect and Clean Condenser Coils
One of the most frequent reasons for a refrigerator losing its cooling power is dirty condenser coils. These coils are responsible for releasing heat from inside the fridge into the room. If they’re coated in a thick layer of dust, dirt, or pet hair, they cannot dissipate heat efficiently, causing the compressor to overwork, overheat, and eventually fail to cool.
- Location: Condenser coils are usually found either on the back of the refrigerator or underneath it, behind a kickplate or grill.
- Cleaning Procedure: Always unplug your refrigerator before cleaning. Use a vacuum cleaner with a brush attachment or a specialized condenser coil brush to thoroughly remove all accumulated debris. Regular cleaning (every 6-12 months, or more often if you have pets) is crucial for optimal performance and energy efficiency.
3. Check for Blocked Airflow and Vents
Proper air circulation is vital for your refrigerator to maintain consistent temperatures. Blocked vents, both internal and external, can significantly hinder cooling performance.
- Internal Vents: Ensure that food items are not packed too tightly against the vents inside your refrigerator and freezer compartments. Cold air needs to move freely to cool all areas.
- External Clearance: Make sure there’s adequate space (typically a few inches) between the back and sides of your refrigerator and the surrounding walls or cabinetry. This allows proper ventilation for the condenser coils to expel heat.
4. Examine Door Seals (Gaskets)
A faulty or damaged door seal (gasket) allows cold air to escape and warm ambient air to seep into the refrigerator, forcing the appliance to run constantly and struggle to maintain temperature. This leads to increased energy consumption and poor cooling.
- The Dollar Bill Test: To check your seals, close the refrigerator door on a dollar bill. If you can easily pull the bill out, the seal in that section is weak. Repeat this test around the entire perimeter of both the refrigerator and freezer doors.
- Cleaning & Repair: Clean dirty seals with warm, soapy water to remove grime that might be preventing a tight seal. If seals are visibly torn, cracked, or brittle, they will need to be replaced.
5. Listen for Fan Motors
Your refrigerator relies on at least two critical fan motors to move air:
- Evaporator Fan Motor: Located inside the freezer compartment, this fan circulates cold air throughout the freezer and also pushes it into the fresh food section. If this fan fails, you might notice the freezer cooling but the fridge not, or no cooling at all. If you open the freezer door (and press the door switch if necessary) and hear no fan noise, it could be faulty or blocked by ice.
- Condenser Fan Motor: Situated near the compressor at the bottom or back of the unit, this fan cools both the compressor and the condenser coils. If it’s not running, the system will quickly overheat, leading to a loss of cooling.
Unusual noises such as grinding, rattling, or squealing, or a complete absence of fan noise, are strong indicators of a problem. Always unplug the appliance before inspecting or attempting to clear any obstructions around the fan blades.
Preventative Maintenance: Key to a Long and Healthy Fridge Life
Proactive maintenance can dramatically extend the lifespan of your refrigerator and prevent many common cooling issues before they start. Incorporating these simple habits into your routine will ensure your appliance runs efficiently and reliably for years to come:
- Clean Condenser Coils Regularly: Make it a habit to clean your condenser coils at least twice a year, or more frequently if you have shedding pets.
- Check and Clean Door Seals: Periodically perform the dollar bill test and clean your door gaskets to ensure a tight seal.
- Maintain Optimal Temperature Settings: Avoid setting your thermostat unnecessarily low, as this can overwork the compressor. Stick to the recommended temperature ranges.
- Avoid Overloading: Don’t pack your refrigerator or freezer too tightly. Adequate space is needed for proper air circulation.
- Ensure Proper Ventilation: Keep the area around your refrigerator clear of obstructions, allowing sufficient space for heat dissipation.
- Address Minor Issues Promptly: Don’t ignore unusual noises, slight temperature fluctuations, or minor ice buildup. Addressing small problems early can prevent them from escalating.
When to Call a Professional Appliance Technician
While many refrigerator problems are solvable with DIY troubleshooting, it’s equally important to know when to defer to professional expertise. Attempting complex repairs without the necessary skills or tools can lead to further damage or even create safety hazards. Call a certified technician if:
- All DIY Steps Have Failed: If you’ve diligently tried all the reset methods and diagnostic checks outlined above, and your refrigerator still isn’t cooling, the issue is likely beyond basic troubleshooting.
- Suspected Refrigerant Leaks: If you notice an oily residue, a strange chemical smell, or a hissing sound, it could indicate a refrigerant leak. Refrigerant is a hazardous substance, and its handling and replacement require specialized tools and licenses.
- Compressor Malfunction: While a power cycle can sometimes reset a compressor, persistent issues like a loud, constant hum without cooling, extreme heat emanating from the compressor area, or a completely silent compressor (despite the unit being powered on) often point to a failing compressor. Compressor repairs are complex and costly, best left to professionals.
- Electrical Faults: Any signs of sparking, burning smells originating from electrical components, or repeated tripping of the circuit breaker for your refrigerator are serious indicators of an electrical fault. Unplug the unit immediately and call a professional.
- Lack of Confidence or Expertise: If you feel uncomfortable or unqualified to perform any of the troubleshooting steps, or if the problem seems too intricate, it is always safer and wiser to consult a professional. Your safety and the longevity of your appliance are paramount.
Conclusion: Empowering You to Keep Your Cool
A non-cooling refrigerator can indeed be a cause for concern, but it doesn’t always necessitate an immediate service call. As this guide illustrates, many common issues can be resolved with simple, DIY-friendly troubleshooting steps, starting with the often-miraculous reset hack, inspired by practical experts like DIY with Michael Borders. By equipping yourself with this knowledge and committing to regular maintenance, you can save money, extend the life of your appliance, and ensure your food stays fresh and safe.
Remember, while self-reliance is empowering, recognizing the limits of DIY repair and knowing when to call a qualified professional is key to smart home appliance management. Keep this guide bookmarked, and you’ll be well-prepared to tackle most refrigerator cooling issues with confidence and competence!
*Many thanks to DIY with Michael Borders via YouTube for inspiring this detailed guide with his practical, helpful insights. If you found this hack beneficial, we highly recommend visiting his channel for more invaluable DIY tips and tutorials!