
Effortless Window Blinds Cleaning: A Quick Guide for Vertical and Horizontal Blinds
Window blinds are an indispensable feature in most homes, serving multiple purposes from ensuring privacy and regulating natural light to significantly contributing to a room’s overall aesthetic. However, their very design—featuring numerous slats—makes them highly susceptible to accumulating dust, grime, and airborne pollutants. Over time, especially with prolonged exposure to sunlight and infrequent cleaning, blinds can develop an unsightly yellowish tint, making them appear dirty and neglected. Beyond the visual appeal, this buildup of grease, gunk, and other debris creates a hospitable environment for allergens, bacteria, and even mold, potentially impacting the indoor air quality and, consequently, your health.
The thought of tackling this cleaning task can often feel overwhelming. The traditional method typically involves the arduous process of carefully taking down each blind, individually scrubbing every slat, allowing them to dry completely, and then painstakingly reinstalling them. This time-consuming and often cumbersome routine often leads to procrastination, allowing the problem to worsen. But what if there was a simpler, faster, and equally effective way to achieve sparkling clean blinds? We’re excited to share a revolutionary, quick, and easy method, inspired by the cleaning experts at Clean My Space on YouTube, that will have your vertical and horizontal blinds looking immaculate in just a few minutes, without the need for removal.
Why Regular Blinds Cleaning is Essential for a Healthier Home
While the aesthetic improvement is immediate and noticeable, the benefits of regularly cleaning your window blinds extend far beyond just looking good. Integrating blind cleaning into your routine can significantly enhance your living environment:
- Improved Indoor Air Quality: Blinds are silent collectors of dust, pet dander, pollen, and other airborne particles. When these accumulate, they can be easily disturbed and released back into the air, contributing to allergies, asthma, and general respiratory discomfort. Regular cleaning dramatically reduces the presence of these indoor pollutants.
- Elimination of Germs and Allergens: The mix of dust, moisture, and sometimes grease (especially in kitchen areas) creates an ideal breeding ground for bacteria, mold, and dust mites. A clean blind is a hygienic blind, actively preventing the spread of these unwanted microorganisms.
- Enhanced Natural Light: A layer of grime can subtly block incoming sunlight, making rooms appear darker and duller. Clean blinds allow maximum natural light to filter through, brightening your home and potentially reducing the need for artificial lighting.
- Preservation of Blind Material: Dirt and chemical residues can degrade the material of your blinds over time, leading to discoloration, brittleness, or even permanent damage. Regular, gentle cleaning helps maintain the integrity and extends the lifespan of your window treatments.
- A Brighter, More Inviting Atmosphere: Sparkling clean blinds instantly elevate the appearance of any room, contributing to a sense of freshness and order. They reflect light better, making spaces feel larger and more welcoming.
Essential Materials for Your Blinds Cleaning Toolkit
Before you embark on your blinds cleaning journey, ensure you have these simple, readily available materials at hand. Having everything prepared beforehand will make the process smooth and efficient:
- Microfiber Cloths: These are absolute must-haves. Their ultra-fine fibers are exceptionally effective at trapping dust and dirt, and they absorb liquids without leaving streaks or lint. We recommend having at least two: one for applying the cleaning solution and another for a final wipe or buff, if desired.
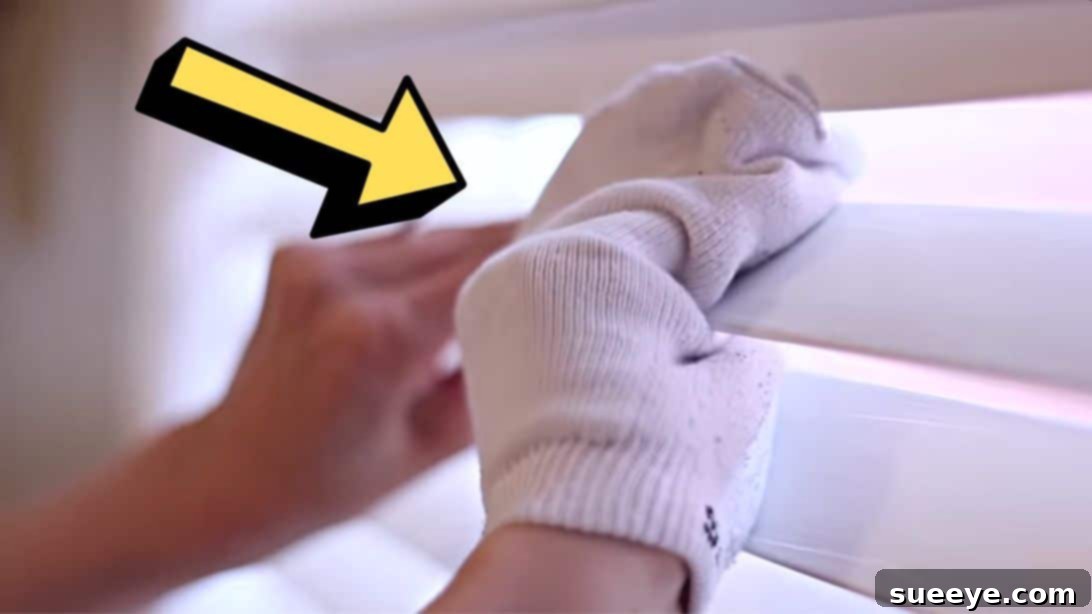
- Duster or an Old Sock: Perfect for the initial dry dust removal. A standard feather duster works for light dust, but an old, clean sock slipped over your hand offers superior control and grip, allowing you to effectively clean both sides of a slat simultaneously.
- Vacuum Cleaner with Brush Attachment: For blinds with heavier dust accumulation or textured surfaces, a vacuum cleaner equipped with a soft brush attachment is incredibly efficient. It pulls dust away rather than merely displacing it, offering a more thorough initial clean.
- Mild Dish Soap: A gentle, grease-cutting dish soap (like popular kitchen brands) is your primary cleaning agent. Its ability to emulsify grease and lift dirt makes it ideal for removing common household grime without harsh chemicals that could damage your blinds.
- Warm Water: Warm water is crucial as it helps dissolve the dish soap more effectively and aids in breaking down and lifting dirt and grease from the blind surfaces, making the cleaning process easier.
- A Bowl or Bucket: You’ll need a container large enough to comfortably mix your cleaning solution and to thoroughly dunk and wring out your microfiber cloth.
- Baking Soda (optional, for stubborn stains or yellowing): This household staple is a natural wonder. When added to your cleaning solution, it acts as a mild abrasive and deodorizer, making it exceptionally effective at tackling heavy grease, deep-set grime, and reversing the unsightly yellowing caused by sun exposure.
Step-by-Step Directions to Achieve Immaculate Blinds
Step 1: The Initial Dust-Off and Solution Preparation
The foundation of any effective cleaning process is to start by removing loose debris. Skipping this step can lead to a muddy mess rather than a clean surface. Choose the most appropriate method for your blinds’ condition:
Thorough Dust Removal:
- Using a Duster or Sock: Begin by gently closing your blinds in one direction to create a flat surface. For vertical blind slats, always clean from top to bottom, moving downwards along the length of each slat. For horizontal blinds, clean from left to right, providing gentle support to each slat with one hand as you wipe with the other to prevent bending. If using a sock, slip it over your hand and pinch each slat between your fingers, wiping both sides simultaneously for maximum efficiency.
- Utilizing a Vacuum with a Brush Attachment: For blinds that are heavily laden with dust or have intricate textures, a vacuum cleaner with a soft brush attachment is highly recommended. Position the attachment gently against the blinds. For vertical blinds, move the vacuum attachment steadily downwards. For horizontal blinds, move it horizontally across the slats, ensuring the suction effectively lifts away embedded dust without damaging the blind material. Always use a soft brush to avoid scratches.
Once the initial dry dusting is complete, it’s time to prepare your gentle yet potent cleaning solution. In your chosen large bowl or bucket, add approximately three drops of your mild dish soap. Then, fill the container with warm water. The warmth of the water is key, as it helps the dish soap dissolve quickly and enhances its ability to cut through grease and dirt. Submerge one of your microfiber cloths into this solution, ensuring it is thoroughly saturated.
Step 2: The Deep Clean and Targeted Stain Removal
This is where your blinds truly begin to transform, as accumulated grime is lifted away, revealing their original sheen.
The Damp Wipe Technique:
The success of this step hinges on controlling moisture. Wring the saturated microfiber cloth *exceptionally well* until it is merely damp, not dripping wet. Excess water can lead to streaks, drip onto floors, or potentially damage some blind materials. Twist the blind slats so they lie completely flat and present a broad, accessible surface. For vertical blinds, execute a top-to-bottom wiping motion. For horizontal blinds, wipe carefully from left to right. The most effective technique involves pinching the damp cloth around each individual slat, gripping it firmly between your thumb and forefinger, and then drawing it along the entire length of the slat. This applies even pressure to both sides, efficiently removing dirt, grease, and general grime in a single, fluid motion.
Rinse and Repeat for Persistent Cleanliness:
As you clean several slats or a section of the blind, you’ll inevitably notice the cloth accumulating dirt. It’s crucial to rinse the soiled cloth thoroughly in your cleaning mixture (or in a separate basin of clean water for optimal results). Wring it out again until it’s just damp, and then continue wiping the remaining blinds. Repeat this rinse-and-wring cycle as frequently as needed, ensuring your cloth is consistently clean enough to effectively lift dirt rather than just spreading it around. Work systematically across all your blinds until every slat is sparkling and free from residue.
Tackling Stubborn Grease, Gunk, and Yellowing:
For blinds that present a more significant challenge—perhaps due to heavy grease buildup in a kitchen, stubborn gunk, or visible yellowing from sun exposure and age—a powerful yet gentle boost to your cleaning solution is highly effective. Simply add approximately 1 tablespoon of baking soda to your dish soap and warm water mixture. Stir the solution until the baking soda largely dissolves. Baking soda works wonders as a mild abrasive and a natural deodorizer. Its gentle scrubbing action helps to release and loosen even the most entrenched dirt and discoloration without the need for harsh, potentially damaging chemicals. Apply this enhanced solution with your damp microfiber cloth, using a little extra gentle pressure and a circular motion on the most affected areas. You will be astonished at how effectively the stubborn grime and yellowing lift away.
Additional Tips for Maintaining Spotless Blinds Year-Round
Beyond the deep cleaning, incorporating a few simple habits can keep your blinds looking their best with minimal effort:
- Regular Light Dusting: The most effective way to prevent heavy buildup is consistent maintenance. Aim for a quick dry dust-off of your blinds once a week or bi-weekly. This simple habit will significantly reduce the frequency and intensity of deep cleaning required.
- Spot Clean Immediately: Don’t let small spills or smudges set. If you notice a specific mark, address it immediately with a lightly damp microfiber cloth. This prevents minor issues from becoming major cleaning projects.
- Consider Your Blind Material: While this cleaning method is generally safe for most vinyl, aluminum, faux wood, and even many plastic blinds, always perform a small patch test in an inconspicuous area if you are unsure about the material, especially for delicate fabric, natural wood, or specialized finishes.
- Ensure Adequate Ventilation: When cleaning blinds in humidity-prone areas like bathrooms or kitchens, ensure good air circulation by opening windows or using exhaust fans. This helps the blinds dry faster and prevents moisture-related issues like mildew.
- For a Streak-Free Finish: To achieve an absolutely pristine, streak-free shine, particularly on glossy or darker blinds, consider following up your damp wipe with a separate, clean, and completely dry microfiber cloth to buff each slat. This ensures no water marks or residues are left behind.
Conclusion: Enjoy Your Brighter, Healthier Home
Cleaning window blinds no longer has to be a source of dread or a time-consuming, back-breaking chore. With this quick, incredibly efficient, and surprisingly simple method, you can effortlessly transform your dirty, dusty, or yellowed blinds into sparkling clean fixtures that not only enhance your home’s aesthetic appeal but also contribute significantly to a healthier living environment. Say goodbye to the endless scrubbing, the cumbersome process of removal, and the hassle of reinstallation. Embrace this easy-to-follow hack and relish the satisfaction of immaculately clean vertical and horizontal blinds. Your windows will radiate cleanliness, and your home will feel fresher and more inviting, benefiting both its appearance and your well-being!
*These amazing images are all credited to Clean My Space via YouTube. We highly recommend checking out their channel for more incredible cleaning tips and follow their content for a consistently tidy and well-maintained home!