
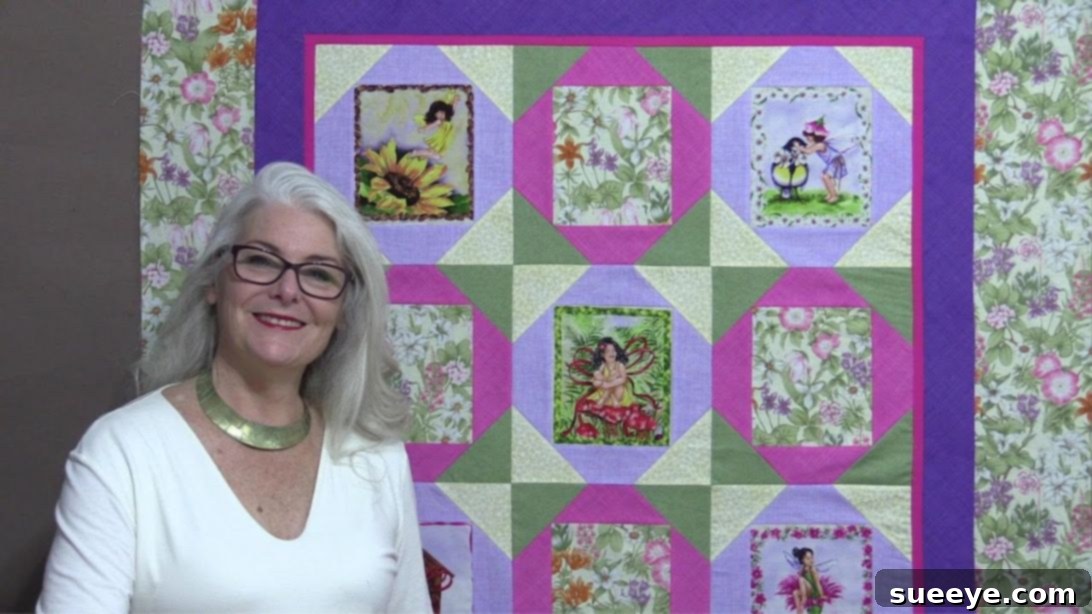
Easy Baby Quilt Tutorial for Beginners: Sew a Beautiful Quilt with Your Fabric Stash
Embark on a delightful quilting journey with this incredibly charming and easy baby quilt project, brilliantly showcased by SewVeryEasy on YouTube. This pattern is not just a creative outlet; it’s a fantastic opportunity to breathe new life into your existing fabric stash, making it a sustainable and economical crafting choice. Whether you’re a seasoned quilter looking for a quick project or a beginner eager to learn the ropes, this tutorial offers a straightforward path to creating a beautiful, personalized quilt.
The design of this baby quilt is both visually appealing and refreshingly simple to construct. Its neat appearance belies the ease with which it comes together, making it an ideal project for gifting. Imagine the joy of presenting a handmade quilt at baby showers, birthdays, or as a thoughtful gesture for any occasion – or even just because you love to create! This quilt is more than just a blanket; it’s a cuddly piece of art, made with love, that will be cherished for years to come. Let’s dive into the materials you’ll need and the simple steps to bring this wonderful creation to life.
Essential Materials for Your Easy Baby Quilt
Gathering your materials is the first exciting step in any quilting project. For this easy baby quilt, you’ll find that many items might already be in your crafting drawer. Precision in cutting and sewing will ensure a beautifully finished product, so invest in good quality tools where possible. Here’s a detailed list of what you’ll need:
- Fabric Panels with Picture: These are the focal points of your quilt. Choose panels with charming illustrations, cute animals, or vibrant designs that will capture a baby’s attention. The beauty of this project is that you can use existing pre-cut panels or carefully cut specific motifs from larger fabric pieces.
- Patterned Fabric, for the alternating panel: Select a complementary patterned fabric that will alternate with your picture panels. This fabric should harmonize with your picture panels in color and style, adding visual interest without overwhelming the main designs. Small prints, subtle geometrics, or tone-on-tone patterns work wonderfully.
- Two Different Color Fabrics, for the borders: Borders frame your quilt blocks and add a professional finish. Choosing two contrasting or coordinating colors will add depth and definition to your design. Consider one lighter and one darker shade, or two colors that pop against your main panels.
- Square Fabrics, for the cornerstones: These small squares will be used to create decorative corner accents within your quilt blocks. They often provide a contrasting pop of color or a unifying element that ties the different fabrics together. Scraps from your stash are perfect for this!
- Ruler: A clear acrylic quilting ruler with precise measurements is indispensable for accurate cutting. Look for one with non-slip grips for added safety and precision.
- Marking Pen: A fabric-safe marking pen (water-soluble or heat-erasable) is essential for drawing guide lines, especially for diagonal stitching on your cornerstones.
- Needle and Thread: High-quality polyester or cotton thread that matches or complements your fabrics will ensure strong, durable seams. Make sure your needles are sharp and appropriate for your sewing machine and fabric type.
- Scissors or Rotary Cutter and a Cutting Mat: While fabric scissors are always handy, a rotary cutter paired with a self-healing cutting mat will revolutionize your cutting process, making it faster, more accurate, and less strenuous, especially for cutting strips and squares.
- Sewing Machine: A reliable sewing machine is your best friend for quilting, enabling quick and consistent seams. Ensure it’s in good working order and you have a fresh needle installed.
Step-by-Step Guide to Crafting Your Easy Baby Quilt
Creating this baby quilt is a rewarding process, broken down into manageable steps. Take your time with each stage, paying attention to detail, and you’ll be delighted with the professional-looking result.
Step 1: Preparing Your Panels and Borders
The foundation of your quilt lies in accurately cut panels and neatly applied borders. Precision here will ensure all your blocks fit together perfectly, resulting in a square and attractive quilt.
- Cut Your Panels: Begin by carefully cutting out your chosen picture panels or motifs from your fabric. Once cut, measure one of these panels precisely. This measurement will dictate the size for your alternating fabric panels, ensuring uniformity across your quilt. In this particular project, the designer’s panels measure a convenient 6½ by 7½ inches. If your panels are a different size, simply adjust your alternating fabric cuts accordingly, always prioritizing consistency.
- Prepare Border Strips: Next, select your two different border fabrics. Cut these into 2½ inches wide strips. For best results and to prevent distortion, cut these strips across the width of the fabric (from selvage to selvage), as this provides a stable grain for your borders. Make sure to have enough strips of both colors to create alternating borders around each panel.
- Attach the First Set of Borders: Take one of your picture panels. For the first two strips of border fabric, you will attach them to the shorter sides of your panel. Measure the exact length of the panel’s side and cut two border strips to this length. With right sides together, align one border strip with one side of the panel, pinning if necessary, and sew them together using a consistent ¼ inch seam allowance. Repeat for the opposite side.
- Pressing for Flatness: After sewing, it’s crucial to press your seams. Lay the piece flat on your ironing board, then gently press the seam allowance away from the main panel, towards the border fabric. This technique helps to reduce bulk and creates a crisp, flat finish for your quilt blocks.
- Attach the Second Set of Borders: Now, you need to add borders to the longer sides of your panel. First, measure the total length of the panel *including* the two border strips you just added on the sides. Cut two more 2½-inch wide border strips to this new, longer measurement. With right sides together, sew one of these longer border strips to the top of your panel, again using a ¼ inch seam allowance. Repeat for the bottom of the panel.
- Final Pressing: Once all four borders are attached, give the entire piece a final, thorough press, ensuring all seam allowances are neat and lying flat, usually pressed outwards for consistency. This completes one of your bordered quilt blocks. Repeat this process for all your picture panels and your alternating patterned fabric panels.
Step 2: Adding Cornerstones and Assembling the Quilt Top
This step brings your individual blocks to life with decorative cornerstones and then joins them into the complete quilt top. It’s where your quilt truly starts to take shape!
- Prepare Your Cornerstones: From your square fabric for cornerstones, cut multiple squares at 4½ inches. These squares will add a lovely contrasting or accent detail to the corners of your bordered panels.
- Apply Cornerstones to Panels: Take one of your bordered panels. Place one 4½-inch cornerstone square on each of its four corners, ensuring the cornerstone’s right side is facing down onto the right side of the panel. Align the edges perfectly at the corner. Using your fabric marking pen, draw a diagonal line from one corner to the opposite corner of the cornerstone square. This line will be your sewing guide.
- Sewing and Trimming Cornerstones: Carefully sew directly along the diagonal line you just drew. Once sewn, you’ll need to trim away the excess fabric. Measure ¼ inch *outside* the sewn line (towards the raw edge of the corner). Cut along this ¼ inch mark, effectively removing the triangular bulk.
- Pressing Cornerstones Open: Now, gently fold back the corner fabric. This will reveal your perfectly formed cornerstone. Give it a good press so that the seam allowance lies flat underneath the cornerstone fabric, and the cornerstone itself forms a neat square at the corner of your main panel. This technique is often referred to as “snowballing” a corner. Repeat this process for all four corners of every picture panel and every alternating panel.
- Assemble Blocks into Rows: Once all your panels have their cornerstones, it’s time to arrange and sew them into rows. Lay out your bordered panels in your desired pattern, alternating picture panels with patterned fabric panels. A common layout might be 3 to 4 panels across for each row. With right sides together, sew the panels in a row, one by one, using a ¼ inch seam allowance. Pay attention to how the cornerstones meet at the seams, aiming for a consistent point.
- Pressing Rows: After sewing each seam within a row, press the seam allowances. For rows, it’s often helpful to press the seams in opposite directions for adjacent rows. For example, press all seams in the first row to the left, and all seams in the second row to the right. This allows the seams to “nest” when you join the rows, reducing bulk and creating flatter intersections.
- Join the Rows: Once you have completed and pressed all your individual rows (you might aim for 3 to 4 rows in total), it’s time to sew the rows together. With right sides together, carefully align the first row with the second row, matching up all the seam intersections. Pin extensively at these intersections to ensure they meet perfectly. Sew the rows together with a ¼ inch seam allowance.
- Final Pressing of the Quilt Top: After all rows are joined, give the entire quilt top a thorough final press. This flattens all the seams and prepares your quilt top for the next stage.
- Finishing Your Quilt: To complete your quilt, you’ll add final borders around the entire quilt top. These outer borders can be as wide or as narrow as you like, and you can choose a design or pattern that complements your overall aesthetic. This is also where you would typically layer your quilt top with batting and backing fabric, quilt the three layers together (using techniques like stitch-in-the-ditch or free-motion quilting), and then bind the edges for a durable and professional finish. The choice of border width and fabric offers another opportunity for personalization, allowing you to truly make this quilt your own.
Why Choose This Easy Baby Quilt Pattern?
Beyond its aesthetic appeal, this baby quilt pattern offers numerous advantages, making it a standout choice for anyone interested in sewing or quilting:
- Perfect for Beginners: The clear, step-by-step instructions and simple block construction make this an ideal project for those new to quilting. You’ll learn fundamental techniques like accurate cutting, consistent seam allowances, and proper pressing, which are essential for future quilting endeavors.
- Stash-Busting Friendly: If you have a collection of fabric scraps or panels you’ve been saving for a special project, this quilt is your perfect opportunity. It encourages creativity in combining different patterns and colors, transforming forgotten fabrics into a beautiful, cohesive piece.
- Quick and Rewarding: Compared to more complex quilt designs, this baby quilt comes together relatively quickly, offering a sense of accomplishment and instant gratification. It’s perfect for when you need a thoughtful gift in a shorter timeframe.
- Customizable and Versatile: While designed as a baby quilt, the pattern can easily be scaled up or down by adjusting panel and border sizes. The choice of fabrics allows for endless customization, from vibrant and playful to soft and subdued, making it suitable for any nursery theme or personal preference.
- A Cherished Gift: A handmade quilt is more than just a blanket; it’s a heirloom filled with love and personal touch. It’s a gift that will be treasured, providing warmth and comfort to a new arrival for years.
Fabric Selection Tips for Your Baby Quilt
Choosing the right fabrics is key to a beautiful and long-lasting baby quilt:
- Quality Matters: Opt for 100% cotton quilting fabric. It’s easy to work with, holds its shape well, and becomes softer with each wash, which is ideal for a baby’s delicate skin.
- Theme and Color Palette: Decide on a theme or color scheme early on. This will help you select picture panels and coordinating patterned and border fabrics. Consider the nursery decor or the recipient’s favorite colors.
- Contrast and Variety: Use a mix of large prints, small prints, and solids to create visual interest. Ensure there’s enough contrast between your main panels, alternating fabrics, and borders so each element stands out.
- Pre-Wash Fabrics (Optional but Recommended): Pre-washing your fabrics before cutting can prevent shrinkage and color bleeding after the quilt is finished. Use a gentle cycle with a mild detergent.
Essential Quilting Tools for Beginners
Having the right tools can make your quilting experience much more enjoyable and efficient:
- Rotary Cutter and Mat: A rotary cutter makes straight, clean cuts quickly. Pair it with a self-healing cutting mat to protect your work surface and prolong blade life.
- Quilting Rulers: Clear acrylic rulers with distinct measurement lines are crucial for precise cutting and trimming.
- Good Quality Thread: Invest in strong, lint-free thread that won’t break easily. Cotton or polyester threads are common choices.
- Seam Ripper: Mistakes happen! A sharp seam ripper is your friend for quickly and cleanly removing stitches.
- Iron and Ironing Board: Pressing is as important as sewing in quilting. A good iron helps flatten seams and keep your blocks square.
Caring for Your Handmade Baby Quilt
To ensure your beautiful baby quilt remains soft and vibrant for years, proper care is essential:
- Gentle Washing: Machine wash on a delicate cycle with cold water using a mild, baby-safe detergent.
- Low Heat Drying: Tumble dry on low heat or, ideally, lay flat to air dry. High heat can cause shrinkage and damage the fabric.
- Avoid Harsh Chemicals: Do not use bleach or fabric softeners, as these can break down fabric fibers and dull colors over time.
*All image credit belongs to SewVeryEasy via YouTube. Follow and subscribe to her channel for more inspiring and easy-to-follow tutorials!
Quick And Easy Baby Quilt Tutorial
This comprehensive guide should equip you with everything you need to confidently create a stunning and easy baby quilt. Whether you’re making it for a loved one or as a comforting addition to your own home, the process of bringing fabric to life through quilting is incredibly fulfilling. So, gather your materials, set up your sewing space, and get ready to stitch together a masterpiece that will be cherished for generations to come!