
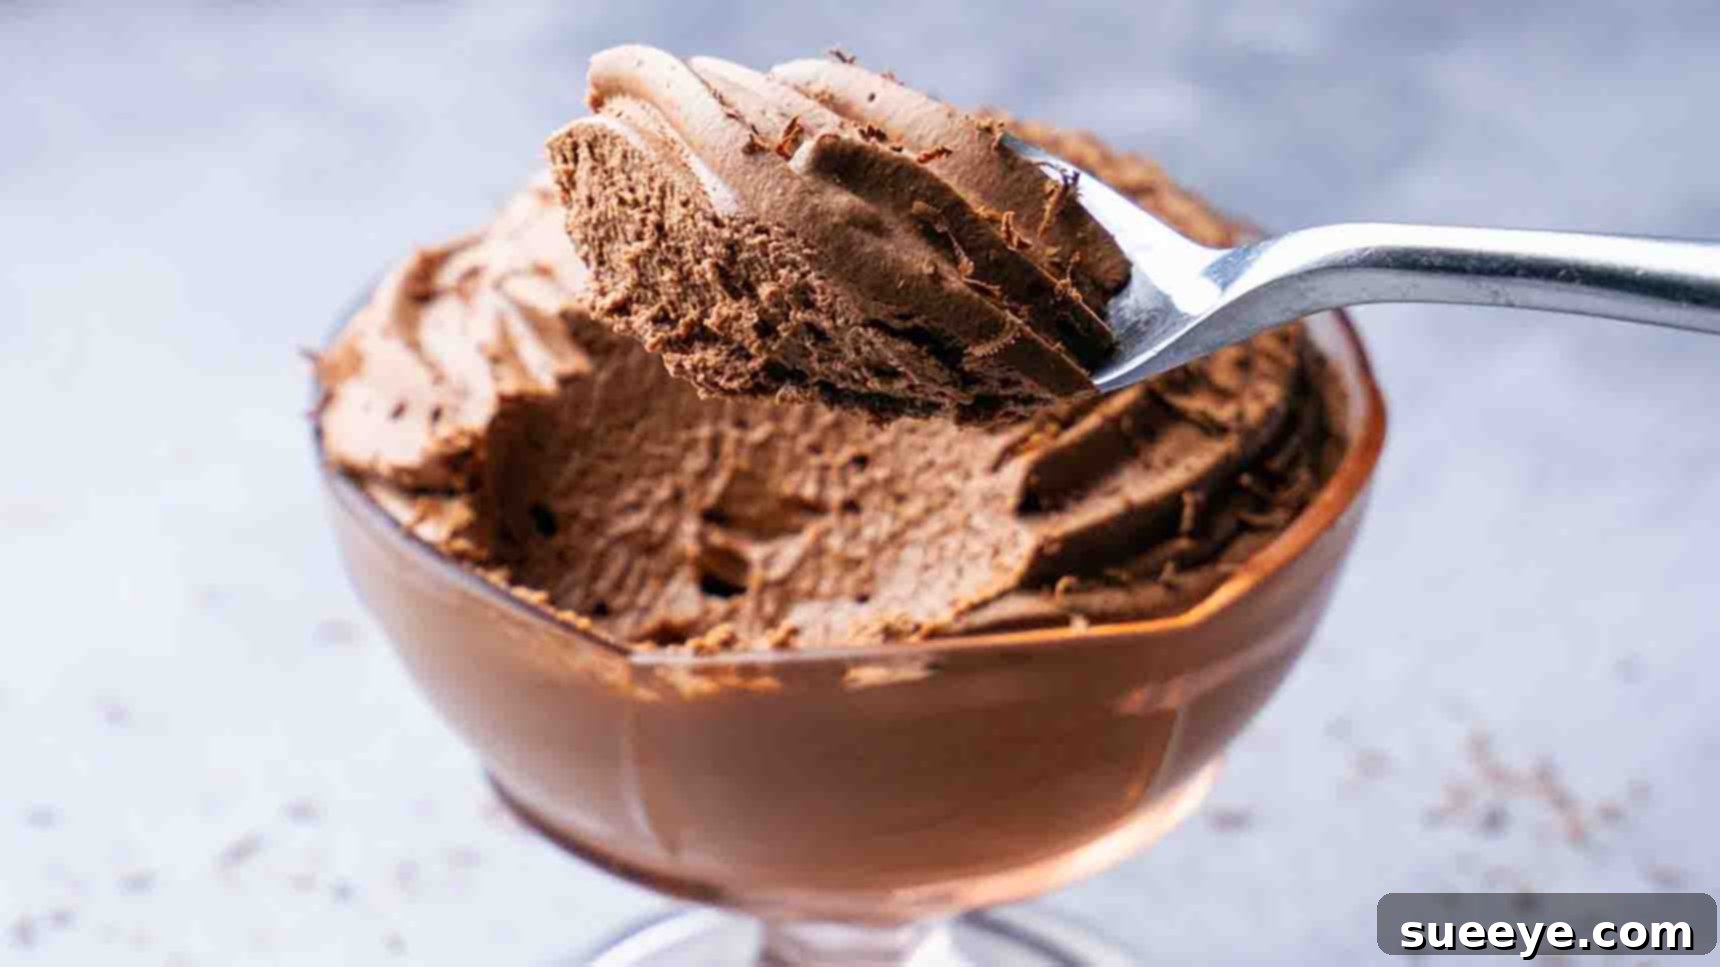
Indulge in Pure Bliss: The Ultimate 2-Ingredient Chocolate Mousse Recipe
Are you yearning for a dessert that’s rich, velvety, and utterly decadent, yet surprisingly simple to create? Look no further! This revolutionary 2-ingredient chocolate mousse recipe is a game-changer for any dessert lover, busy home cook, or novice baker. Forget complex techniques and long ingredient lists; with just two staple items, you can conjure up a gourmet-quality dessert that tastes like it came straight from a patisserie. Perfect for unexpected guests, a last-minute craving, or a celebratory treat, this mousse truly hits all the right notes.
Originating from the creative culinary minds at Spice Bangla on YouTube, this recipe has taken the internet by storm for its sheer simplicity and incredible results. It’s a testament to the idea that sometimes, less is indeed more. Prepare to impress your family and friends with a dessert that’s not only unbelievably easy but also irresistibly delicious. Dive into the full recipe below and discover how effortlessly you can elevate your dessert game!
The Magic Behind 2-Ingredient Chocolate Mousse: Why It Works
Before we dive into the steps, let’s appreciate the ingenious simplicity of this recipe. A traditional chocolate mousse often involves eggs, sugar, butter, and multiple complex steps like tempering, folding, and precise temperature control. This two-ingredient version, however, relies on the perfect synergy between high-quality chocolate and heavy whipping cream. When these two ingredients are combined correctly, the fat content in the cream provides the necessary structure and aeration, while the chocolate delivers intense flavor and helps set the mousse into its characteristic light, airy, yet firm texture.
This recipe is not just easy; it’s a testament to minimal effort yielding maximum reward. It eliminates the fuss of tempering eggs or worrying about raw egg consumption, making it a safe and accessible option for everyone. Plus, the quick preparation time means you can whip this up even on a busy weekday, allowing ample time for chilling before serving.
Essential Ingredients for Your Perfect Chocolate Mousse
The beauty of this recipe lies in its brevity, but the quality of your chosen ingredients will significantly impact the final taste and texture. Opt for the best you can find!
- 1 cup (200 g) Semi-Sweet Dark Chocolate: This is the heart of your mousse. Semi-sweet dark chocolate, typically in the 60-70% cacao range, provides a rich, deep chocolate flavor without being overly bitter or too sweet. Higher quality chocolate melts more smoothly and offers a superior taste profile. If you prefer a sweeter mousse, you can opt for milk chocolate, but be aware it might result in a slightly less intense chocolate flavor and a softer set due to its lower cacao content and higher sugar. Conversely, very dark chocolate (75%+) will yield a more robust, slightly bitter mousse that true dark chocolate aficionados will adore. Ensure your chocolate is in chip, bar, or block form for easy measurement and melting.
- 1 ¾ cup (400 ml) Whipping Cream (divided): This is the ingredient that provides the luscious, airy texture characteristic of mousse. Ensure you are using heavy whipping cream or double cream, which has a fat content of at least 35%. This high-fat content is crucial for the cream to whip up properly and hold its structure. The cream is divided into two portions: a smaller amount to melt with the chocolate, and a larger, chilled portion to whip. The chilling of the larger portion is paramount for successful whipping.
Step-by-Step Directions to Your Dreamy Chocolate Mousse
Creating this exquisite dessert is a delightful process. Follow these detailed steps to ensure a flawless, delectable result every single time.
Step 1: Melting the Chocolate to Perfection
The first critical step involves melting your chosen chocolate and combining it with a portion of the cream to create a rich ganache-like base. Precision here ensures a smooth, lump-free foundation for your mousse.
- Begin by finely chopping your semi-sweet dark chocolate into small, uniform pieces. Smaller pieces melt more quickly and evenly, preventing any hot spots or burning. Transfer these chocolate pieces into a heat-resistant bowl. Glass or metal bowls are ideal for this process, as they conduct heat well.
- Next, prepare a double boiler setup. Place the bowl containing the chocolate on top of a saucepan with a couple of inches of simmering water. It is crucial that the bottom of the bowl does not touch the surface of the simmering water. The steam from the simmering water will gently and indirectly heat the chocolate, preventing it from scorching.
- Add ½ cup (100 ml) of whipping cream into the bowl with the chopped chocolate. This cream should be at room temperature. The reason for using room temperature cream here is vital: adding cold cream to hot chocolate can cause the chocolate to seize, turning it into a gritty, unworkable mess. Room temperature cream ensures a smooth, harmonious blend.
- Gently stir the chocolate and cream mixture with a spatula or whisk until the chocolate is completely melted and the mixture is smooth, glossy, and homogenous. Continue stirring until there are no visible lumps of chocolate. Once fully melted and combined, carefully remove the bowl from the saucepan.
- Allow this rich chocolate mixture to cool down for five to ten minutes. It should be warm to the touch but not hot. Cooling is essential before combining it with the whipped cream in the next step. If the chocolate mixture is too hot, it will deflate the whipped cream, resulting in a runny, dense mousse. You can stir it occasionally during cooling to speed up the process.
Step 2: Whipping the Cream and Assembling Your Mousse
This is where the magic truly happens, transforming your rich chocolate base into a light and airy mousse. Careful whipping and gentle folding are key to achieving that signature delicate texture.
- In a separate, large mixing bowl, add the remaining 1 ¼ cup (300 ml) of whipping cream. For optimal results, ensure this cream is thoroughly chilled. For an even quicker and firmer whip, you can chill your mixing bowl and whisk attachments in the freezer for about 10-15 minutes beforehand.
- Using an electric mixer (handheld or stand mixer with a whisk attachment), begin to whip the chilled cream. Start on a low speed to prevent splattering, then gradually increase to medium-high speed. Whip the cream until it reaches a soft consistency, characterized by soft peaks that hold their shape but still have a gentle curl at the top. Be careful not to over-whip at this stage, as over-whipped cream can become grainy or turn into butter.
- Once your cream is at soft peak consistency, it’s time to incorporate the cooled chocolate mixture. Gently add the cooled chocolate in small portions to the whipped cream. Do not dump it all in at once. With each addition, use a spatula to gently fold the chocolate into the cream. The “folding” technique involves cutting down through the middle of the mixture with your spatula, across the bottom, and up the side, turning the ingredients over onto themselves. This method helps to preserve the air you’ve whipped into the cream, which is crucial for the mousse’s airy texture.
- Continue to gently fold until the chocolate is fully incorporated and the mixture is uniform in color, without any streaks of white cream. The mousse should look light, fluffy, and smooth. Stop folding as soon as it’s combined to avoid deflating the cream.
- Now, your chocolate mousse is ready for serving! For a professional and elegant presentation, you can fill a piping bag fitted with your desired nozzle (a star tip works beautifully) with the mousse. Use this to neatly fill up individual dessert glasses, ramekins, or small bowls. This step is entirely optional; you can simply scoop the mousse directly into your chosen serving vessels for a more rustic charm.
- The final, crucial step is chilling. Cover your mousse-filled glasses or bowls with plastic wrap and refrigerate for at least 2-4 hours, or ideally overnight. Chilling allows the mousse to firm up and fully develop its rich flavor and characteristic airy yet stable texture.
Expert Tips for a Flawless 2-Ingredient Chocolate Mousse
While this recipe is incredibly straightforward, a few expert tips can elevate your chocolate mousse from good to absolutely extraordinary.
- Quality Matters: As emphasized, premium dark chocolate will yield a superior flavor profile. Investing in good quality whipping cream also ensures better whipping performance and a richer texture.
- Temperature Control is Key: Pay close attention to the cream temperatures. Room temperature for melting chocolate prevents seizing, and thoroughly chilled cream for whipping ensures maximum volume and stability.
- Don’t Over-Whip: Whipped cream can quickly turn grainy or even separate into butter if over-whipped. Stop at soft peaks for the best mousse texture.
- Gentle Folding: When combining the chocolate mixture with the whipped cream, use a light hand and a folding motion to maintain the airiness. Vigorously stirring will deflate the cream.
- Thorough Chilling: Do not skip or rush the chilling process. This is vital for the mousse to set properly and achieve its ideal firm yet airy consistency.
- Clean and Dry Equipment: Ensure all your bowls and utensils are completely clean and dry, especially when working with chocolate. Even a tiny drop of water can cause chocolate to seize and become grainy.
- Taste and Adjust: Once combined, give your mousse a little taste. If you feel it needs a touch more sweetness, a tiny amount of powdered sugar could be folded in (though generally not needed for semi-sweet chocolate).
Elevate Your Mousse: Serving Suggestions & Flavor Variations
This 2-ingredient chocolate mousse is fantastic on its own, but it also serves as an excellent canvas for customization and impressive presentations.
Delightful Topping Ideas:
- Fresh Berries: A vibrant mix of raspberries, strawberries, or blueberries provides a beautiful color contrast and a refreshing tartness that cuts through the richness of the chocolate.
- Chocolate Shavings or Curls: A classic pairing that enhances the chocolate experience. Use a vegetable peeler on a block of chocolate for easy curls.
- Dusting of Cocoa Powder: A light dusting of unsweetened cocoa powder adds an elegant finish and a subtle bitterness.
- Extra Whipped Cream: A dollop of freshly whipped cream on top creates a lovely textural contrast.
- Mint Leaves: A fresh mint leaf not only adds a pop of color but also a refreshing aroma.
- Chopped Nuts: Toasted almonds, hazelnuts, or pecans offer a delightful crunch.
- Sea Salt Flakes: A tiny pinch of flaky sea salt sprinkled over the top enhances the chocolate flavor and adds a gourmet touch.
Exciting Flavor Variations:
- Coffee or Espresso: Add ½ to 1 teaspoon of instant espresso powder or strong coffee to the melting chocolate for a mocha-flavored mousse.
- Orange Zest: Grate in the zest of half an orange into the melting chocolate for a bright, citrusy note that pairs wonderfully with dark chocolate.
- Liqueur Infusion: For an adult version, a tablespoon of Kahlúa, Grand Marnier, or a raspberry liqueur folded into the cooled chocolate mixture before combining with cream adds sophisticated depth.
- Vanilla Extract: While the original recipe highlights the pure chocolate flavor, a teaspoon of good quality vanilla extract added to the melting chocolate can round out the profile.
- Chili Powder: For a bold kick, a tiny pinch of cayenne pepper or chili powder can be stirred into the melted chocolate for a Mexican hot chocolate-inspired mousse.
Troubleshooting Common Chocolate Mousse Woes
Even with simple recipes, sometimes things don’t go exactly as planned. Here are some common issues and how to resolve them or prevent them next time:
- My Mousse is Too Runny:
- Cause: The chocolate mixture was too hot when added to the whipped cream, deflating it. Or, the cream wasn’t whipped to firm enough peaks. Insufficient chilling time.
- Solution: Unfortunately, it’s hard to salvage a completely runny mousse. For next time, ensure the chocolate mixture is only warm, not hot, and that your cream is whipped to soft-to-medium peaks. Extend chilling time.
- My Mousse is Lumpy or Grainy:
- Cause: The chocolate seized when mixed with cold cream (in Step 1). Or, the cream was over-whipped and became grainy.
- Solution: If chocolate seized, try adding a tablespoon of hot cream or milk and whisk vigorously until smooth again. If cream is over-whipped, it’s difficult to fix for mousse; start over.
- My Mousse is Too Dense and Lacks Airiness:
- Cause: The whipped cream was deflated during folding, either due to over-mixing or too vigorous stirring.
- Solution: Focus on gentle folding techniques. It’s better to have a few small streaks of unmixed cream than to overmix and lose all the air.
- My Mousse Tastes Bland:
- Cause: Low-quality chocolate was used, or the chocolate simply wasn’t flavorful enough.
- Solution: Invest in high-quality semi-sweet dark chocolate. Consider adding a pinch of sea salt, a dash of vanilla extract, or espresso powder to enhance the chocolate’s natural depth.
Conclusion: Your New Go-To Dessert Has Arrived!
This 2-ingredient chocolate mousse recipe is more than just a dessert; it’s a testament to the fact that culinary brilliance can be achieved with simplicity and quality ingredients. It delivers an unbelievably luxurious experience with minimal effort, making it the perfect choice for any occasion, from an elegant dinner party to a cozy night in. The velvety texture and intense chocolate flavor are sure to delight every palate, leaving everyone craving another spoonful.
So, whether you’re a seasoned baker or a complete novice, don’t hesitate to try this fantastic recipe. It’s quick, easy, and yields consistently delicious results. Prepare to be amazed by what just two ingredients can accomplish. Give it a try tonight, and share your delightful creations with us!